
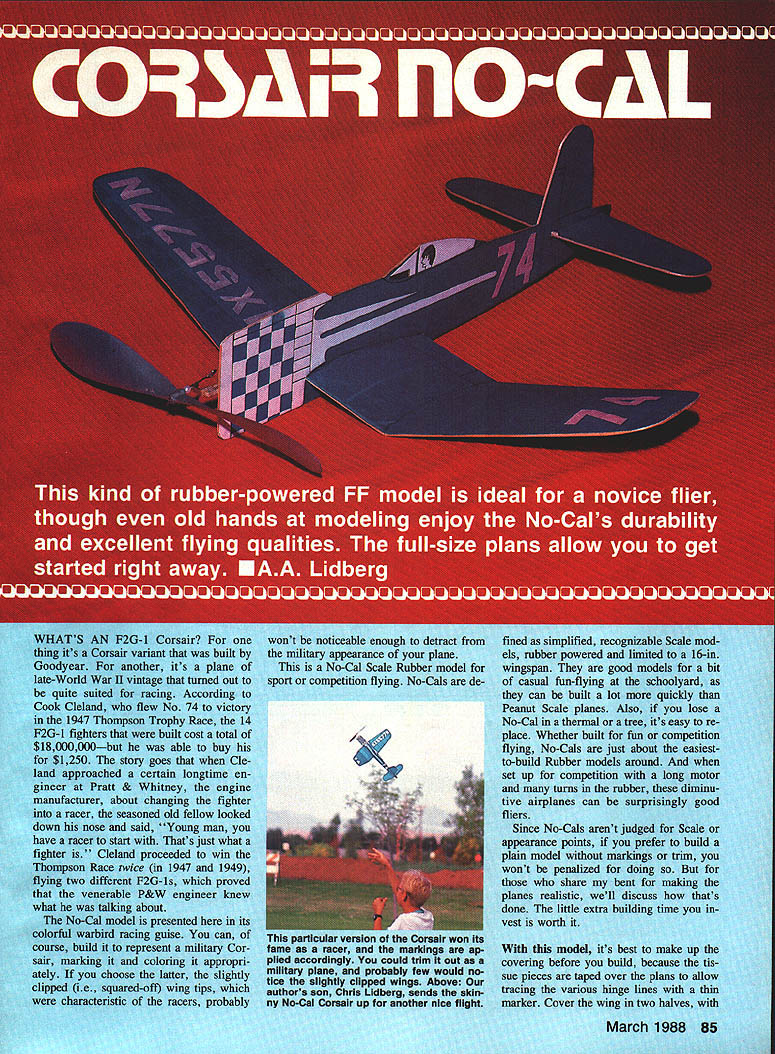
CORSAIR NO-CAL
This rubber-powered free-flight (FF) model is ideal for a novice flier, though even experienced modelers enjoy the No-Cal's durability and excellent flying qualities. The full-size plans allow you to get started right away. — T. A. Lidberg
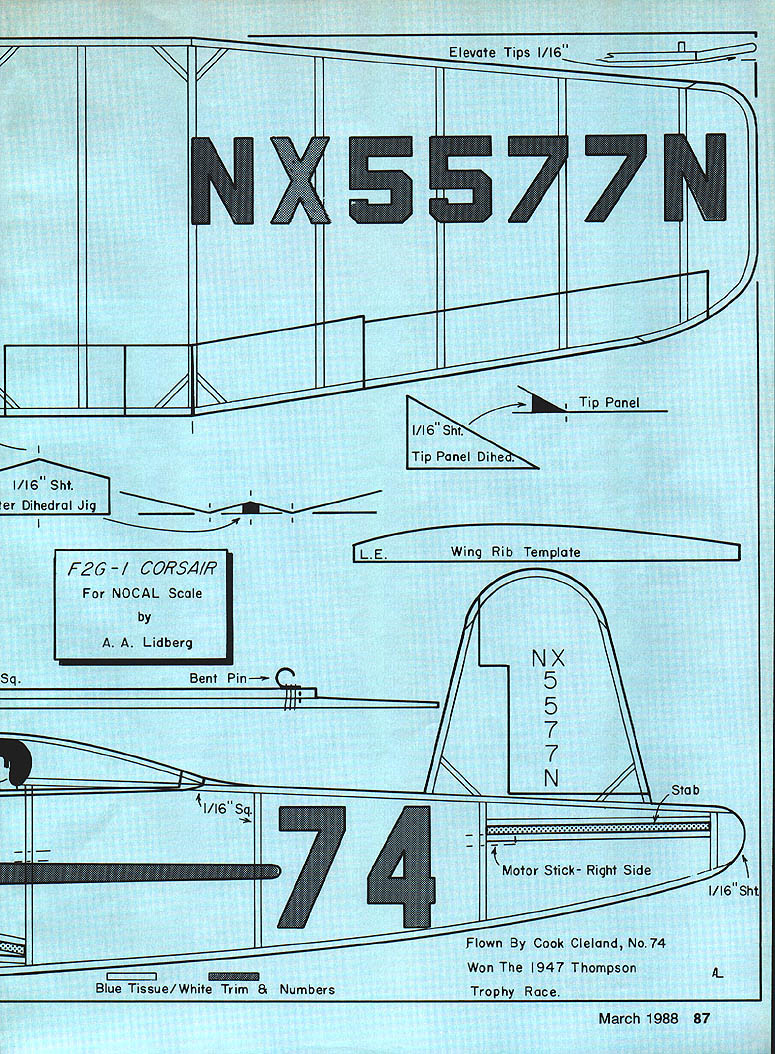
F2G-1 CORSAIR
What’s an F2G-1 Corsair? For one thing it’s a Corsair variant that was built by Goodyear. For another, it’s a late–World War II–vintage plane that proved well suited for racing. According to Cook Cleland, who flew No. 74 to victory in the 1947 Thompson Trophy Race, the 14 F2G-1 fighters that were built cost a total of $18,000,000 — but he was able to buy his for $1,250. The story goes that when Cleland approached a longtime Pratt & Whitney engineer about changing the fighter into a racer, the seasoned old fellow looked down his nose and said, “Young man, you have a racer to start with. That’s just what a fighter is.” Cleland went on to win the Thompson Race twice (1947 and 1949), flying two different F2G-1s, which proved the engineer was right.
The No-Cal model is presented here in its colorful warbird racing guise. You can, of course, build it to represent a military Corsair, marking and coloring it appropriately. If you choose the latter, the slightly clipped (squared-off) wingtips characteristic of the racers probably won’t be noticeable enough to detract from a military appearance.
This is a No-Cal scale rubber model for sport or competition flying. No-Cals are defined as simplified, recognizable scale models, rubber powered and limited to a 16‑in. wingspan. They are good for casual fun-flying at the schoolyard, since they can be built much more quickly than Peanut Scale planes. Also, if you lose a No-Cal in a thermal or a tree, it’s easy to replace. Whether built for fun or competition, No-Cals are among the easiest-to-build rubber models. And when set up for competition with a long motor and many turns in the rubber, these small airplanes can be surprisingly good fliers.
Since No-Cals aren’t judged for scale or appearance points, you won’t be penalized for building a plain model without markings. For those who prefer a realistic finish, the little extra building time is worth it.
Marking and trim
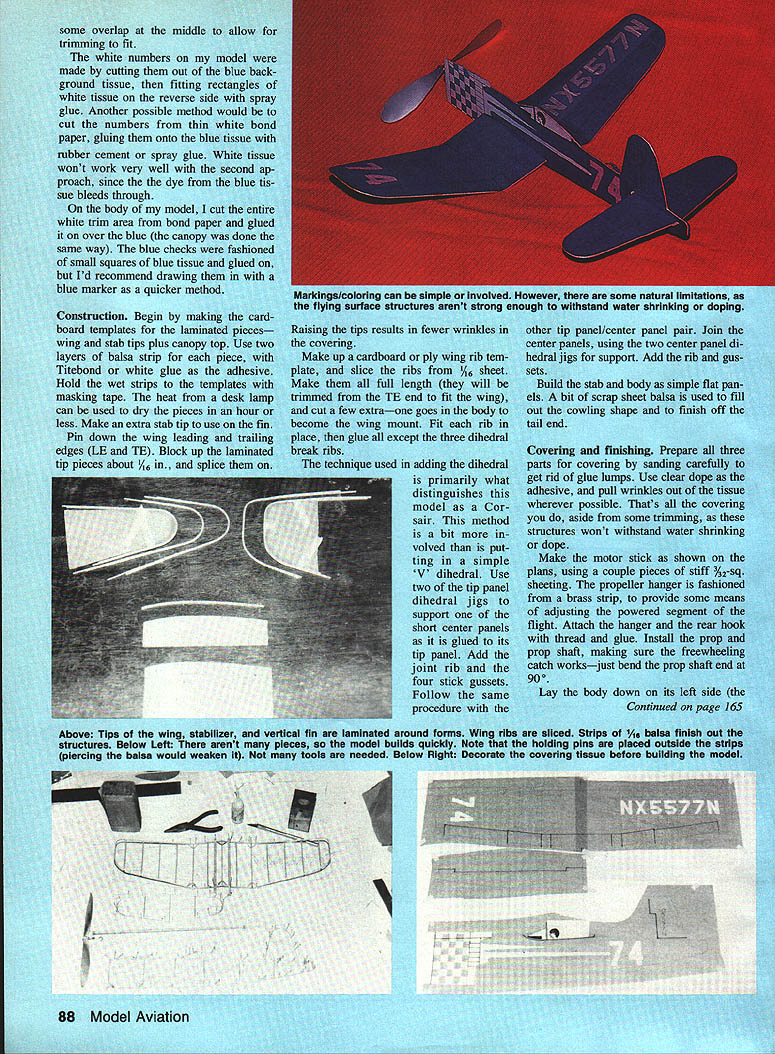
- The white numbers on my model were cut out of the blue background tissue, then rectangles of white tissue were fitted on the reverse side with spray glue.
- Another method is to cut the numbers from thin white bond paper and glue them onto the blue tissue with rubber cement or spray glue. White tissue won’t work well for this approach because the dye from the blue tissue bleeds through.
- On the body I cut the entire white trim area from bond paper and glued it over the blue (the canopy was done the same way).
- The blue checks were made from small squares of blue tissue and glued on, but drawing them with a blue marker is a quicker method.
Flown by Cook Cleland, No. 74 — Won the 1947 Thompson Trophy Race.
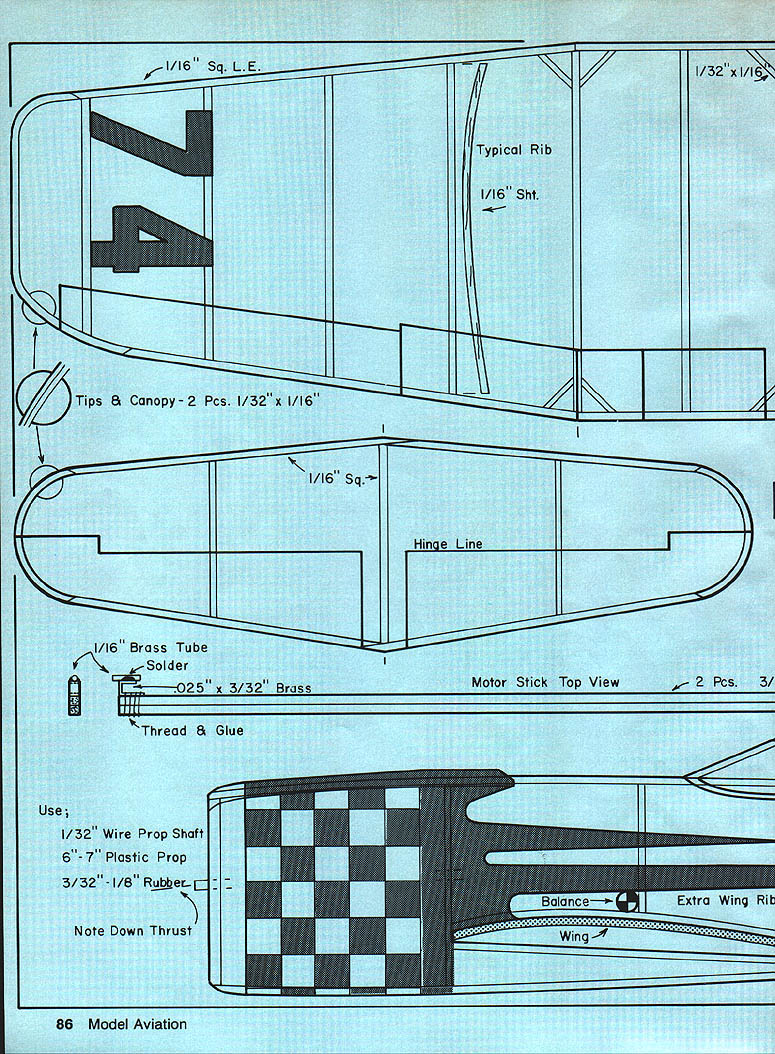
PLAN NOTES / PARTS & DETAILS
- 1/16" sq. leading edge (L.E.)
- 1/32" x 1/16" strip
- Typical rib
- 1/16" sheet
- Tips & canopy — 2 pcs., 1/32" x 1/16"
- 1/16" sq.
- Hinge line
- Tip panel
- Tip panel dihedral
- Motor stick — top view
- 1/16" brass tube
- Solder
- .025" x 3/32" brass
- Thread & glue — 2 pcs.
- Use:
- 1/32" wire prop shaft
- 6"–7" plastic prop
- 3/32"–1/8" rubber
- Note downthrust
- Balance → extra wing rib
- Elevate tips 1/16"
- Tip panel: 1/16" sheet; tip panel dihedral
- Bent pin
- Motor stick — right side: 1/16" sheet
- Blue tissue / white trim & numbers
- Some overlap at the middle to allow trimming to fit
- NX5577N (paint/code note)
- Make an extra stab tip to use on the fin
CONSTRUCTION
- Begin by making cardboard templates for the laminated pieces — wing and stab tips plus canopy top. Use two layers of balsa strip for each piece, with Titebond or white glue as the adhesive. Hold the wet strips to the templates with masking tape. The heat from a desk lamp can dry the pieces in an hour or less.
- Pin down the wing leading and trailing edges (LE and TE). Block up the laminated tip pieces about 1/16 in., and splice them on. Raising the tips results in fewer wrinkles in the covering.
- Make a cardboard or ply wing rib template, and slice ribs from 1/16" sheet. Make them full length (they will be trimmed from the TE end to fit the wing), and cut a few extras — one goes in the body to become the wing mount. Fit each rib in place, then glue all except the three dihedral-break ribs.
- The dihedral technique primarily distinguishes this model as a Corsair. This method is more involved than a simple "V" dihedral:
- Use two tip-panel dihedral jigs to support one short center panel as it is glued to its tip panel.
- Add the joint rib and the four stick gussets.
- Repeat the procedure for the other tip panel/center panel pair.
- Join the center panels using the two center-panel dihedral jigs for support. Add the rib and gussets.
- Build the stab and body as simple flat panels. Use a bit of scrap sheet balsa to fill out the cowling shape and to finish the tail end.
- Make an extra stab tip to use on the fin.
Motor stick and prop
- Make the motor stick as shown on the plans, using a couple of pieces of stiff 3/32"‑sq. sheeting.
- The prop hanger is fashioned from a brass strip to provide some means of adjusting the powered segment of the flight. Attach the hanger and the rear hook with thread and glue.
- Install the prop and prop shaft, making sure the freewheeling catch works — bend the prop shaft end at 90°.
- Lay the body down on its left side (the side that's covered), and glue on the motor stick. Position the stab and wing, and glue in place. If desired, fill in the gap under the wing.
- Add a loop of rubber (3/8" if your model is very light; 1/2" if heavier), and check balance. Use clay (most likely under the stab) to move the balance point to the correct location.
COVERING AND FINISHING
- Prepare all parts for covering by sanding carefully to remove glue lumps.
- Use clear dope as the adhesive for tissue and pull wrinkles out of the tissue wherever possible. Do not subject these structures to water shrinking or heavy dope — they won’t withstand that treatment.
- For the canopy and white trim areas, bond paper can be used over blue tissue to avoid dye bleed-through.
- Blue checks can be small tissue squares glued on or simply drawn with a marker.
FLYING
- Try some test glides, adjusting the amount of clay to modify the glide angle. A gentle turn in either direction is acceptable as long as it isn't too tight.
- Try about 50 turns to see behavior under power. If the model won’t climb, add more turns and/or reduce tail weight. If it stalls or won’t pick a direction, add downthrust.
- Bend the flexible prop hanger to correct a too-tight climb turn, but correct the glide turn first by warping the fin as needed.
- As trim is sorted (usually in a few flights), add more turns. Use a winder from the rear; a helper can hold the prop hub.
- The F2G-1 should climb at between 20° and 50°. With a long, lubricated, winder-wound motor, it can turn in times up to about a minute.
Hope you enjoy the Corsair racer. Invite several friends to build their own No-Cals and work up some brisk No-Cal contest fun!
REFERENCES
- Robert Hull, September Champions (Stackpole Books, 1979) — Cook Cleland information and quotation.
- Charles A. Mendenhall, The National Air Racers in 3-Views, 1929–1949 (Diane Publishing Co., 1971).
Transcribed from original scans by AI. Minor OCR errors may remain.

