
Crashmaster
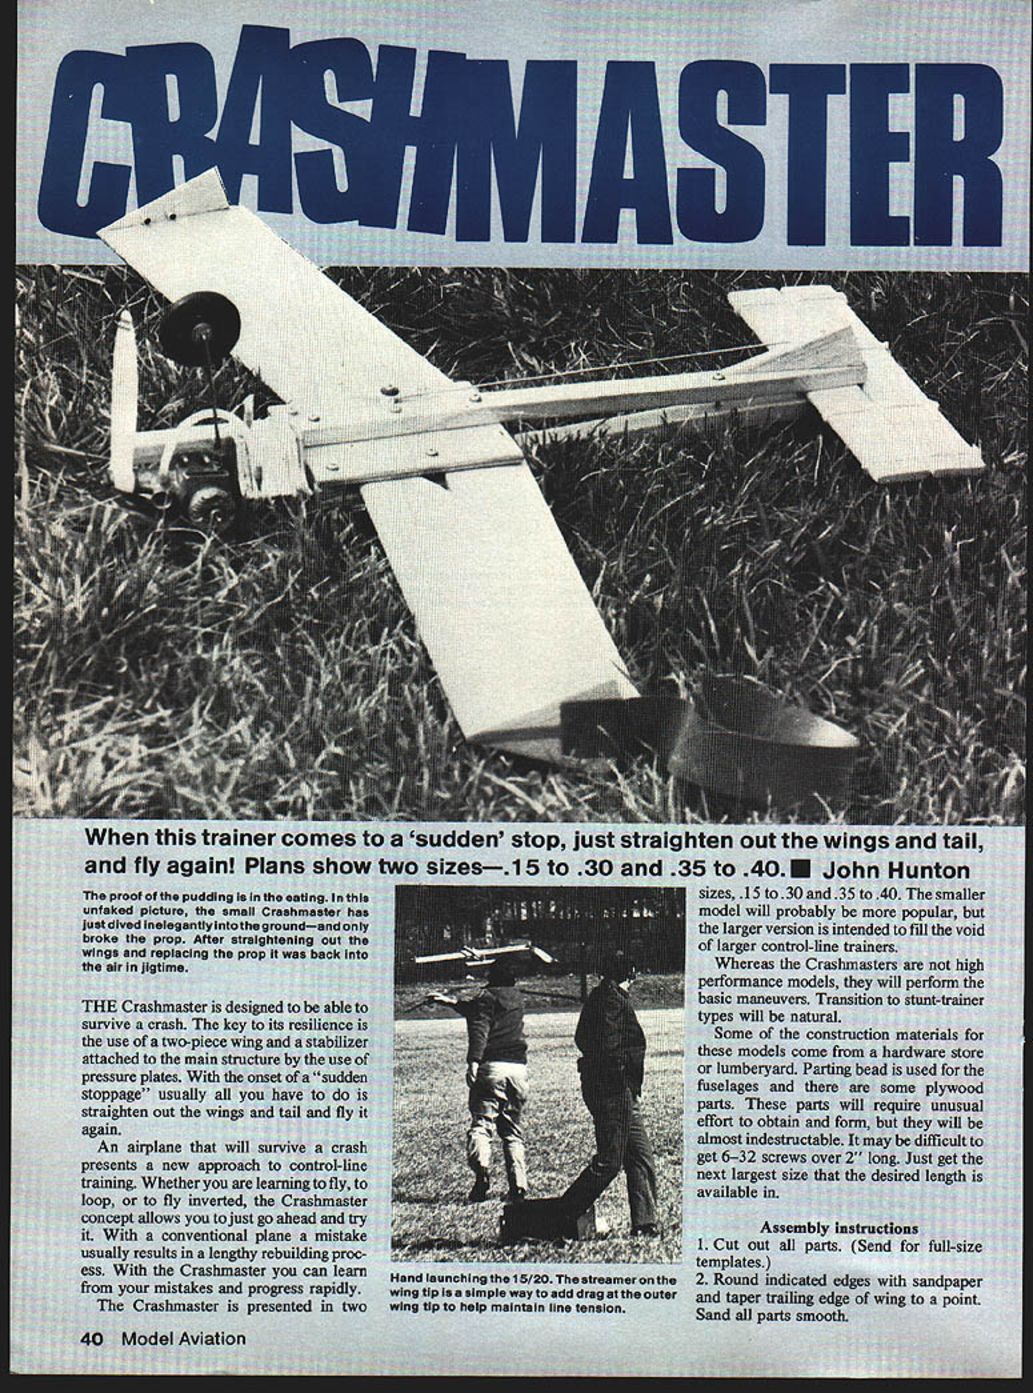
The proof of the pudding is in the eating. In this unfaked picture, the small Crashmaster has just dived inelegantly into the ground—and only broke the prop. After straightening out the wings and replacing the prop it was back in the air in a jiffy.
The Crashmaster is designed to be able to survive a crash. The key to its resilience is the use of a two-piece wing and a stabilizer attached to the main structure by the use of pressure plates. With the onset of a "sudden stoppage" usually all you have to do is straighten out the wings and tail and fly it again.
An airplane that will survive a crash presents a new approach to control-line training. Whether you are learning to fly, to loop, or to fly inverted, the Crashmaster concept allows you to just go ahead and try it. With a conventional plane a mistake usually results in a lengthy rebuilding process. With the Crashmaster you can learn from your mistakes and progress rapidly.
The Crashmaster is presented in two sizes: .15 to .30 and .35 to .40. The smaller model will probably be more popular, but the larger version is intended to fill the void of larger control-line trainers.
Whereas the Crashmasters are not high-performance models, they will perform the basic maneuvers. Transition to stunt-trainer types will be natural.
Some of the construction materials for these models come from a hardware store or lumberyard. Parting bead is used for the fuselages and there are some plywood parts. These parts will require unusual effort to obtain and form, but they will be almost indestructible. It may be difficult to get 6-32 screws over 2" long. Just get the next larger size that the desired length is available in.
An unposed shot of an air disaster reveals a bent prop and scattered dirt. Crashmasters perform basic maneuvers and are a natural transition to stunt.
Assembly instructions
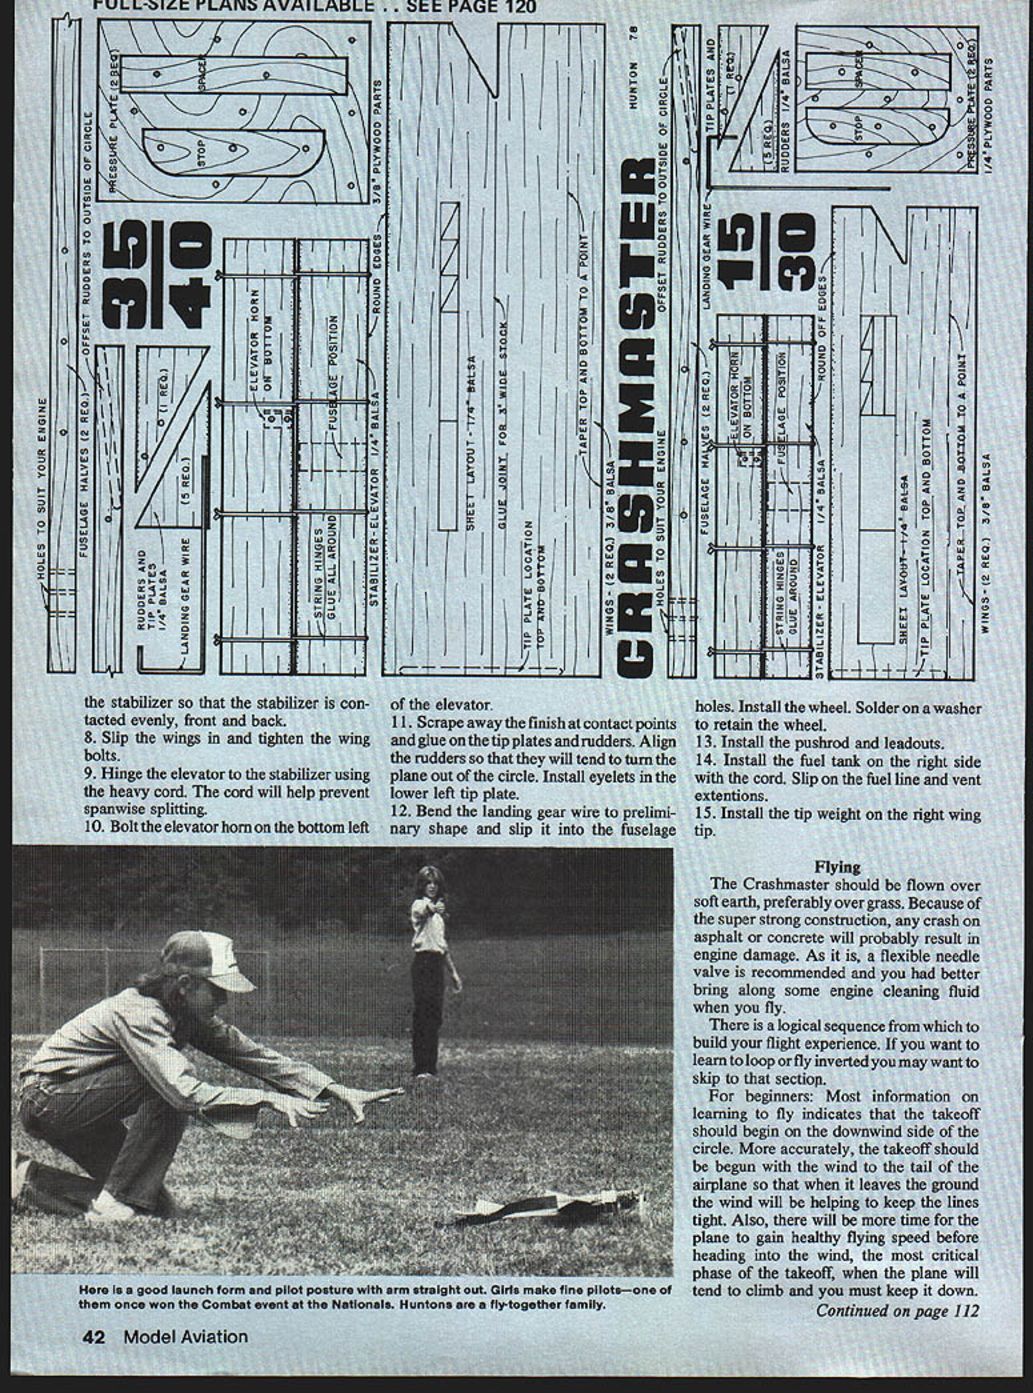
- Cut out all parts. (Send for full-size templates.)
- Round indicated edges with sandpaper and taper trailing edge of wing to a point. Sand all parts smooth.
Materials for each size model
15 to 30
- Parting bead (1/2" x 3/4" pine) - 2 — 18" long
- Plywood - 2 — 1/4" x 4" x 5"; 2 — 1/4" x 1" x 4"
- Balsa wood - 1 sheet 1/4" x 4" x 36"
- Bolts, with washers & locknuts - 7 — No. 6 x 1"; 5 — No. 6 x 2"
- Pushrod wire - 1 — 1/16" x 36"
- Leadout wire - 1 — .030" x 36"
- Wheels - 1 — 2"
- Fuel tank - 1 — 2 oz.
- Fuel line, medium - 6"
- Elevator horn - 1/4" minimum height
- Bellcrank - 2 to 3"
- Control lines - 50' to 60', .012" min.
- Control handle - 4"
- Propeller, nylon (boil before using) - 8" x 6 to 9" x 6
- Glue - White, or model airplane type
- Lead sinker - 1 oz.
- Eyelets - 2 — 1/8"
- Strong cord - Small roll
- Ribbon - 1" x 12"
- Finishing material - Fuel-proof finish system per the quality of your choice; two coats of phenolic resin were used for the prototypes.
30 to 40
- Parting bead (1/2" x 3/4" pine) - 2 — 27" long
- Plywood - 2 — 3/8" x 5" x 7"; 1 — 3/8" x 1" x 6"; 1 — 3/8" x 1-1/4" x 5"
- Balsa wood - 1 sheet 1/4" x 2" x 36"; 2 sheets 3/8" x 3" x 36"
- Bolts, with washers & locknuts - 4 — No. 6 x 1"; 4 — No. 6 x 1-5/8"; 4 — No. 6 x 2-1/2" (or larger)
- Pushrod wire - 1 — 3/32" x 36"
- Leadout wire - 1 — .040" x 36"
- Wheels - 1 — 3"
- Fuel tank - 1 — 3 oz.
- Fuel line, medium - 6"
- Elevator horn - 1" minimum height
- Bellcrank - 3"
- Control lines - 60' to 70', .018" min.
- Control handle - 4"
- Propeller, nylon (boil before using) - 9" x 6 to 10" x 6
- Glue - White, or model airplane type
- Lead sinker - 2 oz.
- Eyelets - 2 — 1/8"
- Strong cord - Small roll
- Ribbon - 1" x 18"
- Drill all holes (9/64" for 6-32 screws).
- Finish all wood parts.
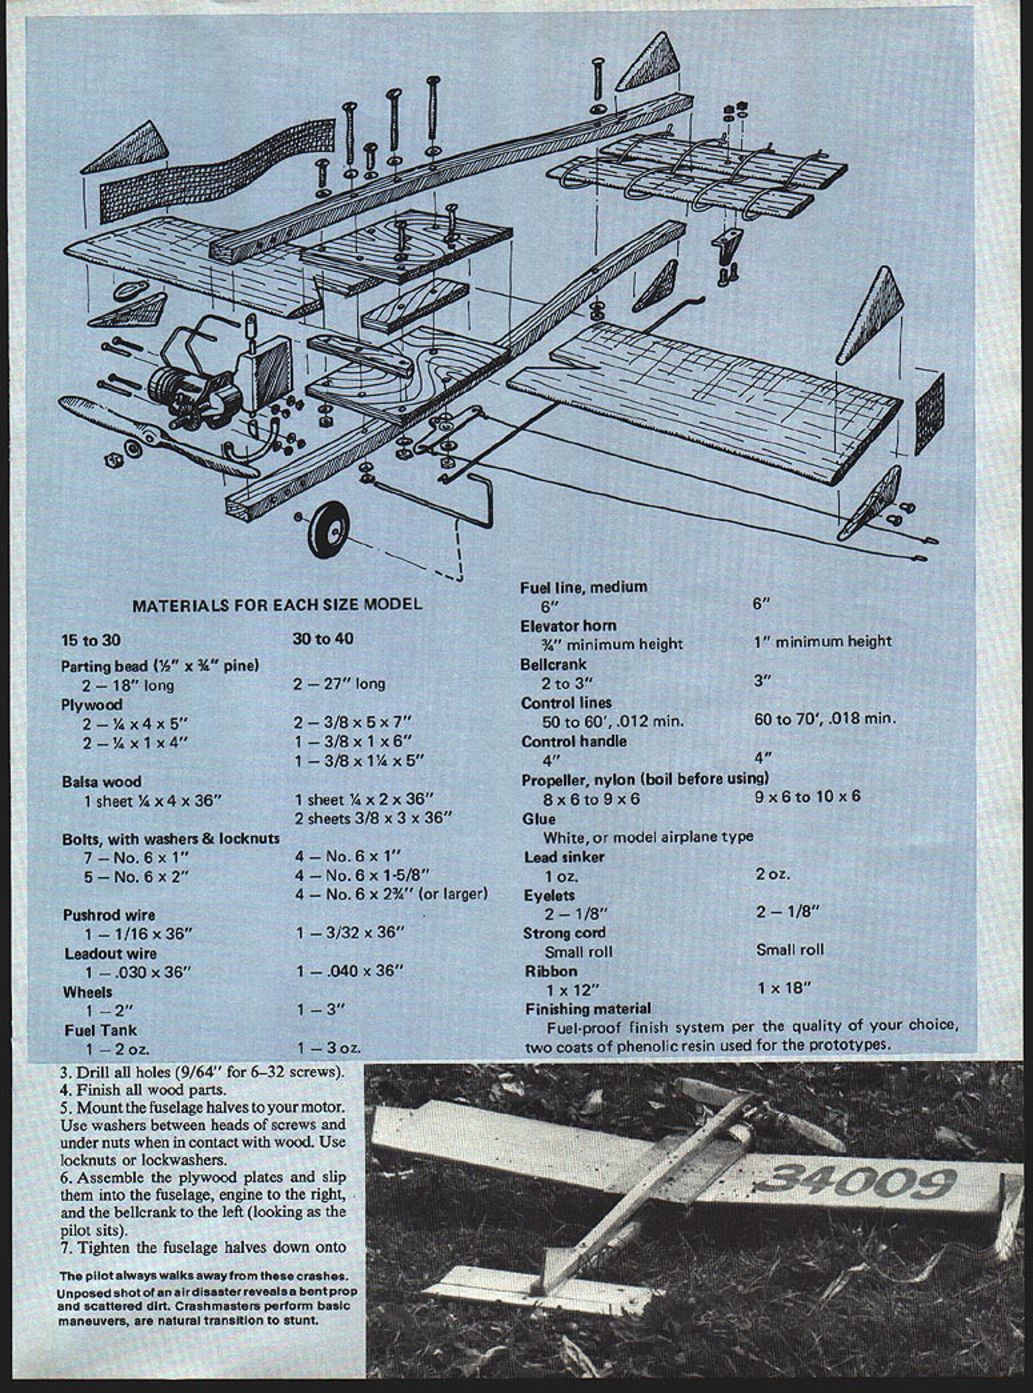
- Mount the fuselage halves to your motor. Use washers between heads of screws and under nuts when in contact with wood. Use locknuts or lockwashers.
- Assemble the plywood plates and slip them into the fuselage, engine to the right, and the bellcrank to the left (looking as the pilot sits).
- Tighten the fuselage halves down onto the plates. Seat the stabilizer so that it is contacted evenly, front and back.
The pilot always walks away from these crashes.
- Slip the wings in and tighten the wing bolts.
- Hinge the elevator to the stabilizer using the heavy cord. The cord will help prevent spanwise splitting.
- Bolt the elevator horn on the bottom left of the elevator.
- Scrape away the finish at contact points and glue on the tip plates and rudders. Align the rudders so that they will tend to turn the plane out of the circle. Install eyelets in the lower left tip plate.
- Bend the landing gear wire to preliminary shape and slip it into the fuselage holes. Install the wheel. Solder on a washer to retain the wheel.
- Install the pushrod and leadouts.
- Install the fuel tank on the right side with the cord. Slip on the fuel line and vent extensions.
- Install the tip weight on the right wing tip.
Flying
The Crashmaster should be flown over soft earth, preferably over grass. Because of the super-strong construction, any crash on asphalt or concrete will probably result in engine damage. As it is, a flexible needle valve is recommended and you should bring along some engine cleaning fluid when you fly.
There is a logical sequence from which to build your flight experience. If you want to learn to loop or fly inverted you may want to skip to that section.
For beginners: Most information on learning to fly indicates that the takeoff should begin on the downwind side of the circle. More accurately, the takeoff should be begun with the wind at the tail of the airplane so that when it leaves the ground the wind will be helping to keep the lines tight. Also, there will be more time for the plane to gain healthy flying speed before heading into the wind, the most critical phase of the takeoff, when the plane will tend to climb and you must keep it down.
Transcribed from original scans by AI. Minor OCR errors may remain.

