
Custom RC Sailplane Field Box
Field Box
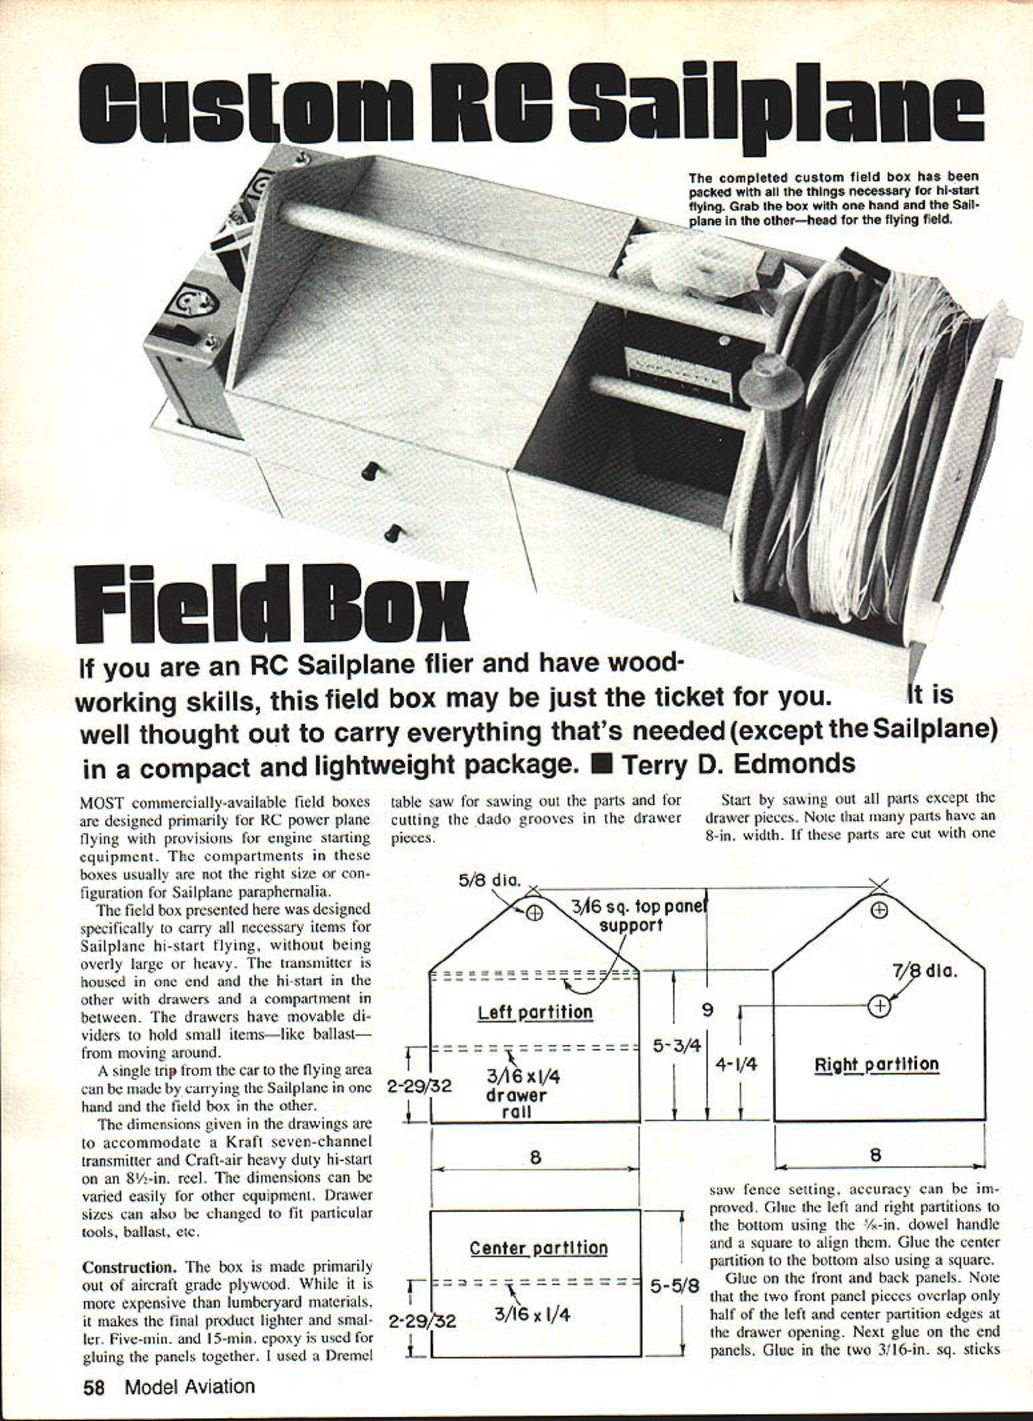
If you are an RC sailplane flier and have woodworking skills, this field box may be just the ticket. It is well thought out to carry everything that's needed (except the sailplane) in a compact, lightweight package. — Terry D. Edmonds
Most commercially available field boxes are designed primarily for RC power planes with provisions for engine starting equipment. Those compartments are usually not the right size or configuration for sailplane paraphernalia.
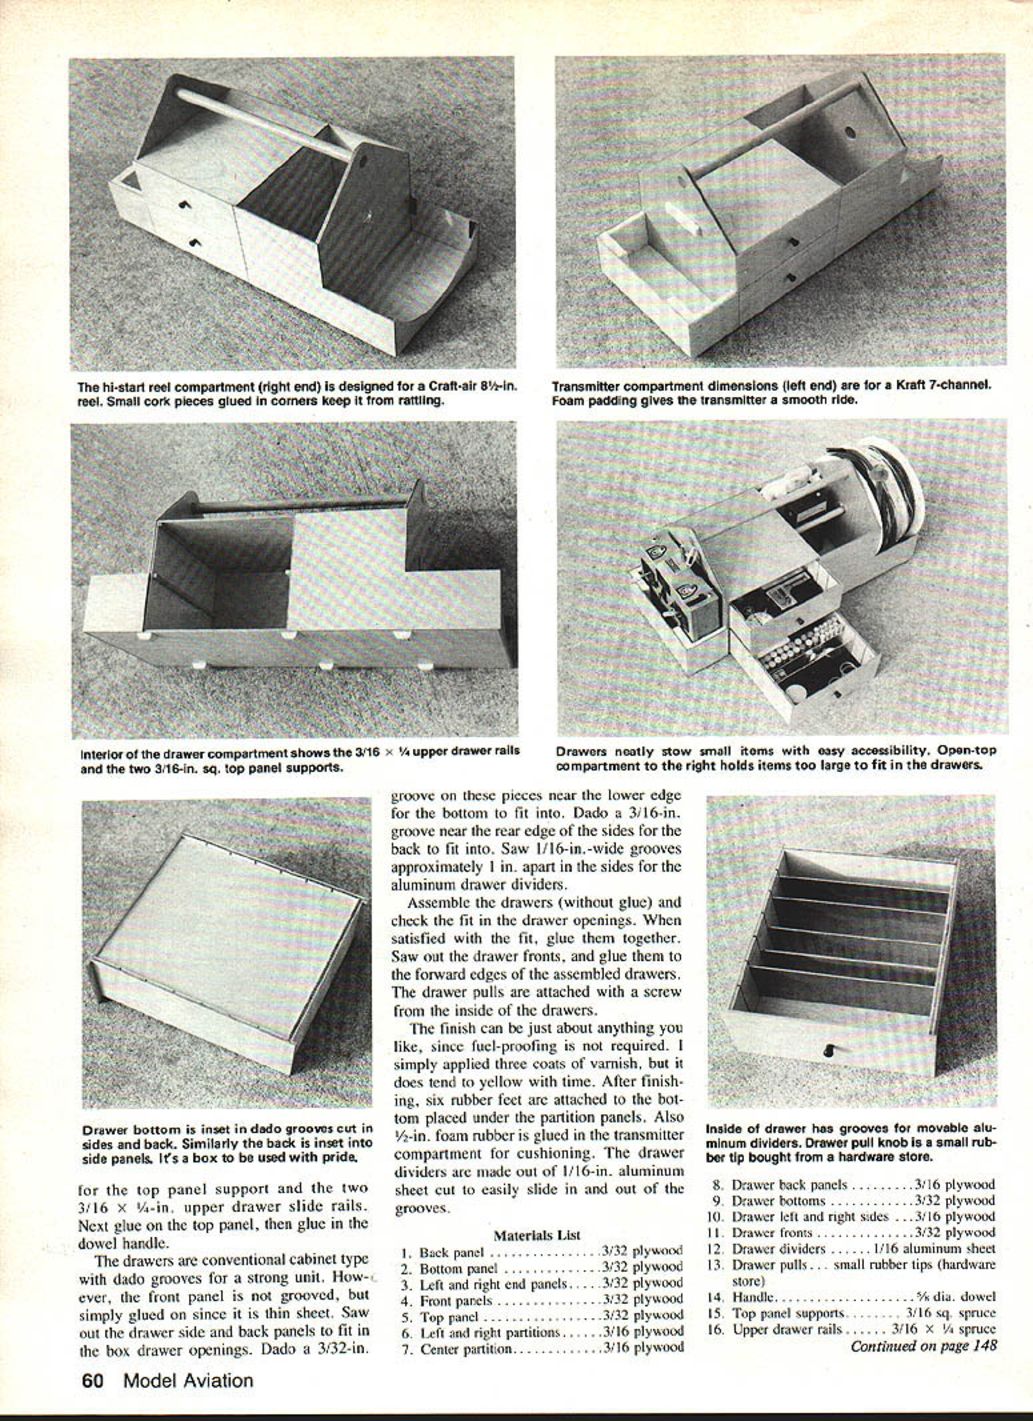
This field box was designed specifically to carry all necessary items for sailplane hi-start flying without being overly large or heavy. The transmitter is housed in one end and the hi-start in the other, with drawers and a compartment in between. The drawers have movable dividers to keep small items—like ballast—from shifting.
A single trip from the car to the flying area can be made by carrying the sailplane in one hand and the field box in the other.
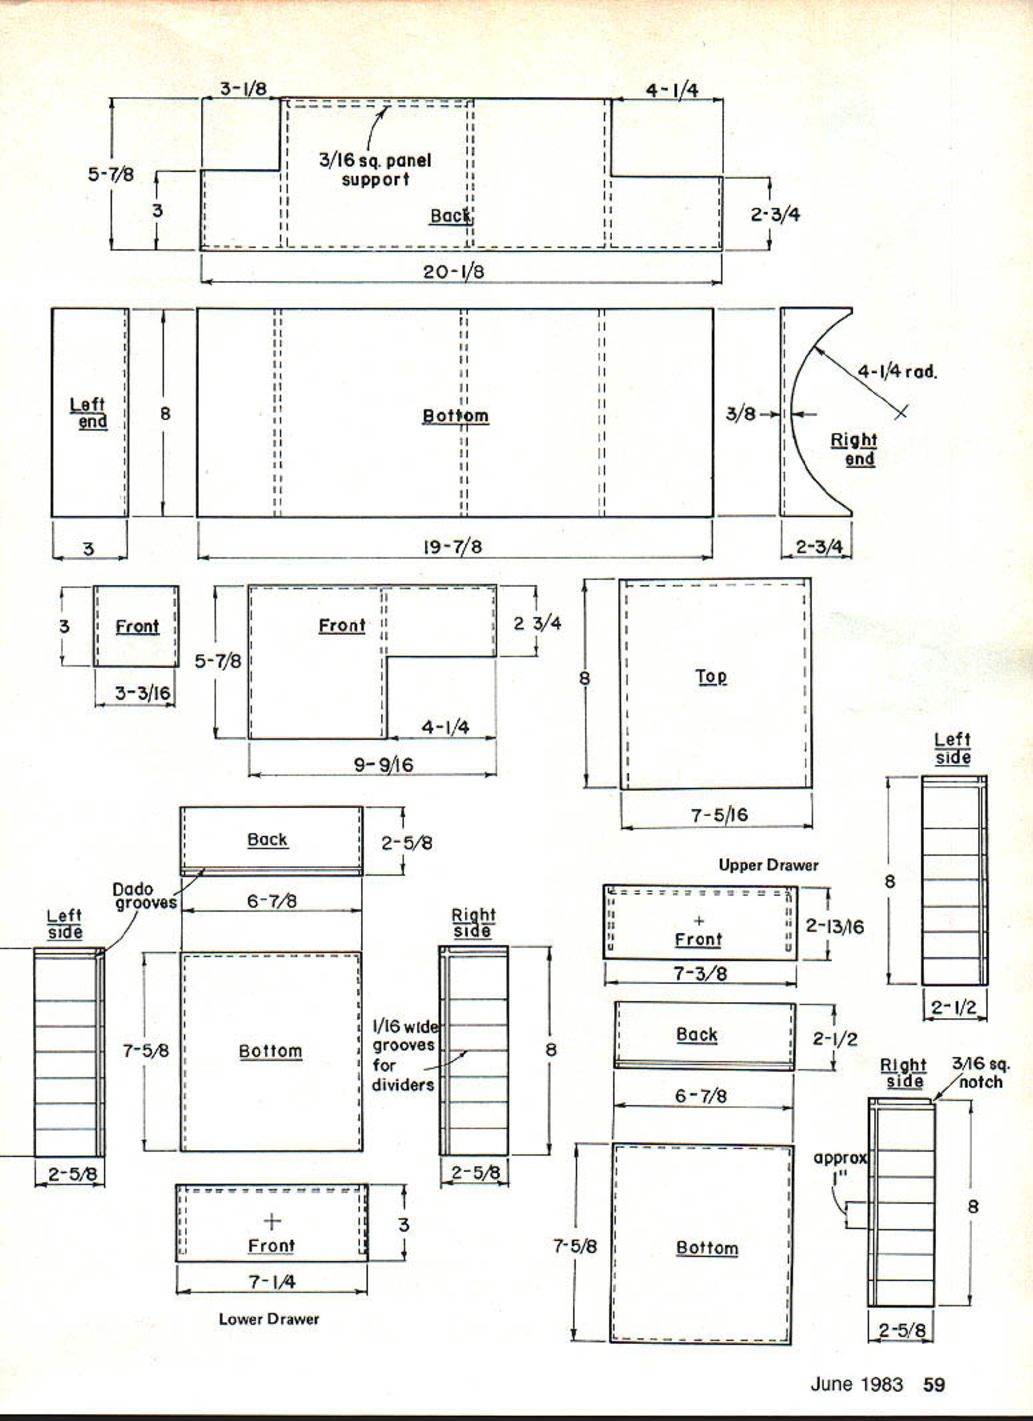
The given dimensions (in the drawings) accommodate a Kraft seven-channel transmitter and a Craft-Air heavy-duty hi-start on an 8-1/2 in. reel. Dimensions can be varied easily for other equipment; drawer sizes can be changed to fit particular tools, ballast, etc.
Construction
- The box is made primarily from aircraft-grade plywood. While more expensive than lumberyard materials, it yields a lighter, more compact final product.
- Use 5-minute and 15-minute epoxy for gluing the panels.
- Tools used: table saw (I used a Dremel table saw) for sawing parts and cutting dado grooves in the drawer pieces.
Steps:
- Saw out all parts except the drawer pieces. Many parts are 8 in. wide; cutting these with one fence setting improves accuracy.
- Glue the left and right partitions to the bottom using the 5/8-in. dowel handle and a square to align them. Glue the center partition to the bottom using a square for alignment.
- Glue on the front and back panels. Note: the two front panel pieces overlap only half of the left and center partition edges at the drawer opening.
- Glue on the end panels.
- Glue in two 3/16-in. square sticks as top panel supports.
- Glue on the top panel; glue in the dowel handle.
Drawers
- The drawers are conventional cabinet-style with dado grooves for strength. The front panels are thin sheet and are simply glued on.
- Saw side and back panels to fit the box drawer openings.
- Dado a 3/32-in. groove near the lower edge of the drawer sides and back to accept the drawer bottom.
- Dado a 3/16-in. groove near the rear edge of the sides to accept the drawer back.
- Saw 1/16-in.-wide grooves approximately 1 in. apart in the sides to accept aluminum drawer dividers.
- Assemble the drawers dry and check fit in the openings. When satisfied, glue them together.
- Saw out drawer fronts and glue to the forward edges of the assembled drawers.
- Attach drawer pulls (rubber tips) with a screw from inside the drawer.
Drawer dividers are made from 1/16-in. aluminum sheet; they cut easily and slide in and out of the grooves.
Finish
- Finish can be any preferred type; apply a fuel-proof finish if required. I applied three coats of varnish (varnish tends to yellow over time).
- After finishing, attach six rubber feet to the bottom, placed under the partition panels.
- Glue 1/4-in. foam rubber in the transmitter compartment for cushioning.
Materials List
- Back panel — 3/32-in. plywood
- Bottom panel — 3/32-in. plywood
- Left and right end panels — 3/32-in. plywood
- Front panels — 3/32-in. plywood
- Top panel — 3/32-in. plywood
- Left and right partitions — 3/16-in. plywood
- Center partition — 3/16-in. plywood
- Drawer back panels — 3/16-in. plywood
- Drawer bottoms — 3/32-in. plywood
- Drawer left and right sides — 3/16-in. plywood
- Drawer fronts — 3/32-in. plywood
- Drawer dividers — 1/16-in. aluminum sheet
- Drawer pulls — rubber tips (hardware store)
- Handle — 5/8-in. diameter dowel
- Top panel supports — 3/16-in. square spruce
- Upper drawer rails — 3/16 x 1/4-in. (see drawing for exact sizes)
- Feet — rubber feet (hardware store)
- Transmitter padding — 1/4-in. foam rubber
Editor's Note: For those who build the Custom RC Sailplane Field Box, follow good cabinet-making practice and custom fit the drawers to the case—cut the parts to fit the openings.
Transcribed from original scans by AI. Minor OCR errors may remain.

