

DAKOTA GRANDE
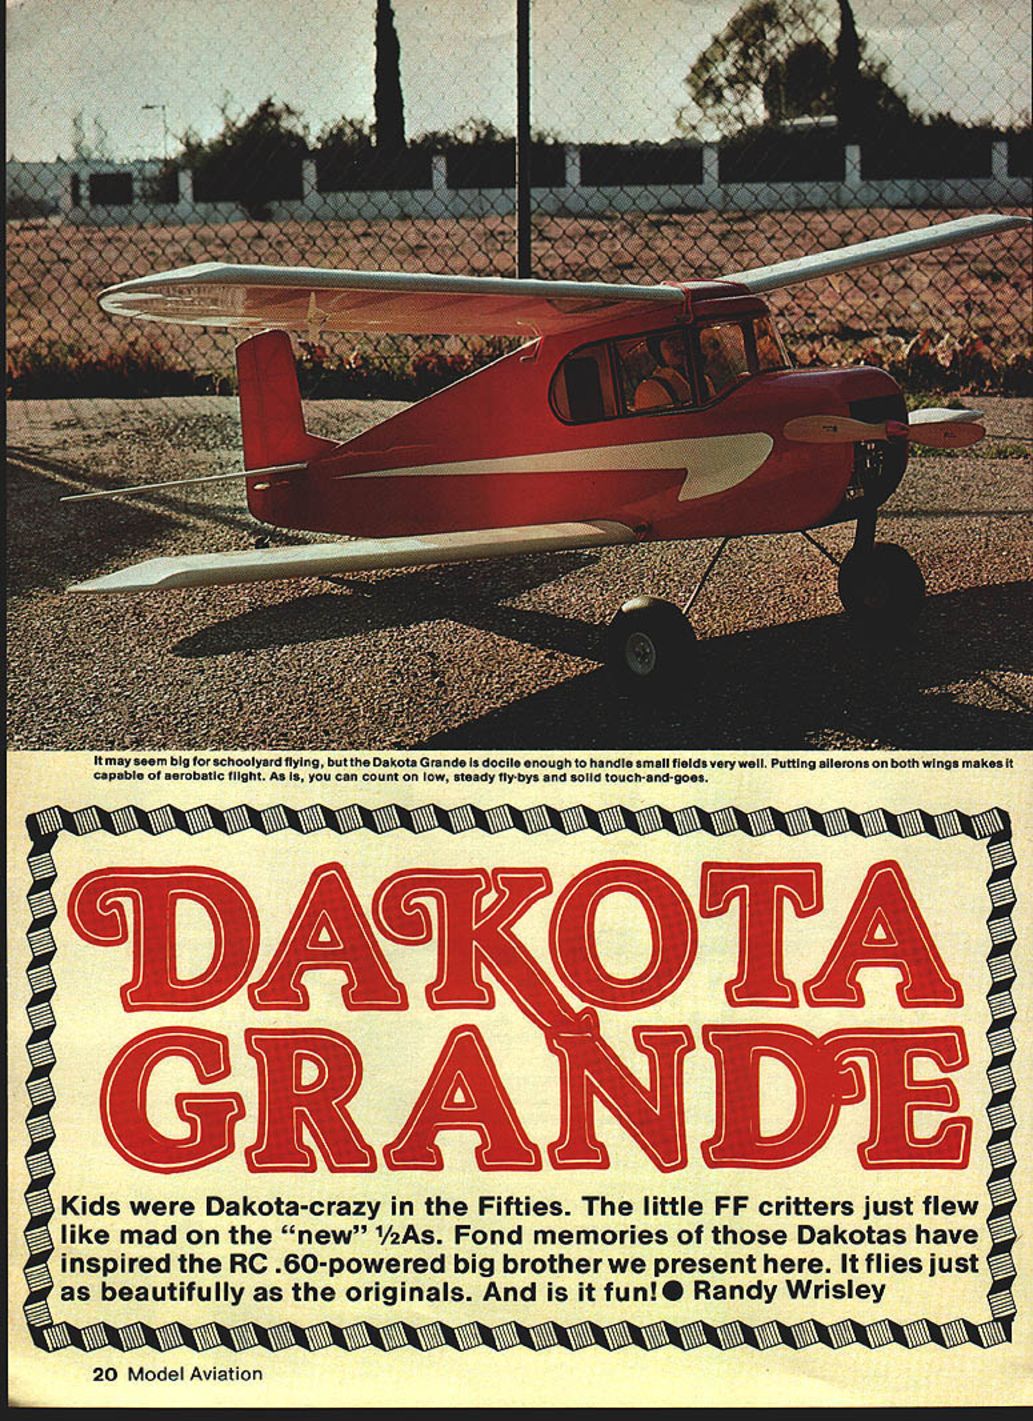
Kids were Dakota-crazy in the Fifties. The little Free Flight (FF) critters just flew like mad on the "new" 1/2A powerplants. Fond memories of those Dakotas inspired the RC .60-powered big brother we present here. It flies just as beautifully as the originals — and is it fun! — Randy Wrisley
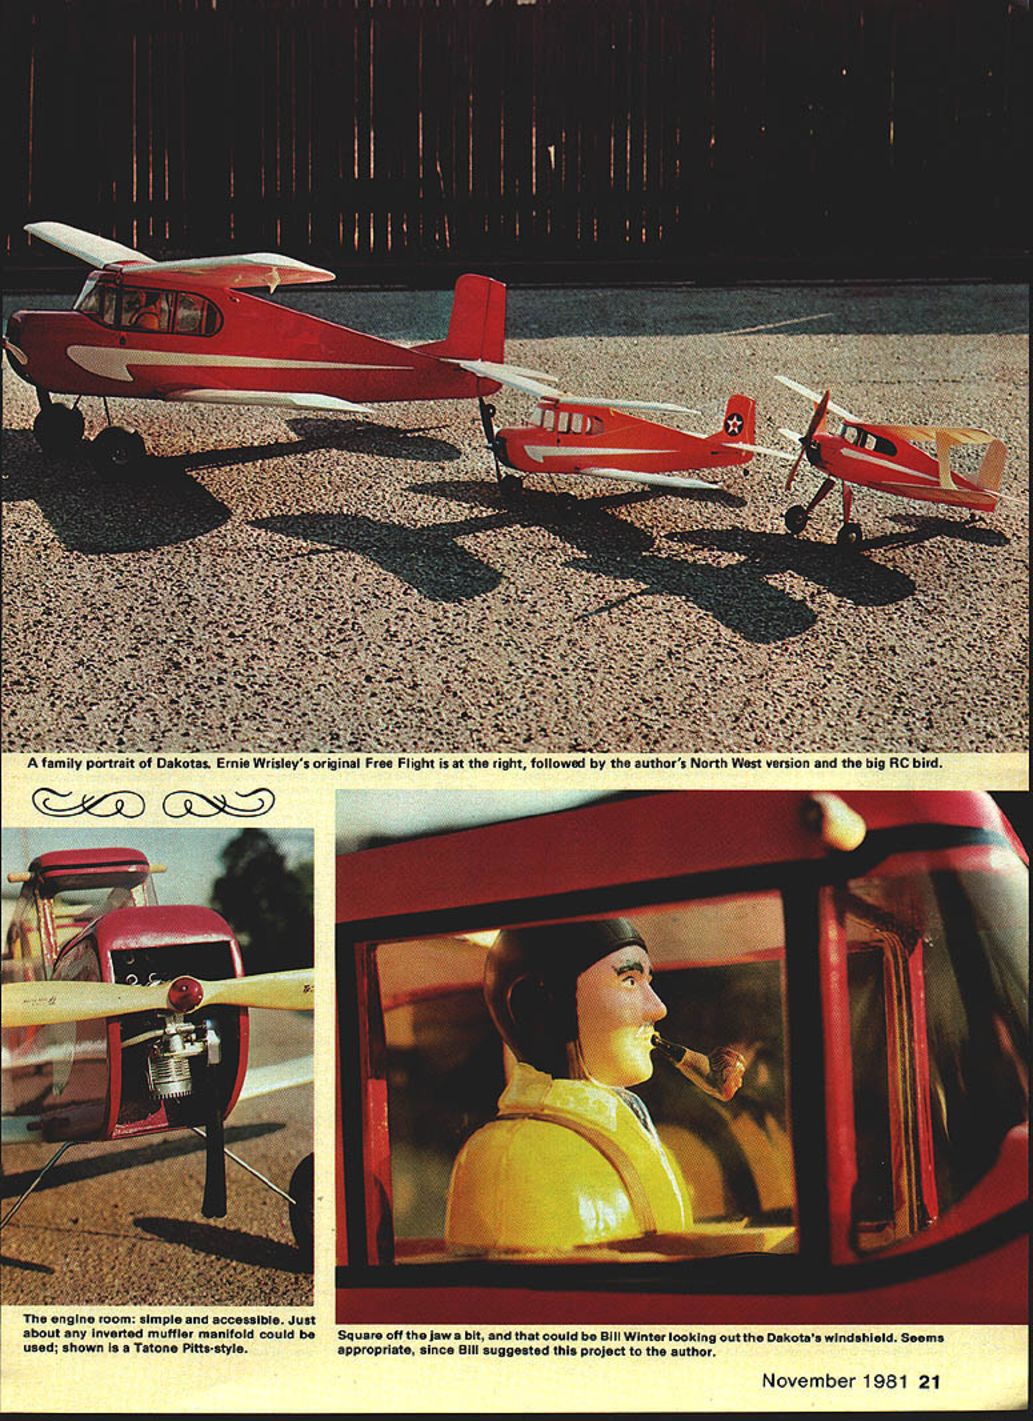
Way back in 1950 Henry Engineering introduced a jaunty little Free Flight biplane in its product line. The Dakota, designed by Joe Wagner, was intended for the then-new .049 powerplants. My father built one around 1957. As a kid I would spend hours cranking the inverted Atwood .049 in its snout. Once the motor started it would run fast and launch the model skyward. Next came the long chase — that old Dakota would fly forever.
Clarence Haught enlarged Joe's design 25% back in 1978 and built an RC version. (Editor: Haught's FF Dakota .049 enlarged 25% was available as MA Plan No. 242.) A major change I made was to convert back to the inverted engine mount I remembered so well.
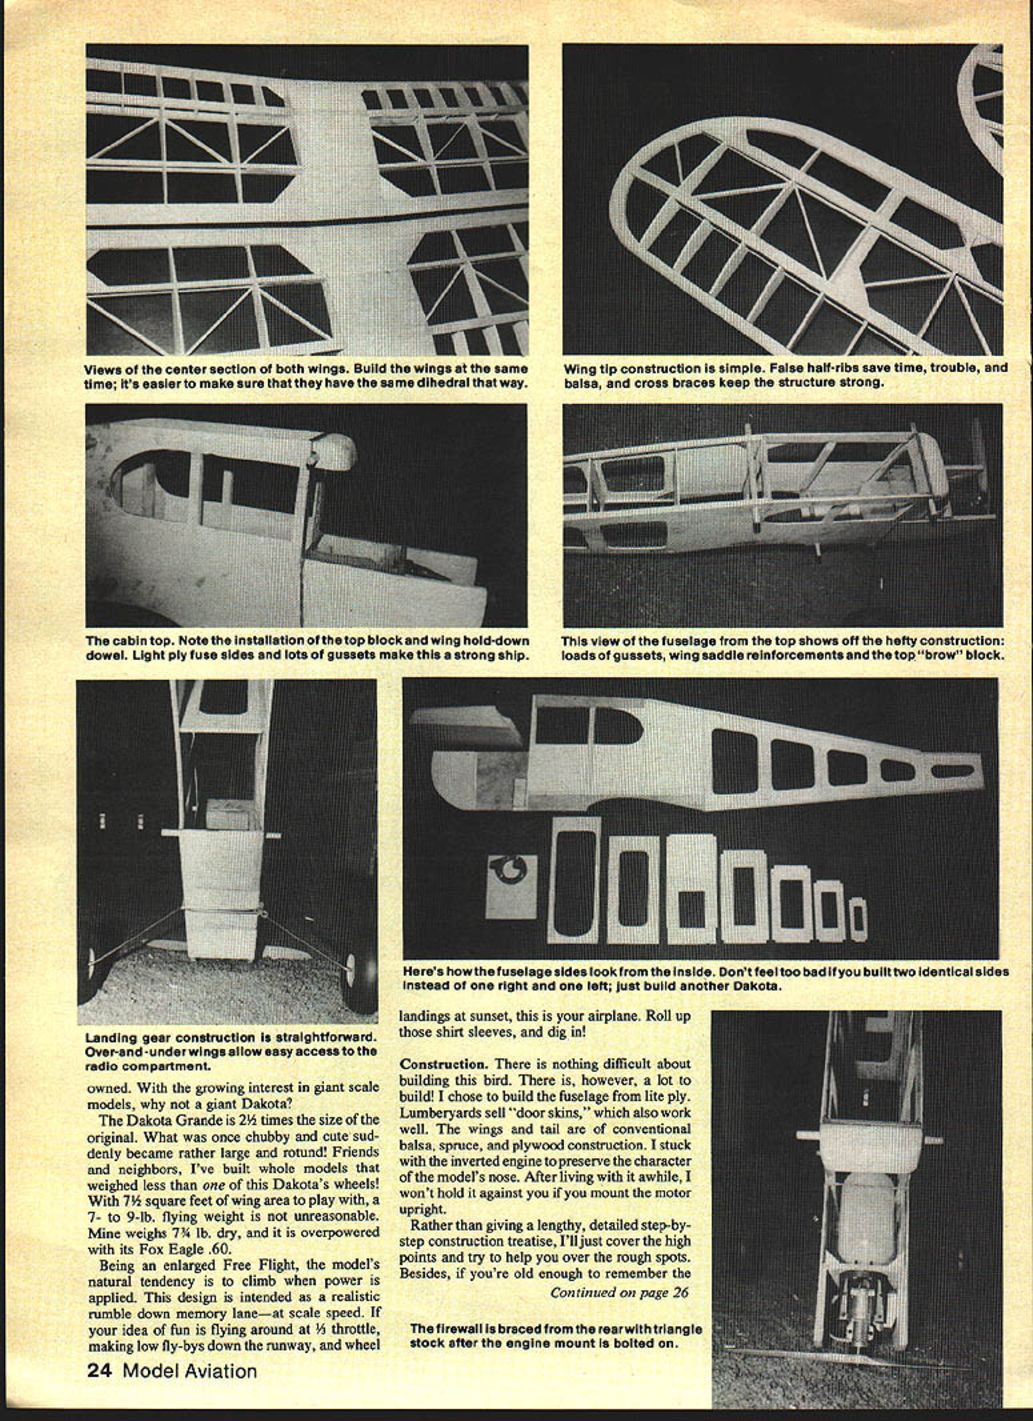
Owned by a growing interest in giant-scale models, the giant Dakota — Dakota Grande — is 2½ times the size of the original. What once was chubby and cute suddenly became rather large and rotund. Friends and neighbors — I've built whole models that weighed less. The Dakota has about seven square feet of wing area; a flying weight of 7–9 lb is reasonable. Mine weighs 7 lb dry and is overpowered with a Fox Eagle .60.
Being an enlarged Free Flight design, the Grande has a natural tendency to climb when power is applied. The design is intended to give a realistic rumble down memory lane at scale speed. It's great fun — flying around at half throttle, making low fly-bys down the runway, and doing wheel landings at sunset.
Construction
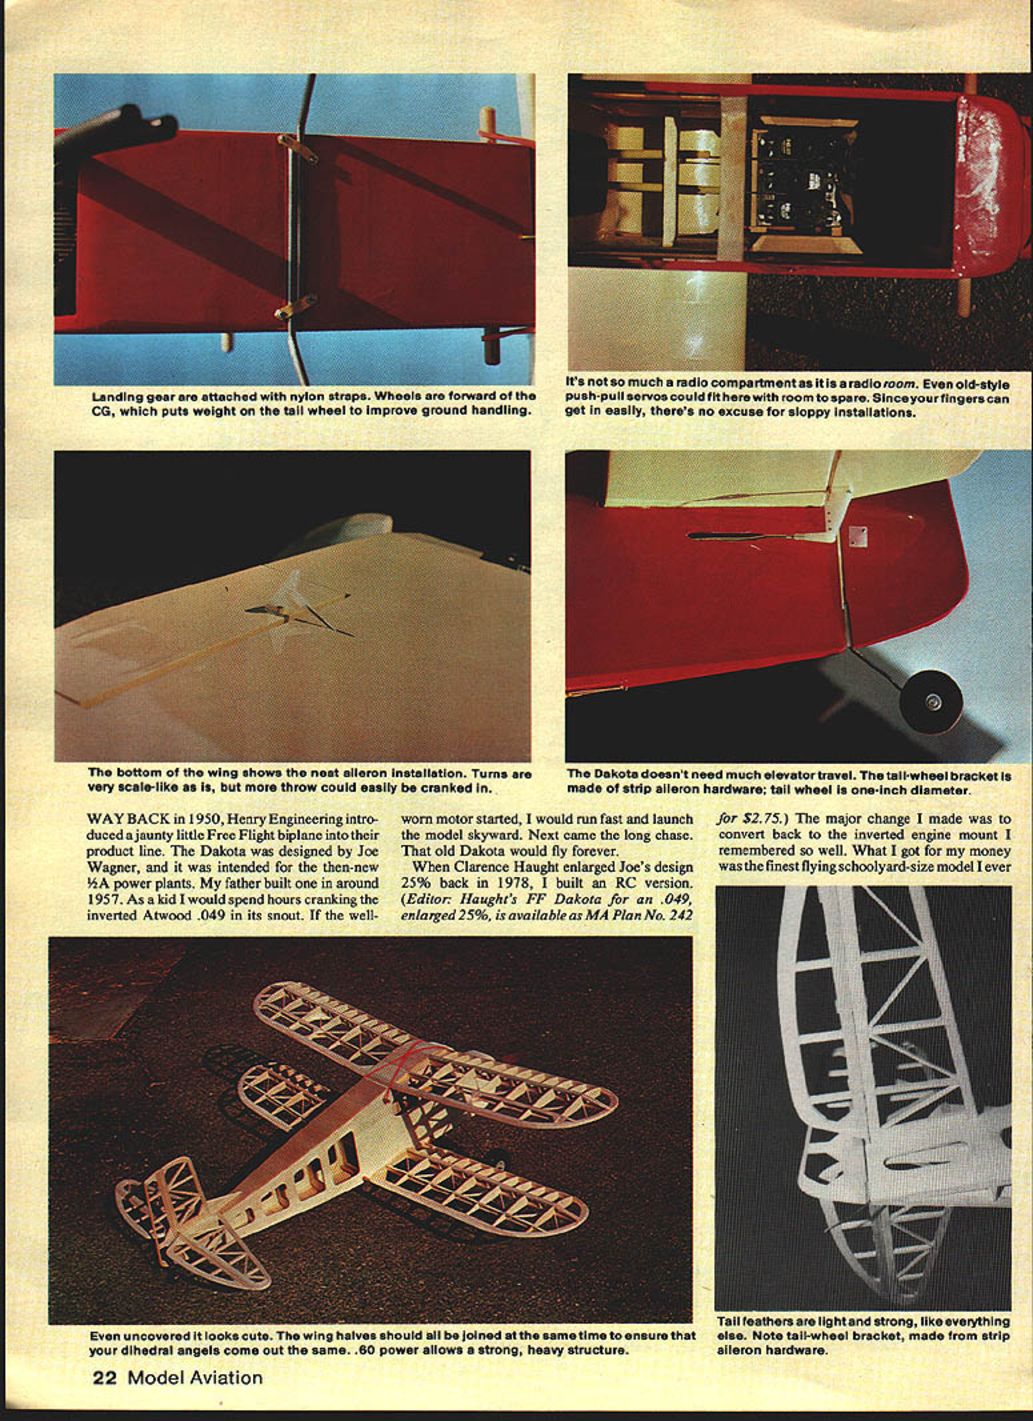
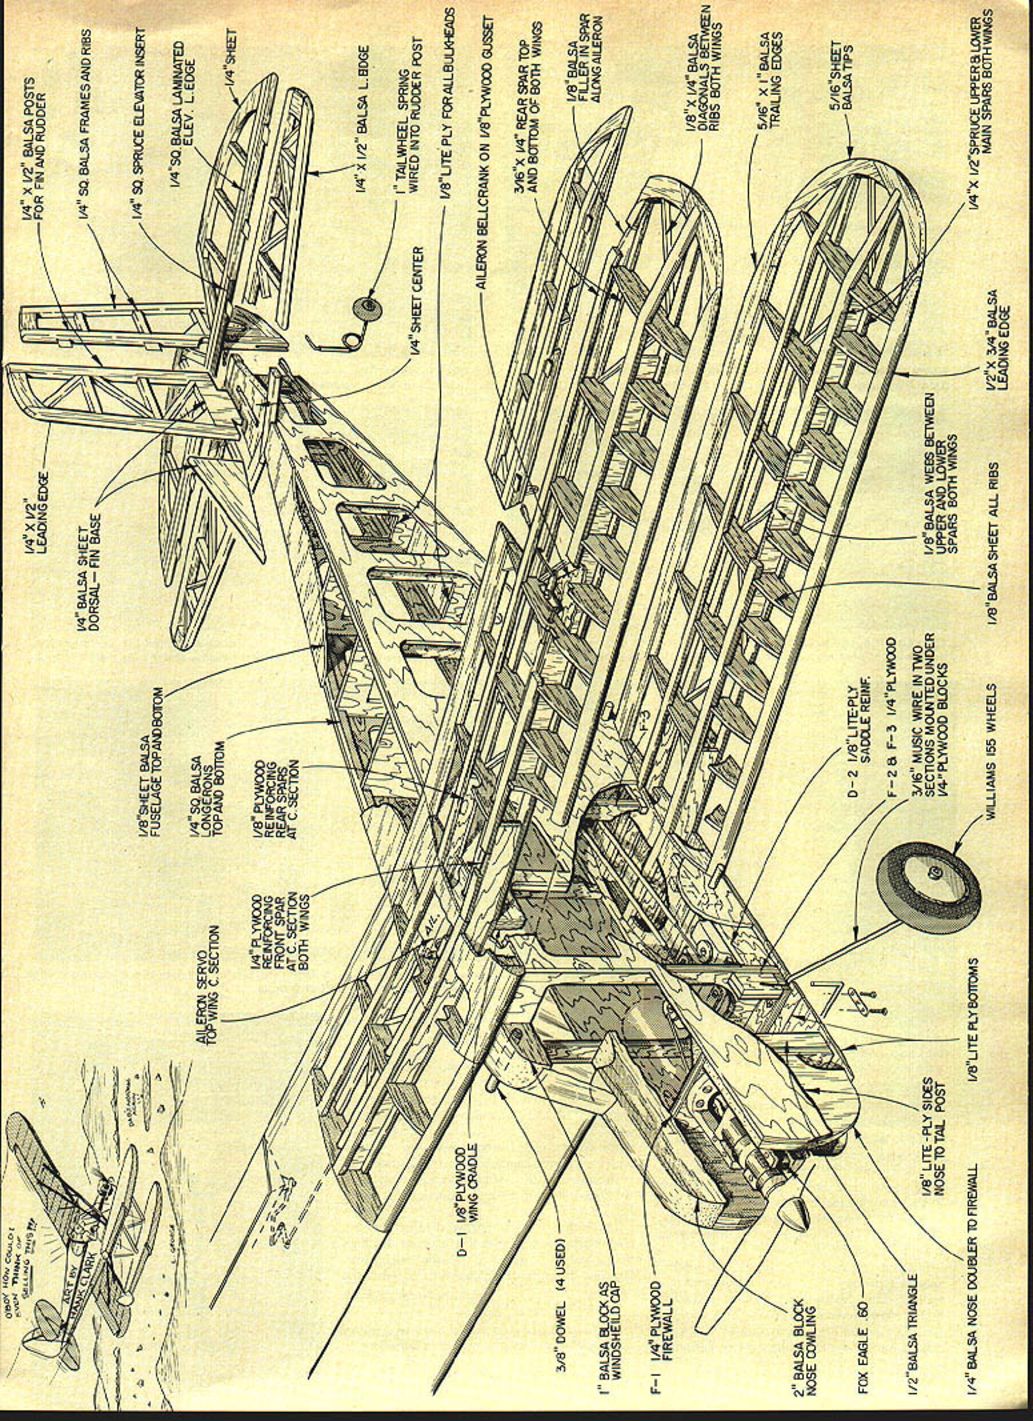
There is nothing difficult about building this bird; however, there is a lot to build. I built the fuselage from lite plywood (lumberyard door skins also work well). The wings are conventional balsa, spruce, and plywood construction. I stuck with the inverted engine to preserve the character of the model's nose, although you may prefer to mount the motor upright after flying it for a while.
Rather than a lengthy step-by-step treatise, here are the high points and tips for the rough spots.
Fuselage
- Cut two identical sides from lite ply and mark all former locations on the inside. Cement doublers 1 through 4 in place, using the formers to help line things up.
- Install the 1/4 x 1/4-in. spruce cabin stiffener and the 1/4-in. square balsa edging aft of the cabin. Pre-drill the gussets for the wing dowels before gluing them in.
- Double-check that you built a left and a right side. Join the sides by cementing formers 2, 3, and 4 in place on a flat surface; check alignment carefully. Once dry, add the rest of the formers aft of the cabin.
- Bolt the motor mount to the firewall and reinforce with slow-cure epoxy. Install 1-in. triangle stock to brace the firewall at the rear after the engine mount is bolted.
- Build the landing gear blocks from 3/16-in. plywood (hardwood is optional if you can rout grooves). Epoxy the completed blocks in place, making sure the left leg leads. Bend the legs from 3/16-in. music wire; if your model ends up much heavier, consider 7/32 or 1/4-in. music wire.
- Slip the legs in place and slide on the wheels. Plank the bottom ahead of the lower wing with lite ply. Plank the rest with firm 1/8-in. balsa applied cross-grain.
- Cut the cabin top block to shape and carve a slot for the wing dowel before epoxying it in place. Mount the motor and install the fuel tank before epoxying the cowl block in place.
- Fiberglass the motor compartment and add cloth around the edges. Sand and catch any remaining small details.
Tail surfaces
- Build tail surfaces strong and light.
- Bend the tailwheel gear from 3/32-in. music wire. Use a strip-aileron bearing for the tailwheel bracket.
- Sand the surfaces and set them aside until installation.
Wings
- Using a template, cut rib stock:
- 20 main ribs
- 6 center-section ribs
- 4 tip ribs
- 24 false ribs
- Pin the leading edge, trailing edge, and spruce bottom spars down on the plan. The trailing edge must be laminated since 5/32 by 1-in. balsa strip stock is uncommon.
- Cut the tip parts for both wings at the same time to ensure uniformity. Cement the tips in place and plank the bottom center-section area, then install the ribs.
- Note: as drawn, the plywood dihedral braces are about 1 in. too long to be cut from a 12-in. sheet. You can cut them from shorter stock.
- Once panels are dry, raise each tip 2 in. off the board and epoxy the dihedral braces in place. Doing all panels at once helps ensure equality.
- I built ailerons into the top wing only for scale-like banking. If snappier roll response is desired, add ailerons to the bottom wing as well.
- Cement the top spars in place, install shear webs, then do the center-section planking and diagonals. Use a block plane to shape leading and trailing edges.
- Before covering the completed wings, embed a piece of 1/16-in. music wire in each center section of the trailing edge to protect against rubberband cuts.
Final assembly
- Mount your radio and route the pushrods before covering the fuselage.
- Do not epoxy in the wing hold-down dowels until after you cover.
- Install windows and windshield only after you no longer need hand access through those openings. For added realism I used a Williams Brothers 3-in. pilot figure.
- Check carefully:
- Does it balance?
- Is everything aligned properly?
- Do the control surfaces move freely and in the correct directions?
- When you wiggle the rudder, does the pushrod flex?
- Does the engine idle properly?
Flying
- Go slowly on the maiden. Make several fast taxi runs before easing the model into the air.
- You can fly the Grande with rudder and throttle alone; control climb with power. Trim the model a tad nose-heavy to control float on final approach.
- Until you get the feel for it, make wheel landings.
- The Grande's forte, like her little sister's, is the low fly-by. Time and time again you'll find yourself flying down the runway, low and slow, savoring the character of a true classic.
Write me c/o the editor and send a picture of your Dakota Grande.
Transcribed from original scans by AI. Minor OCR errors may remain.

