
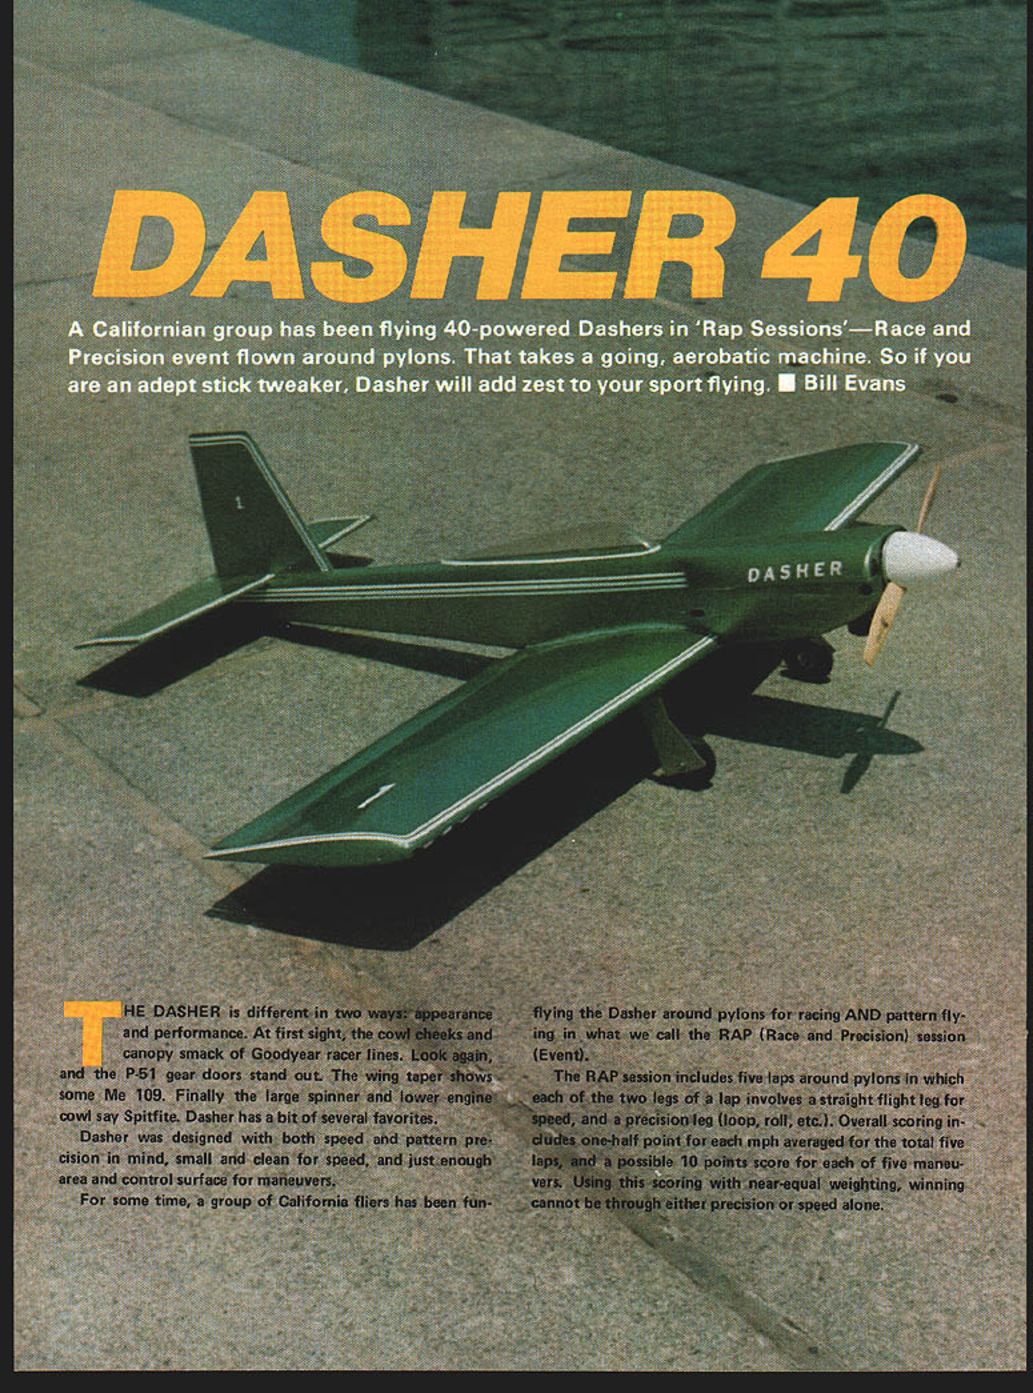
DASHER 40
A Californian group has been flying 40-powered Dashers in "RAP Sessions" — Race and Precision events flown around pylons. That takes a going aerobatic machine. So if you are an adept stick tweaker, Dasher will add zest to your sport flying. — Bill Evans
Overview
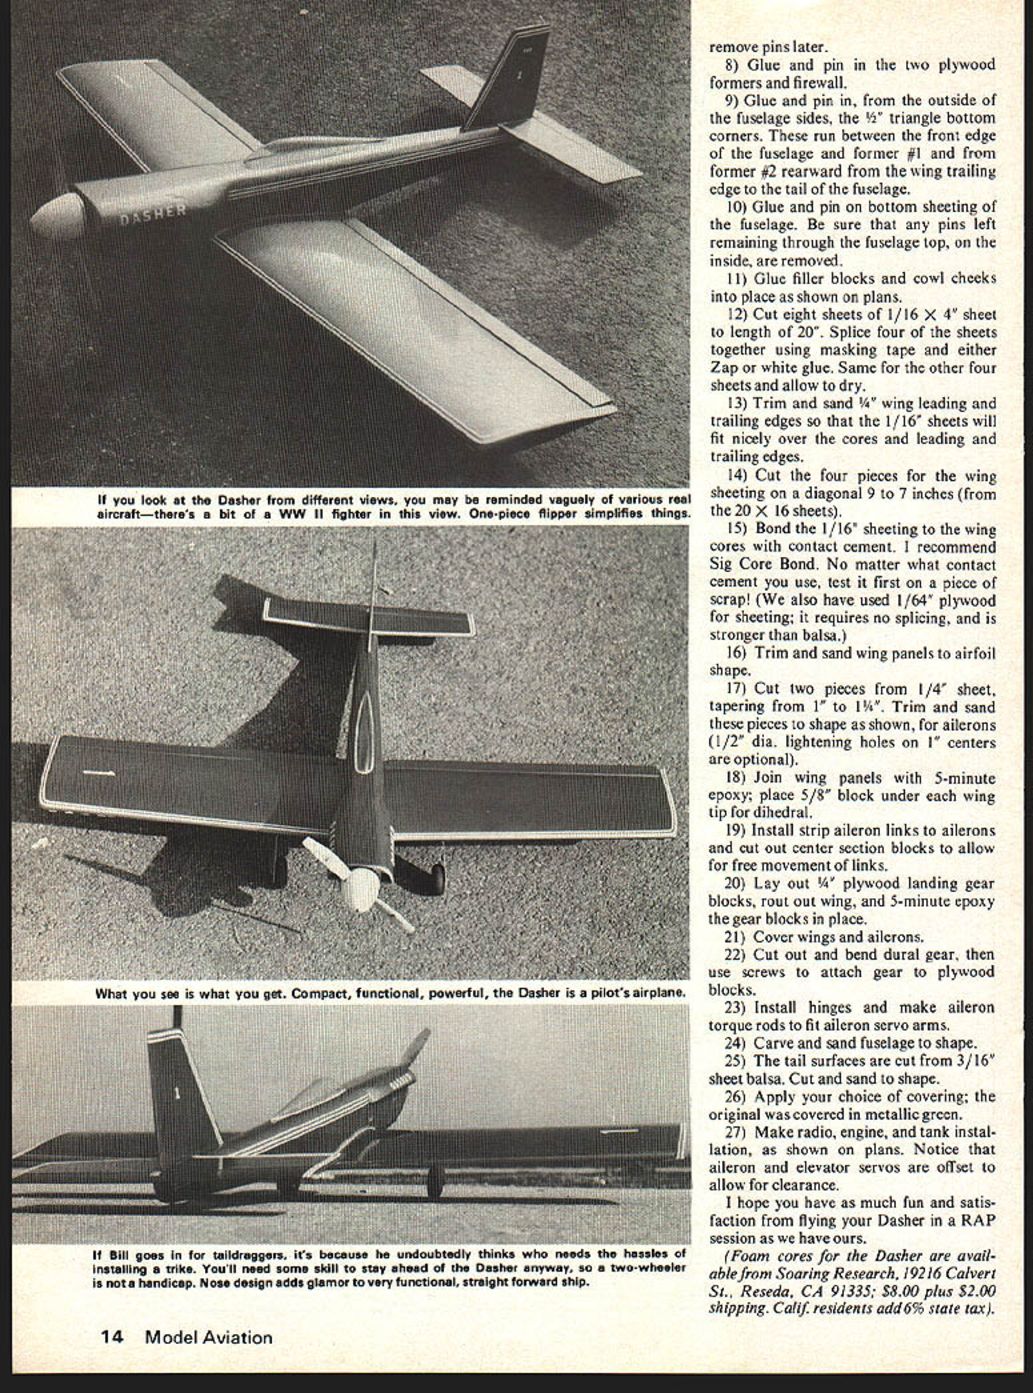
The Dasher is different in two ways: appearance and performance. At first sight, the cowl cheeks and canopy smack of Goodyear racer lines. Look again, and the P-51 gear doors stand out. The wing taper shows some Me 109 influence. Finally, the large spinner and lower engine cowl say Spitfire. Dasher has a bit of several favorites.
Dasher was designed with both speed and pattern precision in mind — small and clean for speed, and with just enough area and control surface for maneuvers.
RAP (Race and Precision) Session
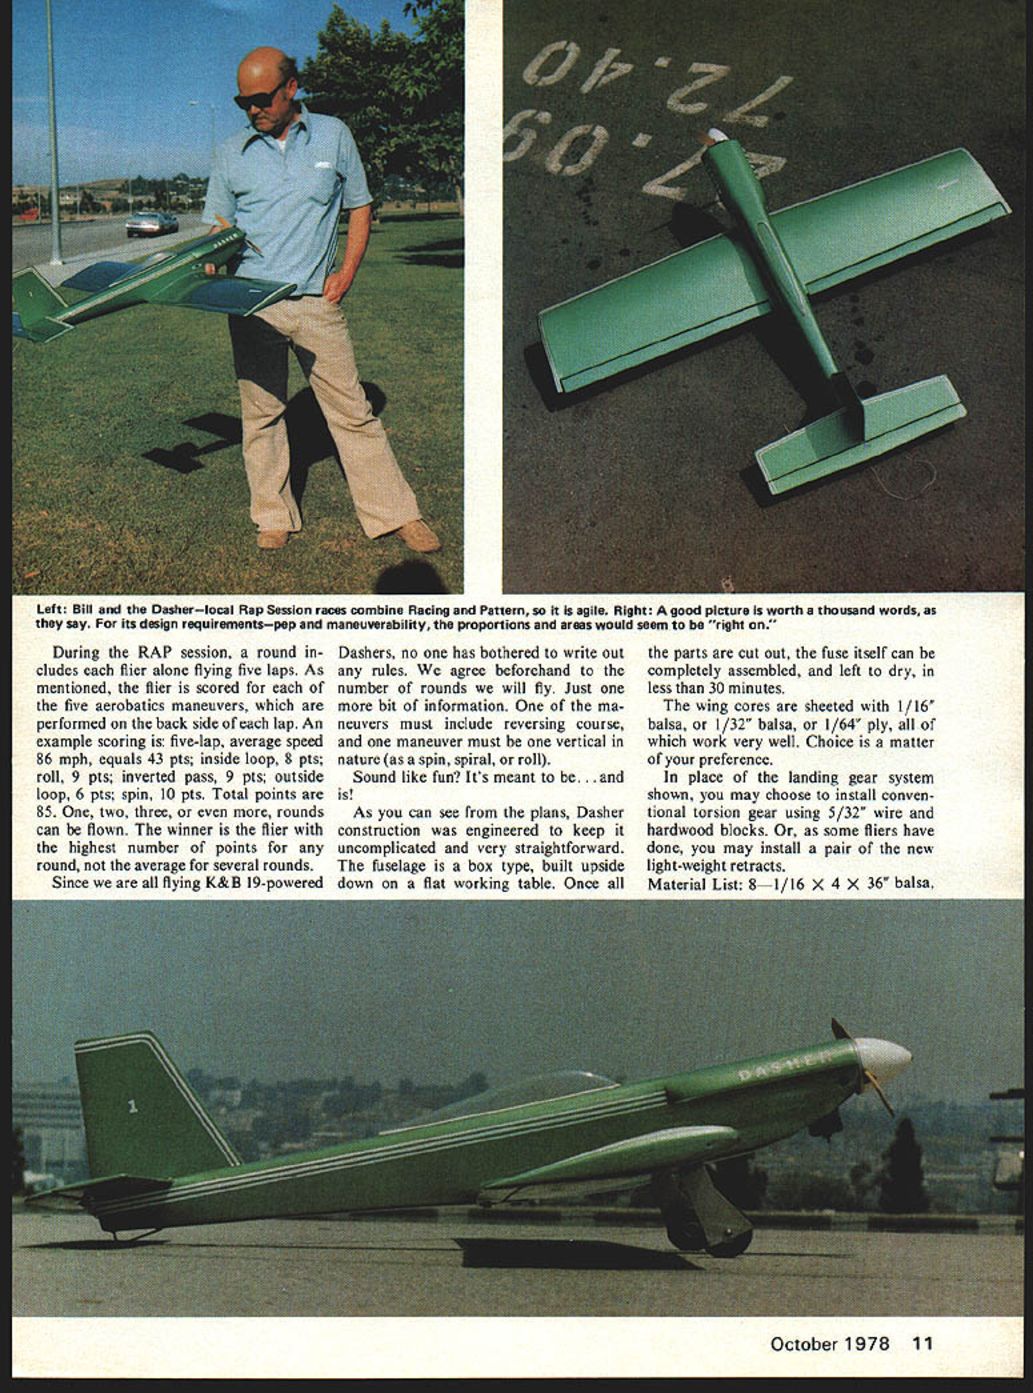
For some time, a group of California fliers has been running the Dasher around pylons for racing AND pattern flying in what we call the RAP (Race and Precision) session (event).
The RAP session includes five laps around pylons in which each of the two legs of a lap involves a straight flight leg for speed, and a precision leg (loop, roll, etc.). Overall scoring includes one-half point for each mph averaged for the total five laps, and a possible 10 points score for each of five maneuvers. Using this scoring with near-equal weighting, winning cannot be through either precision or speed alone.
During the RAP session, a round includes each flier alone flying five laps. As mentioned, the flier is scored for each of the five aerobatic maneuvers, which are performed on the back side of each lap. An example scoring is:
- Five-lap average speed: 86 mph = 43 points
- Inside loop: 8 points
- Roll: 9 points
- Inverted pass: 9 points
- Outside loop: 6 points
- Spin: 10 points
Total points: 85.
One, two, three, or even more rounds can be flown. The winner is the flier with the highest number of points for any single round, not the average for several rounds.
Since we are all flying K&B 19-powered Dashers, no one has bothered to write out any formal rules. We agree beforehand to the number of rounds we will fly. One more bit of information: one of the maneuvers must include reversing course, and one maneuver must be vertical in nature (a spin, spiral, or roll).
Sound like fun? It's meant to be... and is!
Design and Construction
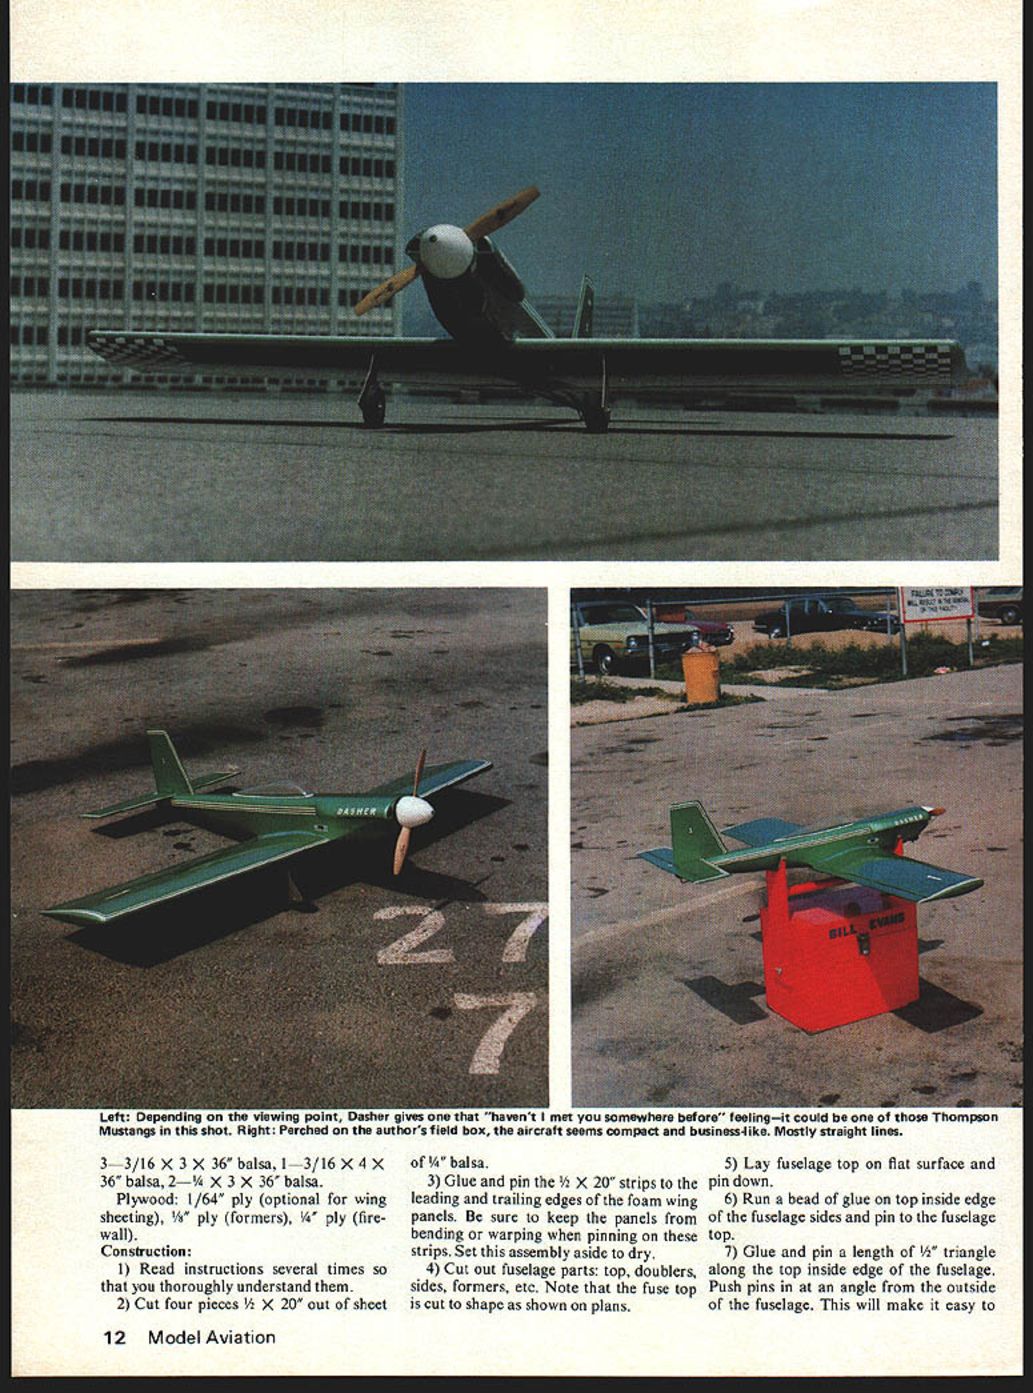
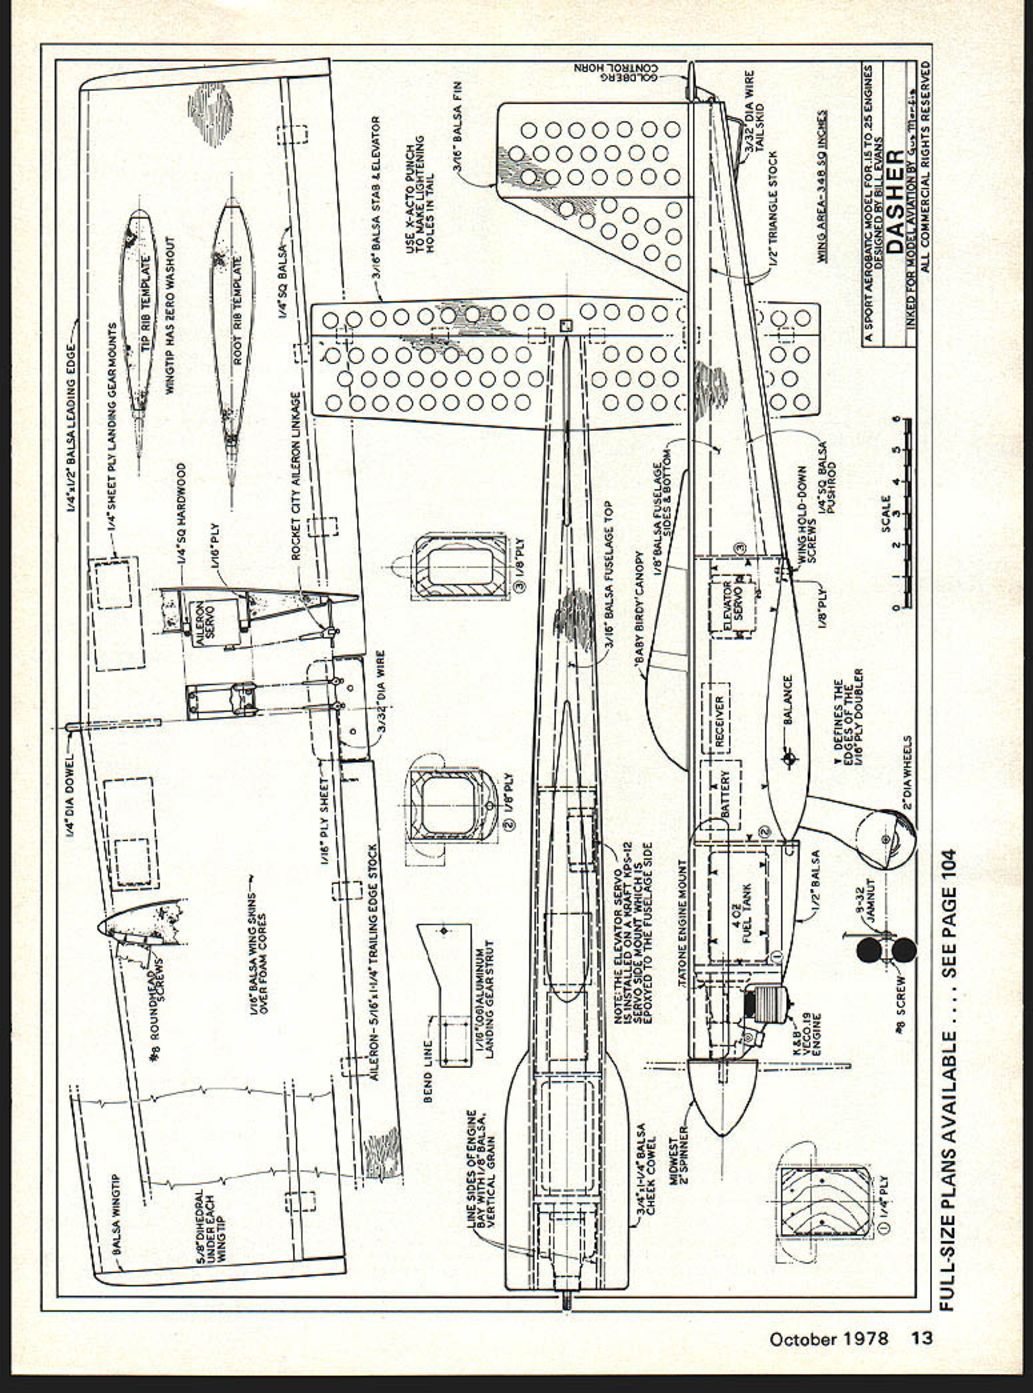
As you can see from the plans, Dasher construction was engineered to keep it uncomplicated and very straightforward. The fuselage is a box type, built upside down on a flat working table. Once all the parts are cut out, the fuse itself can be completely assembled and left to dry in less than 30 minutes.
The wing cores are sheeted with 1/16" balsa, or 1/32" balsa, or 1/64" ply, all of which work very well. Choice is a matter of your preference.
In place of the landing gear system shown, you may choose to install conventional torsion gear using 5/32" wire and hardwood blocks. Or, as some fliers have done, you may install a pair of the new lightweight retracts.
Material List
- 8 — 1/16" x 4" x 36" balsa
- 3 — 3/16" x 3" x 36" balsa
- 1 — 3/16" x 4" x 36" balsa
- 2 — 1/4" x 3" x 36" balsa
- 2 — 1/4" x 4" x 36" balsa
Plywood
- 1/64" ply (optional for wing sheeting)
- 1/8" ply (formers)
- 1/4" ply (firewall)
Construction
- Read the instructions several times so that you thoroughly understand them.
- Cut four pieces 1/2" x 20" out of a sheet of 1/4" balsa.
- Glue and pin the 1/2" x 20" strips to the leading and trailing edges of the foam wing panels. Be sure to keep the panels from bending or warping when pinning on these strips. Set this assembly aside to dry.
- Cut out fuselage parts: top, doublers, sides, formers, etc. Note that the fuse top is cut to shape as shown on the plans.
- Lay the fuselage top on a flat surface and pin down.
- Run a bead of glue on the top inside edge of the fuselage sides and pin to the fuselage top.
- Glue and pin a length of 1/4" triangle along the top inside edge of the fuselage. Push pins in at an angle from the outside of the fuselage. This will make it easy to remove pins later.
- Glue in two plywood formers at the firewall.
- Glue and pin the outside fuselage sides. Angle bottom corners and run sheeting between the front edge (fuselage former #1), former #2 rearward to the wing trailing edge and tail of the fuselage.
- Glue and pin bottom sheeting to the fuselage. Be sure pins left through the fuselage top inside are removed.
- Glue filler blocks and cowl cheeks in place as shown on the plans.
- Cut eight 1/16" x 4" sheets to a length of 20". Splice four of the sheets together using masking tape and either Zap or white glue. Do the same for the other four sheets and allow to dry.
- Trim and sand the 1/4" wing leading and trailing edges so that the 1/16" sheets will fit nicely over the cores and leading and trailing edges.
- Cut the four pieces for the wing sheeting on a diagonal 9" to 7" (from the 20 x 16 sheets).
- Bond the 1/16" sheeting to the wing cores with contact cement. Sig Core Bond is recommended. No matter what contact cement you use, test it first on a piece of scrap. (1/64" plywood has also been used for sheeting; it requires no splicing and is stronger than balsa.)
- Trim and sand wing panels to airfoil shape.
- Cut two pieces from 1/4" sheet, tapering from 1" to 1 1/4". Trim and sand these pieces to shape as shown for the ailerons. (1/2" diameter lightening holes on 1" centers are optional.)
- Join wing panels with 5-minute epoxy; place a 5/8" block under each wing tip for dihedral.
- Install strip aileron links to ailerons and cut out center section blocks to allow for free movement of links.
- Lay out 1/4" plywood landing gear blocks, rout out wing, and 5-minute epoxy the gear blocks in place.
- Cover wings and ailerons.
- Cut out and bend dural gear, then use screws to attach gear to plywood blocks.
- Install hinges and make aileron torque rods to fit aileron servo arms.
- Carve and sand the fuselage to shape.
- The tail surfaces are cut from 3/16" sheet balsa. Cut and sand to shape.
- Apply your choice of covering; the original was covered in metallic green.
- Make radio, engine, and tank installation as shown on the plans. Note that aileron and elevator servos are offset to allow for clearance.
I hope you have as much fun and satisfaction from flying your Dasher in a RAP session as we have ours.
(Foam cores for the Dasher are available from Soaring Research, 19216 Calvert St., Reseda, CA 91335; $8.00 plus $2.00 shipping. California residents add 6% state tax.)
Transcribed from original scans by AI. Minor OCR errors may remain.

