

Dennyplane
Dee B. Mathews
Text and Photos by Larry Kruse
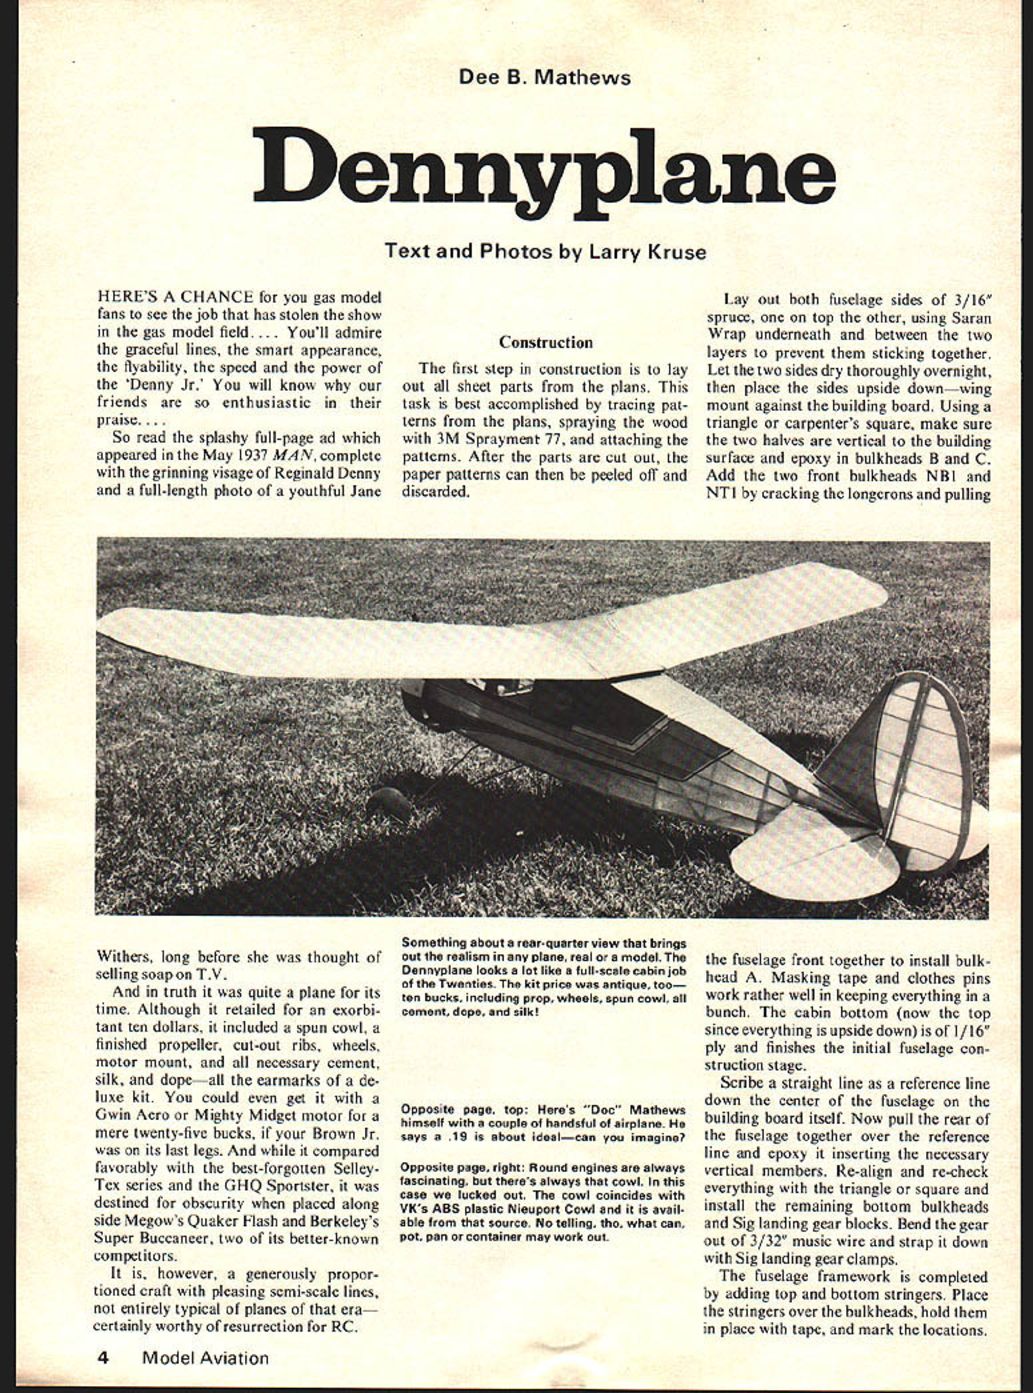
HERE'S A CHANCE for you gas model fans to see the job that has stolen the show in the gas model field. ... You'll admire the graceful lines, the smart appearance, the flyability, the speed and the power of the 'Denny Jr.' You will know why our friends are so enthusiastic in their praise....
So read the splashy full-page ad which appeared in the May 1937 MAN, complete with the grinning visage of Reginald Denny and a full-length photo of a youthful Jane Withers, long before she was thought of selling soap on T.V.
And in truth it was quite a plane for its time. Although it retailed for an exorbitant ten dollars, it included a spun cowl, a finished propeller, cut-out ribs, wheels, motor mount, and all necessary cement, silk, and dope — all the earmarks of a deluxe kit. You could even get it with a Gwin Acro or Mighty Midget motor for a mere twenty-five bucks, if your Brown Jr. was on its last legs. And while it compared favorably with the best-forgotten Selley-Tex series and the GHQ Sportster, it was destined for obscurity when placed alongside Megow's Quaker Flash and Berkeley's Super Buccaneer, two of its better-known competitors.
It is, however, a generously proportioned craft with pleasing semi-scale lines, not entirely typical of planes of that era — certainly worthy of resurrection for RC.
Construction
The first step in construction is to lay out all sheet parts from the plans. This task is best accomplished by tracing patterns from the plans, spraying the wood with 3M Spraymount 77, and attaching the patterns. After the parts are cut out, the paper patterns can then be peeled off and discarded.
Lay out both fuselage sides of 3/16" spruce, one on top the other, using Saran Wrap underneath and between the two layers to prevent them sticking together. Let the two sides dry thoroughly overnight, then place the sides upside down — wing mount against the building board. Using a triangle or carpenter's square, make sure the two halves are vertical to the building surface and epoxy in bulkheads B and C. Add the two front bulkheads NB1 and NT1 by cracking the longerons and pulling the fuselage front together to install bulkhead A. Masking tape and clothes pins work rather well in keeping everything in a bunch. The cabin bottom (now the top since everything is upside down) is of 1/16" ply and finishes the initial fuselage construction stage.
Scribe a straight line as a reference line down the center of the fuselage on the building board itself. Now pull the rear of the fuselage together over the reference line and epoxy it inserting the necessary vertical members. Re-align and re-check everything with the triangle or square and install the remaining bottom bulkheads and Sig landing gear blocks. Bend the gear out of 3/32" music wire and strap it down with Sig landing gear clamps.
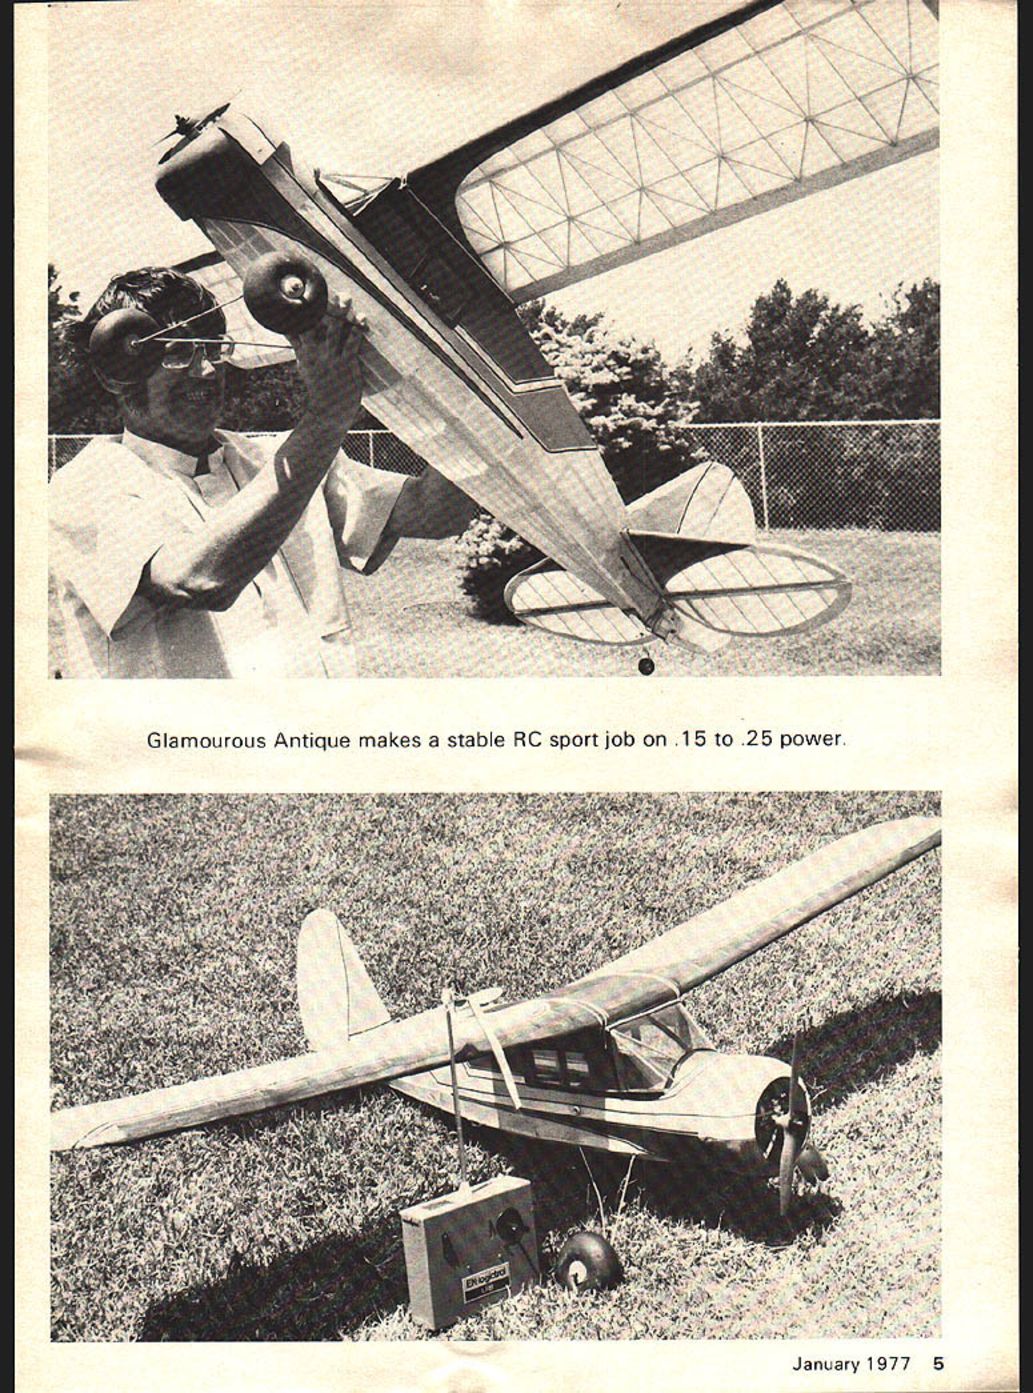
The fuselage framework is completed by adding top and bottom stringers. Place the stringers over the bulkheads, hold them in place with tape, and mark the locations. Glamourous Antique makes a stable RC sport job on .15 to .25 power.
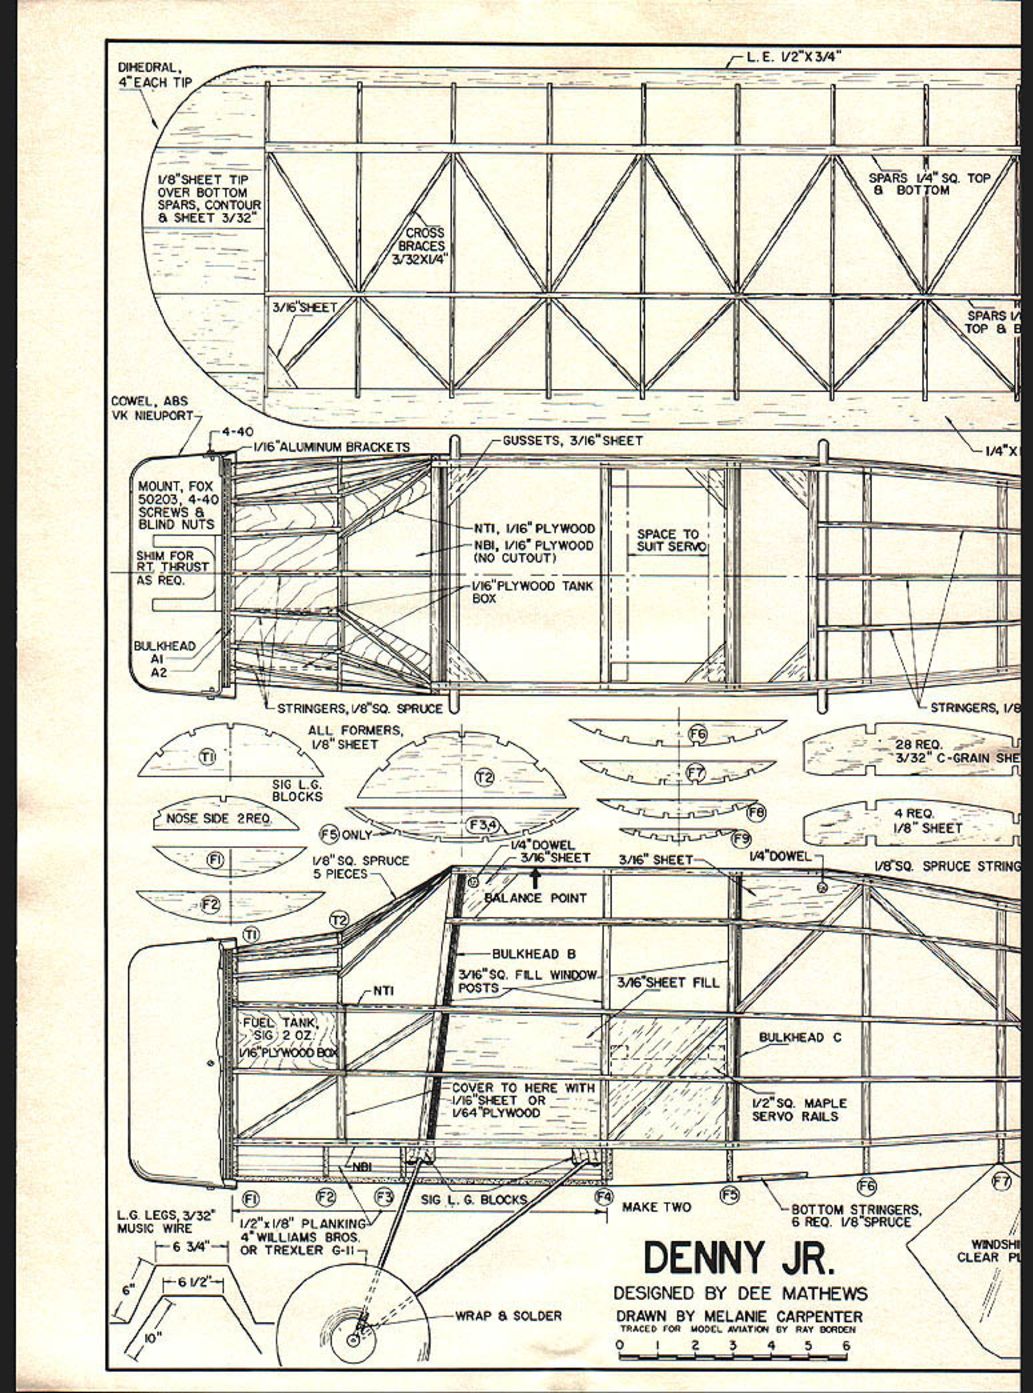
DENNY JR.
DESIGNED BY DEE MATHEWS
DRAWN BY MELANIE CARPENTER
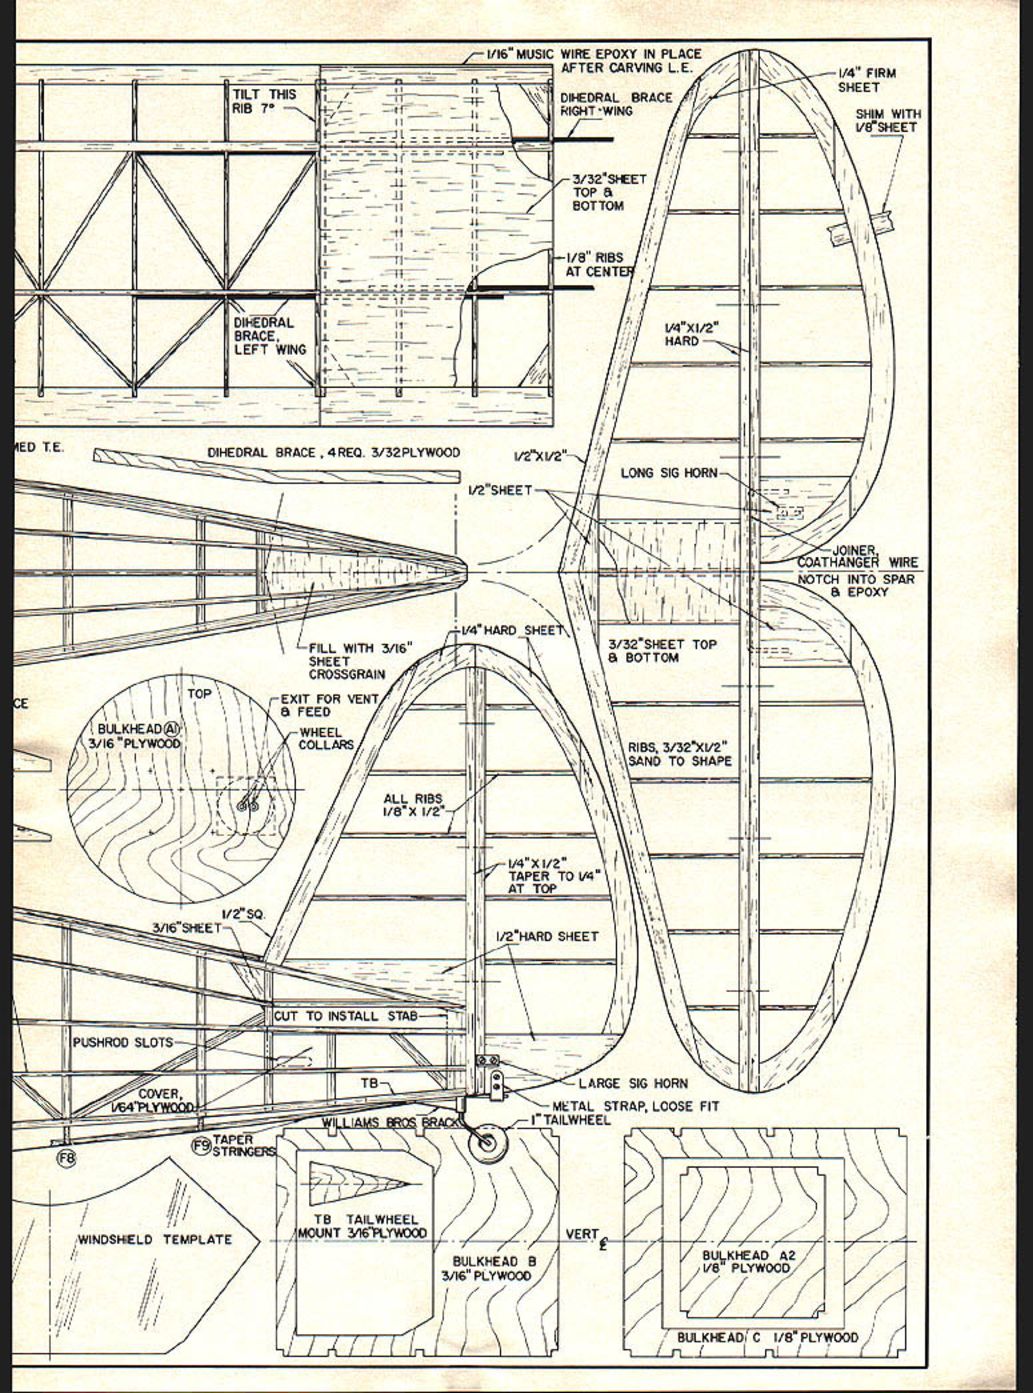
TRACED FOR MODEL AVIATION BY RAY BORDEN 1/16" MUSIC WIRE EPOXY IN PLACE AFTER CARVING L.E.
TILT THIS RIB 7°
DIHEDRAL BRACE, LEFT WING
DIHEDRAL BRACE, RIGHT WING
3/32" SHEET TOP & BOTTOM
1/8" RIBS AT CENTER
1/4" FIRM SHEET
SHIM WITH 1/8" SHEET
1/4" x 1/2" HARD
LONG SIG HORN
JOINER, COATHANGER WIRE NOTCH INTO SPAR & EPOXY
3/32" SHEET TOP & BOTTOM
RIBS, 3/32" x 1/2" SAND TO SHAPE
DIHEDRAL BRACE, 4 REQ. 3/32 PLYWOOD
1/2" x 1/2"
1/2" SHEET
FILL WITH 3/16" SHEET CROSSGRAIN
1/4" HARD SHEET
EXIT FOR VENT & FEED
WHEEL COLLARS
ALL RIBS 1/8" x 1/2"
1/4" x 1/2" TAPER TO 1/4" AT TOP
1/2" HARD SHEET
1/2" x 1/8" SQ SPRUCE STRINGERS
1/2" SQ.
3/16" SHEET
CUT TO INSTALL STAB
PUSHROD SLOTS
COVER, 1/64" PLYWOOD
TAPER STRINGERS
WINDSHIELD TEMPLATE
TB TAILWHEEL MOUNT 3/16" PLYWOOD
BULKHEAD B 3/16" PLYWOOD
BULKHEAD A2 1/8" PLYWOOD
BULKHEAD C 1/8" PLYWOOD
LARGE SIG HORN
METAL STRAP, LOOSE FIT "T" TAILWHEEL
WILLIAMS BROS BRACKET
1/2" PLANKING
TB Now notch the bulkheads to fit. Run the first stringer to match the centerline, then the others can follow the fuselage contours. This method gives much straighter, longerons than pre-notching the bulkheads. The front top and side stringers are 1/8" x 1/4" balsa, the bottom is 1/8" sq. spruce. After the entire assembly is dry, it can be sanded to contour.
The cowling is a fortunate accident. In all probability, one of the reasons the Dennyplane has not been a particular favorite over the years has been the cowl and the difficulty of reproducing it. However, the ABS plastic Nieuport cowling from VK Models is exactly right and is available at nominal cost from VK. It is held in place by four brackets, as noted on the plan, tapped for 4-40 bolts.
Trexler G-II wheels available from Sig and a Fox 50203 motor mount are the remaining pieces of hardware needed to complete the fuselage.
Horizontal and vertical tail surfaces are built by cutting outline pieces of 1/4" hard balsa. The 1/4" outlines are shimmed 1/8" and all surfaces are built flat on the plans. All ribs and posts are sanded to an airfoil section blending into the 1/4" trailing-edge outlines. Careful sanding in the direction of the grain should minimize breakage. Add the stab and rudder hinges before preparing the surfaces for covering.
Start the wing by notching the TE and pinning it to the building board. Position the bottom spars and notch the leading edge. Ribs are glued in place next; tilt the ribs at the dihedral break to match the necessary dihedral. Wing tips should be placed over the bottom spars with top spars tapered on the bottom side and pulled onto the tips. Placing tip contours can be obtained by filling the top area with scrap balsa and sanding to shape.
The dihedral angle is obtained by pinning down the center section and joining both left and right halves to it with epoxy. Each tip is blocked up 4°. After the epoxy is cured, all dihedral braces should be added, along with the 1/16" music wire to keep the trailing edge from being notched by the wing hold-down rubberbands. The wing is completed by sheeting the center and sanding everything smooth in preparation for covering.
Covering and Finishing
If you want to go the easy way as far as covering is concerned, the shiny Mylar stuff is the best direction. However, if authenticity is your thing, get out the silk. The prototype was wet-covered with silk after three coats of sanding sealer had been applied to the framework. Now brace yourself. After the silk dried, the entire plane was "painted" with a coat of Knox unflavored gelatin, mixed according to package direction. Such treatment turned the whole project into a very large prune, but after it dried the wrinkles disappeared and the silk weave was filled.
The gelatin trick saves a considerable amount of dope (and weight) and also stops the annoying dope run-throughs that give you a "striped" silk finish even with numerous coats of clear.
The tail surfaces should be covered prior to assembly and then set together after the initial coat of gelatin is applied. Additional coats of clear can now be brushed or sprayed on until the finish is slick, shiny and fuel-proof. Celluloid windows can be carefully glued in place after the dope is dry. A neat trick is to use black vinyl tape cut to 3/16" width to outline the windows and cover the windshield joints.
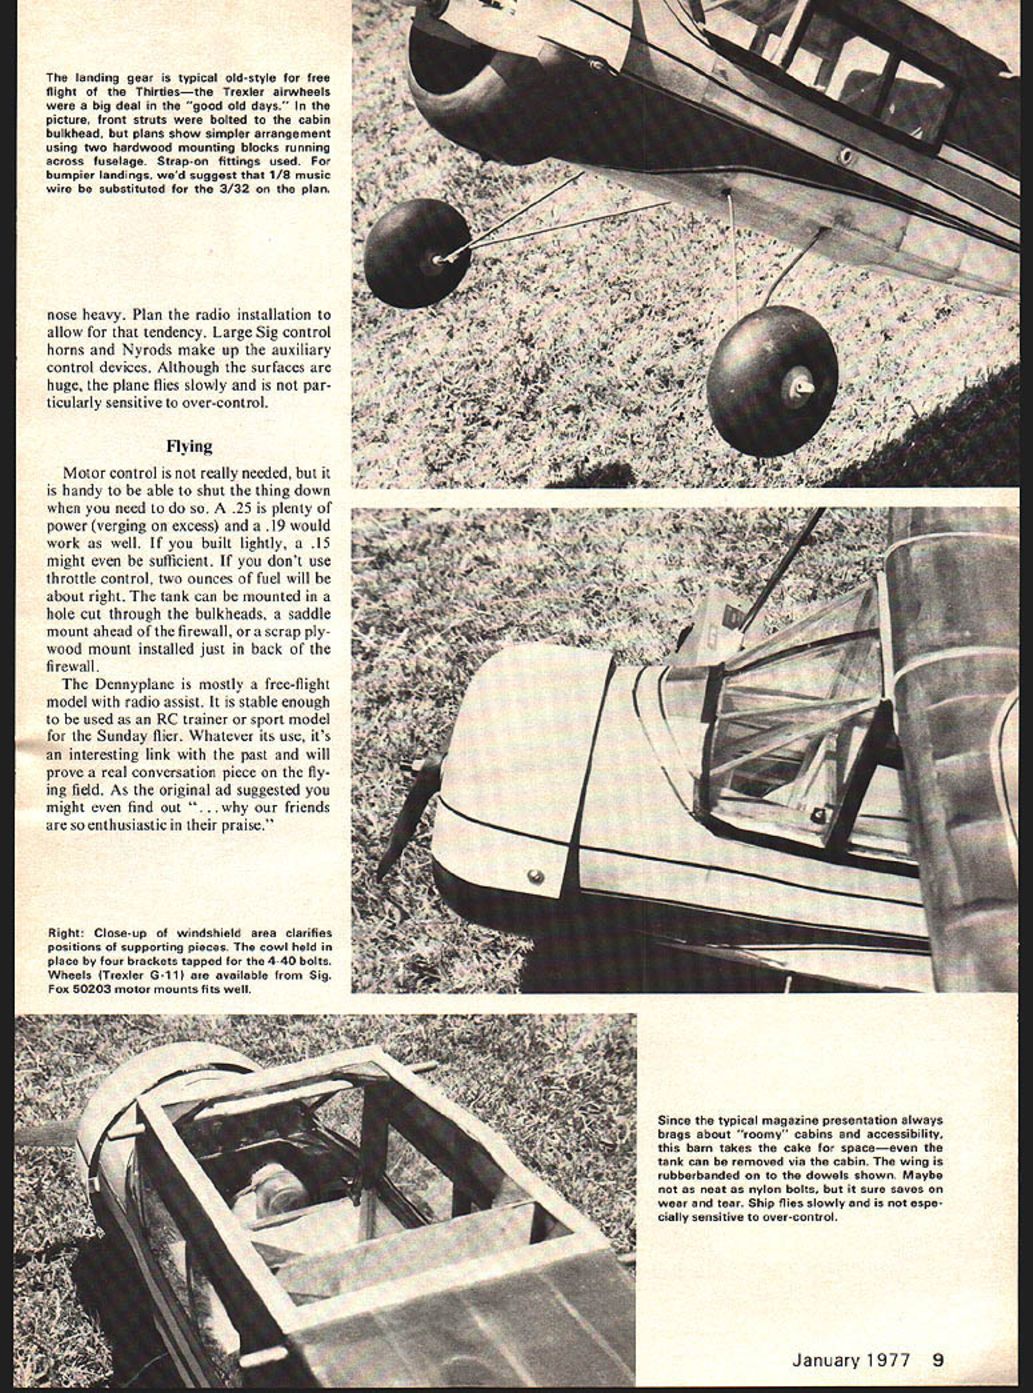
Many options are available when it comes to mounting the RC gear. The fuselage is nothing, if not cavernous. One thing to especially watch, though, is that the gear is mounted behind the CG since the plane with its short tail moment tends to build nose heavy. Plan the radio installation to allow for that tendency. Large Sig control horns and Nyrods make up the auxiliary control devices. Although the surfaces are huge, the plane flies slowly and is not particularly sensitive to over-control.
Flying
Motor control is not really needed, but it is handy to be able to shut the thing down when you need to do so. A .25 is plenty of power (verging on excess) and a .19 would work as well. If you built lightly, a .15 might even be sufficient. If you don't use throttle control, two ounces of fuel will be about right. The tank can be mounted in a hole cut through the bulkheads, a saddle mount ahead of the firewall, or a scrap plywood mount installed just in back of the firewall.
The Dennyplane is mostly a free-flight model with radio assist. It is stable enough to be used as an RC trainer or sport model for the Sunday flier. Whatever its use, it's an interesting link with the past and will prove a real conversation piece on the flying field. As the original ad suggested you might even find out "...why our friends are so enthusiastic in their praise."
Transcribed from original scans by AI. Minor OCR errors may remain.

