
Developing Your Workshop
George Wilson
"A good workman never blames his tools." Similarly, many magnificent models come from the simplest of workshops. (Tori Cappo, an early microfilm expert, built his gossamer treasures on a folding card table in his living room.) But an efficient workshop, well-outfitted with tools, makes model building easier and more fun.
My current shop was part of my retirement home design. Prior to retirement, I made do with whatever space was available.
Here in the northern climates, the basement is the usual place for the workshop. Southern workshops are often in a garage or a spare room, or even on a covered patio.
My shop has a dehumidifier to keep the tools and supplies dry in the summertime, and a wood stove to warm things up in the winter.
Developing your shop
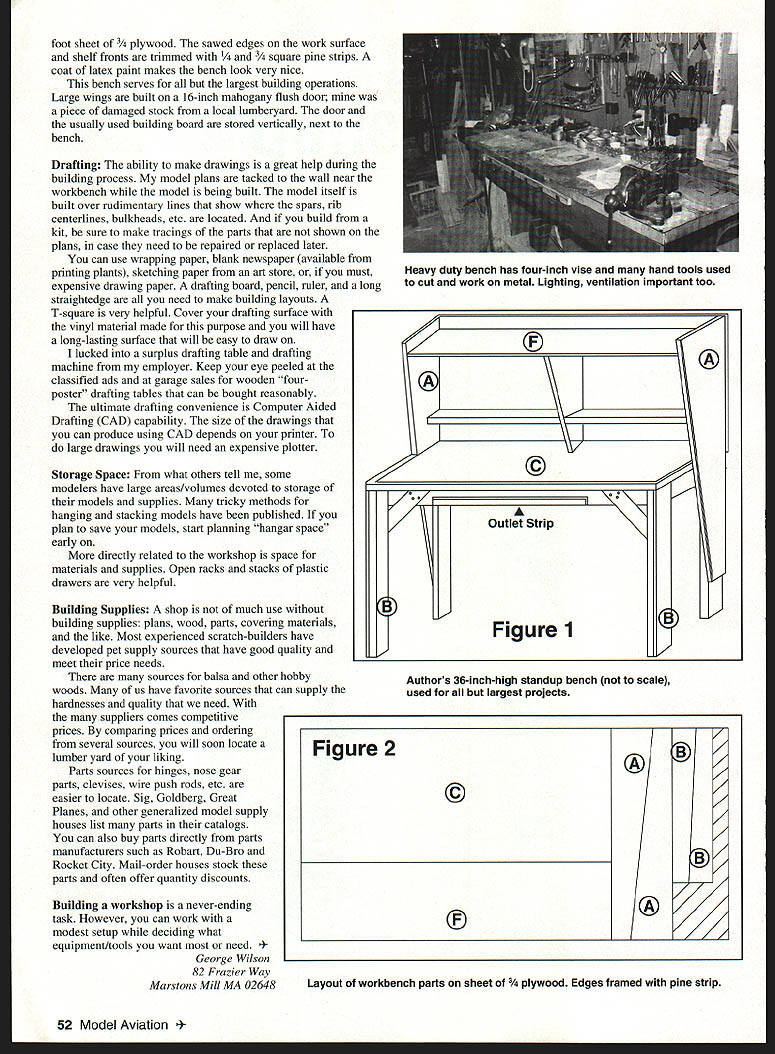
A good workshop has several areas of capability: tools, a workbench, and storage provisions, including space for model storage and drafting. A special drafting area is a luxury, since the workbench or the kitchen table can serve the purpose. Another luxury is a separate heavy-duty workbench with a vise and the strength necessary for metalworking (typically, bending landing gear and similar tasks). Provide good ventilation in your shop to get rid of the fumes from the liquids you will use.
Tools
List the hand tools and power tools that you want, in the order of their need. Start with a #11 hobby knife and its handle, and progress from there. Remember to add tools to your Christmas and birthday lists.
The urge to build frequently occurs when the hobby shop is closed. If you have a balsa stripper, you can make strip wood of the needed sizes from the sheet wood left over from a kit or from the stockpile you are building.
There are many hand tools that make building easier, but knives for cutting, trimming, and carving are the mainstays. Following these are sandpaper blocks. The only other essentials are the tools necessary to cover your models: an iron, or the necessary brushes if you are not using heat-shrink covering.
In their order of usefulness, the following machine tools are suggested:
- A band saw or jig saw (one of several benchtop, hobby-level saws will do)
- A bench saw (eight-inch or larger is suggested)
- A combination disc and belt sander
- A drill press
- A dual-wheel grinder (coarse and fine wheels)
Bear in mind that machine tools are not necessary, but they do allow you to work faster and more accurately.
The Workbench
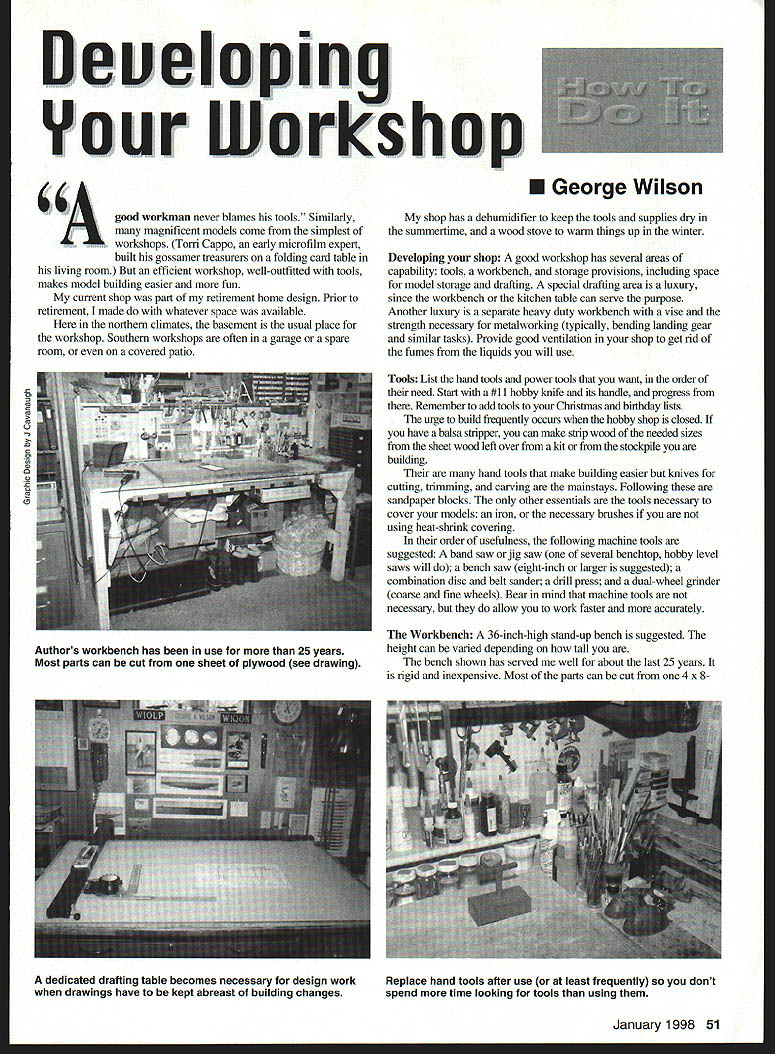
A 36-inch-high stand-up bench is suggested. The height can be varied depending on how tall you are.
The bench shown has served me well for about the last 25 years. It is rigid and inexpensive. Most of the parts can be cut from one 4 x 8-foot sheet of 3/4" plywood. The sawed edges on the work surface and shelf fronts are trimmed with 1/4" and 3/4" square pine strips. A coat of latex paint makes the bench look very nice.
This bench serves for all but the largest building operations. Large wings are built on a 16-inch mahogany flush door; mine was a piece of damaged stock from a local lumberyard. The door and the usually used building board are stored vertically, next to the bench.
Drafting
The ability to make drawings is a great help during the building process. My model plans are tacked to the wall near the workbench while the model is being built. The model itself is built over rudimentary lines that show where the spars, rib centerlines, bulkheads, etc., are located. And if you build from a kit, be sure to make tracings of the parts that are not shown on the plans, in case they need to be repaired or replaced later.
You can use wrapping paper, blank newspaper (available from printing plants), sketching paper from an art store, or, if you must, expensive drawing paper. A drafting board, pencil, ruler, and a long straightedge are all you need to make building layouts. A T-square is very helpful. Cover your drafting surface with the vinyl material made for this purpose and you will have a long-lasting surface that will be easy to draw on.
I lucked into a surplus drafting table and drafting machine from my employer. Keep your eye peeled at the classified ads and at garage sales for wooden "four-poster" drafting tables that can be bought reasonably.
The ultimate drafting convenience is Computer Aided Drafting (CAD) capability. The size of the drawings that you can produce using CAD depends on your printer. To do large drawings you will need an expensive plotter.
Storage Space
From what others tell me, some modelers have large areas devoted to storage of their models and supplies. Many tricky methods for hanging and stacking models have been published. If you plan to save your models, start planning "hangar space" early on.
More directly related to the workshop is space for materials and supplies. Open racks and stacks of plastic drawers are very helpful.
Building Supplies
A shop is not of much use without building supplies: plans, wood, parts, covering materials, and the like. Most experienced scratch-builders have developed pet supply sources that have good quality and meet their price needs.
There are many sources for balsa and other hobby woods. Many of us have favorite sources that can supply the hardnesses and quality that we need. With the many suppliers comes competitive prices. By comparing prices and ordering from several sources, you will soon locate a lumber yard of your liking.
Parts sources for hinges, nose gear parts, clevises, wire push rods, etc., are easy to locate. Sig, Goldberg, Great Planes, and other generalized model supply houses list many parts in their catalogs. You can also buy parts directly from parts manufacturers such as Robart, Du-Bro, and Rocket City. Mail-order houses stock these parts and often offer quantity discounts.
Building a workshop is a never-ending task. However, you can work with a modest setup while deciding what equipment and tools you want most or need.
George Wilson 82 Frazier Way Marston Mill, MA 02648
Transcribed from original scans by AI. Minor OCR errors may remain.

