
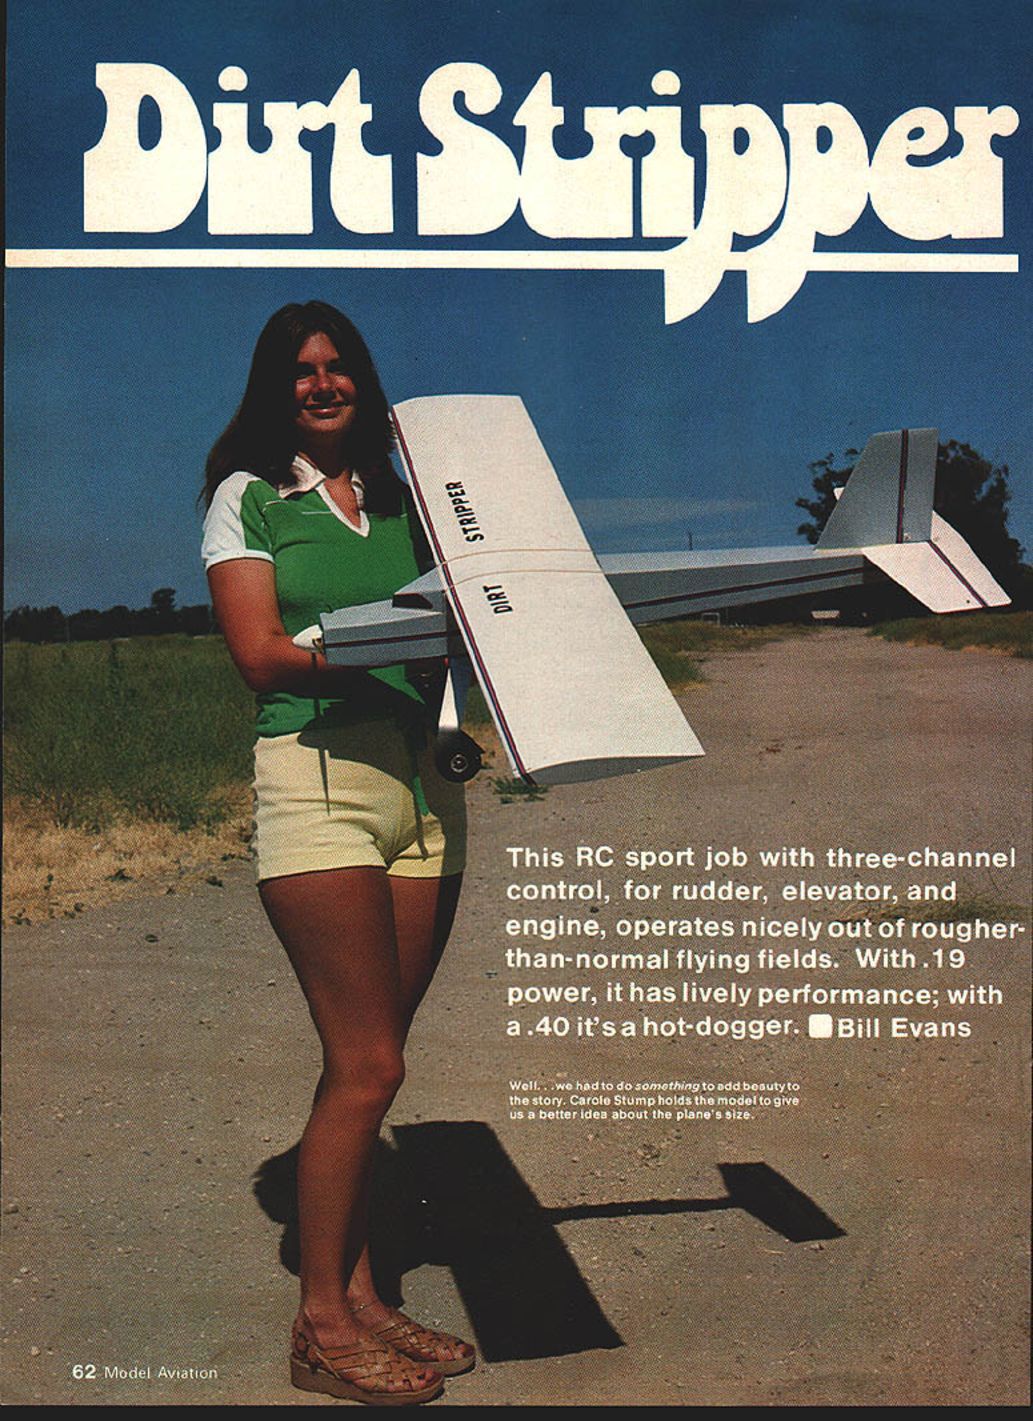
Dirt Stripper
This RC sport job with three-channel control, for rudder, elevator, and engine, operates nicely out of rougher-than-normal flying fields. With .19 power, it has lively performance; with a .40 it's a hot-dogger.
— Bill Evans
Though we now have more and better RC flying fields as a result of a greater number of well-organized RC clubs, overcrowding is a problem at many fine sites, simply because clubs are growing by leaps and bounds—fed by an influx of new RC enthusiasts in great numbers. This overcrowding has driven many fliers to search for and fly at undeveloped fields, the majority of which are so rough as to make landings and takeoffs tough for ships designed to operate off the more normal smooth surfaces.
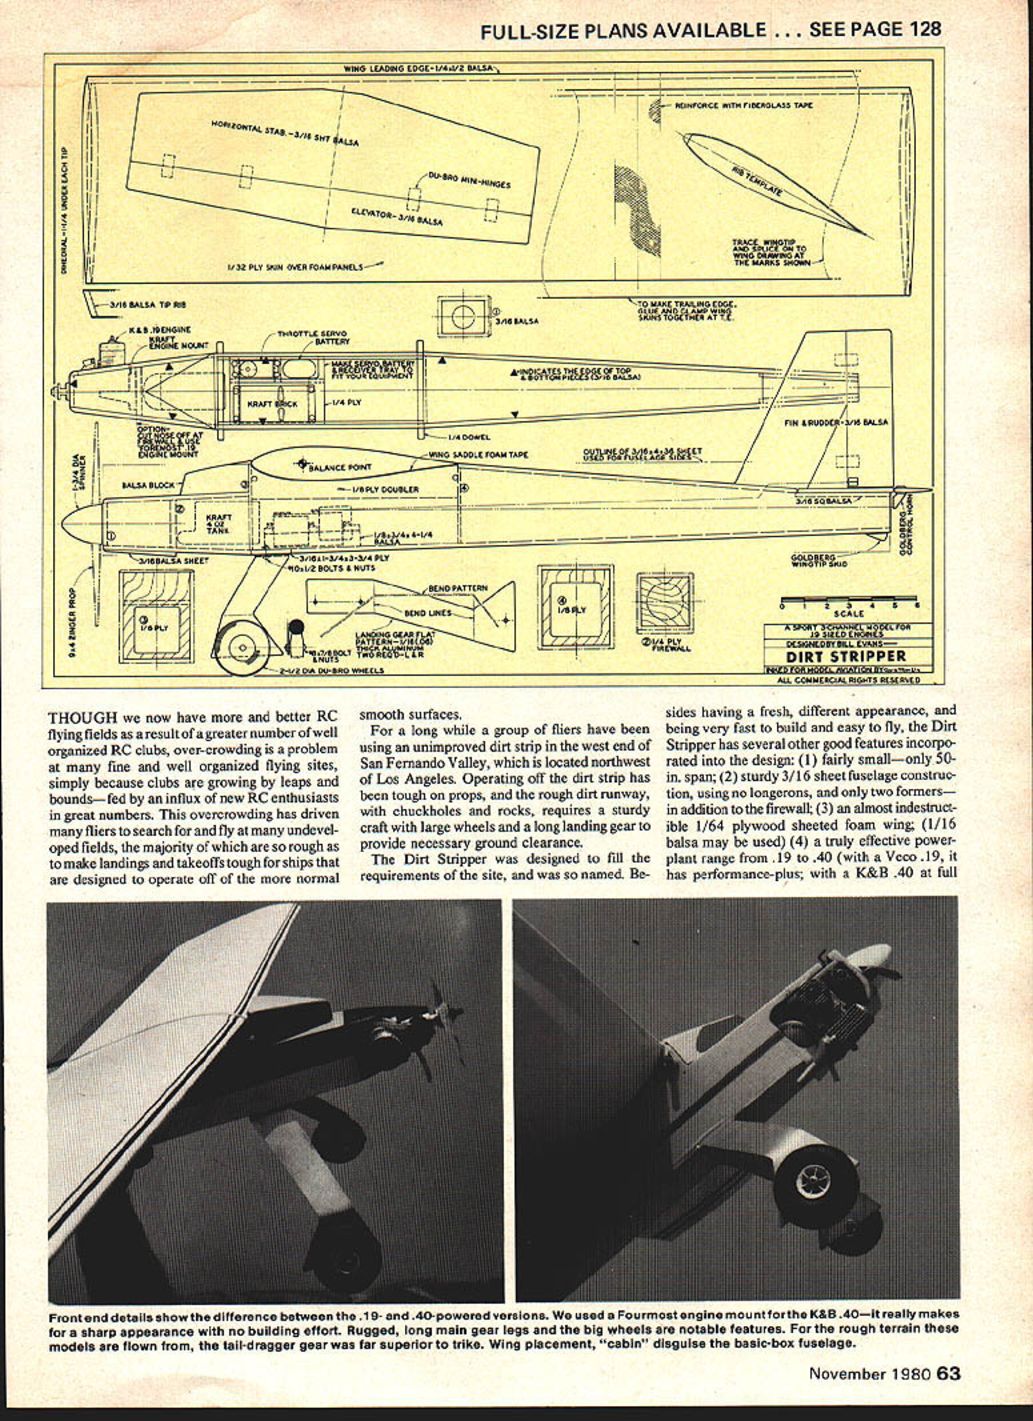
For a long while a group of fliers used an unimproved dirt strip in the west end of the San Fernando Valley, northwest of Los Angeles. Operating off the dirt strip has been tough on props, and the rough dirt runway, with chuckholes and rocks, requires a sturdy craft with large wheels and a long landing gear to provide necessary ground clearance.
The Dirt Stripper was designed to fill the requirements of the site, and was so named. Besides having a fresh, different appearance and being very fast to build and easy to fly, the Dirt Stripper has several other good features incorporated into the design:
- Fairly small—only 50 in. span.
- Sturdy 3/16-in. sheet fuselage construction, using no longerons and only two formers—in addition to the firewall.
- An almost indestructible 1/64-in. ply-sheeted foam wing (1/16 balsa may be used).
- A truly effective powerplant range from .19 to .40 (with a Veco .19 it has performance-plus; with a K&B .40 at full throttle it really makes rocket-like performance). The new Fourmost engine mount for the K&B .40 works great and is incorporated in the .40 fuselage variation.
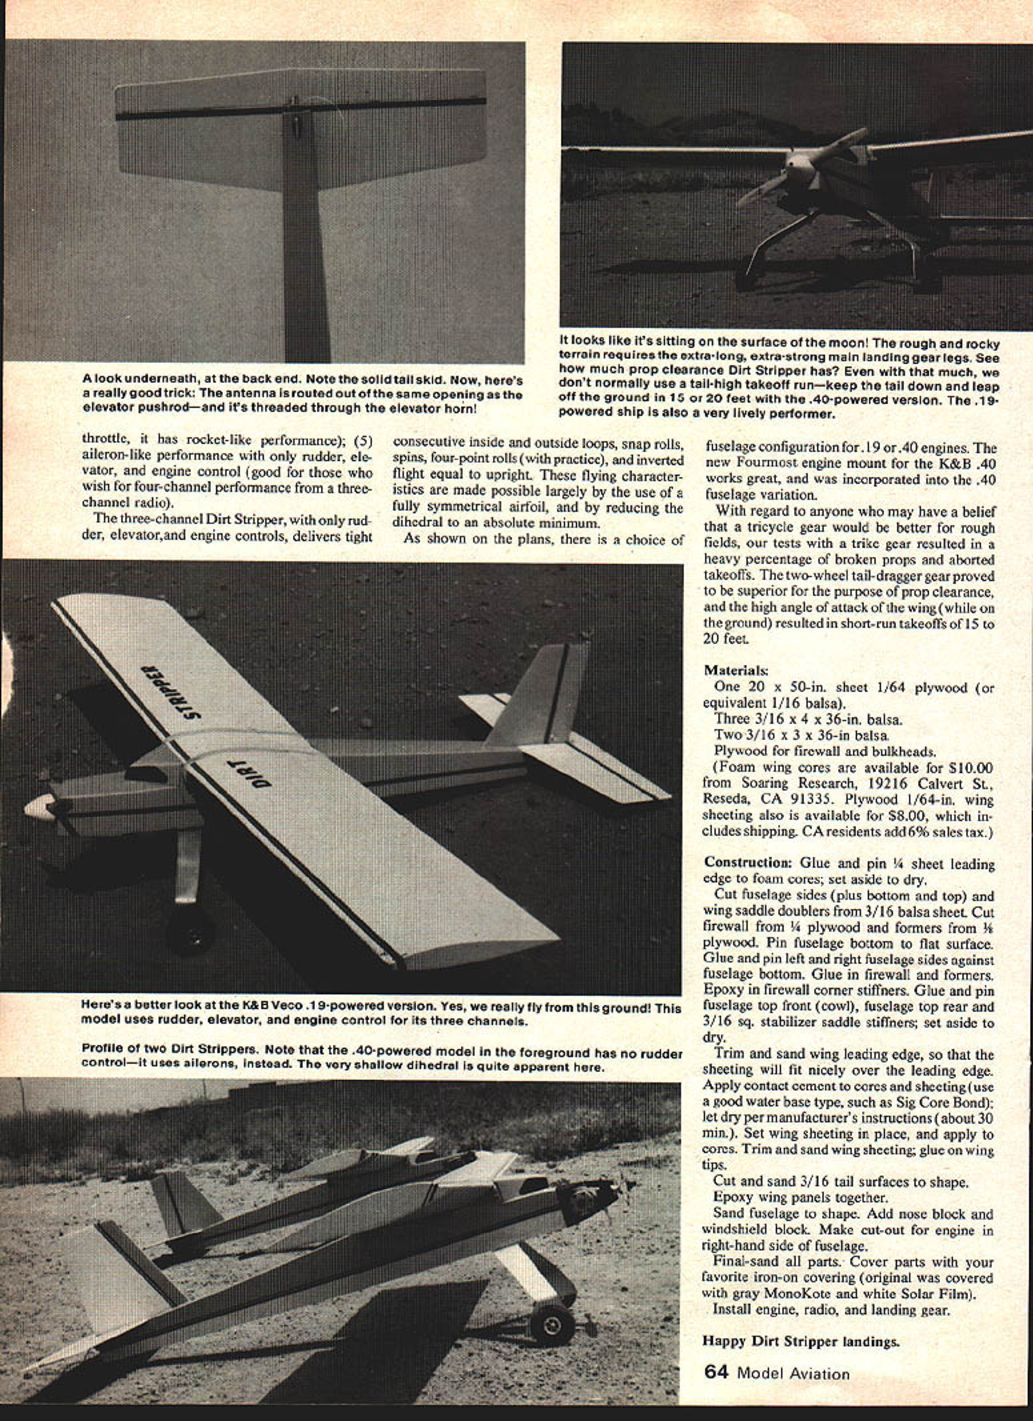
- Aileron-like performance from the rudder/elevator/engine control combination—good, with four-channel performance available if using a four-channel radio. The three-channel Dirt Stripper (rudder, elevator and engine controls) delivers tight, consecutive inside and outside loops, snap rolls, spins, four-point rolls and allows practice inverted flight with equal upright flying characteristics. This is made possible largely by the use of a fully symmetrical airfoil and by reducing dihedral to an absolute minimum.
Regardless of anyone's belief that tricycle gear would be better on rough fields, tests with trike gear resulted in a high percentage of broken props and aborted takeoffs. Two-wheel tail-dragger gear proved superior for the purpose—prop clearance and the high angle of attack of the wing on the ground resulted in short-run takeoffs (15–20 feet).
Materials
- 20 x 50-in. sheet 1/64-in. plywood (equivalent to 1/16 balsa)
- Three 3/16 x 4 x 36-in. balsa
- Two 3/16 x 3 x 36-in. balsa
- Plywood firewall and bulkheads
- Foam wing cores available, $10.00 — Soaring Research, 19216 Calvert St., Reseda, CA 91335
- Plywood 1/64-in. wing sheeting also available, $8.00 (includes shipping). CA residents add 6% sales tax.
Construction
- Glue-pin trailing-edge foam cores; set aside to dry.
- Cut fuselage sides, bottom, top, and wing saddle doublers from 3/16-in. balsa sheet.
- Cut firewall and plywood formers. For the .40 fuselage variation, use a 1/4-in. plywood firewall and 1/8-in. plywood formers.
- Pin fuselage bottom to a flat surface. Glue-pin left and right fuselage sides against the fuselage bottom.
- Glue firewall and formers in place. Epoxy firewall corner stiffeners.
- Glue-pin fuselage top front (cowl) and fuselage top rear. Glue 3/16-in. square stabilizer saddle stiffeners; set aside to dry.
- Glue and pin a 1/4-in. sheet leading edge to the foam cores; set aside to dry.
- Trim and sand the wing leading edge so the sheeting will fit nicely. Apply contact cement to cores and sheeting (use a good water-base type, such as Sig Core Bond); let dry per manufacturer's instructions (about 30 minutes).
- Set wing sheeting in place and bond to cores. Trim and sand wing sheeting; glue on wingtips.
- Cut and sand 3/16-in. tail surfaces to shape.
- Epoxy wing panels together.
- Sand fuselage to shape. Add nose block and windshield block. Make a cutout for the engine in the right-hand side of the fuselage.
- Final-sand all parts. Cover parts with your favorite iron-on covering (original was covered with gray MonoKote and white Solar Film).
- Install engine, radio, and landing gear.
Happy Dirt Stripper landings.
Transcribed from original scans by AI. Minor OCR errors may remain.

