
Do-It-Yourself Soft Engine Mount
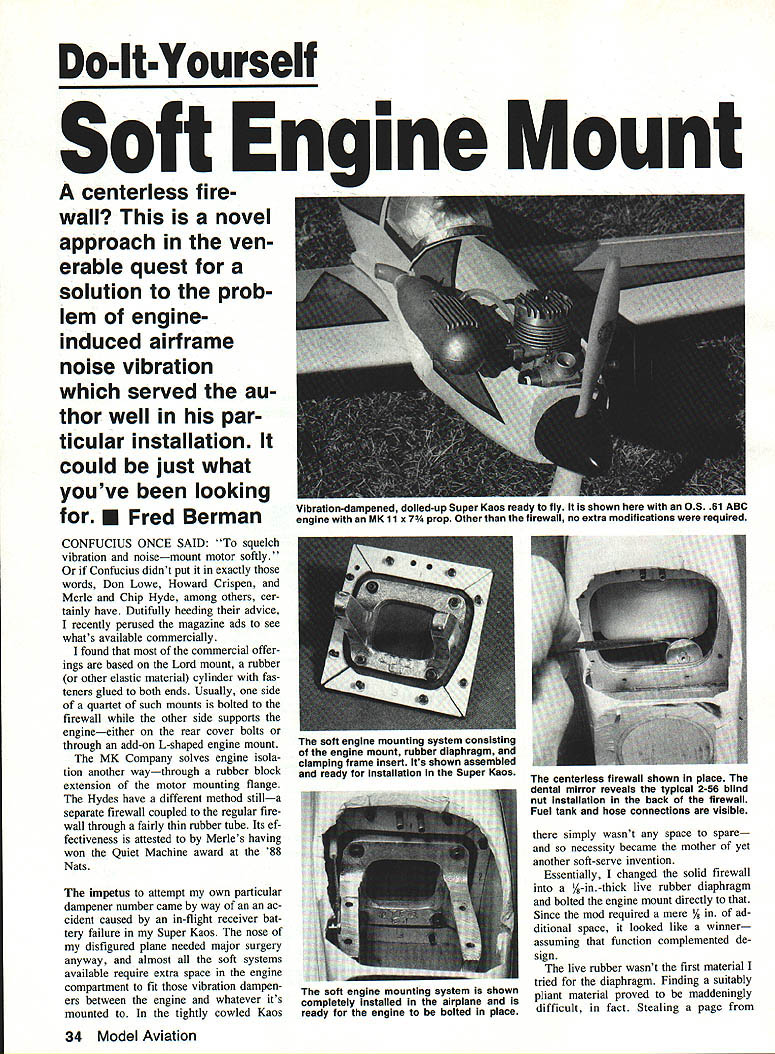
A centerless firewall? This is a novel approach in the venerable quest for a solution to the problem of engine-induced airframe noise and vibration which served the author well in his particular installation. It could be just what you've been looking for. — Fred Berman
Background
Confucius once said: "To squelch vibration and noise—mount motor softly." Or if Confucius didn't put it in exactly those words, Don Lowe, Howard Crispen, Merle and Chip Hyde, among others, certainly have. Dutifully heeding their advice, I recently perused the magazine ads to see what's available commercially.
I found that most of the commercial offerings are based on the Lord mount, a rubber (or other elastic material) cylinder with fasteners glued to both ends. Usually, one side of a quartet of such mounts is bolted to the firewall while the other side supports the engine—either on the rear cover bolts or through an add-on L-shaped engine mount.
The MK Company solves engine isolation another way—through a rubber block extension of the motor mounting flange. The Hydes have a different method still—a separate firewall coupled to the regular firewall through a fairly thin rubber tube. Its effectiveness is attested to by Merle's having won the Quiet Machine award at the '88 Nats.
Motivation for the Centerless Firewall
The impetus to attempt my own particular dampener came by way of an accident caused by in-flight receiver battery failure. My Super Kaos nose was disfigured and the plane needed major surgery anyway. Almost all the soft systems available require extra space in the engine compartment to fit vibration dampeners between the engine and whatever it's mounted to. In the tightly cowled Kaos there simply wasn't any space to spare—and so necessity became the mother of yet another soft-serve invention.
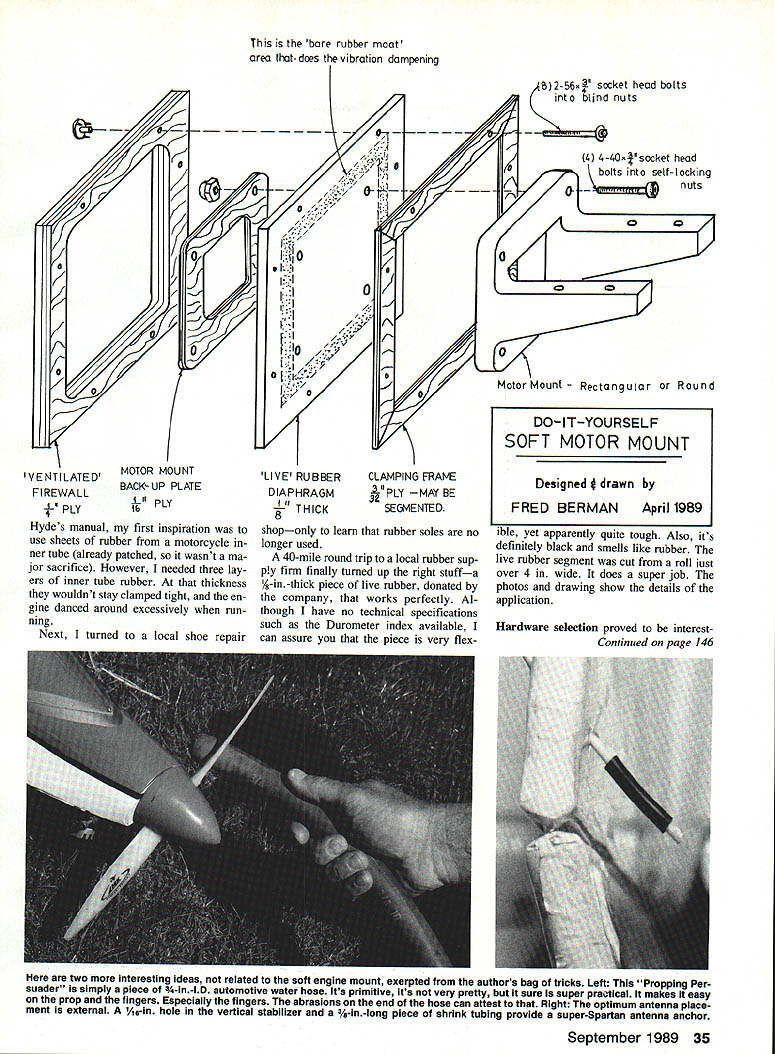
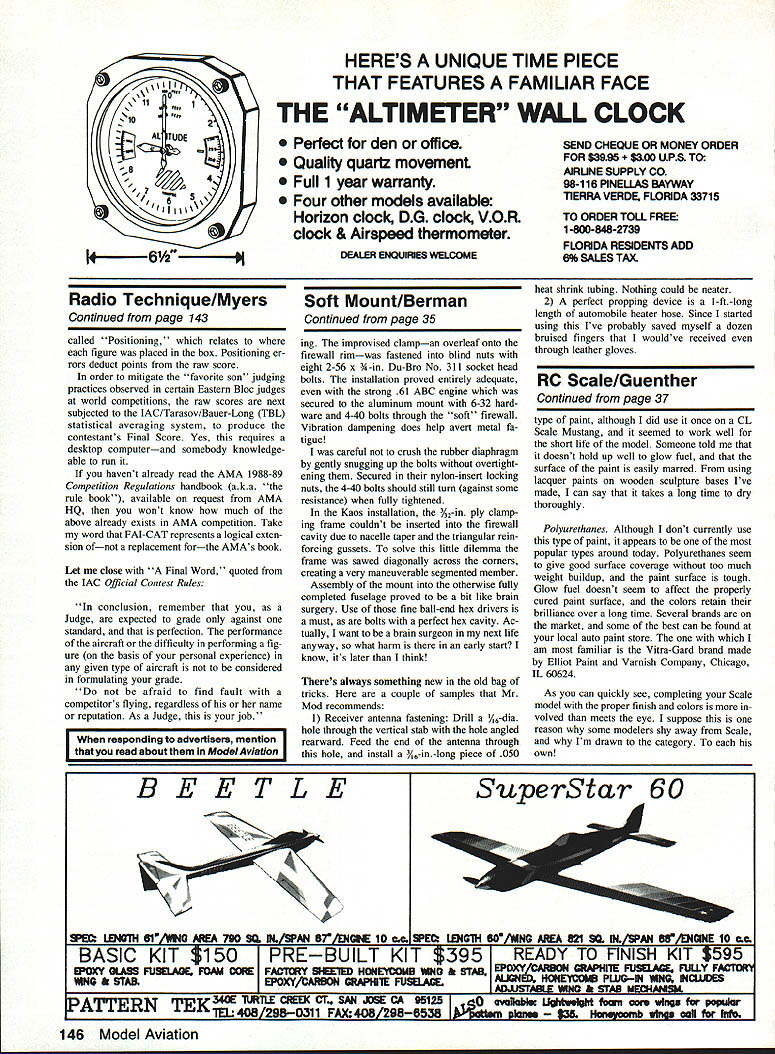
Essentially, I changed the solid firewall into a 1/8-in.-thick live rubber diaphragm and bolted the engine mount directly to that. Since the mod required a mere 3/8 in. of additional space, it looked like a winner—assuming that function complemented design.
Materials Tried
Live rubber wasn't the first material I tried for the diaphragm. Finding a suitably pliant material proved maddeningly difficult. Stealing a page from the Hydes' manual, my first inspiration was to use sheets of rubber motorcycle inner tube. That, already patched, wasn't a major sacrifice. However, three layers of inner-tube rubber thickness wouldn't stay clamped tight—the engine danced around excessively when running.
Next I turned to the local shoe repair shop only to learn rubber soles are no longer used. A 40-mile round trip to a local rubber supply firm finally turned up the right stuff—a 1/8-in.-thick piece of live rubber donated by the company. It works perfectly. Although I have no technical specifications such as Durometer index available, I can assure you the piece is very flexible yet apparently quite tough. Also it's definitely black and smells like rubber. The live rubber segment cut from the roll just over 4 in. wide does a super job. The photos and drawing show details of the application.
Hardware and Installation
Hardware selection proved interesting. The improvised clamp—an overlap clamp onto the firewall rim—was fastened into blind nuts with eight 2-56 x 3/4-in. Du-Bro No. 31 socket-head bolts. The installation proved entirely adequate, even with the strong .61 ABC engine which was secured to the aluminum mount with 6-32 hardware and 4-40 bolts through the "soft" firewall. Vibration dampening does help avert metal fatigue.
I was careful not to crush the rubber diaphragm by gently snugging up the bolts without overtightening. Secured in their nylon-insert locking nuts, the 4-40 bolts should still turn (against some resistance) when fully tightened.
In the Kaos installation, the 3/8-in. ply clamp-ring frame couldn't be inserted into the firewall cavity due to nacelle taper and the triangular reinforcing gussets. To solve this little dilemma, the frame was sawed diagonally across the corner, creating a very maneuverable segmented member.
Assembly of the mount into the otherwise fully completed fuselage proved to be a bit like brain surgery. Use of those fine ball-end hex drivers is a must, as are bolts with a perfect hex cavity.
Tips and Miscellany
There's always something new in the old bag of tricks. Here are a couple of samples that Mr. Mod recommends:
- Receiver antenna fastening: Drill a 1/16-in.-dia. hole through the vertical stab with the hole angled rearward. Feed the end of the antenna through this hole, and install a 1/2-in.-long piece of .050 heat-shrink tubing. Nothing could be neater.
- A perfect propping device is a 1-ft.-long length of automobile heater hose. Since I started using this I've probably saved myself a dozen or more bruised fingers that I would've received even though I wear leather gloves.
Transcribed from original scans by AI. Minor OCR errors may remain.

