
John Hunton
Eaglet Bipe
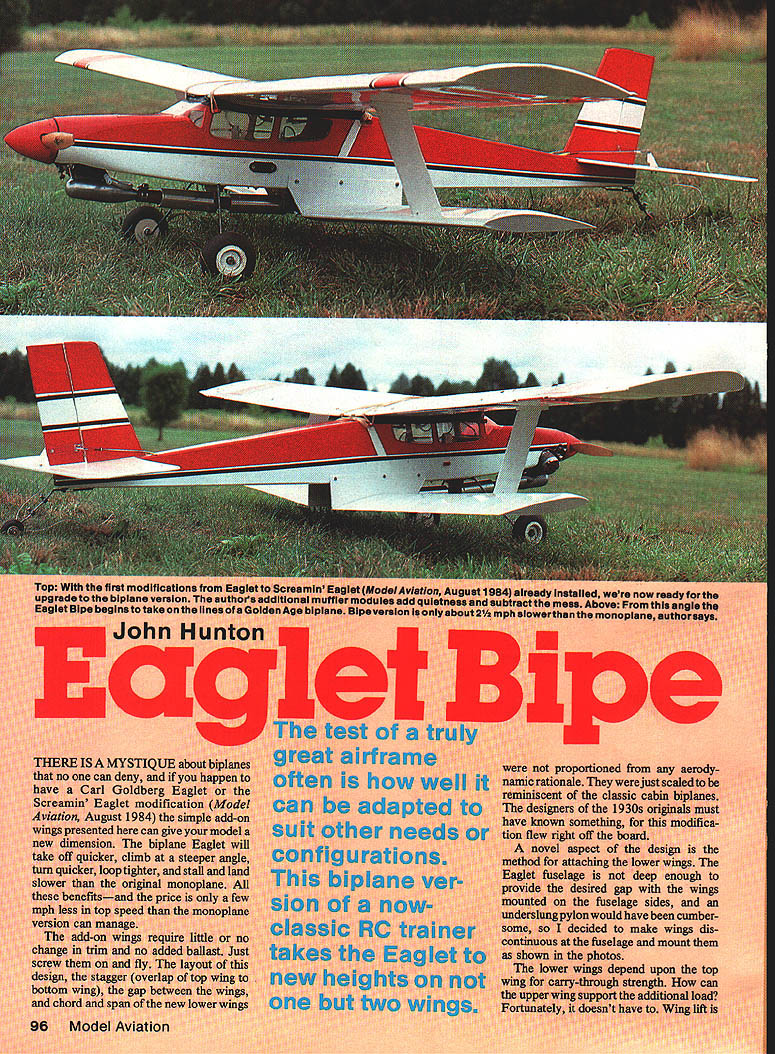
The test of a truly great airframe often is how well it can be adapted to suit other needs or configurations. This biplane version of a now-classic RC trainer takes the Eaglet to new heights on not one but two wings.
There is a mystique about biplanes that no one can deny, and if you happen to have a Carl Goldberg Eaglet or the Screamin' Eaglet modification (Model Aviation, August 1984), the simple add-on wings presented here can give your model a new dimension. The biplane Eaglet will take off quicker, climb at a steeper angle, turn quicker, loop tighter, and stall and land slower than the original monoplane. All these benefits—and the price is only a few mph less in top speed than the monoplane version can manage.
The add-on wings require little or no change in trim and no added ballast. Just screw them on and fly.
The layout of this design—the stagger (overlap of top wing to bottom wing), the gap between the wings, and the chord and span of the new lower wings—were not proportioned from any aerodynamic rationale. They were just scaled to be reminiscent of the classic cabin biplanes. The designers of the 1930s originals must have known something, for this modification flew right off the board.
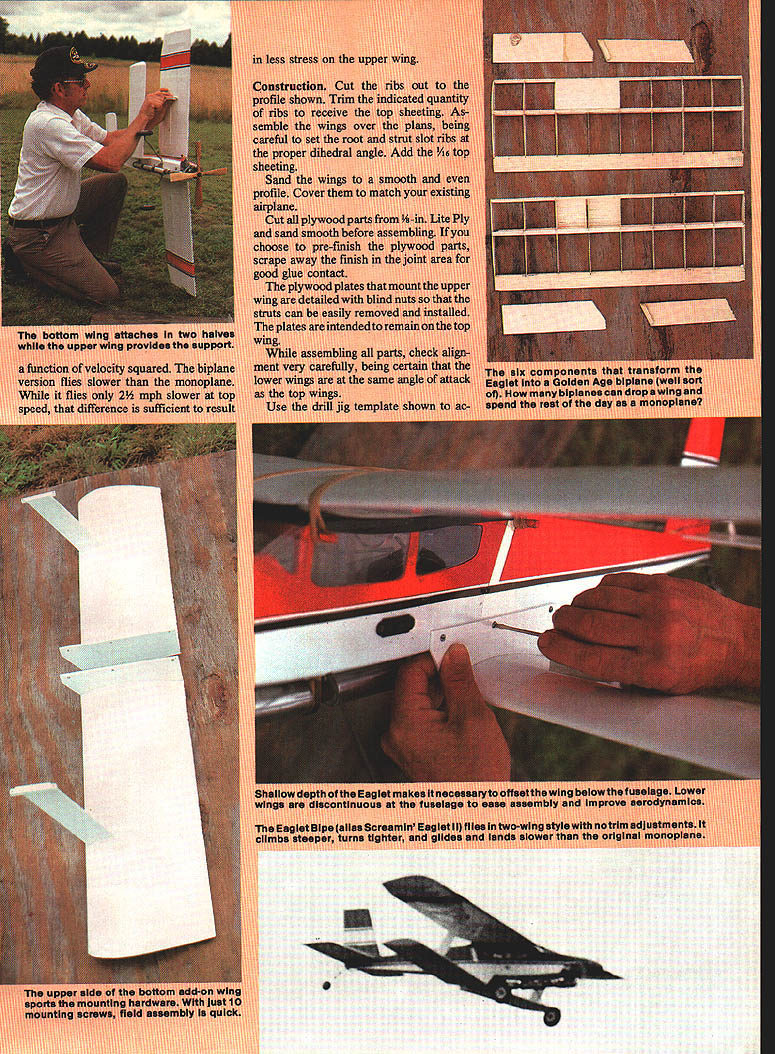
A novel aspect of the design is the method for attaching the lower wings. The Eaglet fuselage is not deep enough to provide the desired gap with the wings mounted on the fuselage sides, and an underslung pylon had been cumbersome, so I decided to make the wings discontinuous at the fuselage and mount them as shown in the photos.
The lower wings depend upon the top wing for carry-through strength. How can the upper wing support the additional load? Fortunately, it doesn't have to—the arrangement places less stress on the upper wing.
Construction
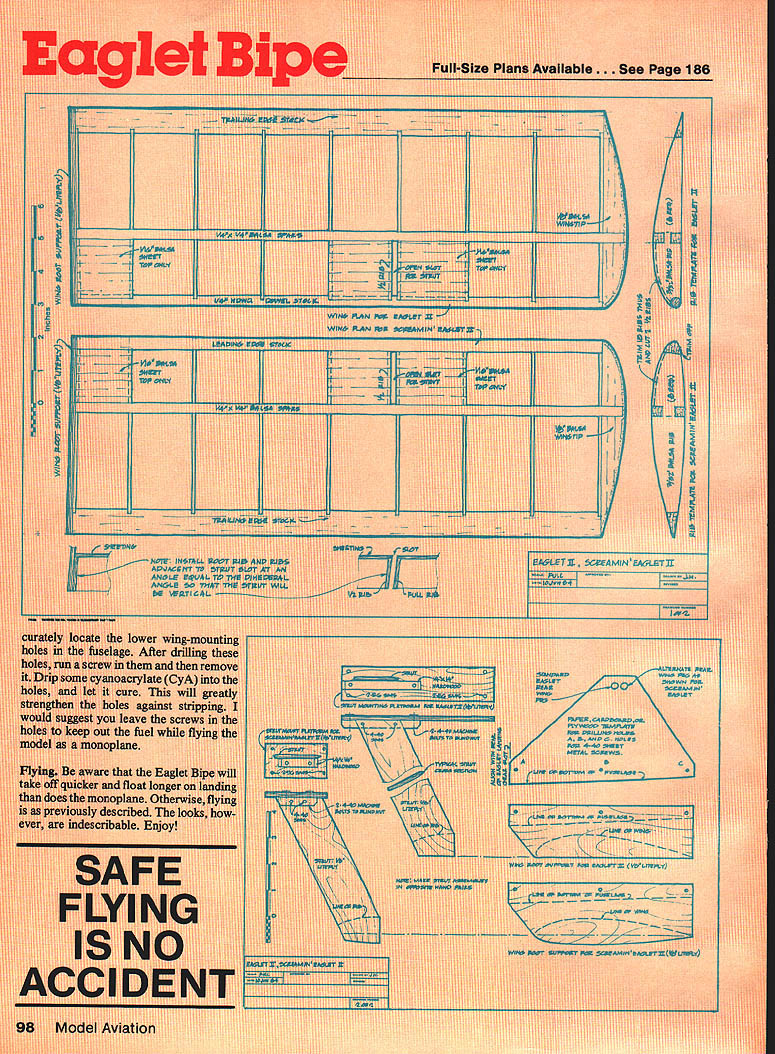
- Cut the ribs out to the profile shown on the plans.
- Trim the indicated quantity of ribs to receive the top sheeting.
- Assemble the wings over the plans, being careful to set the root and strut-slot ribs at the proper dihedral angle.
- Add the 1/16" top sheeting.
- Sand the wings to a smooth and even profile. Cover them to match your existing airplane.
Cut all plywood parts from 1/8-inch Lite Ply and sand smooth before assembling. If you choose to pre-finish the plywood parts, scrape away the finish in the joint area for good glue contact.
The plywood plates that mount the upper wing are detailed with blind nuts so that the struts can be easily removed and installed. The plates are intended to remain on the top wing.
While assembling all parts, check alignment very carefully, being certain that the lower wings are at the same angle of attack as the top wings.
Use the drill-jig template shown to accurately locate lower wing-mounting holes in the fuselage. After drilling holes, run the screws in and out. Drip some cyanoacrylate (CyA) in the holes; let cure. This will greatly strengthen the holes against stripping. I suggest leaving the screws in the holes to keep out fuel while flying the model.
Flying characteristics
Be aware the Eaglet Bipe will:
- take off quicker,
- climb steeper,
- turn tighter,
- glide and land slower
than the monoplane. Otherwise, flying characteristics are as previously described. Enjoy.
Safety
SAFE FLYING IS NO ACCIDENT.
Notes
No additional article text on this page — it contains full-size plans and diagrams only.
Transcribed from original scans by AI. Minor OCR errors may remain.

