
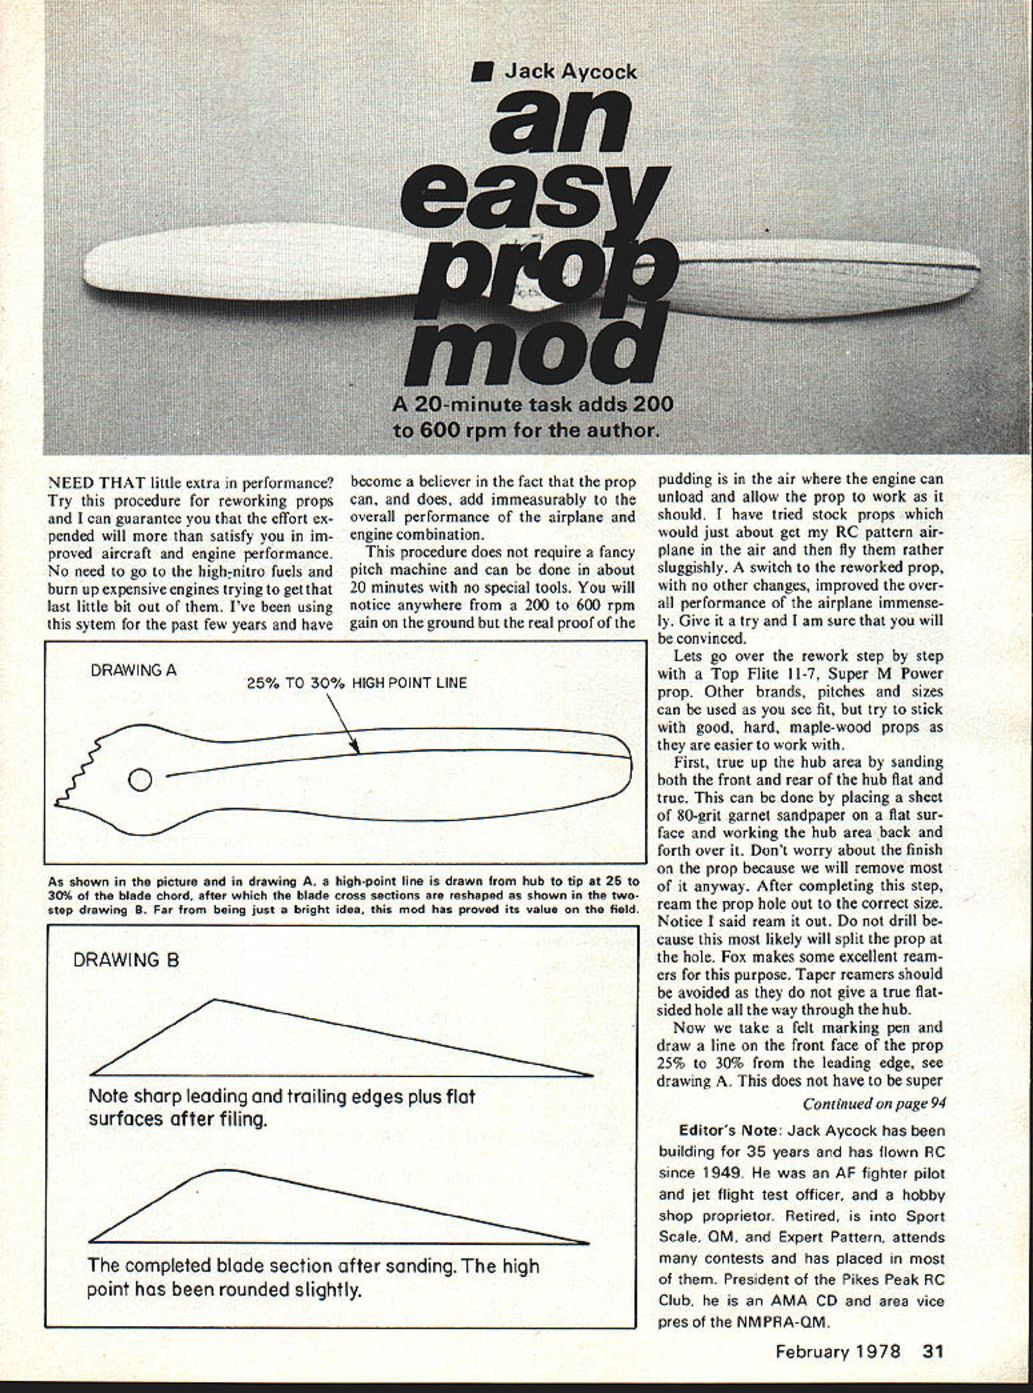
an easy prop mod
Jack Aycock
A 20-minute task adds 200 to 600 rpm for the author.
NEED THAT little extra in performance? Try this procedure for reworking props and I can guarantee you that the effort expended will more than satisfy you in improved aircraft and engine performance. No need to go to the high-nitro fuels and burn up expensive engines trying to get that last little bit out of them. I've been using this system for the past few years and have become a believer in the fact that the prop can, and does, add immeasurably to the overall performance of the airplane and engine combination.
This procedure does not require a fancy pitch machine and can be done in about 20 minutes with no special tools. You will notice anywhere from a 200 to 600 rpm gain on the ground but the real proof of the pudding is in the air where the engine can unload and allow the prop to work as it should. I have tried stock props which would just about get my RC pattern airplane in the air and then fly them rather sluggishly. A switch to the reworked prop, with no other changes, improved the overall performance of the airplane immensely. Give it a try and I am sure that you will be convinced.
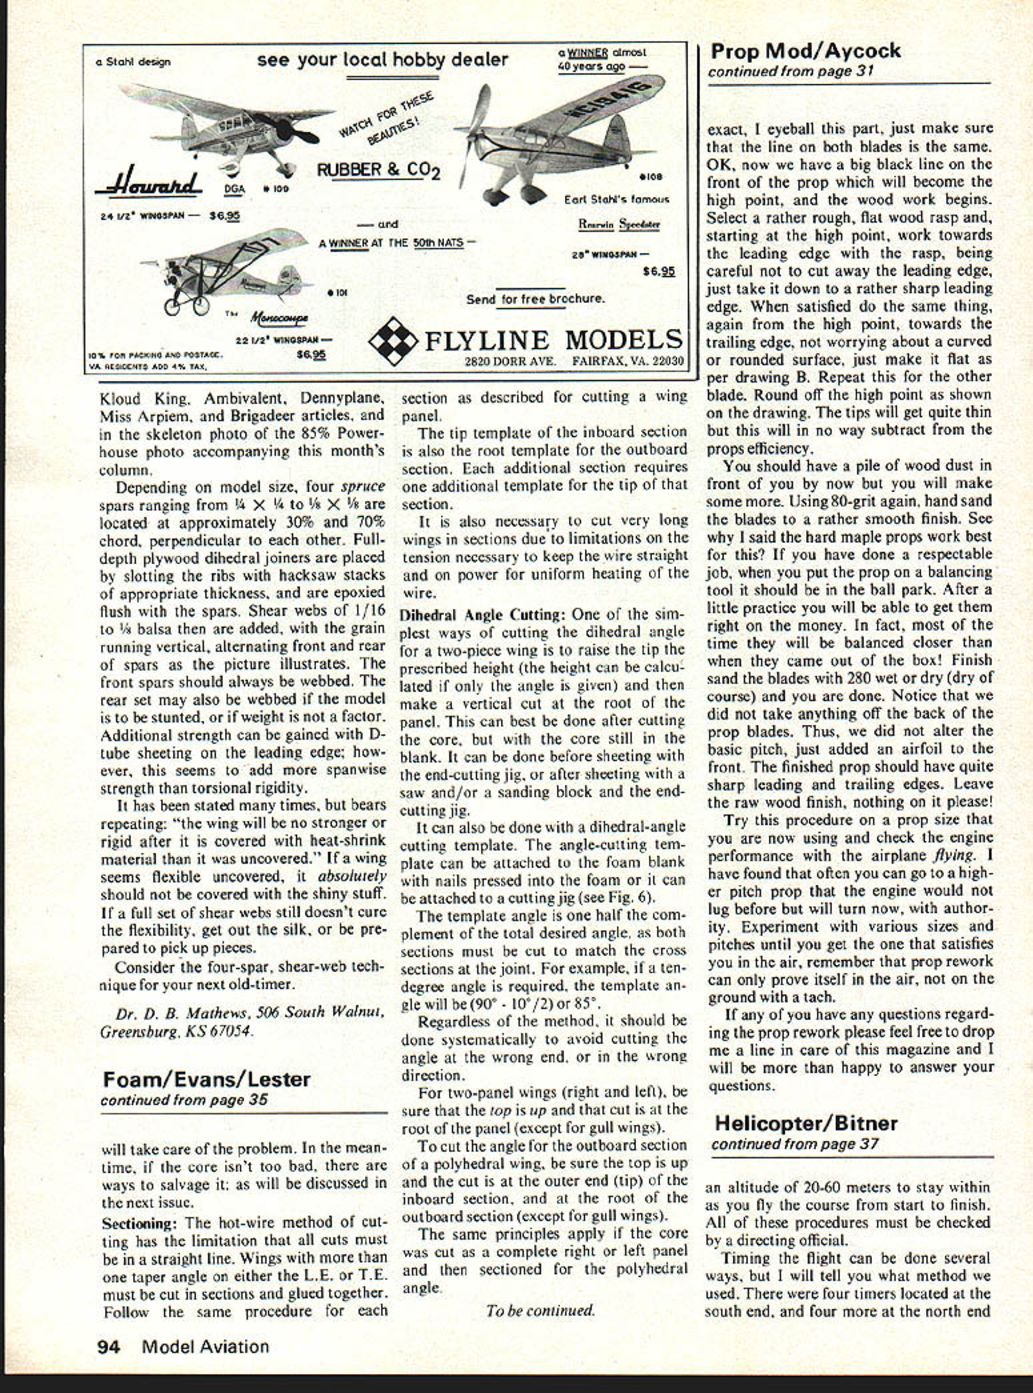
As shown in the picture and in drawing A, a high-point line is drawn from hub to tip at 25 to 30% of the blade chord, after which the blade cross sections are reshaped as shown in the two-step drawing B. Far from being just a bright idea, this mod has proved its value on the field.
DRAWING A 25% TO 30% HIGH POINT LINE
DRAWING B Note sharp leading and trailing edges plus flat surfaces after filing.
The completed blade section after sanding. The high point has been rounded slightly.
Let's go over the rework step by step with a Top Flite 11-7, Super M Power prop. Other brands, pitches and sizes can be used as you see fit, but try to stick with good, hard, maple-wood props as they are easier to work with.
First, true up the hub area by sanding both the front and rear of the hub flat and true. This can be done by placing a sheet of 80-grit garnet sandpaper on a flat surface and working the hub area back and forth over it. Don't worry about the finish on the prop because we will remove most of it anyway. After completing this step, ream the prop hole out to the correct size. Notice I said ream it out. Do not drill because this most likely will split the prop at the hole. Fox makes some excellent reamers for this purpose. Taper reamers should be avoided as they do not give a true flatsided hole all the way through the hub.
Now we take a felt marking pen and draw a line on the front face of the prop 25% to 30% from the leading edge, see drawing A. This does not have to be super
Editor's Note: Jack Aycock has been building for 35 years and has flown RC since 1949. He was an AF fighter pilot and jet flight test officer, and a hobby shop proprietor. Retired, is into Sport Scale, Q.M., and Expert Pattern, attends many contests and has placed in most of them. President of the Pikes Peak RC Club, he is an AMA CD and area vice pres of the NMPRA-QM. exact, I eyeball this part, just make sure that the line on both blades is the same. OK, now we have a big black line on the front of the prop which will become the high point, and the wood work begins. Select a rather rough, flat wood rasp and, starting at the high point, work towards the leading edge with the rasp, being careful not to cut away the leading edge, just take it down to a rather sharp leading edge. When satisfied do the same thing, again from the high point, towards the trailing edge, not worrying about a curved or rounded surface, just make it flat as per drawing B. Repeat this for the other blade. Round off the high point as shown on the drawing. The tips will get quite thin but this will in no way subtract from the prop's efficiency.
You should have a pile of wood dust in front of you by now but you will make some more. Using 80-grit again, hand sand the blades to a rather smooth finish. See why I said the hard maple props work best for this? If you have done a respectable job, when you put the prop on a balancing tool it should be in the ball park. After a little practice you will be able to get them right on the money. In fact, most of the time they will be balanced closer than when they came out of the box! Finish sand the blades with 280 wet or dry (dry of course) and you are done. Notice that we did not take anything off the back of the prop blades. Thus, we did not alter the basic pitch, just added an airfoil to the front. The finished prop should have quite sharp leading and trailing edges. Leave the raw wood finish, nothing on it please!
Try this procedure on a prop size that you are now using and check the engine performance with the airplane flying. I have found that often you can go to a higher pitch prop that the engine would not lug before but will turn now, with authority. Experiment with various sizes and pitches until you get the one that satisfies you in the air, remember that prop rework can only prove itself in the air, not on the ground with a tach.
If any of you have any questions regarding the prop rework please feel free to drop me a line in care of this magazine and I will be more than happy to answer your questions.
Transcribed from original scans by AI. Minor OCR errors may remain.

