
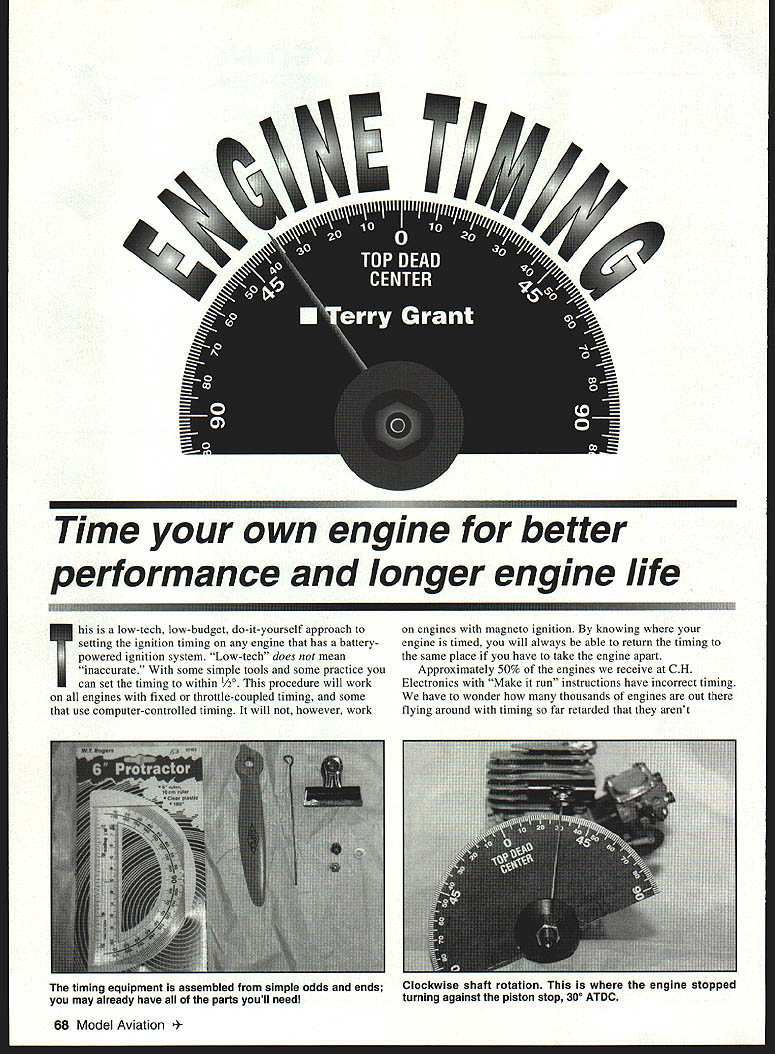
Engine Timing
Terry Grant
Time your own engine for better performance and longer engine life.
This is a low-tech, low-budget, do-it-yourself approach to setting the ignition timing on any engine that has a battery-powered ignition system. "Low-tech" does not mean "inaccurate." With some simple tools and some practice you can set the timing to within 1/2°. This procedure will work on all engines with fixed or throttle-coupled timing, and some that use computer-controlled timing. It will not, however, work on engines with magneto ignition. By knowing where your engine is timed, you will always be able to return the timing to the same place if you have to take the engine apart.
Approximately 50% of the engines we receive at C.H. Electronics with "Make it run" instructions have incorrect timing. Many engines in the field may therefore be running so far retarded that they aren't developing their potential, or so far advanced that they are damaging themselves. Here's how to get the timing right.
Terms Used
- TDC — Top Dead Center: piston at top of its stroke.
- BTDC — Before TDC: piston moving up to TDC.
- ATDC — After TDC: piston past TDC going down.
I have found 90% of engines work best within these general ranges for timing:
- Idle: 4°–8° BTDC
- Full power: 28°–32° BTDC
- Total movement: approximately 24° timing change
If the timing is too far advanced at full throttle the engine develops less power and might detonate. If the timing is too retarded at full throttle the engine can't develop maximum power and will run hotter. An engine too far advanced at idle will kick back when you're trying to start it; too far retarded at idle will slow throttle response. Always follow the manufacturer's recommendations when provided.
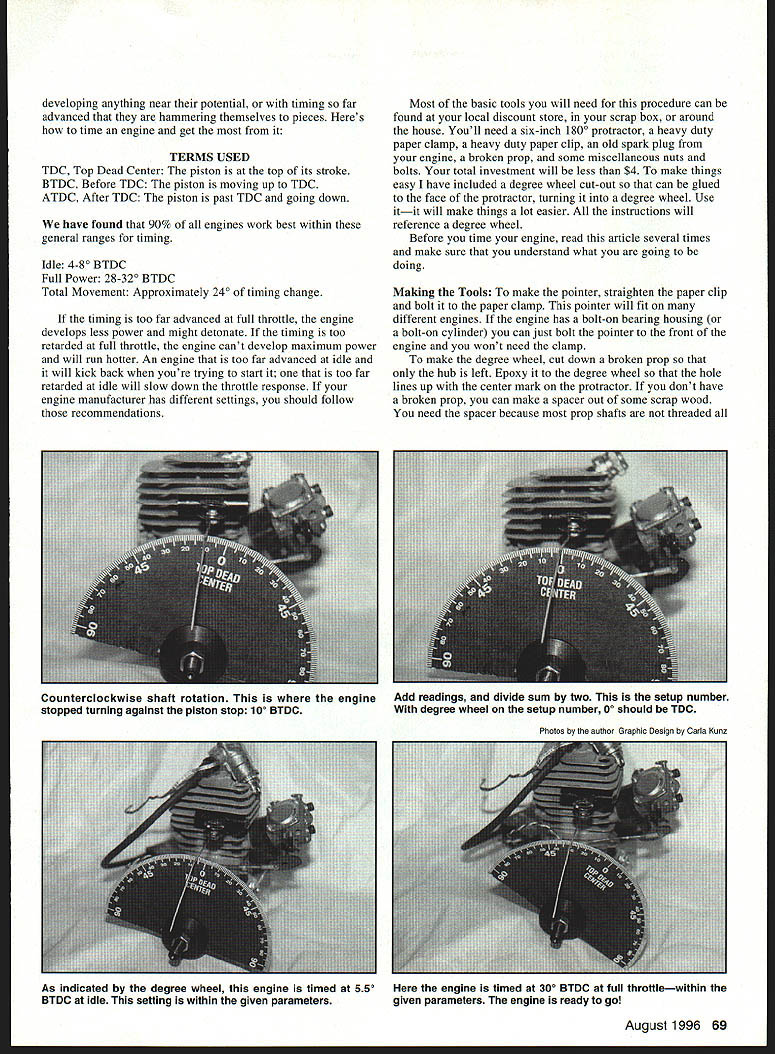
Tools
Most basic tools can be found at a discount store or around the house. You'll need:
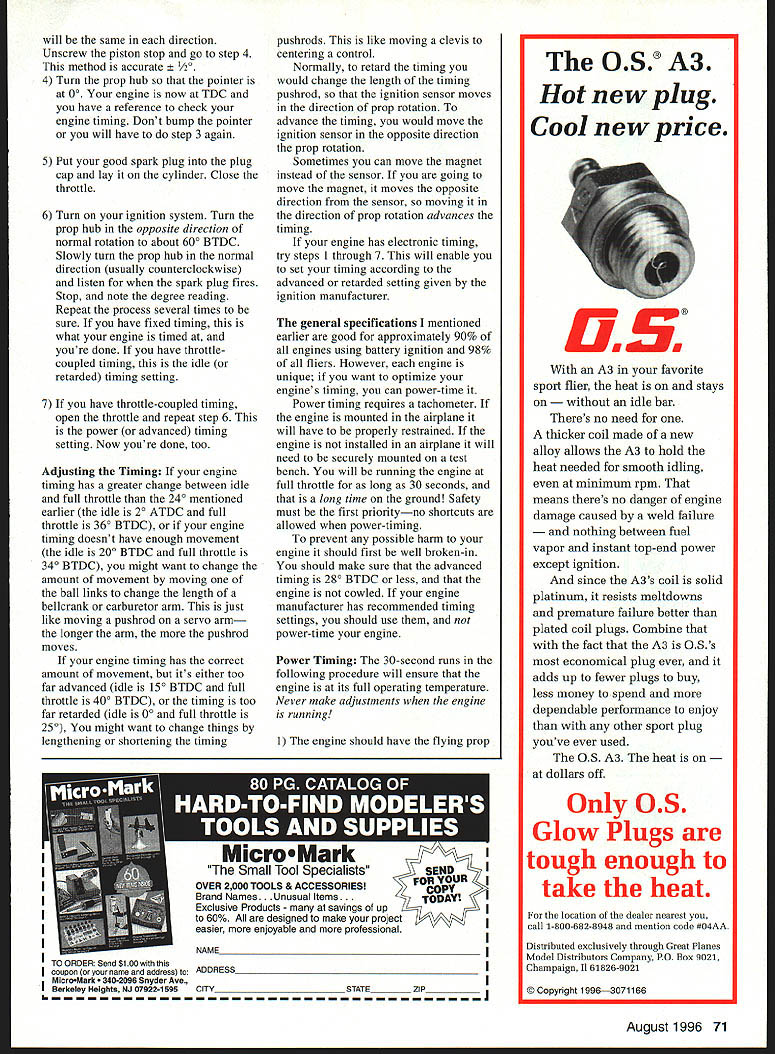
- 6-inch (180°) protractor
- Degree wheel cutout (optional; glue to the protractor face to form a degree wheel)
- Heavy-duty paper clamp
- Heavy-duty paper clip
- Old spark plug (for a piston stop) or a machined plastic/brass stop if available
- Broken prop or spacer for mounting the degree wheel (prop shafts are threaded)
- Miscellaneous nuts and bolts
Total investment should be under $4 if you have simple scrap parts on hand.
Making the Pointer
- Straighten the paper clip and bolt it to the paper clamp to make a pointer.
- The pointer will fit many engines. If the engine has a bolt-on bearing housing or bolt-on cylinder you can bolt the pointer directly to the front of the engine and skip the clamp.
Making the Degree Wheel
- Cut down a broken prop hub or make a spacer from scrap wood to clear the prop shaft threads.
- Epoxy the degree wheel cutout so the hole lines up with the center mark on the protractor. Use a light to align marks if necessary. Trim as needed. Drill a center hole (e.g., 7/16") if you want the wheel to be more universal. Glue the cutout to the protractor to form the degree wheel.
Making a Piston Stop
- Examine the engine first — on some engines the spark plug angle prevents a piston stop from working; you can skip this step if so.
- To make a stop from an old spark plug: put the plug in a vise, cut off the crimp just above the hex with a cutoff wheel or hacksaw, then knock the porcelain out (wear safety glasses). Remove the gasket and cut off the side electrode. Whittle a piece of hardwood to fit inside the plug to protect the piston top. Drill a small hole in the stop to allow compression to bleed off.
- If the engine uses a short 14 mm plug, use an old 1/4-inch-reach 14 mm plug or machine a proper stop on a lathe.
Checking the Timing
Timing is affected by the sensor, the magnet, and their spacing. By timing your engine correctly you eliminate a major variable.
- Remove the good spark plug and rotate the prop hub so the piston is near TDC. Remove the prop and install the degree wheel.
- Clamp or bolt the pointer on the engine so it points near the 0° mark on the degree wheel. You can bend the pointer to fit. The 0° mark does not have to be upright — you will reference it later.
- Find TDC. More accurate TDC yields more accurate timing. Three quick methods and one slow-but-accurate method:
- Exhaust-port method (two-stroke): turn the prop hub until the piston is at the top; there will be a little play. Adjust the degree wheel until the pointer points to the same number of degrees in both directions during the rocking. Accuracy ±2°.
- Pushrod method (two- or four-stroke): remove the spark plug, insert a 6-inch piece of inner nylon pushrod, rotate the prop hub until the pushrod stops moving up. Rock the piston and adjust the degree wheel so the pointer reads the same number of degrees in both directions. Accuracy ±2°.
- Compression-bleed method (leave a good plug in): turn the prop until on the compression stroke and continue to TDC; let the compression bleed off by loosening the plug slightly so you can feel the crankshaft rock. Move the degree wheel until the pointer travels the same number of degrees in each direction during the rocking. Loosen the spark plug and proceed. With practice this yields ±1°.
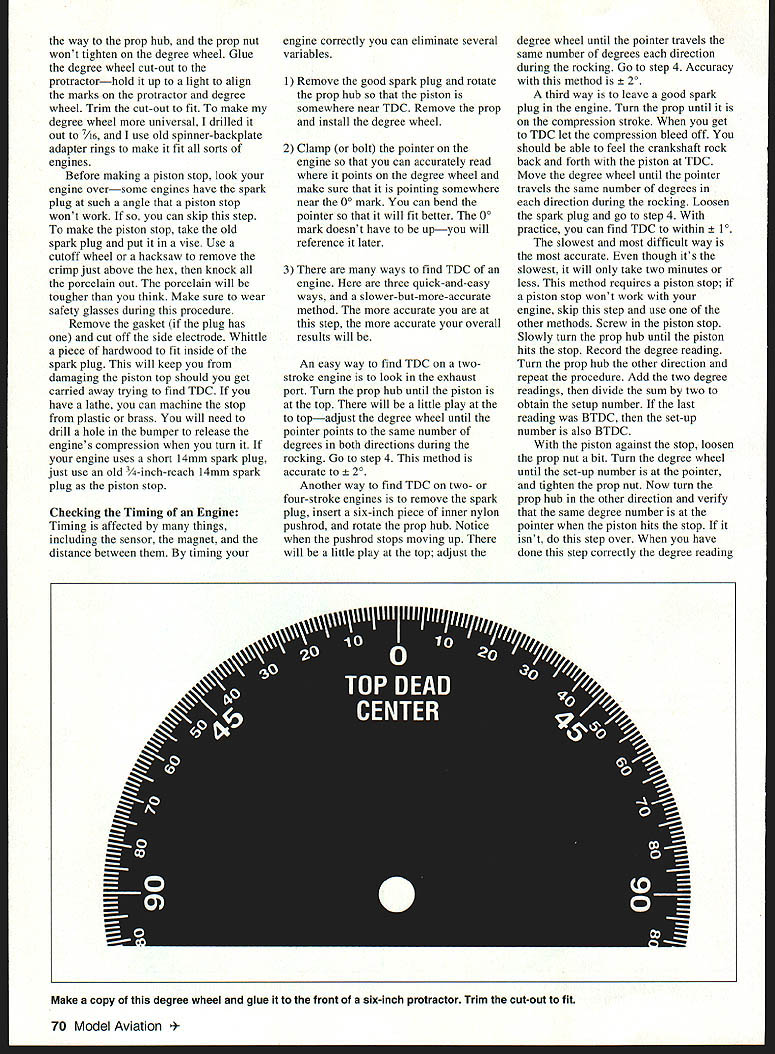
- Piston-stop method (most accurate, requires a piston stop): screw in the piston stop. Slowly turn the prop hub until the piston hits the stop; record the degree reading. Turn the prop the other direction until it hits the stop again; record that reading. Add the two readings and divide by two to obtain the setup number (if the last reading was BTDC, the setup is BTDC). With the piston against the stop, loosen the prop nut slightly, turn the degree wheel until the setup number aligns with the pointer, then tighten the prop nut. Verify by turning the prop the opposite direction and checking the same degree number at the pointer when the piston hits the stop. If it matches, unscrew the piston stop and proceed. Accuracy ±½°.
- Turn the prop hub so the pointer is at 0°. The engine is now at TDC and you have a reference. Do not bump the pointer or you will have to repeat step 3.
- Put a good spark plug into the plug cap and lay it against the cylinder head (with the plug wire/end insulated). Close the throttle.
- Turn on the ignition system. Turn the prop hub in the opposite direction of normal rotation to about 60° BTDC. Slowly turn the prop hub in the normal rotation (usually counterclockwise) and listen for when the spark plug fires. Stop and note the degree reading. Repeat several times to confirm. If you have fixed timing, this is the timed setting and you are done. If you have throttle-coupled timing, this is the idle (retarded) setting.
- If you have throttle-coupled timing, open the throttle and repeat step 6 to find the power (advanced) timing. If unsure, check both idle and full-throttle settings.
Adjusting the Timing
- If your timing change between idle and full throttle is greater or less than the expected ~24°, you can change the amount of movement by moving one of the ball links to change the effective length of a bellcrank or carburetor arm (longer arm = more movement).
- If the timing movement is correct but both idle and full-throttle settings are too advanced or too retarded, alter timing by lengthening or shortening the timing pushrods (like moving a clevis to center a control).
- To retard the timing, change the timing pushrod so the ignition sensor moves in the direction of prop rotation. To advance timing, move the sensor opposite the prop rotation.
- If you move the magnet instead of the sensor, note that moving the magnet in the direction of prop rotation advances the timing (opposite effect of moving the sensor).
- For electronic ignitions, use the same checking steps (1–7) to set timing per the ignition manufacturer's recommended advanced/retarded settings.
These general specifications suit roughly 90% of engines using battery ignition. If you want to optimize further, you can power-time the engine.
Power Timing
Power timing requires a tachometer and a secure mounting (engine restrained in the airplane or on a test bench). You will run the engine at full throttle for up to 30 seconds; safety is essential. Do not power-time an engine that is not well broken-in. Ensure the advanced timing is 28° BTDC or less and the engine is not cowled. If the manufacturer recommends specific timing settings, use those instead of power-timing.
Procedure (never adjust while the engine is running):
- Install the flying prop and exhaust system.
- Start and warm the engine at half throttle.
- Go to full throttle for 30 seconds and take a tachometer reading. Let the engine idle for 30 seconds and shut it off.
- Advance the timing slightly — for example, two turns of a ball link.
- Restart, warm at half throttle, then go to full throttle for 30 seconds and take another tachometer reading. Bring the engine back to idle and shut it off.
- If RPM increased, repeat steps 4 and 5. If RPM decreased, retard the timing by four turns and repeat steps 4 and 5.
- Continue adjusting until there is no further RPM increase. Then revert to the last timing setting that produced an RPM increase.
- Verify the RPM again at full throttle.
This procedure only sets full-throttle timing. After power-timing, use the TDC degree-wheel method to ensure idle timing is at 4–8° BTDC and note the advanced timing reading so you can restore the settings after disassembly.
We prefer to back timing down slightly from maximum power — reducing peak RPM by about 100 rpm — to enhance engine life.
Engine timing is straightforward. It may take half an hour to time your first engine; with practice it can take less than five minutes. Make a set of simple tools and set the ignition timing on your engines for better performance and longer life.
Transcribed from original scans by AI. Minor OCR errors may remain.

