
'Extra Hands'
By Michael Jennings
Fly Control Line (CL) all by your lonesome with this clever stooge. It features a positive safety lock for engine starting and adjustment, and a smooth, sure release when the time comes.
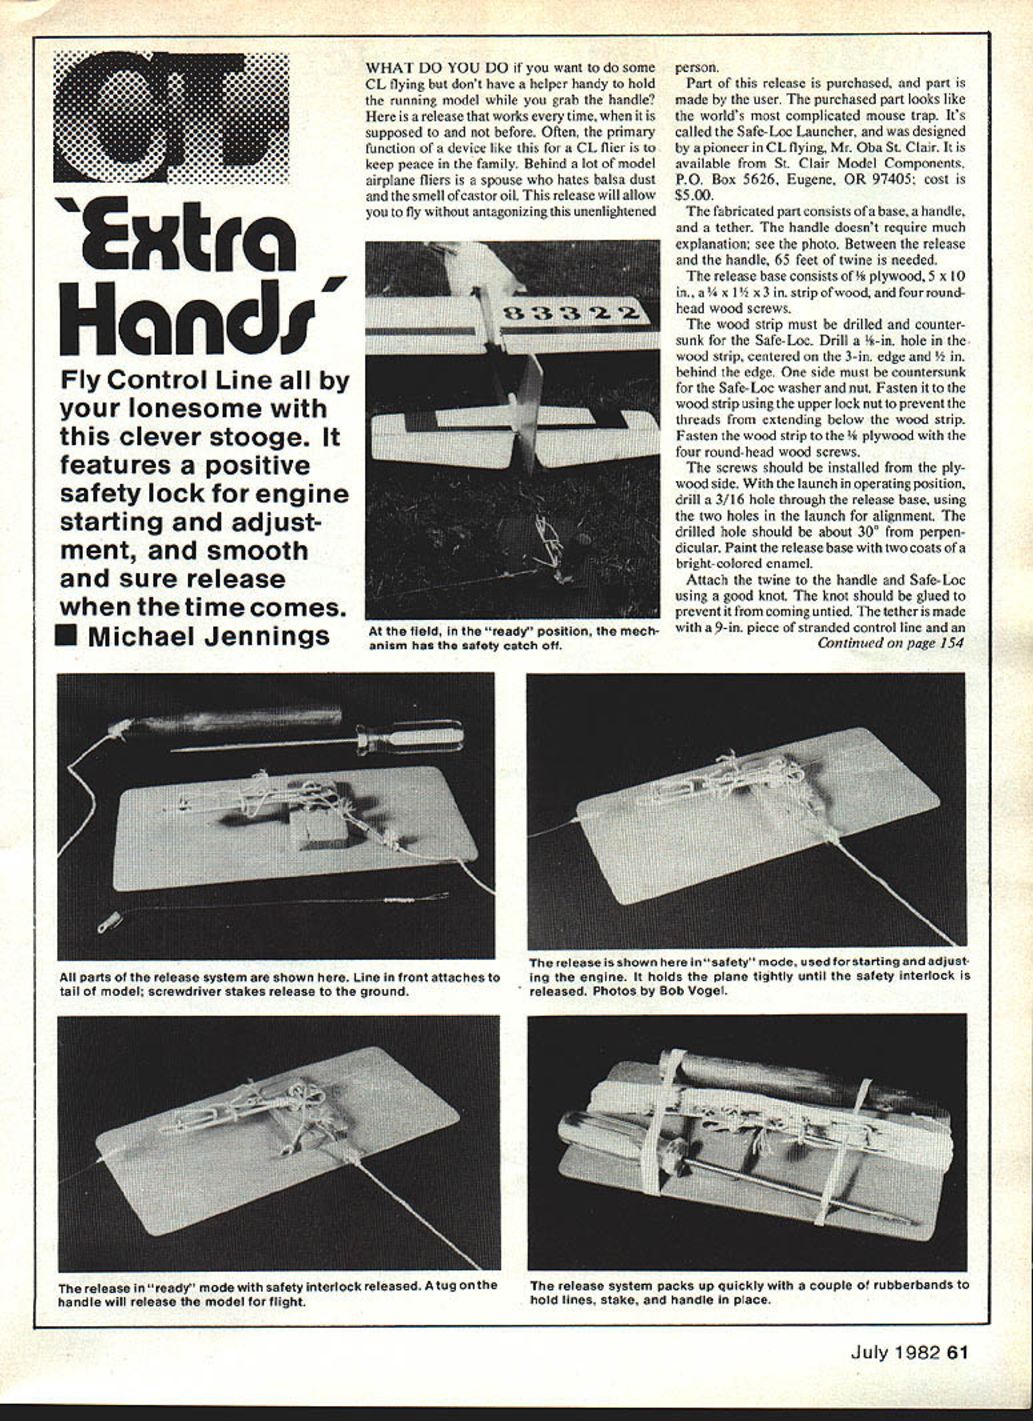
What do you do if you want to do some CL flying but don't have a helper handy to hold the running model while you grab the handle? Here is a release that works every time — when it is supposed to and not before.
Often the primary function of a device like this for a CL flier is to keep the peace in the family. Behind a lot of model airplane fliers is a spouse who hates balsa dust and the smell of castor oil. This release will allow you to fly without antagonizing this unenlightened person.
Part of this release is purchased, and part is made by the user. The purchased part looks like the world's most complicated mousetrap. It's called the Safe-Loc Launcher, and was designed by a pioneer in CL flying, Mr. Oba St. Clair. It is available from St. Clair Model Components, P.O. Box 5626, Eugene, OR 97405; cost is $5.00.
Fabricated parts
The fabricated part consists of a base, a handle, and a tether. The handle doesn't require much explanation; see the photo. Between the release and the handle, 65 feet of twine is needed.
The release base consists of:
- 1/8" plywood, 5 x 10 in.
- a 1/4 x 1 1/2 x 3 in. strip of wood
- four round-head wood screws
The wood strip must be drilled and countersunk for the Safe-Loc. Drill a 1/4-in. hole in the wood strip, centered on the 3-in. edge and 1/2 in. behind the edge. One side must be countersunk for the Safe-Loc washer and nut. Fasten the Safe-Loc to the wood strip using the upper lock nut to prevent the threads from extending below the wood strip. Fasten the wood strip to the 1/8" plywood with the four round-head wood screws.
The screws should be installed from the plywood side. With the launcher in operating position, drill a 3/16-in. hole through the release base, using the two holes in the launcher for alignment. The drilled hole should be about 30° from perpendicular. Paint the release base with two coats of a bright-colored enamel.
Tether construction and attachment
Attach the twine to the handle and Safe-Loc using a good knot. The knot should be glued to prevent it from coming untied.
The tether is made with a 9-in. piece of stranded control line and an electrical solderless ring tongue. Loop the control line through, around, and again through the crimping eye of the lug, then crimp the lug. With the other end of the control line, make a normal soldered leadout-constructed loop about an inch in diameter. Make a tether for each of your aircraft.
The tether should be attached to a solid structure in the rear of the aircraft. If you use a cap screw and a blind nut, be sure to glue the threads to prevent vibration from backing the screw out.
Tools
You will need to purchase a long-shank screwdriver. The shank must be 3/16-in. diameter or less. Normally, the blade must be ground down so that it will go through the release.
Safe-Loc features
If you look at the Safe-Loc closely, you will see that it is well-designed. It features a positive opening action with a safety lock mechanism. Upon first look, it is difficult to see how it operates.
The safety mode is for starting the engine and adjusting the needle valve. In this mode, the aircraft can rest on the ground or be held in a vertical position. This will allow for fine-tuning of the needle valve.
Operation — Ready mode
The ready mode is used after the engine is running correctly and the aircraft is resting on the ground. Check to see that the tether loop is in the right position. Release the safety catch, and pick up the control handle. Pick up the release handle. Tug lightly on it. This triggers the launch, and the aircraft immediately starts moving forward. You are on your own!
After you are finished flying, the release can be packed up quickly and easily. It fits compactly in a field box.
This release allows you to go flying by yourself. The safety mechanism and positive opening action assure operation when you want it to.
Transcribed from original scans by AI. Minor OCR errors may remain.

