
For Fiberglass Parts: How to Repair A Broken Part
— Myron Pickard
Unless it's a complete wipe-out, a broken fiberglass part is probably repairable, and with a little patience you can make it look as good as new.
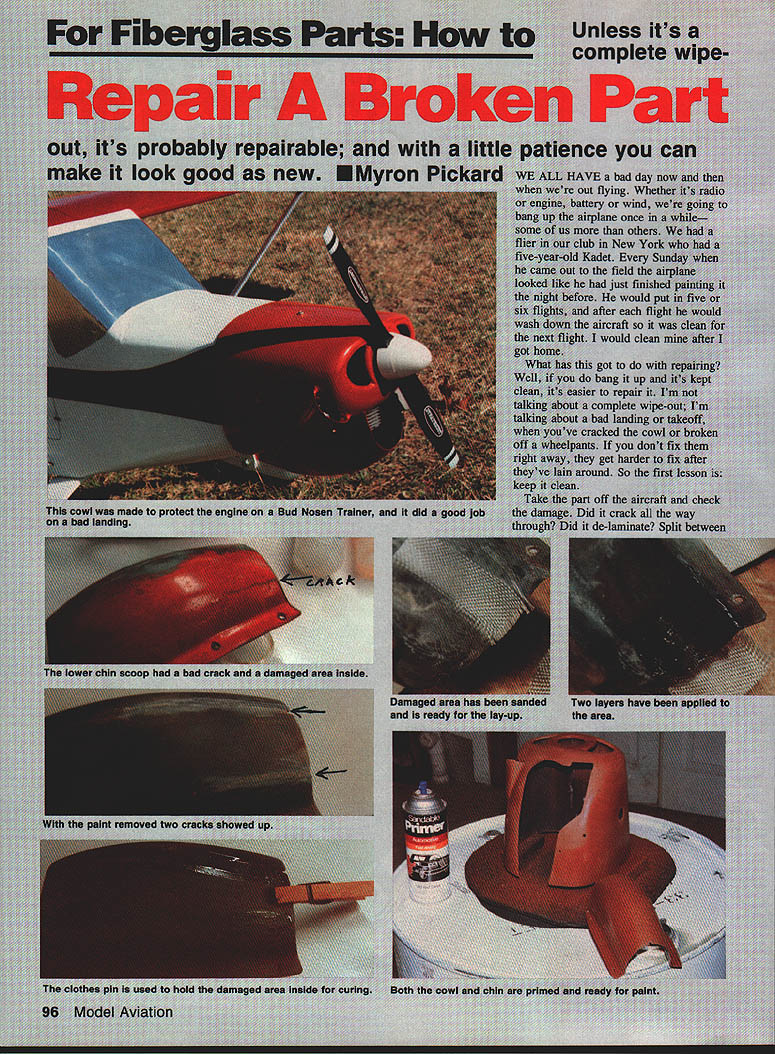
We all have a bad day now and then when we're out flying. Whether it's radio or engine, battery or wind, we're going to bang up the airplane once in a while—some of us more than others. I remember a flier in our New York club who had a five‑year‑old Kader. Every Sunday when he came out to the field the airplane looked as if he'd just finished painting it the night before. He would fly several times, then wash the aircraft so it was clean for the next flight. If you keep it clean, it's easier to repair.
First lesson: keep the damaged parts clean and repair them promptly. If you leave broken parts lying around, they get harder to fix.
Assessment
- Remove the part from the aircraft and inspect the damage.
- Determine whether it cracked completely, delaminated, or split between layers.
- Check whether you can access the damage from the inside.
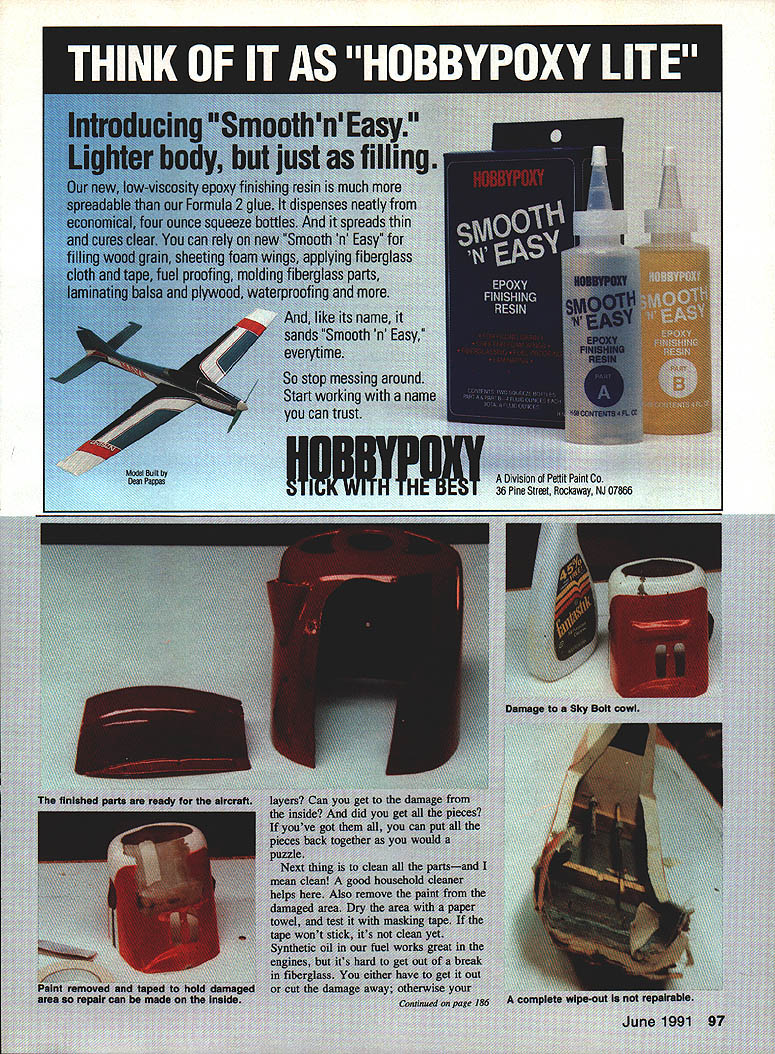
- Collect all fragments. If you have all the pieces, you can fit them together like a puzzle.
Cleaning and preparation
- Clean the parts thoroughly with a good household cleaner.
- Remove paint from the damaged area.
- Dry the area with a paper towel, then test it with masking tape: if the tape won't stick, the surface is not clean enough.
- Beware of oil contamination. Synthetic oil from fuel helps engines but is difficult to remove from fiberglass. Resins will not bond to oil‑soaked areas—either remove the oil completely or cut away the contaminated section.
- Sand the damaged area inside and out until it's rough and clean.
- Tape the parts together with masking tape to restore the original shape before laying up.
Repair procedure (step‑by‑step)
- Fit the pieces and tape them to get the shape back.
- Make a small lay‑up on the inside of the repair and let it cure.
- After the inside lay‑up cures, sand the area to roughen the new lay‑up and feather the edges for the next layer.
- Depending on the damage and the stress on the area, apply additional internal layers (three layers is often sufficient for the inside).
- Once the inside is cured and smooth, remove the tape on the outside and resand the damaged area.
- Apply a small lay‑up of lightweight cloth over the outside damage and let it cure.
- Give the outside lay‑up a light sanding to feather the edges.
- Apply another coat of resin only and let it cure. When hard, sand the area again. If you can see the cloth, apply another coat of resin rather than sanding through it.
Finishing tips
- Do not sand into the lightweight cloth covering the repair.
- It will take time to get the repaired section to match the original finish; a good repair is partly patience and partly judgment.
- Clean work and proper layering will result in a strong, long‑lasting repair.
It's all in the eye of the beholder—take your time and the repaired part can look and perform like new.
Transcribed from original scans by AI. Minor OCR errors may remain.

