
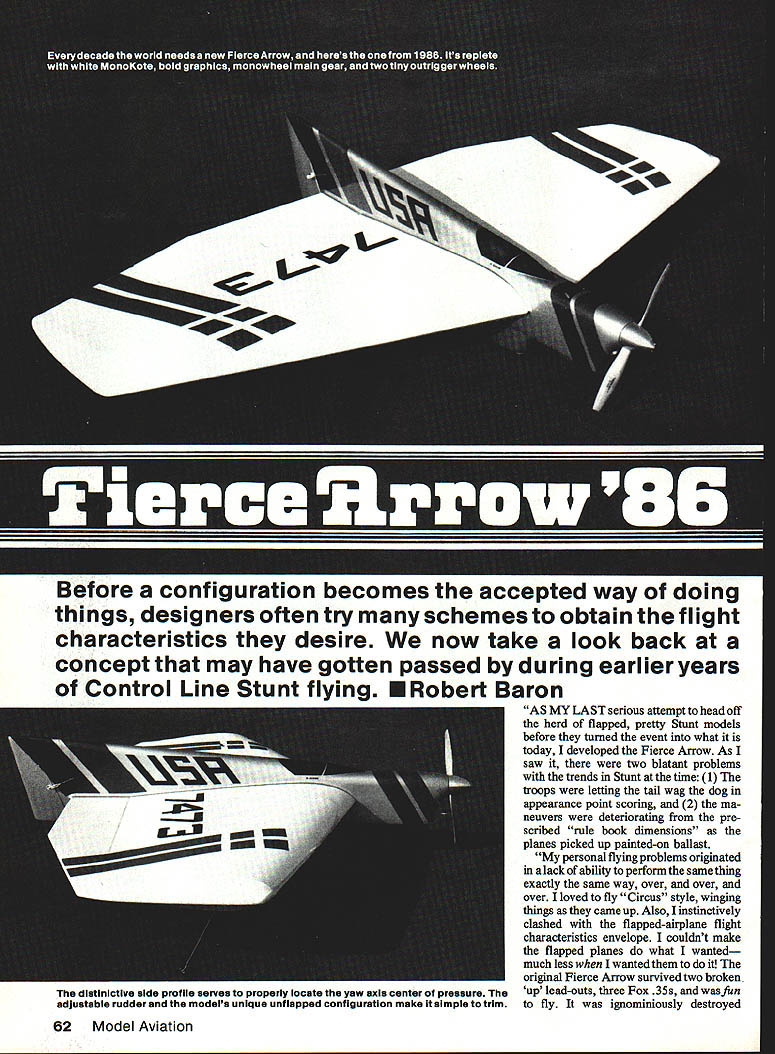
Fierce Arrow '86
Before a configuration becomes the accepted way of doing things, designers often try many schemes to obtain the flight characteristics they desire. We now take a look back at a concept that may have gotten passed by during earlier years of Control Line Stunt flying. — Robert Baron
"As my last serious attempt to head off the herd of flapped, pretty Stunt models before they turned the event into what it is today, I developed the Fierce Arrow. As I saw it, there were two blatant problems with the trends in Stunt at the time:
- The troops were letting the tail wag the dog in appearance point scoring, and
- The maneuvers were deteriorating from the prescribed 'rule book dimensions' as the planes picked up painted-on ballast.
My personal flying problems originated in a lack of ability to perform the same thing exactly the same way, over and over and over. I loved to fly 'Circus' style, winging things as they came up. Also, I instinctively clashed with the flapped-airplane flight characteristics envelope. I couldn't make the flapped planes do what I wanted—much less when I wanted them to do it! The original Fierce Arrow survived two broken-up lead-outs, three Fox .35s, and was fun to fly. It was ignominiously destroyed."
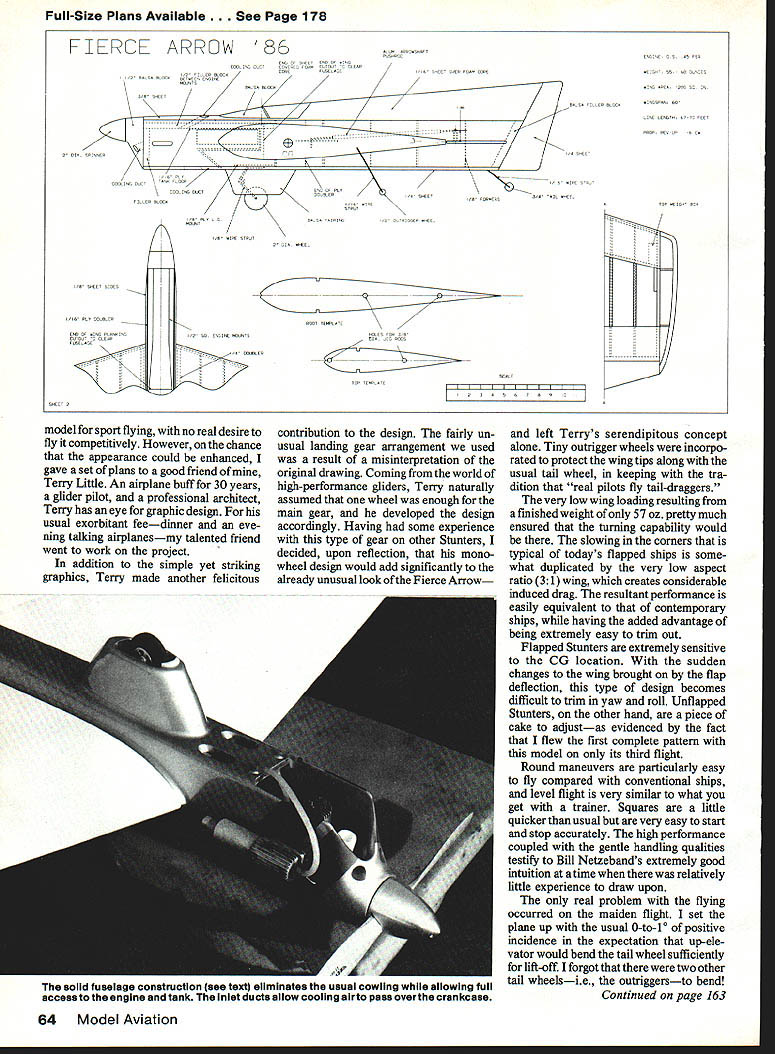
Designed by
- Bill Netzeband
Drawn by
- Robert Baron
You read about that in "Control Line Capers," didn't you?
"The Half Fast .15-powered FAs (second-generation Fierce Arrows) were calculated using better equations, and they turned out to be more stable than the larger original. When Bob Baron asked for a Fierce Arrow capable of using the O.S. .45 FSR, my 1986 design data said it should enclose at least 1,600 sq. in. Because Bob wanted to pilot his Volvo from inside, we compromised on a smaller, 1,200-sq.-in. version. I finally got to see it fly at the end of February, on a cold, blustery day when sane folks were indoors. It is still spectacular in flight, and an armful on the ground. I may have to build one for myself."
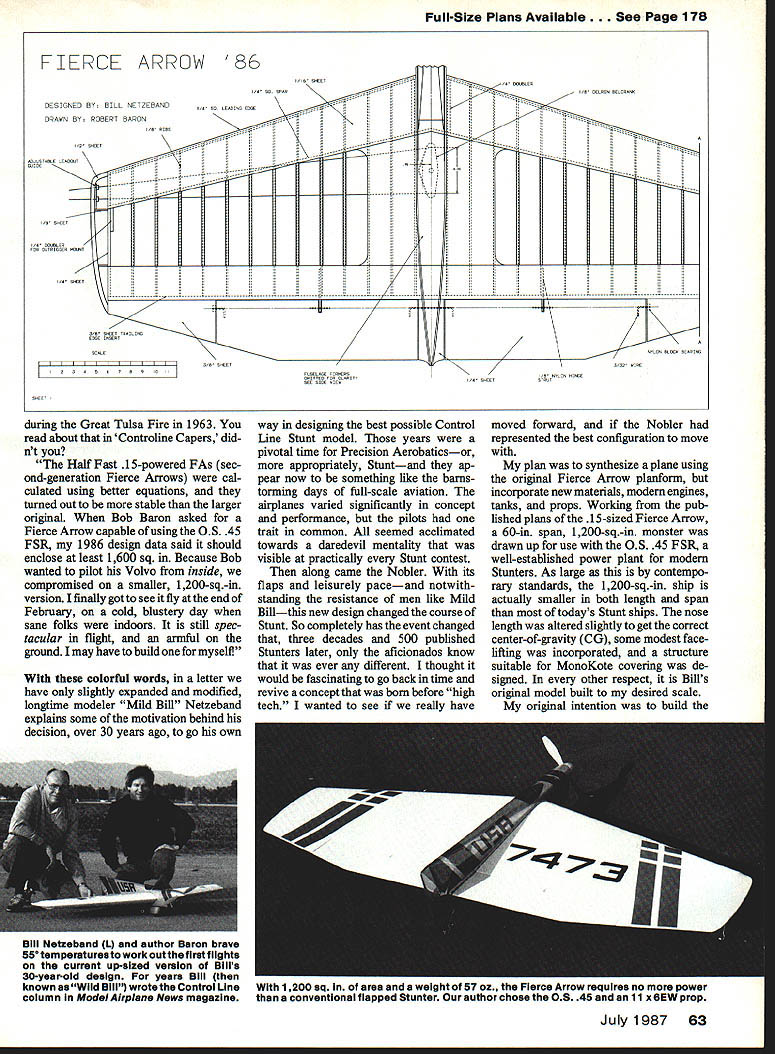
With these colorful words, in a letter we have only slightly expanded and modified, longtime modeler "Wild Bill" Netzeband explains some of the motivation behind his decision, over 30 years ago, to go his own way in designing the best possible Control Line Stunt model. Those years were a pivotal time for Precision Aerobatics—or, more appropriately, Stunt—and they appear now to be something like the barnstorming days of full-scale aviation. The airplanes varied significantly in concept and performance, but the pilots had one trait in common: all seemed acclimated toward a daredevil mentality that was visible at practically every Stunt contest.
Then along came the Nobler. With its flaps and leisurely pace—and notwithstanding the resistance of men like Wild Bill—this new design changed the course of Stunt. So completely has the event changed that, three decades and 500 published Stunters later, only the aficionados know that it was ever any different. I thought it would be fascinating to go back in time and revive a concept that was born before "high tech." I wanted to see if we really have moved forward, and if the Nobler had represented the best configuration to move with.
My plan was to synthesize a plane using the original Fierce Arrow planform, but incorporate new materials, modern engines, tanks, and props. Working from the published plans of the 1.5-sized Fierce Arrow, a 60-in. span, 1,200-sq.-in. monster was drawn up for use with the O.S. .45 FSR, a well-established power plant for modern Stunters. As large as this is by contemporary standards, the 1,200-sq.-in. ship is actually smaller in both length and span than most of today's Stunt ships. The nose length was altered slightly to get the correct center-of-gravity (CG); some modest facelifting was incorporated, and a structure suitable for MonoKote covering was designed. In every other respect, it is Bill's original model built to my desired scale.
My original intention was to build the model for sport flying—no real desire to fly competitively. However, the chance appearance could be enhanced, so I gave a set of plans to good friend Terry Little. An airplane buff, 30 years a glider pilot and professional architect, Terry has an eye for graphic design (and the usual exorbitant fee!). One evening, talking airplanes, my talented friend went to work on the project. In addition to simple yet striking graphics, Terry made another felicitous contribution to the design—fairly unusual.
The fairly unusual landing gear arrangement we used was a result of a misinterpretation of the original drawing. Coming from the world of high-performance gliders, Terry naturally assumed that one wheel was enough for the main gear, and he developed the design accordingly. Having had some experience with this type of gear on other Stunters, I decided, upon reflection, that his monowheel design would add significantly to the already unusual look of the Fierce Arrow—and left Terry's serendipitous concept alone. Tiny outrigger wheels were incorporated to protect the wing tips along with the usual tail wheel, in keeping with the tradition that "real pilots fly tail-draggers."
The very low wing loading resulting from a finished weight of only 57 oz. pretty much insured that the turning capability would be there. The slowing in the corners that is typical of today's flapped ships is somewhat duplicated by the very low aspect ratio (3:1) wing, which creates considerable induced drag. The resultant performance is easily equivalent to that of contemporary ships, while having the added advantage of being extremely easy to trim out.
Flapped Stunters are extremely sensitive to the CG location. With the sudden changes to the wing brought on by the flap deflection, this type of design becomes difficult to trim in yaw and roll. Unflapped Stunters, on the other hand, are a piece of cake to adjust—as evidenced by the fact that I flew the first complete pattern with this model on only its third flight.
Round maneuvers are particularly easy to fly compared with conventional ships, and level flight is very similar to what you get with a trainer. Squares are a little quicker than usual but are very easy to start and stop accurately. The high performance coupled with the gentle handling qualities testify to Bill Netzeband's extremely good intuition at a time when there was relatively little experience to draw upon.
The only real problem with the flying occurred on the maiden flight. I set the plane up with the usual 0° to 1° of positive incidence in the expectation that up-elevator would bend the tail well enough for lift-off. I forgot that there were two other tail wheels—i.e., the outriggers—to bend! The first takeoff consumed two laps before full up-elevons bent all three struts and the ship leaped into a vertical takeoff three feet off the ground. Once my heart stopped pounding, I began to realize just how easily this model flies. By experience, be careful to set up the gear exactly as shown on the plans—unless you want a 1,200-sq.-in., fan-powered car.
Building
For the most part, the Fierce Arrow '86 uses conventional building techniques. I highly recommend the method of assembling the wing on 3/16-in.-dia. steel rods, as pioneered by Al Rabe. There is no finer way to ensure accurate, warp-free construction, and the Stunt community is indebted to Al for this significant contribution.
The holes in the rib templates are in the only practical location, given the extreme taper of the wing, but are still sufficiently separated to ensure a straight wing. Slide the ribs onto the tubes, prop the steel rods so that they are parallel, and build the wing as you would any other one. Note that 1/8-in. ribs are used to help cope with the extreme taper of the wing when carving the ribs between the root and tip templates.
After sheeting the wing leading and trailing edges, glue on the cap strips. Remove the rods by turning them in a hand drill while pulling them out the end of the wing. This will prevent damage to any of the ribs during removal. Install the bellcrank, pushrod, and lead-outs, and complete the center-section planking.
Two other areas of construction are somewhat unique to this design:
- Top block: The top block undergoes a very unusual transition from the cross section of the canopy to that of the rudder. A more conventional approach of a 3/4-in. top block with a 1/4-in. sheet rudder would have made the fuselage graphics difficult to execute. To avoid a heavy, difficult carve from solid wood, the top block was formed first in foam. Make templates of the canopy and rudder cross sections together with the bottom, undercut the 1/8-in. templates and tack them onto the foam. Sand the foam to the contour indicated by the templates. Soak 1/16-in. sheeting with ammonia-water and apply it to the foam with spray-on contact cement. Wrap everything with an Ace bandage and leave overnight to dry. Remove the templates, and glue the top block to the fuselage.
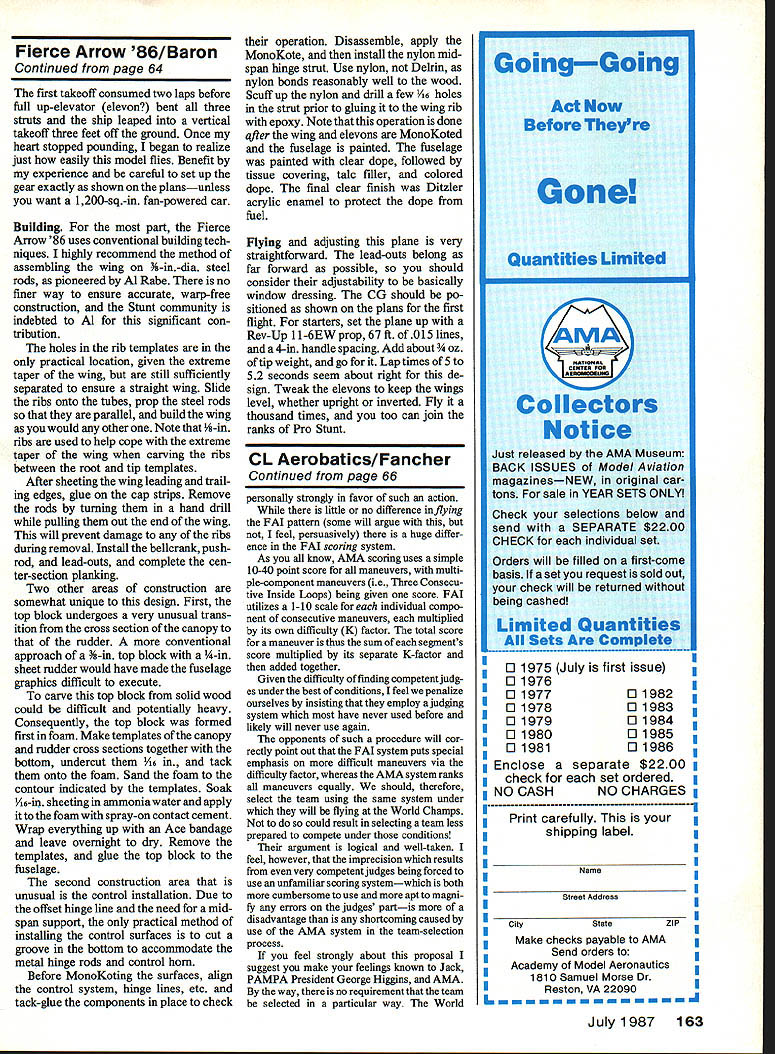
- Control installation: Due to the offset hinge line and the need for a mid-span hinge support, the only practical method of installing the control surfaces is to cut a groove in the bottom to accommodate the metal hinge rods and control horns. Before MonoKoting the surfaces, align the control system, hinge lines, etc., and tack-glue the components in place to check their operation. Disassemble, apply the MonoKote, and then install the nylon mid-span hinge strut. Use nylon, not Delrin, as nylon bonds reasonably well to the wood. Scuff up the nylon and drill a few 1/16-in. holes in the strut prior to gluing it to the wing rib with epoxy. Note that this operation is done after the wing and elevons are MonoKoted and the fuselage is painted. The fuselage was painted with clear dope, followed by tissue covering, flat filler, and colored dope. The final clear finish was Ditzler acrylic enamel to protect the dope from fuel.
Flying and adjusting
Flying and adjusting this plane is very straightforward. The lead-outs belong as far forward as possible, so you should consider their adjustability to be basically window dressing. The CG should be positioned as shown on the plans for the first flight.
For starters:
- Prop: Rev-Up 11-6E W
- Lines: 67 ft. of .051
- Handle spacing: 4 in.
- Tip weight: add about 3/4 oz.
Lap times of 5 to 5.2 seconds seem about right for this design. Tweak the elevons to keep the wings level, whether upright or inverted. Fly it a thousand times, and you too can join the ranks of Pro Stunt.
Transcribed from original scans by AI. Minor OCR errors may remain.

