
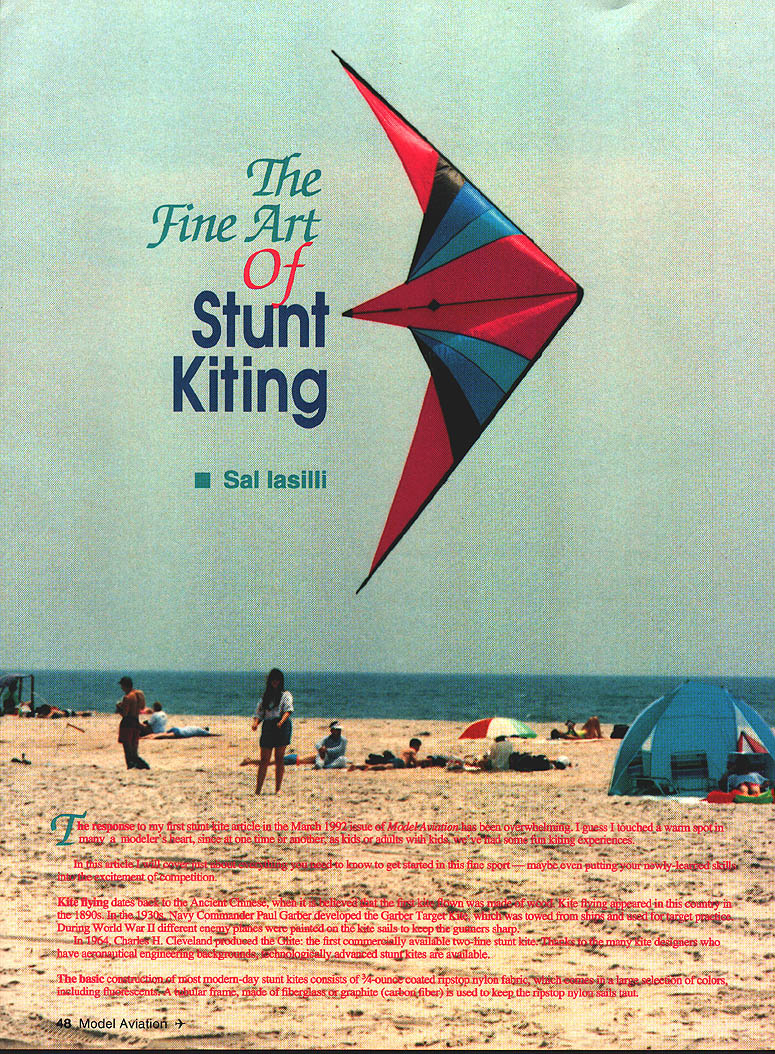
The Fine Art of Stunt Kiting
Sal Iasilli
The response to my first stunt-kite article in the March 1992 issue of Model Aviation was overwhelming. I guess I touched a warm spot in many a modeler's heart, since at one time or another—whether as kids or adults with kids—we've all had some fun kiting experiences.
In this article I cover just about everything you need to know to get started in this fine sport, including tips that may help you progress to competition.
A Brief History
- Kite flying dates back to ancient China, when the first kites were believed to be made of wood.
- Kite flying arrived in the United States in the 1890s.
- In the 1930s, Navy Commander Paul Garber developed the Garber Target Kite, towed from ships for gunnery practice; enemy planes were painted on kite sails to keep gunners sharp.
- In 1964, Charles H. Cleveland produced the Chute, the first commercially available two-line stunt kite.
- Thanks to many kite designers with aeronautical backgrounds, technologically advanced stunt kites are now available.
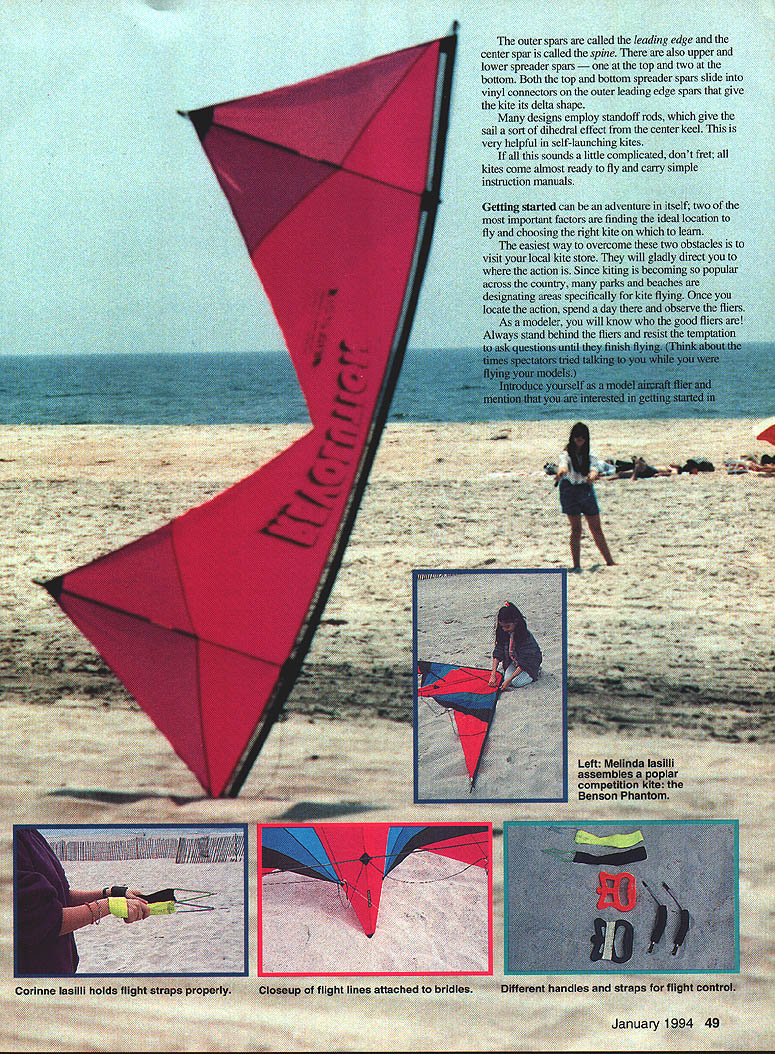
Construction and Materials
Most modern stunt kites are built from:
- 3/4-ounce coated ripstop nylon fabric (available in many colors, including fluorescent).
- A tubular frame made of fiberglass or graphite (carbon fiber) to keep the sails taut.
Frame nomenclature and parts:
- Outer spars: leading edge.
- Center spar: spine.
- Upper and lower spreader spars: one at the top, two at the bottom; these slide into vinyl connectors on the leading edges to form the delta shape.
- Standoff rods: used on many designs to give the sail a dihedral effect from the center keel; helpful for self-launching kites.
Most kites come almost ready to fly and include simple instruction manuals.
Getting Started: Location and Choosing a Kite
Two of the most important factors when starting are finding an ideal flying location and choosing the right beginner kite.
- Visit a local kite store. They can point you to active flying sites and recommend equipment.
- Many parks and beaches now designate areas specifically for kite flying. Spend a day observing experienced fliers to learn location-specific tips.
- As a modeler, you can usually spot the good fliers—stand behind them and wait until they finish a flight before asking questions. Introduce yourself, mention your interest, and offer a compliment—kite fliers are friendly and appreciate positive feedback.
- You might be offered a chance to try flying someone’s kite or find a used beginner kite for sale.
Recommended beginner kite characteristics:
- Wingspan: 7 to 8.5 feet. Smaller 4–6-foot kites fly faster and are less stable for novices.
- Frame: fiberglass is recommended for durability. It’s heavier and requires more wind than graphite, but will better withstand the crashes that come with learning.
Accessories and Lines
Basic accessories required:
- Handles:
- Molded plastic handles are economical and designed for easy line adjustments; excess line wraps around the handle and secures to an anchor molded into it. These handles can also be used for winding and storage.
- Padded handles and wrist straps are available for greater comfort when flying stronger wind conditions. Their trade-offs may include reduced line length adjustability and the possible need for a separate winder to take in and store lines.
- Lines:
- Spectra kite lines are the preferred choice for stunt kite fliers due to low weight, low friction, and minimal stretch.
- Lines come in a variety of strengths and lengths; most beginner setups use two 150-foot spools.
- Manufacturers will recommend minimum and maximum line strengths; 135–150 pounds is a good starting strength for beginners.
- Hardware:
- Two snap swivels (as used in fishing tackle) are needed to attach the flying lines to the kite.
- Sleeving: knotting lines to swivels requires sleeving the lines with about three inches of Dacron to retain maximum line strength at the knots. Some lines come presleeved, or you can buy a sleeving kit.
Bridle and attachment:
- The lines attached to the leading edges and spine are called the bridle; it keeps the kite at the correct angle relative to the wind.
- There are two rings on the bridle where the snap swivels from the flying lines attach.
- Bridles are preadjusted from the factory for normal wind conditions but can be adjusted for light or strong wind. Small colored marks on the bridle lines indicate the starting point (normally at the attachment rings).
- Do not alter the bridle until you learn basic flying technique and fully understand the adjustment procedures in your kite manual.
Launching and Basic Flying Technique
Suggested conditions and site selection:
- Start in wide-open conditions with wind around 8–12 mph. Too little wind makes the kite sluggish; too much wind makes it hard to control.
- Avoid flying near tall trees, hills, or buildings that create turbulent wind. If these obstacles are present, fly far downwind where the wind may smooth out.
- Beaches are often ideal: flat and free of obstructions.
Preflight and setup:
- Make sure the two flying lines are the same length.
- Set up the kite and lines in the center of the wind direction (a small streamer works as a windsock). This is the center of the flight envelope.
- Imagine a giant clock: top is 12, left is 9, bottom is 6, and right is 3. As long as you keep the kite within that circular flight envelope, it will fly; go beyond and it will descend.
Launching procedure:
- Have a helper assist with launching and act as a safety observer.
- Stand with your back to the wind. The helper should stand behind the kite facing the wind, holding one corner and the leading edge at shoulder height.
- Handles are often color-coded: black for the left hand, red for the right.
- With the lines off the ground and taut, the helper gives the kite a gentle tug up into the air while you pull the handles toward you and take a few steps forward until the lines are taut.
- A successful launch sends the kite skyward in a straight path, reaching about a 45° angle to the handles.
Basic control inputs:
- Small, smooth pulls on the right handle move the kite right; small pulls on the left move it left.
- Pulling both handles down slightly makes the kite climb.
- Pushing both handles forward makes the kite descend.
- Practice small, smooth movements until they become second nature.
- Gradually move farther out in the flight envelope until the kite reaches the edge and begins to descend; this allows a controlled, gentle landing on the kite's wingtip.
After a few practice sessions you'll gain confidence, fly lower, and progress to spins and power dives. Instructional videos can accelerate your learning.
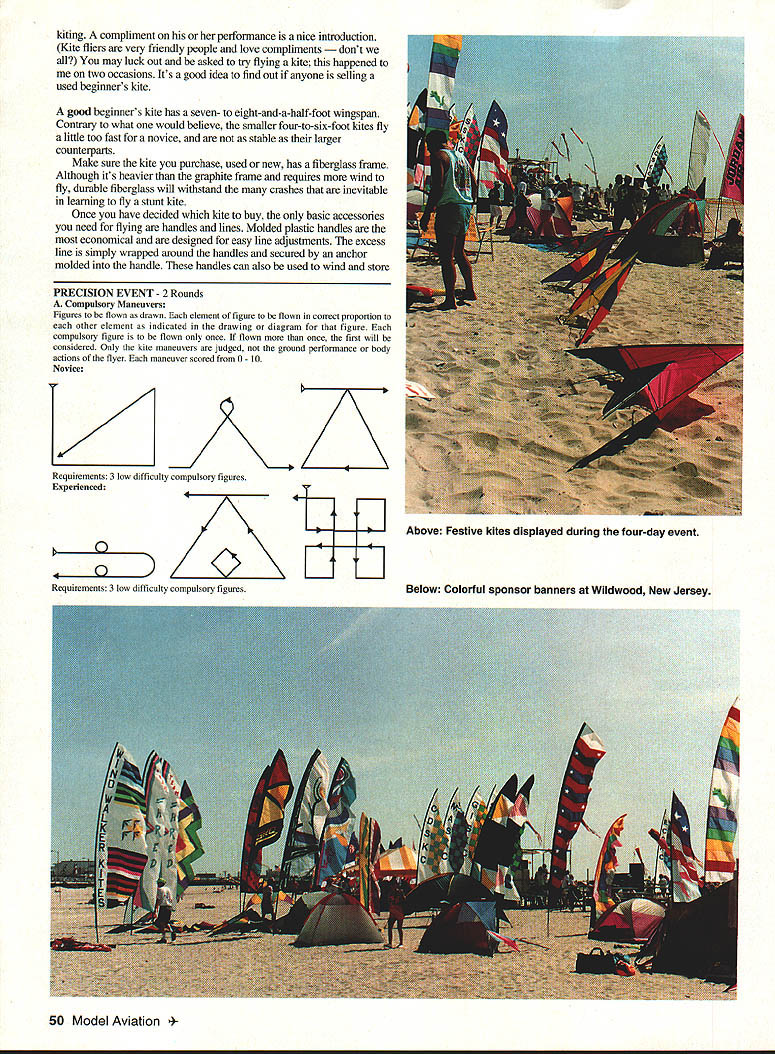
Precision Event — 2 Rounds
A. Compulsory Maneuvers
- Figures are to be flown as drawn; each element of a figure must be in correct proportion to the other elements.
- Each compulsory figure is to be flown only once. If flown more than once, only the first will be considered.
- Only the kite maneuvers are judged—not the ground performance or body actions of the flyer.
- Each maneuver is scored from 0–10.
Requirements:
- Novice: 3 low-difficulty compulsory figures.
- Experienced: 3 low-difficulty compulsory figures.
Competition: Events and Scoring
- Stunt kite competition draws top fliers nationally and internationally.
- Major events attract fliers from as far away as Japan and Europe.
- Events include Individual Precision, Ballet, Innovative, and Quad-line Ballet. Team events include Precision and Ballet.
- Individual Precision is demanding: pilots perform three compulsory maneuvers and a freestyle routine lasting from 30 seconds to 2 minutes. Judges score each maneuver from 0–10.
- Freestyle is scored in two categories:
- Artistic: content, variety, creativity, number of different maneuvers, and smoothness of flow (0–10).
- Technical: accuracy, control, timing, complexity, and spacing (0–10).
Attending major competitions lets you see top performers and examine the equipment champion fliers use.
Notable Kites and Suppliers
- Benson Phantom
- Designed in England; popular on contest circuits in Europe and the U.S.
- Distributed by Robbie Sugarman, Air Circus, West Shore Road, Mill Neck, NY 11765; Tel.: (516) 922-3508.
- Big Brother
- Designed in France; a premium kite favored by competitive fliers.
- Distributed by Susan Badortoff, P.O. Box 450459, Sunrise, FL 33345; Tel.: (305) 736-7725.
- Susan Badortoff is a national champion and editor of Stunt Kite Quarterly.
- Revolution kite
- Flown with four lines (quad-line category); performance compared to a helicopter.
- Designed and manufactured by Revolution Enterprises, Inc., 3089-A Clairemont Drive #171, San Diego, CA 92117; Tel.: (619) 554-1106.
- Comes with a free instructional video.
Final Thoughts
Stunt kiting is rapidly growing, with hundreds of new participants each year. Competitions are fun to attend, and many families find the sport addictive. If you’re thinking of trying stunt kite flying, go to a local event—observe, ask questions, and you’ll likely get hooked.
Transcribed from original scans by AI. Minor OCR errors may remain.

