

The Finishing Touch
With so many materials and methods to choose from—which way—and how do you go?
In the first of a series the author sheds some much-needed light on RC and CL considerations.
Fred Marks Photos by Bill McCaw
OVER THE PAST 30 years of model building, there have been many materials introduced for covering and finishing models. The most popular and easiest to finish at the time I became an active modeler was Silkspan (like tea-bag paper). For larger models, one used silk. Dope was the only finish used then. The period was 1948.
Up to that time, nitrate dope sufficed because models used either gasoline ignition or diesel engines, or were rubber powered. When Ray Arden introduced the glow plug engine in the late 1940's, the now familiar glow fuel containing alcohol and nitromethane came into being. Nitrate dope was no longer suitable so we began to use butyrate dope. Butyrate dope is used on full scale fabric-covered aircraft because it is fire resistant while nitrate dope is not. It has the virtue of being hot fuel proof, or more appropriately, heat and fuel resistant.
Modelers experimented with numerous paints that they thought might overcome the bad habits of dope. Those weaknesses include a tendency to shrink excessively, even continuing over a period of years; less than desired durability; fading pigmentation with time; general brittleness; the effort required to apply it; the objection of the family to the odor of dope; and the fact that it "blushes" if applied when there is high humidity. "Blushing" is the appearance of a milky whiteness in the pigmented dope that occurs as a result of trapped moisture from the air. Blushings can be overcome by the addition of retarder to the dope that slows its drying so that the moisture can escape.
While enamels and the like were suitable for boats and car models, they were too heavy to use on aircraft models. Many modelers think that polyester resin is new to the field of modeling. Not so; it was used on boats long ago but was just too heavy to use on aircraft models. In the early 1960's Pettit Paints introduced Hobbypoxy; it was the first of the epoxy enamels. They are characterized by the use of a catalyst that caused the basic material to "cure" or harden as opposed to the use of solvents that must evaporate from dope or other paints. Thus epoxy enamels do not shrink upon curing. One could also purchase epoxy enamels at the local hardware store. Although there is no inherent reason for dope to contain low pigmentation, most epoxy or automotive paints contain greater pigmentation and thus affect quicker coverage.
The epoxy paints then, and to some extent now, suffer from one particular problem—compatibility. Before the final finish can be applied to any model other than the molded fiberglass or plastic, the structure and covering for the model must be filled to provide a smooth base for the final finish. Pigmented finishes are entirely too heavy and expensive to use for that purpose. Thus, filler materials that are different from the finish material must be used and this leads to problems with compatibility.
An early experience with epoxy enamels in 1963 will illustrate the point. A Falcon 56 was covered with silk as usual and the weave was sealed using butyrate dope as instructed and the required time was permitted to elapse before the next step, application of the filler. The filler or primer used with most epoxies is akin to automobile primer so it is heavy. The filler was so hard to sand that it was unbelievable; but it provided a beautifully smooth base. We should also note that the Falcon 56 has an open wing structure (vs. being sheeted) and the job of sanding was extremely difficult there.
The base coat of epoxy paint was applied and permitted to harden thoroughly before we masked off for trim and applied the trim coat. Imagine the chagrin when the entire base color and the filler came up with the tape. We tried the procedure once... more before giving up. Obviously more work was needed on epoxies but they did not fade from use because people persevered. I do recall remarks about having "a beautifully shiny 400 grit finish" because they also took quite some time to cure and seemed to attract dust.
While the manufacturers of epoxy paints worked to solve such problems, modelers began to discover acrylic lacquer and acrylic enamels used for automobiles. These handle quite like dope and are much less expensive. The acrylic lacquer has an even greater tendency to brittleness to the extent that it is imperative that acrylic lacquers have a plasticizer added. Acrylic enamels, on the other hand, are too flexible and soft for hand rubbing unless a rather expensive hardener is added to them. The acrylics are particularly easy to handle with a spray gun and produce a truly beautiful finish with few pigmented coats.
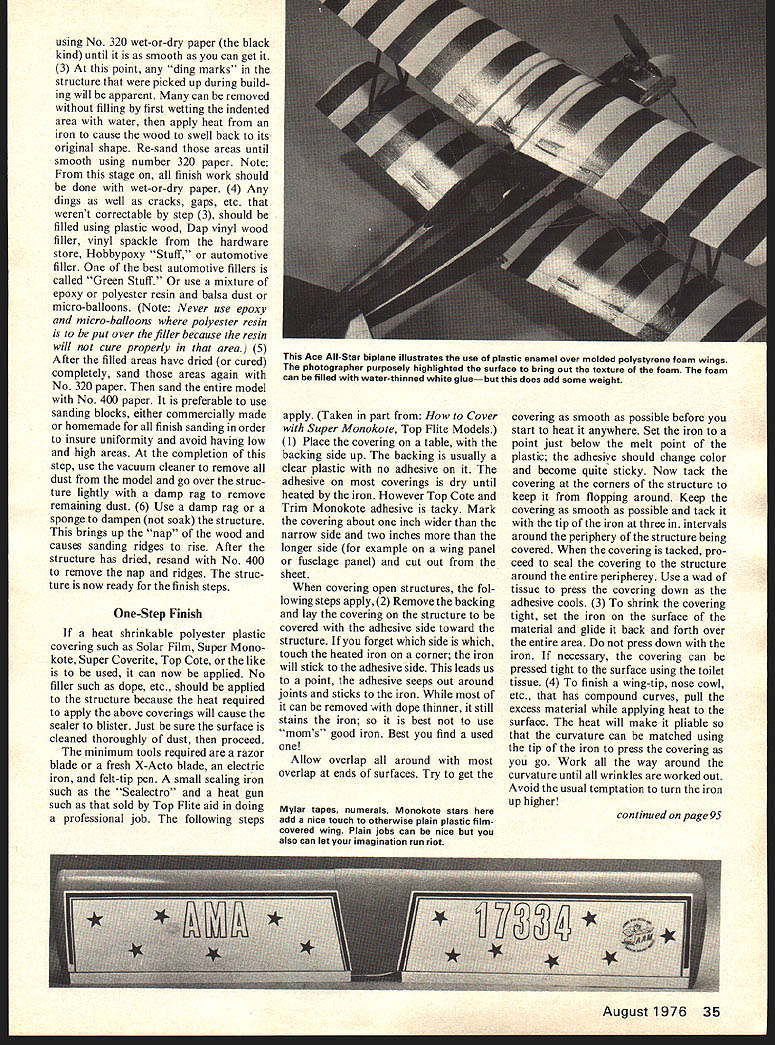
At the same time, plastic covering materials such as Monokote almost seemed to sweep the field. For a quick covering that requires a minimum of effort to produce a pretty model, they couldn't be beat. However, they do have the look of plastic rather than the deep, rich appearance of a paint finish. They are difficult to apply to Most of the preceding are intended for use on wood, fiberglass, or plastic models. Molded polystyrene foam models, primarily aircraft models, have become quite popular in the smaller sizes. They will not accept any of the materials that contain solvent because solvents also dissolve the foam. Thus, it is either necessary to seal the foam with a base coat of thinned white glue, epoxy or enamel or simply to apply a light coat of enamel designed for plastic.
All this leads us to the point that the beginner is faced with a confusing array of possibilities for finishing a model. There are more experienced modelers faced with the same thing and a way to determine the usefulness of the numerous "new" paints and coverings that crop up each year promising to overcome the weakness of all previous materials.
How to Select and Use Finishing Materials
Over my own modeling career I've used just about every technique discussed earlier. Some worked well, others not. Those that I've not used, I have seen used by others and know them well. I have built some models that were well done (at least I thought so) and others that my colleagues charged were obviously done with a frozen mop! There is one thing I can tell the reader for an absolute fact: the quality of a finished model is 90 percent a function of the amount of effort that is put into the job. Those who have learned the hardware can tell you what is and isn't compatible and how to do the job but in the ultimate, it is almost entirely a function of the patience and willingness to do the work. To illustrate the point: one of the most beautifully finished models I've ever seen was the "Viper" by Dario Brisighelli that won the "best finish" award at the 1972 Toledo show. It was a relatively simple finish — the model was all balsa sheet so the sealer and filler was polyester resin; very simple. However, the finish consisted of (a) ten coats of white dope as the base, (b) ten coats of each trim color dope (orange and brown), followed by (c) ten coats of clear dope. The model was sanded with number 600 dry paper between each coat, then wiped down with Prep-Sol between coats, and the final clear was hand rubbed and waxed. Are you willing to put that kind of effort into it? Not many would be; so we look for simpler ways. There are simpler ways but few, if any, will produce that kind of finish.
What, then, is best for your needs? That depends on the model. We will first tackle those that I suspect most of our readers will encounter. As space permits, others will be covered and we shall present more on film in later issues. Having done this you will be better able to make a more appropriate selection for your basic needs.
Beginning of the Finish
A good finish, whether it is the simplest or the most complex, starts with preparation of the surface. We shall assume that you have a well constructed model that is neither warped nor poorly put together. A poorly prepared surface always shows up in the final finish; errors cannot be covered up with paint. The procedure which follows pertains specifically to wood models. Much of that which follows naturally is not required for finishing fiberglass or plastic models. As mentioned earlier, stuccoed models required a different technique.
- After all blocks and structure have been carved and sanded smooth, the model is considered ready to finish. Rough sand the entire model using first No. 180 then No. 200 sandpaper. If you first find it necessary to "shape" the structure, use paper that is as coarse as No. 80, but gently!
- Sand the model all over again using finer grades, No. 320 and No. 400, and clean thoroughly with a soft brush and tack cloth.
- Fill any minor dents and depressions with a suitable filler; use thin coats and sand smooth.
- Apply the sealer-coat; this may be a light coat of dope, sanding sealer, epoxy or other suitable sealer. Allow to dry and sand lightly with No. 400 or finer.
- Apply the base coat. Use thin, even coats and allow to dry thoroughly between coats. Sand lightly between coats with No. 600 or finer if necessary.
- Apply trim colors and markings. Mask carefully, use light coats and allow to dry.
- Final coat — clear if desired. Sand and polish as required.
using No. 320 wet-or-dry paper (the black kind) until it is as smooth as you can get it.
(3) At this point, any "ding marks" in the structure that were picked up during building will be apparent. Many can be removed without filling by first wetting the indented area with water, then apply heat from an iron to cause the wood to swell back to its original shape. Re-sand those areas until smooth using number 320 paper. Note: From this stage on, all finish work should be done with wet-or-dry paper. (4) Any dings as well as cracks, gaps, etc. that weren't correctable by step (3), should be filled using Plastic Wood, Dap vinyl wood filler, vinyl spackle from the hardware store, Hobbypoxy "Stuff," or automotive filler. One of the best automotive fillers is called "Green Stuff." Or use a mixture of epoxy or polyester resin and balsa dust or micro-balloons. (Note: Never use epoxy and micro-balloons where polyester resin is to be put over the filler because the resin will not cure properly in that area.) (5) After the filled areas have dried (or cured) completely, sand those areas again with No. 320 paper. Then sand the entire model with No. 400 paper. It is preferable to use rubber sanding blocks, either commercially made or homemade for all finish sanding in order to insure uniformity and avoid having low and high areas. At the completion of this step, use the vacuum cleaner to remove all dust from the model and go over the structure lightly with a damp rag to remove remaining dust. (6) Use a damp rag or a sponge to dampen (not soak) the structure. This brings up the "nap" of the wood and causes sanding ridges to rise. After the structure has dried, resand with No. 400 to remove the nap and ridges. The structure is now ready for the finish steps.
One-Step Finish
If a heat shrinkable polyester plastic covering such as Solar Film, Super Monokote, Super Coverite, Top Cote, or the like is to be used, it can now be applied. No filler such as dope, etc., should be applied to the structure because the heat required to apply the above coverings will cause the filler to blister. Just be sure the surface is cleaned thoroughly of dust, then proceed.
The minimum tools required are a razor blade or a fresh X-Acto blade, an electric iron, and felt-tip pen. A small sealing iron such as the "Sealector" and a heat gun such as that sold by Top Flite aid in doing a professional job. The following steps apply. (Taken in part from: How to Cover with Super Monokote, Top Flite Models.)
(1) Place the covering on a table, with the backing side up. The backing is usually a clear plastic with no adhesive on it. The adhesive on most coverings is dry until heated by the iron. However Top Cote and Trim Monokote adhesive is tacky. Mark the covering about one inch wider than the narrow side and two inches more than the longer side (for example on a wing panel or fuselage panel) and cut out from the sheet.
When covering open structures, the following steps apply. (2) Remove the backing and lay the covering on the structure to be covered with the adhesive side toward the structure. If you forget which side is which, touch the heated iron on a corner; the iron will stick to the adhesive side. This leads us to a point, the adhesive seeps out around rivets and sticks to the iron. While most of it can be removed with dope thinner, it still stains the iron; so it is best not to use "mom's" good iron. Best to find a used one!
Allow overlap all around with most overlap at ends of surfaces. Try to get the covering as smooth as possible before you start to heat it anywhere. Set the iron to a point just below the melt point of the plastic; the adhesive should change color and become quite sticky. Now tack the covering at the corners of the structure to keep it from flopping around. Keep the covering as smooth as possible and tack it with the tip of the iron at three in. intervals across the periphery of the structure being covered. When the covering is tacked, proceed to seal the covering to the structure around the entire periphery. Use a wad of tissue to press the covering down as the adhesive cools. (3) To shrink the covering tight, set the iron on the surface of the material and glide it back and forth over the entire area. Do not press down with the iron. If necessary, the covering can be pressed tight to the structure using the toilet tissue. (4) To finish a wing-tip, nose cowl, etc., that has compound curves, pull the excess material while applying heat to the surface. The heat will make it pliable so that the curvature can be matched using the tip of the iron to press the covering as you go. Work all the way around the curvature until all wrinkles are worked out. Avoid the usual temptation to turn the iron up higher!
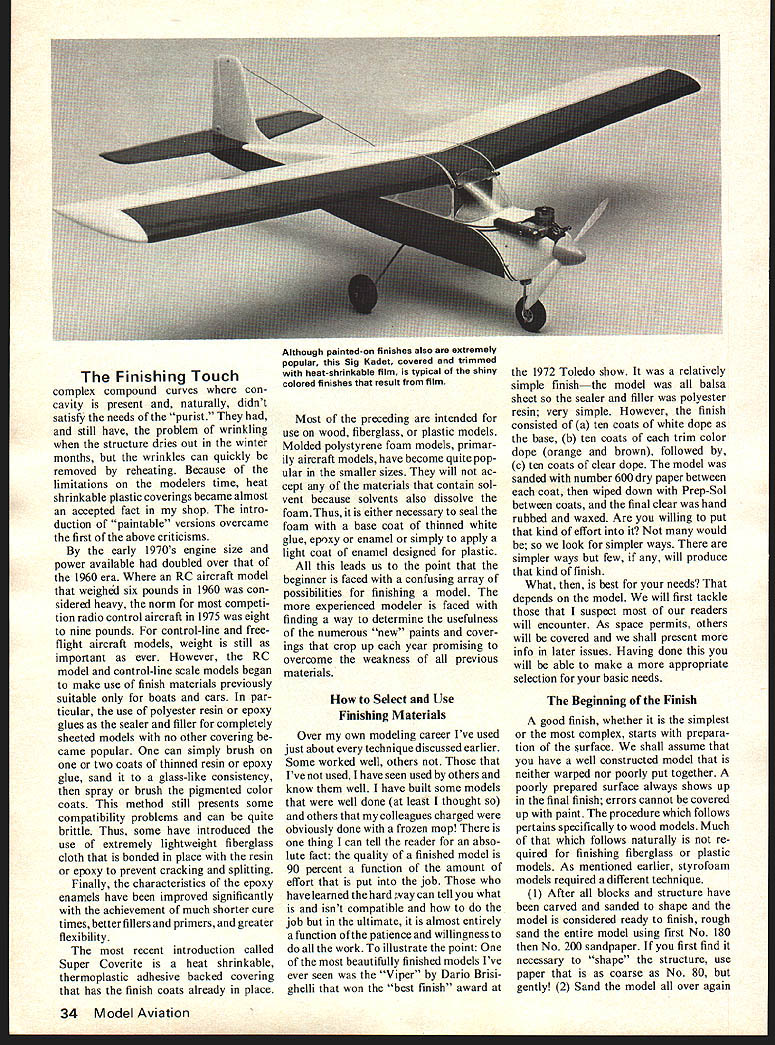
Mylar tapes, numerals, Monokote stars here add a nice touch to otherwise plain plastic film-covered wing. Plain jobs can be nice but you also can let your imagination run riot. (5) Lay out and cut the covering as for open structures. Lay the covering in place and work out every bit of air that you can from beneath the covering. Bond the covering in the center of the panel first and iron toward the edges of the panel, allowing air to escape from under the material as you go. This sounds easier than it really is — it is extremely difficult to avoid captured bubbles. When one occurs that you just can't get rid of, prick the bubble with a pin at the center and iron the air out. The heat gun does a better job here. Use the wad of tissue or a bit of cloth to work the air out and cause the covering to bond. Trim the edges of excess covering and seal those cut edges using the iron. The plastic coverings can be trimmed using other colors of the same covering, by using the sticky trim sheets, by using decals, or by using vinyl sheetings, etc. Where large areas over solid sheeting are to be trimmed, it is best to cut away the base covering and allow only a slight overlap of one-fourth inch or so. Trapped air bubbles are a real plague when placing trim over a base coat. Where that is the case, the base covering should be pricked with a pin throughout the area of overlap to permit the air to escape.
(Editor's Note: In the September issue, Mr. Marks continues his series on covering and finishes.)
Transcribed from original scans by AI. Minor OCR errors may remain.

