
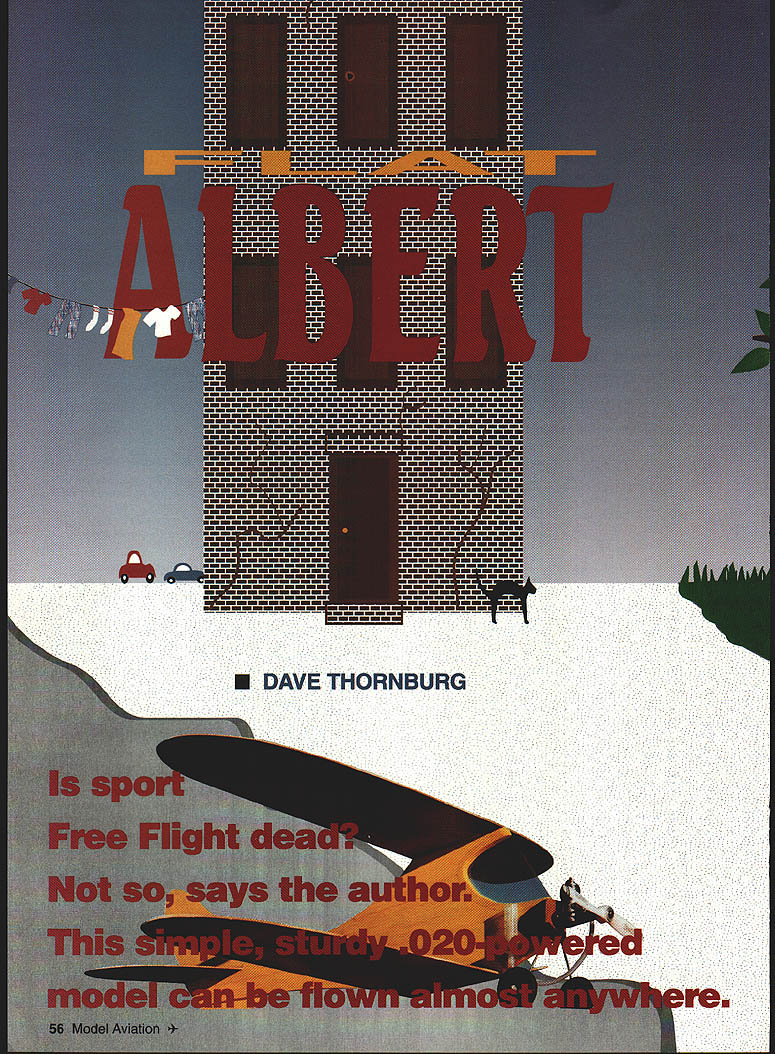
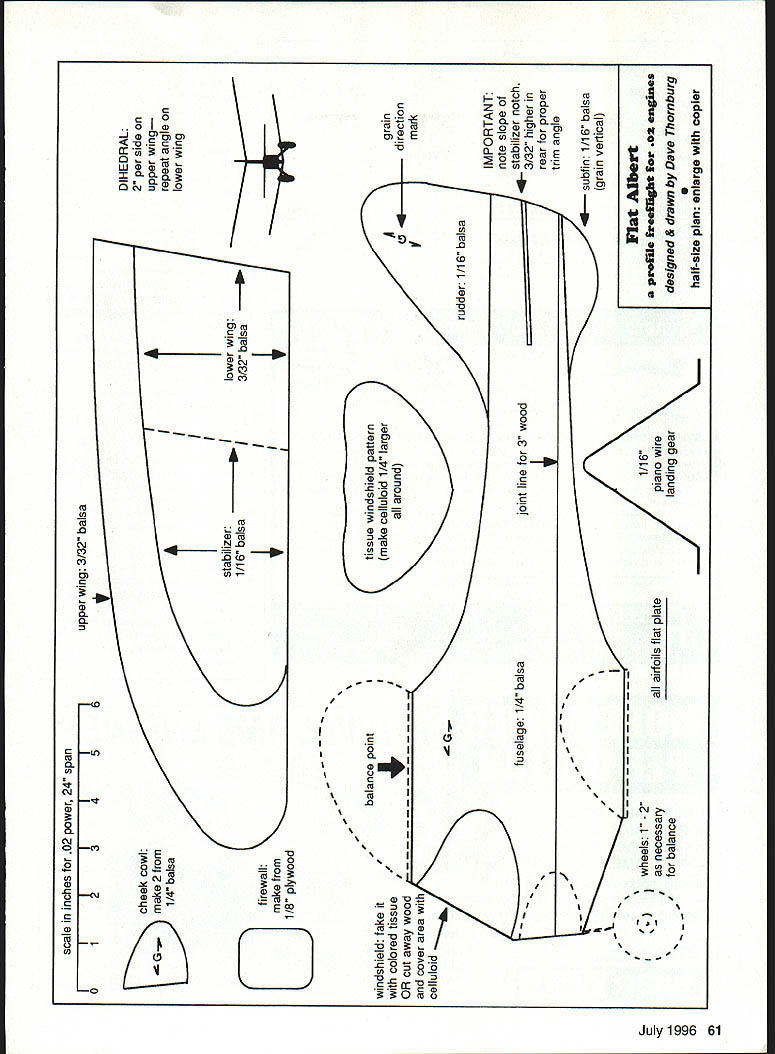

Flat Albert
by Dave Thornburg
Is Sport Free Flight dead? Not so, says the author.
This simple, sturdy, .020-powered model can be flown almost anywhere.
Joe Wagner's little Dakota Bipe, a popular kit of the 1950s, will always be the sport Free Flight biplane. So — do we really need another? I can't answer that. All I can say is that Flat Albert came to me in a flash while I was looking something up in the Britannica.
Suddenly I saw this funny-looking shape hit my head: something between a Hiperbipe and a Velie Monocoupe. Before it had a chance to fade, I whipped out a sheet of paper and sketched it. And here (with a few modifications) it is.
Sport Free Flight, so the story goes, is dead. No place left to fly. No holes left in America; every square inch of the country built up, fenced in, plowed under. Gotta put a radio in everything you build now. Put a radio in it, and join a club, and drive 40 miles to some private field so you can stand in line to fly.
Baloney.
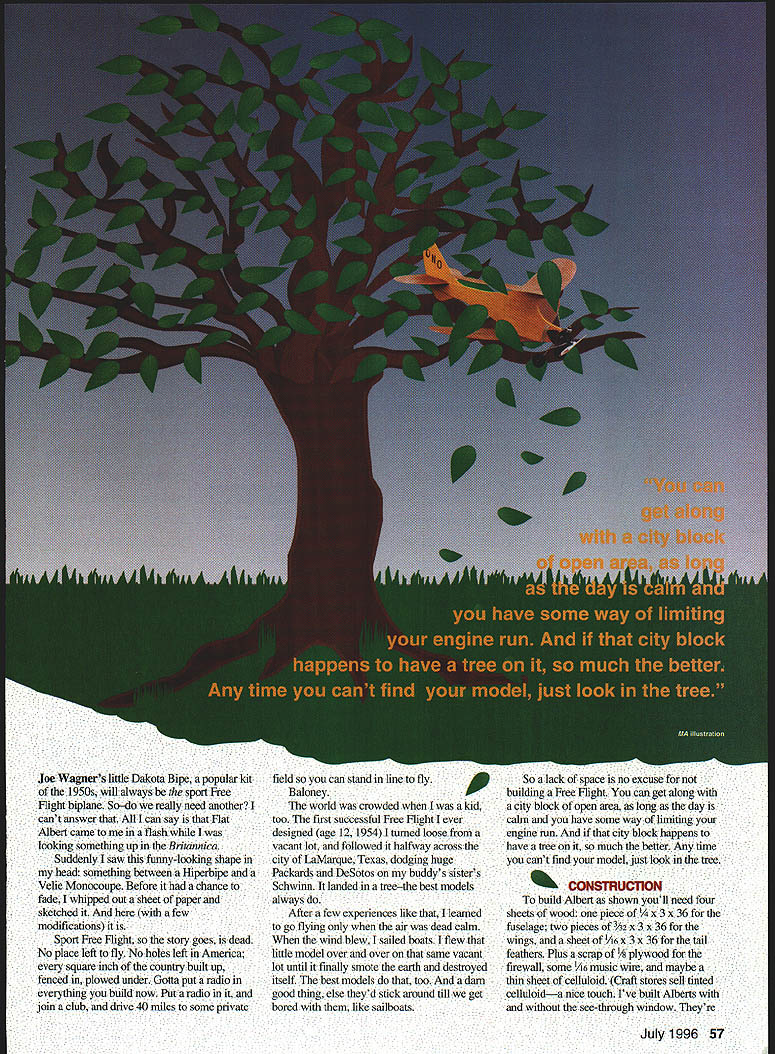
The world was crowded when I was a kid. The first successful Free Flight I ever designed (age 12, 1954) I turned loose from a vacant lot, and followed it halfway across the city of LaMarque, Texas, dodging huge Packards and DeSotos on my buddy's sister's Schwinn. It landed in a tree — the best models always did.
After a few experiences like that, I learned to go flying only when the air was dead calm. When the wind blew, I sailed boats. I flew the little model over and over on that same vacant lot until it finally smote the earth and destroyed itself. The best models do that, too. And a darn good thing, else they'd stick around till we got bored with them, like sailboats.
So lack of space is no excuse for not building a Free Flight. You can get along with a city block of open area, as long as the day is calm and you have some way of limiting your engine run. And if that city block happens to have a tree on it, so much the better. Any time you can't find your model, just look in the tree.
Construction
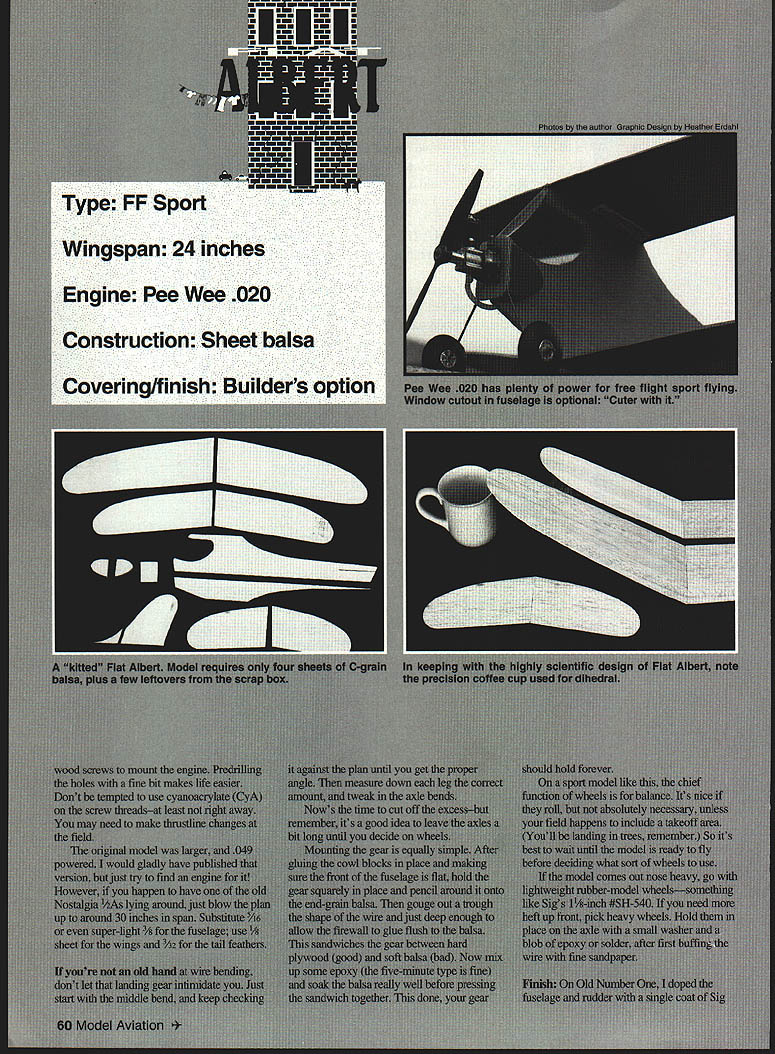
To build Albert as shown you'll need four sheets of wood:
- 1/4" x 3" x 36" for the fuselage
- Two pieces of 3/32" x 3" x 36" for the wings
- 1/16" x 3" x 36" for the tail feathers
- Scraps: 1/8" plywood for the firewall, some 1/16" music wire, and maybe a thin sheet of celluloid for the windshield
Craft stores sell tinted celluloid — a nice touch. I've built Alberts with and without the see-through window. They're simple and rugged.
Plan and materials notes
- Type: FF Sport
- Wingspan: 24 inches
- Engine: Pee Wee .020
- Construction: Sheet balsa
- Covering/finish: Builder's option
- Wheels: 1–2" (necessary for balance)
- Landing gear: 1/16" piano wire
- Firewall: 1/8" plywood
- Cheek cowl: make 2 from 1/4" balsa
- Stabilizer and rudder: 1/16" balsa (grain direction noted on plan)
- Upper and lower wings: 3/32" balsa, flat plate airfoils
- Dihedral: 2° per side on upper wing; repeat angle on lower wing
- Trim angle and center-of-stabilizer notch are marked on the plans
- Windshield: either tissue-covered or celluloid; make celluloid 1/4" larger all around
The full-size plan is provided half-size on the sheet; enlarge with a copier to the correct scale for .020 power (24" span).
Mounting the engine and gear
- Use wood screws to mount the engine. Predrill holes with a fine bit. Don't use cyanoacrylate (CA) on the screw threads right away — you may need to change thrustline at the field.
- If you want a larger version (original was larger and .049 powered), blow the plan up to around 30" span. Substitute 1/16" or even super-light 1/8" sheet for the fuselage; use 1/16" sheet for the wings and 3/32" for the tail feathers.
- For the wire landing gear, start by bending the middle bend first and check it against the plan. Measure down each leg and tweak the axle bends. Leave the axles a bit long until you decide on wheels.
- To mount the gear: after gluing the cowl blocks in place and making the fuselage front flat, hold the gear squarely and pencil around it onto the end-grain balsa. Gouge a trough shaped like the wire, just deep enough so the firewall will glue flush to the balsa. This sandwiches the gear between hard plywood (good) and soft balsa (bad). Mix epoxy (five-minute type is fine) and soak the balsa before pressing the sandwich together. The gear should hold forever after this.
- Wheels on a sport model are chiefly for balance. They don't have to roll unless you have a takeoff area. If nose-heavy, use lightweight rubber-model wheels (e.g., Sig 1-5/8" #SH-540). For more weight up front, pick heavier wheels and hold them on the axle with a small washer and a blob of epoxy or solder after buffing the wire.
Metal parts and finishing touches
- If you're not experienced at wire bending, don't be intimidated — take your time and check against the plan.
- It's a good idea to leave axles long until wheel selection is decided.
- If using a celluloid windshield, cut it to fit and glue or cement in place; alternatively, use colored tissue.
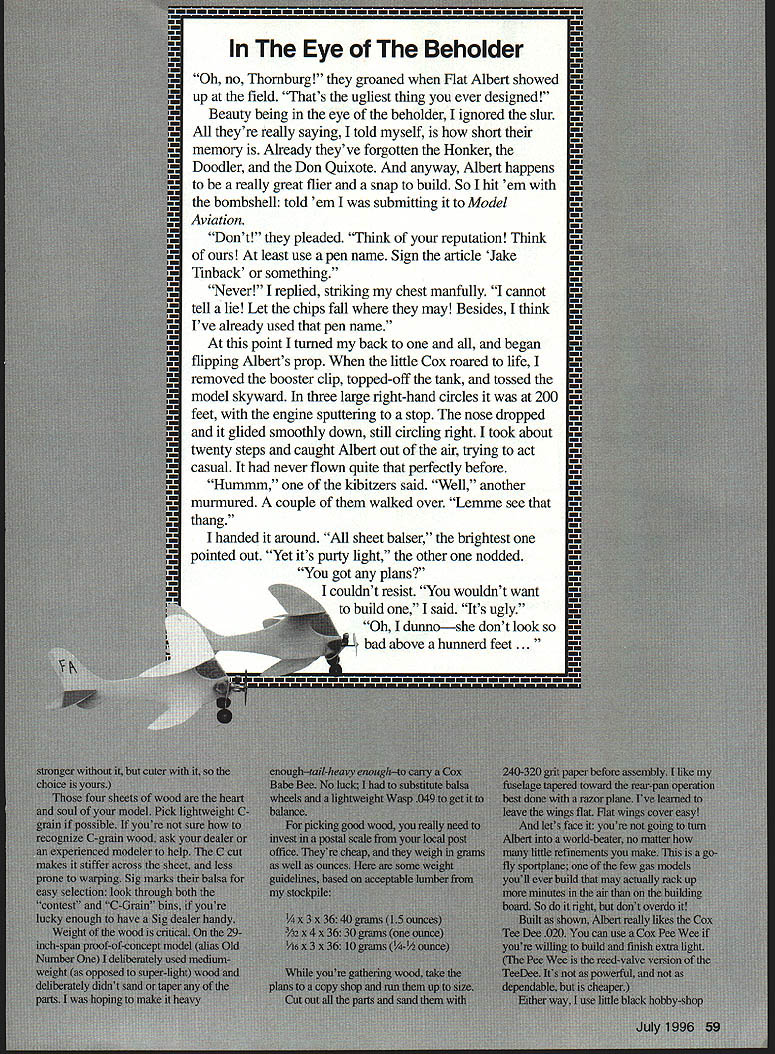
In the Eye of the Beholder
When Flat Albert showed up at the field, some kibitzers grumbled: "That's the ugliest thing you ever designed!" Beauty being in the eye of the beholder, I ignored the slur. All they're really saying is how short their memory is. They've already forgotten the Honker, the Doodler, and the Don Quixote. Anyway, Albert happens to be a really great flier and a snap to build.
At the field, I flipped Albert's prop. When the little Cox roared to life, I removed the booster clip, topped off the tank, and tossed the model skyward. In three large right-hand circles it was at 200 feet, with the engine sputtering to a stop. The nose dropped and it glided smoothly down, still circling right. I took about twenty steps and caught Albert out of the air. It had never flown quite that perfectly before.
They passed it around. "All sheet balsa," one observed. "Yet it's pretty light," another said. "You got any plans?" they asked. I couldn't resist: "You wouldn't want to build one," I said. "It's ugly." A minute later: "Oh, I dunno — she don't look so bad above a hundred feet..."
Finish
On Old Number One I doped the fuselage and rudder with a single coat of Sig Lemon Yellow. The grain showed through, which was fine. Then I masked the fuselage and sprayed Pactra Flat Tan on the wings and stabilizer — again, just one coat. After a day of drying, I sprayed Pactra Formula-U Clear Varnish over everything for extra fuel-proofing. I used these because they happened to be the liquids I had on hand.
I have flown models like Albert totally raw — no finish at all — but not for very long. They absorb castor oil from the exhaust and eventually get too tail-heavy to fly.
At the other extreme, the prettiest finishes use colored tissue and butyrate dope. Put one full-strength coat of clear over all the wood, sand lightly, then add another coat as you apply the tissue and dope it down. Follow up with two to four coats of dope cut 50% with thinner, and you're ready to fly.
If you want to avoid dope, try colored LiteSpan from Hobby Lobby (5614 Franklin Park Circle, Brentwood TN 37027; Tel.: [615] 373-1444). Use their cement and follow instructions for a lovely, lightweight finish.
Flying and trimming
- Balance: Be sure the model balances (with prop) at a point pretty close to the arrow shown on the plans. If you can't find grass or weeds to toss the model into, make your first toss-glides close to the ground — say, from a kneeling position.
- Glide: You may need to warp the stabilizer trailing edges up or down slightly to get a long, smooth glide. Warp them equally or they'll act as ailerons and induce unwanted turn.
- Philosophy: Trim for the glide first, then teach the model to abide the engine. Your model must have some turn in the glide — right or left — depending on whether you want it to end up flying clockwise or counterclockwise. When the engine is running, reduce that glide turn a little at a time until the model flies a circle under power and glides straight back to landing.
- Adjustments:
- If the model climbs out, add a little weight forward.
- If it dives, take a little off the nose.
- If it turns too much under power, give the stabilizer a tad of down-elevator on the inside tip.
- Make small changes one at a time and analyze each flight pattern carefully.
A straight glide path, even from moderate altitude, will disappear over the horizon in seconds. Losing a model on the first flight is disheartening. So never fly under power until you're sure the glide turn is acceptable.
In general, I don't force a turn direction. If a model wants to glide to the right, I let it. If it prefers left, that's fine, too.
What makes Flat Albert unique is that its torque is pretty well cancelled out by the fuselage shape. It will fly a right-right pattern comfortably. In fact, don't be surprised if you need a bit of left thrust to avoid a right power spiral.
Begin powered flight with engine runs of less than five seconds. That requires more than a stock fuel tank and a lucky guess. Two simple fuel-limiting systems are shown in the photos; the coil of tubing works best with .020s. I've never found it necessary to hook an outside fuel tank onto the tubing to get the engine started, as many articles recommend.
Life gets more complex if you're using a Pee Wee instead of a Tee Dee. The Pee Wee has a big tank for such a little engine. Some fliers fill the tank completely with BBs to limit fuel capacity; that always worked better for them than for me (and BBs are dead weight).
I prefer to drill a hole in the tank and run an outside line through to the pickup nozzle. This requires careful disassembly and fiddling with gaskets, but reed-valve engines take maintenance. If you plan to run them, learn to work on them early.
Raw nitromethane is deadly to models; it attacks dopes and glues. The less of it you can get away with, the longer your airplane will last. If your engine will start and run on 1.5% nitro rather than 35–40%, you're better off.
Now go fly!
Dave Thornburg 5 Monticello Dr. Albuquerque, NM 87123
Transcribed from original scans by AI. Minor OCR errors may remain.

