
Flying for Fun
909 North Maize Road, Townhouse 734, Wichita, KS 67212
Stuff in Use
I hope that the last flying season was a great one for everyone. I know I certainly flew my fill. In the midst of all that flying several new techniques (at least to me) have been developed and some new products tried. Furthermore, I've snooped around a bit and found some good ideas others are using.
This column is centered on those subjects—some may be old hat to many modelers, but others may find something new and useful.
AMA does not endorse products nor print product reviews in its publications; a good policy, in my opinion, as it avoids any possible questions concerning objectivity or fairness.
One of the other organizations to which I belong endorses products; unfortunately it also accepts monetary contributions to its research arm from the same manufacturers whose products it tests. Need I say this policy makes the endorsements suspect?
Therefore, the following are strictly my personal opinions and do not in any way imply AMA endorsement. I have no financial interest in any of these products, nor do I receive any compensation from the manufacturers. These simply are unbiased reports.
Trim Stripes
Trim tape adds considerably to the attractiveness of our models. Unfortunately, even when great care is used in its application and clear epoxy is painted on the seams, exhaust residues will eventually loosen the material.
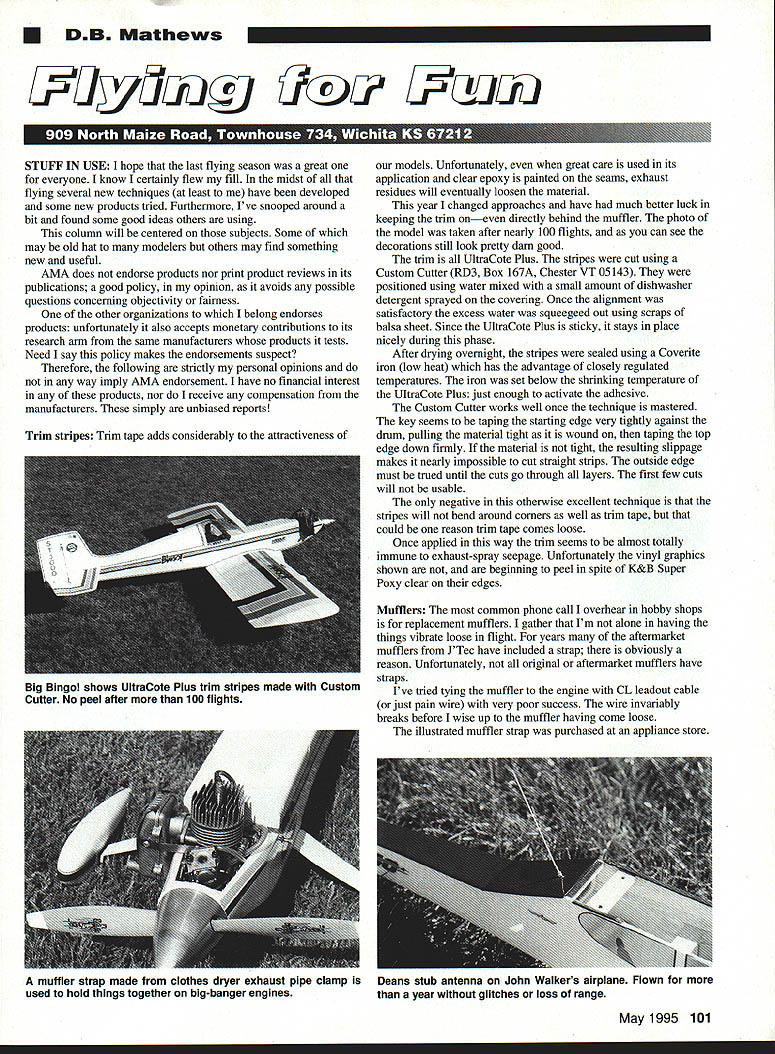
This year I changed approaches and have had much better luck in keeping the trim on—even directly behind the muffler. A photo of the model was taken after nearly 100 flights, and the decorations still looked very good.
The trim is UltraCote Plus. The stripes were cut using a Custom Cutter (RD3, Box 167A, Chester, VT 05143). They were positioned using water mixed with a small amount of dishwasher detergent sprayed on the covering. Once the alignment was satisfactory the excess water was squeegeed out using scraps of balsa sheet. Since the UltraCote Plus is sticky, it stays in place nicely during this phase.
After drying overnight, the stripes were sealed using a Coverite iron (low heat), which has the advantage of closely regulated temperatures. The iron was set below the shrinking temperature of the UltraCote Plus—just enough to activate the adhesive.
The Custom Cutter works well once the technique is mastered. The key seems to be taping the starting edge very tightly against the drum, pulling the material tight as it is wound on, then taping the top edge down firmly. If the material is not tight, the resulting slippage makes it nearly impossible to cut straight strips. The outside edge must be trued until the cuts go through all layers. The first few cuts will not be usable.
The only negative in this otherwise excellent technique is that the stripes will not bend around corners as well as trim tape, but that could be one reason trim tape comes loose.
Once applied in this way the trim seems almost totally immune to exhaust-spray seepage. Unfortunately the vinyl graphics are not, and are beginning to peel in spite of K&B Super Poxy clear on their edges.
Mufflers
The most common phone call I overhear in hobby shops is for replacement mufflers. I gather that I'm not alone in having the things vibrate loose in flight. For years many aftermarket mufflers from J'Tec have included a strap; there is obviously a reason. Unfortunately, not all original or aftermarket mufflers have straps.
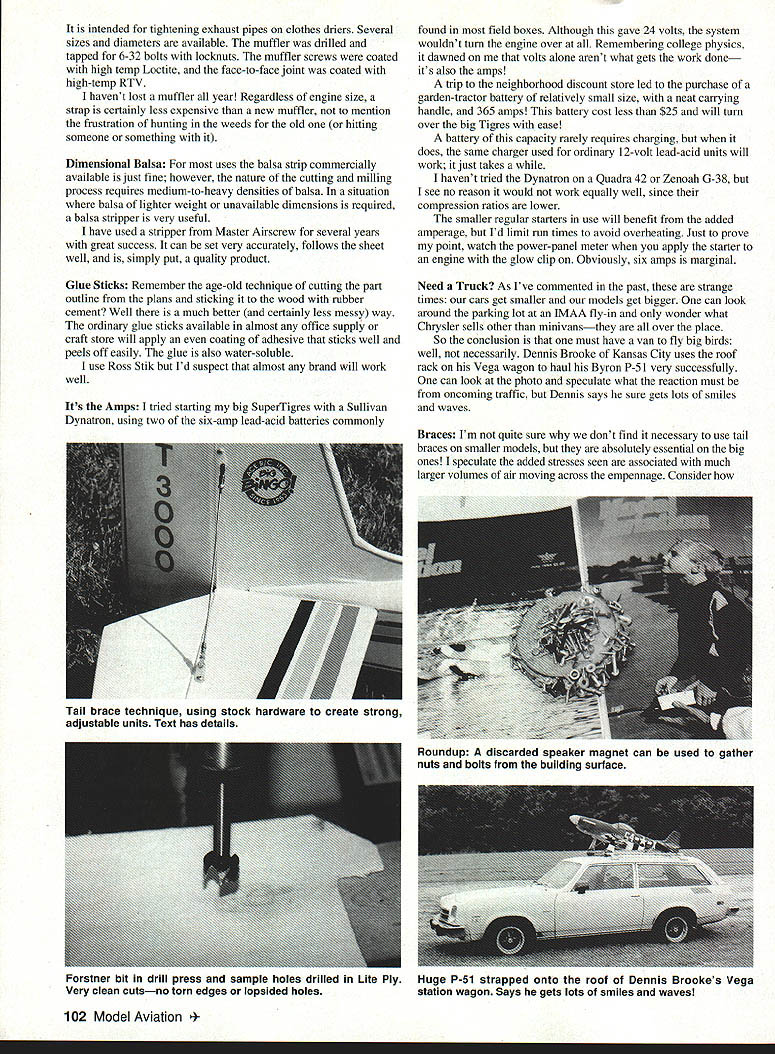
I've tried tying the muffler to the engine with CL leadout cable (or just plain wire) with very poor success. The wire invariably breaks before I wise up to the muffler having come loose. The muffler strap I now use was purchased at an appliance store. Several sizes and diameters are available.
The muffler is drilled and tapped for 6-32 bolts. I use locknuts and muffler screws coated with high-temp Loctite and coat face-to-face joints with high-temp RTV. I haven't lost a muffler in a year. Regardless of engine size, the strap is certainly less expensive than a new muffler.
Dimensional Balsa
For most uses the balsa strip commercially available is just fine; however, the nature of the cutting and milling process requires medium-to-heavy densities of balsa. In situations where lighter-weight or unusual/unavailable dimensions are required, a balsa stripper is very useful.
I have used a stripper from Master Airscrew for several years with great success. It can be set very accurately, follows the sheet well, and is, simply put, a quality product.
Glue Sticks
Remember the age-old technique of cutting the part outline from the plans and sticking it to the wood with rubber cement? There is a much better (and certainly less messy) way. Ordinary glue sticks available in almost any office supply or craft store will apply an even coating of adhesive that sticks well and peels off easily. The glue is also water-soluble.
I use Ross Stik, but almost any brand will work well.
It's the Amps
I tried starting my big Super Tigers with a Sullivan Dynatron, using two of the six-amp lead-acid batteries commonly found in most field boxes. Although this gave 24 volts, the system wouldn't turn the engine over at all. Remembering college physics, it dawned on me that volts alone aren't what gets the work done—it's also the amps.
A trip to the neighborhood discount store led to the purchase of a garden-tractor battery of relatively small size, with a neat carrying handle, and 36/45 amps. This battery cost less than $25 and will turn over the big Tigers with ease!
A battery of this capacity rarely requires charging, but when it does, the same charger used for ordinary 12-volt lead-acid units will work; it just takes a while.
I haven't tried the Dynatron on a Quadra 42 or Zenoah G-38, but I see no reason it would not work equally well, since their compression ratios are lower.
The smaller regular starters in use will benefit from the added amperage, but I'd run mine to avoid overheating. Just to prove my point, watch the power-panel meter when you apply the starter to an engine with the glow clip on. Obviously, six amps is marginal.
Need a Truck?
As I've commented in the past, these are strange times: our cars get smaller and our models get bigger. One can look around the parking lot at an IMAA fly-in and only wonder what Chrysler sells other than minivans—they are all over the place.
So the conclusion is that one must have a van to transport big birds; well, not necessarily. Dennis Brooke of Kansas City uses the roof rack on his Vega wagon to haul his Byron P-51 very successfully. You can imagine the reaction from oncoming traffic, but Dennis says he sure gets lots of smiles and waves!
Braces
I'm not quite sure why we don't find it necessary to use tail braces on smaller models, but they are absolutely essential on the big ones. I speculate the added stresses are associated with much larger volumes of air moving across the empennage. Consider how much more turbulent air is generated by an 18 x 10 prop than by a 10 x 6!
I have twice observed models that, for one reason or another, broke a tail brace in flight. They suddenly exhibited really wild flutter when none had been observed prior to the breakage.
John Riggs, John Walker, and I have evolved (over many models) a simple-to-install, strong, easily maintained tail-brace system. We now use 4-40 threaded pushrods with screw clevises on one end and soldered links on the other. These are snapped into large nylon landing-gear retainer straps (Sig SH-709 or equivalent) that are in turn bolted through hard points (usually 3/8" or 1/2" dowel sections CA'ed into drilled holes) in the stab and fin.
This provides an adjustable setup so they may be "tuned" above or below the inevitable harmonic vibrations. Notice the use of jam nuts and plastic sleeves on all ends; this is a requirement for safety at all IMAA events, and a darn good idea.
Stub Antenna
Several of us have been using "rubber ducky" antennae on transmitters for five years now without a problem. I've become so used to them that I actually forget to extend the old-style antenna on one of my other transmitters. The advantages are self-evident.
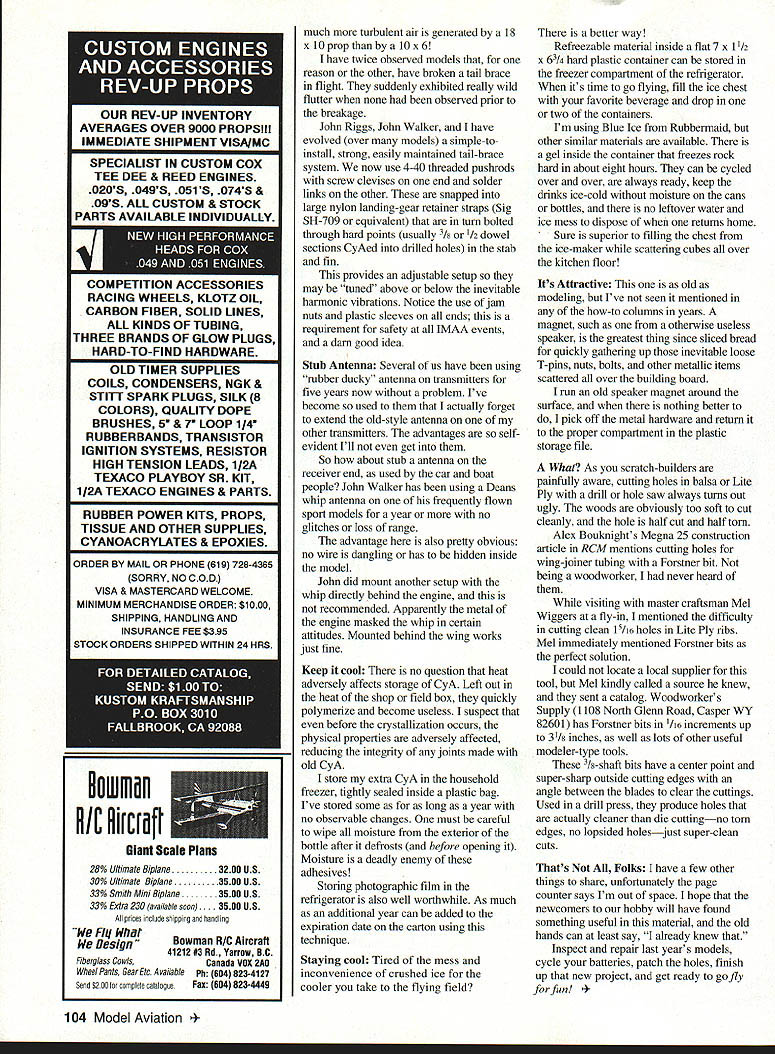
So how about a stub antenna on the receiver end, as used by the car and boat people? John Walker has been using a Deans whip antenna on one of his frequently flown sport models for a year or more with no glitches or loss of range.
The advantage is obvious: no wire is dangling or has to be hidden inside the model. John did mount another setup with the whip directly behind the engine, and this is not recommended. Apparently the metal of the engine masked the whip in certain attitudes. Mounted behind the wing works just fine.
Keep It Cool
There is no question that heat adversely affects storage of cyanoacrylate (CA) adhesives. Left out in the heat of the shop or field box, they quickly polymerize and become useless. I suspect that even before crystallization occurs, the physical properties are adversely affected, reducing the integrity of any joints made with old CA.
I store my extra CA in the household freezer, tightly sealed inside a plastic bag. I've stored some as long as a year with no observable changes. One must be careful to wipe all moisture from the exterior of the bottle after it defrosts (and before opening it). Moisture is a deadly enemy of these adhesives!
Storing photographic film in the refrigerator is also worthwhile. You can often add about a year to the expiration date on the carton using this technique.
Staying Cool
Tired of the mess and inconvenience of crushed ice for the cooler you take to the flying field? There is a better way.
Refreezable packs inside a flat 7 x 1 1/2 x 6 3/4-inch hard plastic container can be stored in the freezer compartment of the refrigerator. When it's time to go flying, fill the ice chest with your favorite beverage and drop in one or two of the containers.
I'm using Blue Ice from Rubbermaid, but other similar products are available. There is a gel inside the container that freezes rock hard in about eight hours. They can be cycled over and over, are always ready, keep beverages ice-cold without moisture on the cans or bottles, and there is no leftover water and ice mess to dispose of when one returns home. It's far superior to filling the chest from the ice-maker and scattering cubes all over the kitchen floor.
It's Attractive
This one is as old as modeling, but I've not seen it mentioned in any of the "how-to" columns in years. A magnet, such as one from an otherwise useless speaker, is the greatest thing since sliced bread for quickly gathering up those inevitable loose T-pins, nuts, bolts, and other metallic items scattered all over the building board.
I run an old speaker magnet around the surface, and when there is nothing better to do I pick off the metal hardware and return it to the proper compartment in the plastic storage tile.
A What?
As you scratch-builders are painfully aware, cutting holes in balsa or lite ply with a drill or hole saw always turns out ugly. The woods are too soft to cut cleanly, and the hole is half cut and half torn.
Alex Roukhnight's Magna 25 construction article in RCM mentions cutting holes for a joiner tube using a Forstner bit. Not being a woodworker, I had never heard of them.
While visiting with master craftsman Mel Wiggers at a fly-in, I mentioned the difficulty in cutting clean 1 1/8" holes in lite ply ribs. Mel immediately mentioned Forstner bits as the perfect solution.
I could not locate a local supplier for this tool, but Mel kindly called a source for me and they sent a catalog. Woodworker's Supply (1108 North Glenn Road, Casper, WY 82601) has Forstner bits in 1/16" increments up to 3/4", as well as lots of other useful modelers' tools.
These 3/8" shaft bits have a center point and super-sharp outside cutting edges with an angle between the blades to clear the cuttings. Used in a drill press, they produce holes that are actually cleaner than die cutting—no torn edges, no lopsided holes—just super-clean cuts.
That's Not All, Folks
I have a few other things to share; unfortunately the page counter says I'm out of space. I hope that newcomers to our hobby will have found something useful in this material, and the old hands can at least say, "I already knew that."
Inspect and repair last year's models, cycle your batteries, patch the holes, finish up that new project, and get ready to go fly for fun!
Transcribed from original scans by AI. Minor OCR errors may remain.

