
D.B. Mathews
Flying for Fun
Do Chimps Have Backaches?
Ergonomics has become a popular term in advertising, particularly by those selling automobiles. Basically, the concept involves the measurement of effort used to perform a task. Ergs are a measurement of energy.
In common usage, ergonomics reflects an effort to maximize the comfort of seating, to make instruments easy to reach, read, and operate, to make entry and egress more convenient, and to minimize the expenditure of energy needed to operate a machine.
So what on earth do ergonomics have to do with model airplanes? As I visit other modelers' workshops, I'm struck by the wide variance in shop layout and ergonomics. Certainly there are builders with very limited space for their shops, and these folks are pretty well stuck with what they can squeeze into the available room. But even in a limited-space situation some tenets of ergonomics can be applied.
On the other hand, many serious modelers have free-standing shops, or use parts of basements or garage space. These facilities can benefit from some ergonomic thinking as well.
There is an old adage that states, "You can work hard or you can work smart, but seldom both." Standing up to build, sitting in an inadequate chair, scattering building materials and tools well away from the work surface, and working with poor lighting or inadequate ventilation are all examples of working hard and dumb.
Another favorite adage is, "Never stand up when you can sit, never sit when you can lie down, and never lie down alone." I've been practicing dentistry for more than forty years. Some of you older readers can recall a time when dentists worked standing—something one doesn't see at all now. Why? When I started in the profession one could attend a dental meeting, observe the attendees from the back, and actually determine whether they were left- or right-handed. They would have one shoulder that was several inches lower than the other and have a definite "list" to that side. Needless to say, back problems were nearly universal (and often debilitating) in the profession.
In the mid-1950s a pioneering group of dentists began to develop methods by which dentistry could be practiced by a seated dentist. The earliest supine dental chairs were actually converted "contour" chairs from the furniture store. High-volume saliva evacuators were adapted from vacuum sweeper parts, and dentists' stools were from the office supply store.
My "patron saint" dentist told me to learn to work sitting down—he'd spent his entire career fighting back, leg, and shoulder pain. There were no dental stools available on the clinic floor when I started seeing patients in 1955, so I bought my own and caused a considerable stir among the faculty and my fellow students when I started treating patients while seated. Within five years there were stools for all the dental students. An additional benefit has been the discovery that higher quality treatment can be provided in larger quantities by practitioners seated comfortably.
Let's face it: skeletal muscle fatigue is bound to affect precision whether providing dentistry, repairing watches, drafting, doing arts and crafts, or even eating. Therefore, isn't it logical we should be able to construct better models for longer periods if properly seated and if we have an efficient shop layout that reduces reaching for things?
Ergonomic Workshop
I'm going to be didactic; I hope you'll accept my credentials on the subject. The workshop stool is a critical part of the entire concept. A new secretarial unit on four to six casters can be purchased at less cost than an engine stand. Chairs are available at really inexpensive prices; the units are adjustable. The seat should be set to create a right angle between thighs and back. Feet should be flat on the floor; knees should be slightly higher than the buttocks. If the knees are too low the shoulders will get sore; if they're too high the thighs will hurt. An adjustable backrest should be midway up the spine to provide lumbar support. Auto-seat casters provide mobility. With practice one can learn to push off and roll to the area of the shop, grab things, and minimize getting up. One should be able to reach commonly used tools, building materials, and supplies without getting up.
Once seated properly, adjust the height of the building board. The huge cry about carpal tunnel syndrome has made everyone sensitive to the need for a proper work-surface height. Addressing the problem of proper height will reduce fatigue and effort, improve quality, and increase productivity.
Surface height is a function of the user's body dimensions; no height fits everyone. Basically one's hands should fall onto the work surface, elbows at almost right angles, hands tilted uphill about a 10° angle. Building tables can be elaborate, as a custom-made unit with built-in adjustable hinged jigs, or as simple as a damaged door on sawhorses. What is important is the surface height in relation to the skeletal muscle system. Most tables (with a door on top) will place the surface at about 30 inches. That's not bad for someone who is 6 feet 3 inches tall like me, but for others this will be too high. Consider cutting off the table legs! You'll be glad you did.
A short work surface that will hold the model off the floor at the recommended height should be considered. This can range from a paper box to a small work stand with a carpet-covered model cradle. Something like this certainly makes working inside the model or on the engine less tedious.
While damaged, unfinished, or odd-lot kitchen cabinets and cupboards are marvelous for storage, the surface height is much too tall for seated building. However, their height is fine for all that stuff you don't have room for on the building board. With the castered chair it's easy enough to roll over to them and transfer something to the work surface.
Metal storage shelves are excellent for holding smaller tools and adhesives at a level that's easily reached when one is seated on the stool. I like to keep ball drivers, screwdrivers, pliers, pens, pencils, files, and abrasive sticks separated in individual one-pound coffee cans on these metal shelves.
For those of us who wear bifocals this table height will present a problem. Our close-vision lenses will require tilting the neck backwards if the work is far back on the tabletop. This is not the normal anatomical position for the neck. I solved this problem by buying a pair of safety glasses that have a close-vision panel in the (normal) lower position and also at the top.
In this day and age of deeply discounted fluorescent shop lights there really is no excuse for poor lighting over the building board. However, one should be careful not to over-light the shop, as too much light can produce just as much eye strain as not enough. A two-bulb unit approximately three feet above the building surface seems to be ideal — the hanging chains are easily adjusted. Spring-loaded gooseneck craft lights are excellent for spotlighting a particular area of the work surface.
A box fan with a furnace filter taped on the intake will provide reasonable dust control; the intake side not only circulates air through the shop but also reduces the amount of balsa dust floating in the air. When the filter becomes "grotty" it's easily replaced. Remember to keep good ventilation for solvent fumes and soldering. A fume extractor near the job is a good addition. An outside source of air should be present when using adhesives and paints. If natural venting is not possible, an exhaust fan should be ducted to the outside.
Tool control is important. Drawers with foam liners or pegboard and labeled containers reduce time hunting. A wastebasket and small vacuum will keep the area clean. Arrange commonly used items within arm's reach.
Some people build in a radio or TV; I find it distracting. Many people listen to music while building; low volume helps concentration. Keep drinks away from delicate models.
If a model is heavy or you need to move it often, consider a small wheeled dolly or rolling stand. For painting, use a spray booth or ventilated area.
- Comfortable seating
- Proper surface height
- Good lighting
- Adequate ventilation and dust control
- Tool control and convenient storage
These all contribute to a more enjoyable and productive hobby. Ergonomics is not a fad; it's a means of enhancing workmanship, reducing fatigue, and extending the time you can spend doing what you enjoy—flying for fun.
So Do Chimps Have Backaches?
The human (Homo sapiens) spinal column is actually not properly designed for standing or sitting erect. The disks are designed to cushion forces applied when the column is in a horizontal position — not when they are applied vertically. The disks are thicker on the borders than in the center. This is absolutely wrong for standing upright.
In other words, our backs would work better if we walked on all fours. While chimps don't exactly walk on all fours, their long arms are used for support when walking. They move about in a forward-leaning position and carry most of their upper body weight forward of the vertical axis of their spinal column when walking. They also never sit at a desk for hours, don't drive cars or use computers, seldom carry heavy objects, and don't build model airplanes (although I've seen a few models that made me wonder). I seriously doubt that they have backaches (but I have no way to ask).
Humans certainly do have backaches, as well as foot, leg, thigh, shoulder, elbow, wrist, and neck aches. Hopefully some ergonomic principles applied in our model workshops can reduce all of these aches for us.
Something Useful
If you've found nothing of use in the foregoing, let me at least give you a building hint. Instead of those little brass eyelets inside servo grommets, the grommets can be installed easily by placing the eyelet on the tip of an ice pick. The eyelet is then "threaded" into the rubber grommet with a rotational movement. A fingernail holds the eyelet in place when the ice pick is withdrawn. This is a neat trick—try it. An ice pick is also useful when drilling holes for hardware. After drilling the first hole, insert the ice pick to hold the hardware in place while you drill the second hole.
This column is about flying for fun, so I've included some photos of fun machines.
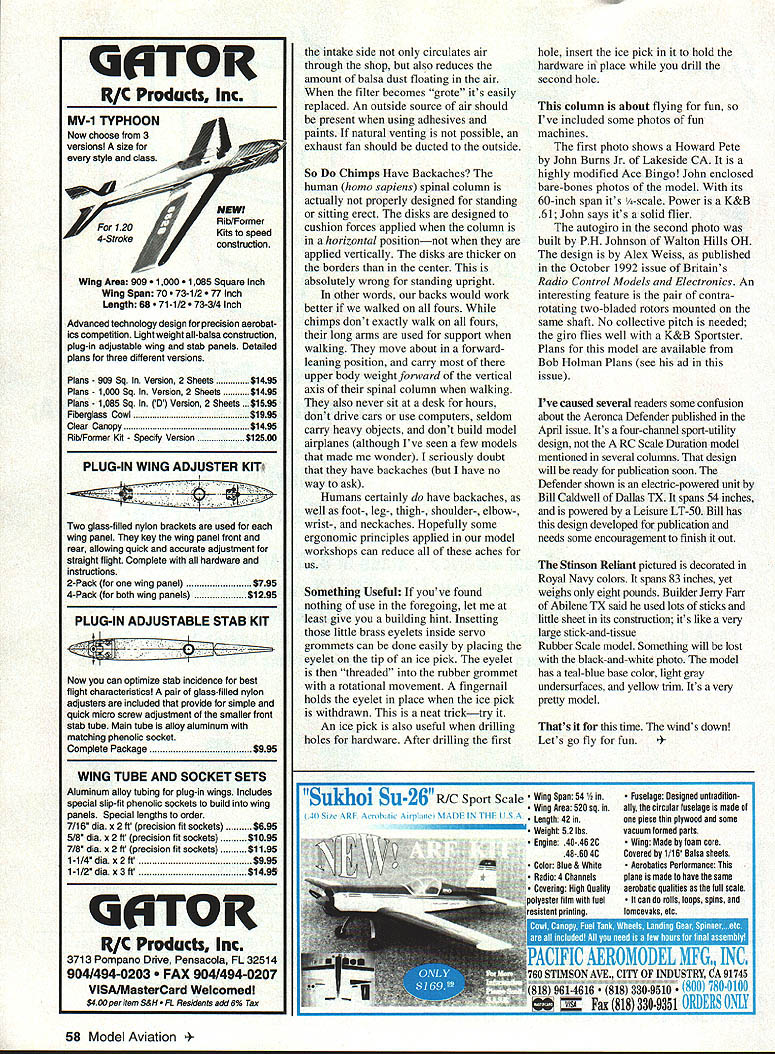
The first photo shows a Howard Pete by John Burns Jr. of Lakeside, CA. It is a highly modified Ace Bingo. John enclosed bare-bones photos of the model. With its 60-inch span it's 1/4-scale. Power is a K&B .61; John says it's a solid flier.
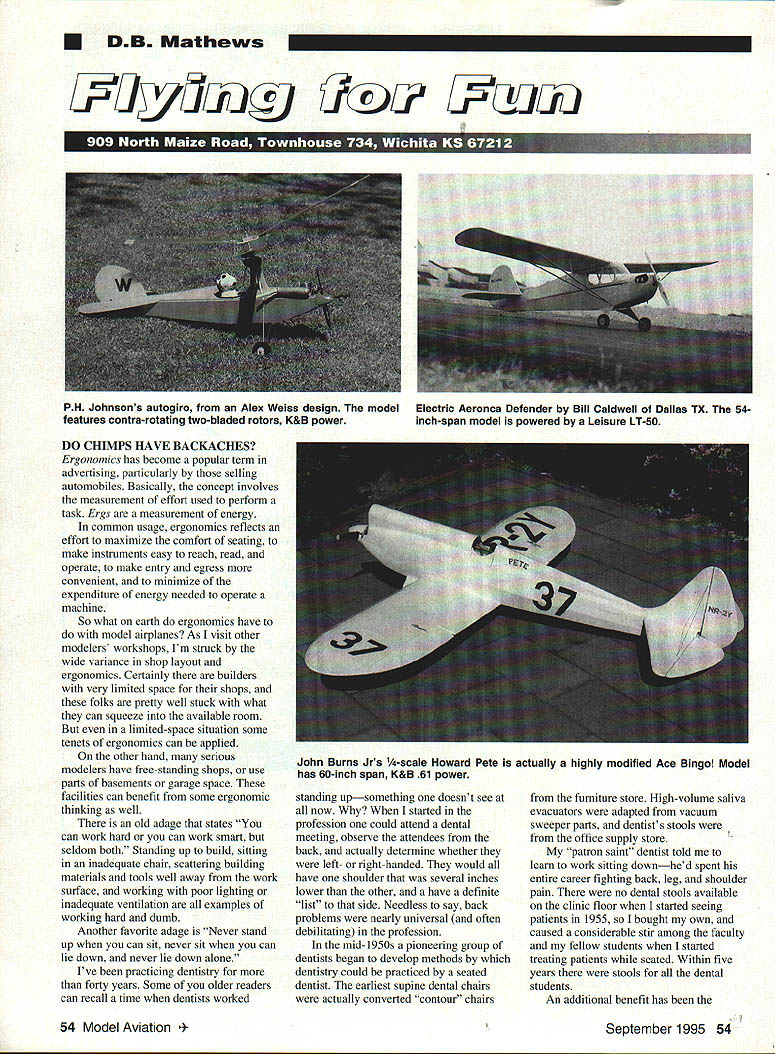
The autogiro in the second photo was built by P. H. Johnson of Walton Hills, OH. The design is by Alex Weiss, as published in the October 1992 issue of Britain's Radio Control Models and Electronics. An interesting feature is the pair of contra-rotating two-bladed rotors mounted on the same shaft. No collective pitch is needed; the gyro flies well with a K&B Sportster. Plans for this model are available from Bob Holman Plans (see his ad in this issue).
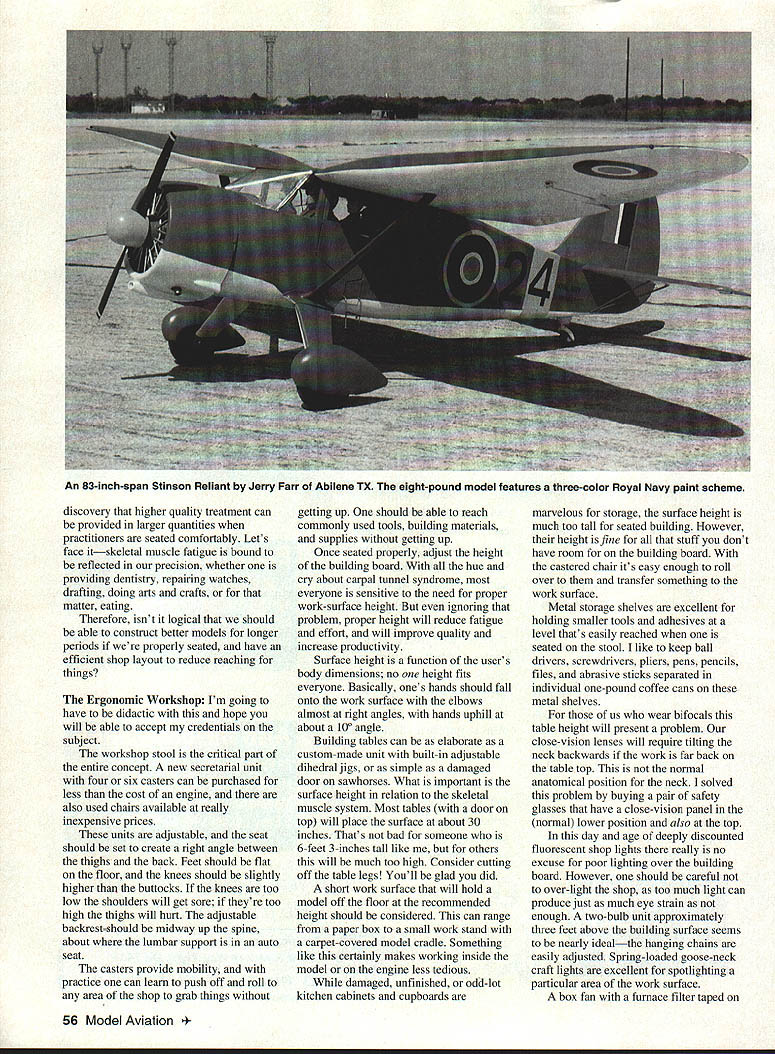
I've caused several readers some confusion about the Aeronca Defender published in the April issue. It's a four-channel sport-utility design, not the R/C scale duration model mentioned in several columns. That design will be ready for publication soon. The Defender shown is an electric-powered unit by Bill Caldwell of Dallas, TX. It spans 45 inches and is powered by a Leisure LT-50. Bill has this design developed for publication and needs some encouragement to finish it out.
The Stinson Reliant pictured is decorated in Royal Navy colors. It spans 83 inches, yet weighs only eight pounds. Builder Jerry Farr of Abilene, TX said he used lots of sticks and little sheet in its construction; it's like a very large stick-and-tissue rubber-scale model. Something will be lost when the black-and-white photo prints. The model has a neat baffle-base cowling, light gray undersurfaces, and yellow trim. It's a very pretty model.
That's it for this time. The wind's down! Let's go fly for fun.
Transcribed from original scans by AI. Minor OCR errors may remain.

