
Flying for Fun
D.B. Mathews 908 N. Maize Rd., Townhouse 734, Wichita KS 67212
LAST MONTH I detailed Bill Schmidt's method of creating model-airplane decorations using clear tape and a photocopier.
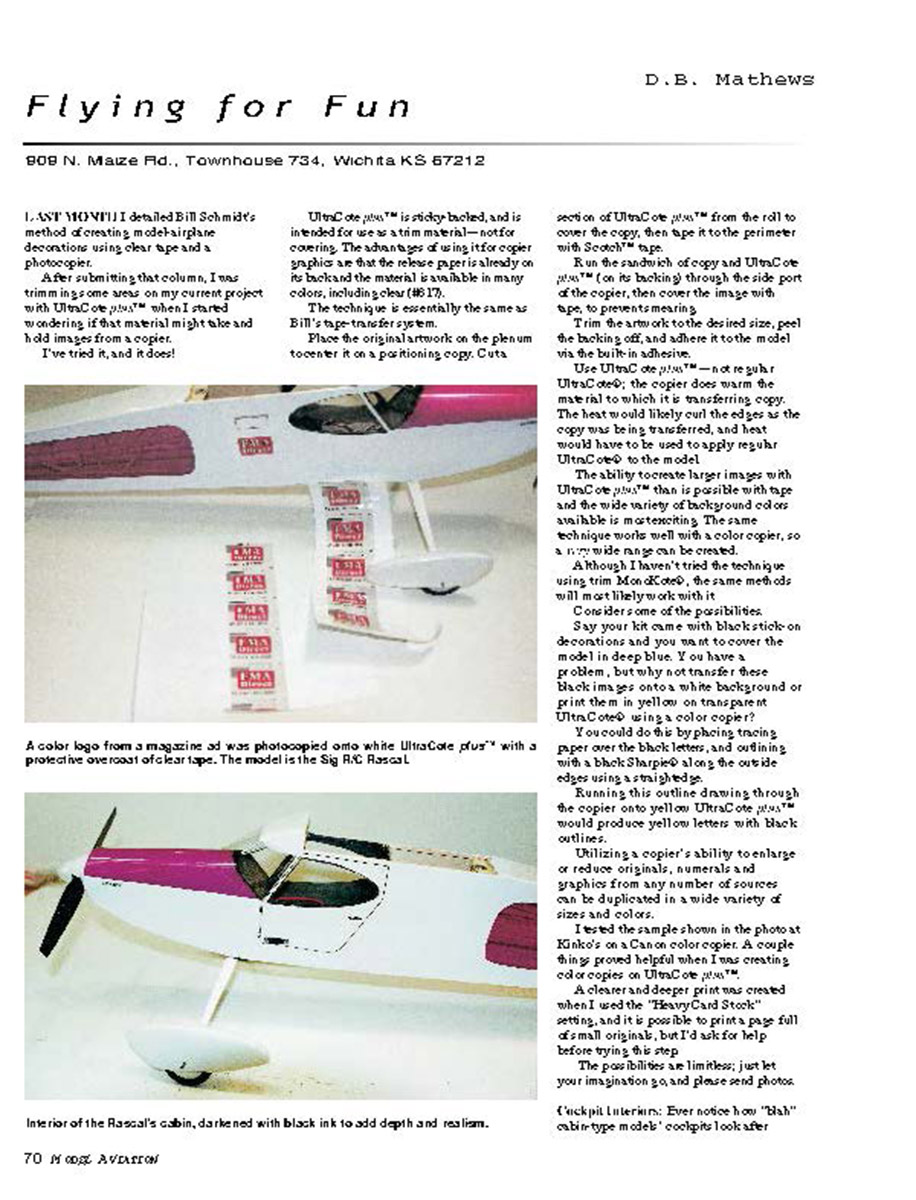
After submitting that column, I was trimming some areas on my current project with UltraCote plus™ when I started wondering if that material might take and hold images from a copier. I've tried it, and it does!
UltraCote plus™ is sticky-backed, and is intended for use as a trim material—not for covering. The advantages of using it for copier graphics are that the release paper is already on its back and the material is available in many colors, including clear (#817). The technique is essentially the same as Bill's tape-transfer system.
Place the original artwork on the platen to center it on a positioning copy. Cut a section of UltraCote plus™ from the roll to cover the copy, then tape it to the perimeter with Scotch™ tape. Run the sandwich of copy and UltraCote plus™ (on its backing) through the side port of the copier, then cover the image with tape to prevent smearing. Trim the artwork to the desired size, peel the backing off, and adhere it to the model via the built-in adhesive.
Use UltraCote plus™—not regular UltraCote®; the copier does warm the material to which it is transferring copy. The heat would likely curl the edges as the copy was being transferred, and heat would have to be used to apply regular UltraCote® to the model.
The ability to create larger images with UltraCote plus™ than is possible with tape and the wide variety of background colors available is most exciting. The same technique works well with a color copier, so a very wide range can be created.
Although I haven't tried the technique using trim MonoKote®, the same methods will most likely work with it.
Consider some of the possibilities. Say your kit came with black stick-on decorations and you want to cover the model in deep blue. You have a problem, but why not transfer these black images onto a white background or print them in yellow on transparent UltraCote® using a color copier? You could do this by placing tracing paper over the black letters and outlining with a black Sharpie® along the outside edges using a straightedge. Running this outline drawing through the copier onto yellow UltraCote plus™ would produce yellow letters with black outlines.
Utilizing a copier's ability to enlarge or reduce originals, numerals and graphics from any number of sources can be duplicated in a wide variety of sizes and colors.
I tested the sample shown in the photo at Kinko's on a Canon color copier. A couple of things proved helpful when I was creating color copies on UltraCote plus™. A clearer and deeper print was created when I used the "Heavy Card Stock" setting, and it is possible to print a page full of small originals, but I'd ask for help before trying this step. The possibilities are limitless; just let your imagination go, and please send photos.
Cockpit Interiors
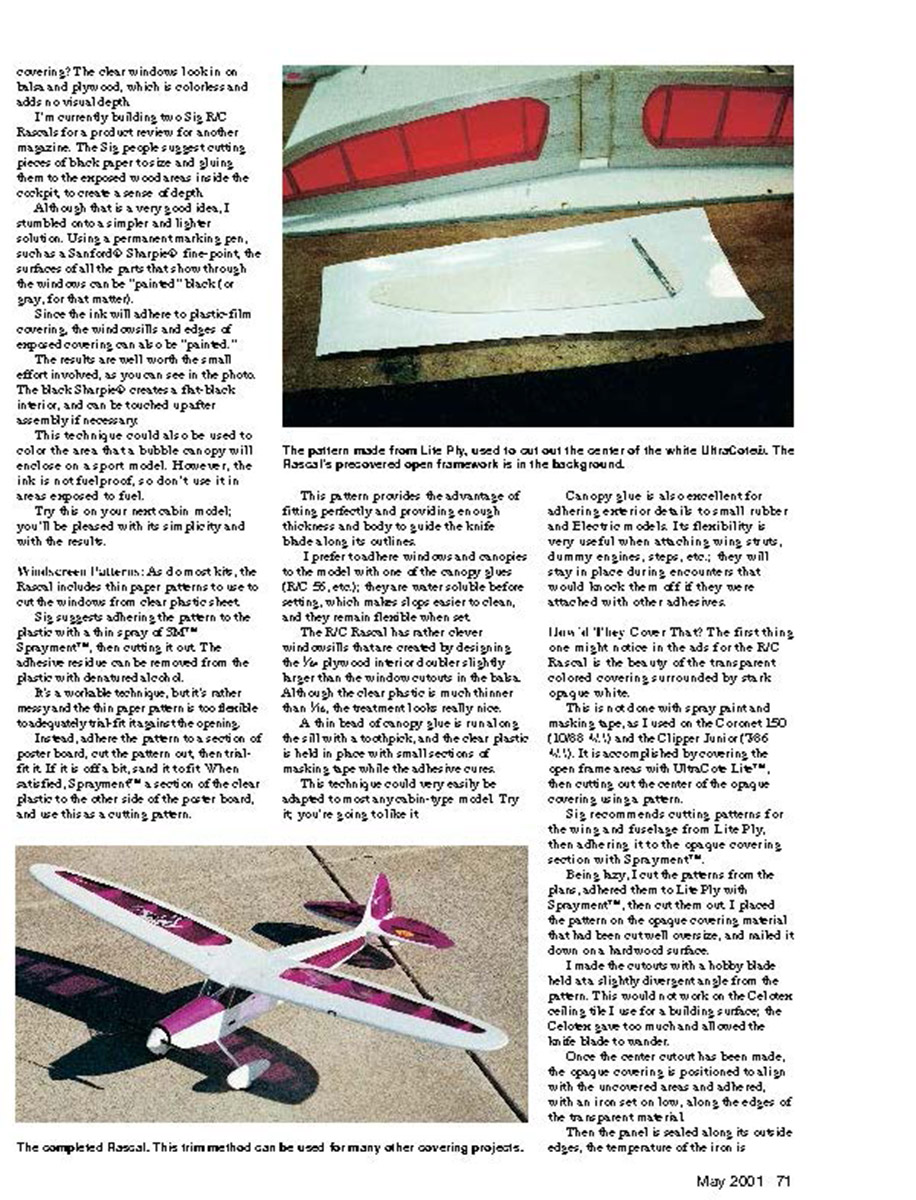
Ever notice how "blah" cabin-type models' cockpits look after covering? The clear windows look in on balsa and plywood, which is colorless and adds no visual depth. I'm currently building two Sig R/C Rascals for a product review for another magazine. The Sig people suggest cutting pieces of black paper to size and gluing them to the exposed wood areas inside the cockpit to create a sense of depth. Although that is a very good idea, I stumbled onto a simpler and lighter solution.
Using a permanent marking pen, such as a Sanford® Sharpie® fine-point, the surfaces of all the parts that show through the windows can be "painted" black (or gray, for that matter). Since the ink will adhere to plastic-film covering, the windowsills and edges of exposed covering can also be "painted." The results are well worth the small effort involved, as you can see in the photo. The black Sharpie® creates a flat-black interior, and can be touched up after assembly if necessary.
This technique could also be used to color the area that a bubble canopy will enclose on a sport model. However, the ink is not fuelproof, so don't use it in areas exposed to fuel.
Try this on your next cabin model; you'll be pleased with its simplicity and the results.
Windscreen Patterns
As do most kits, the Rascal includes thin paper patterns to use to cut the windows from clear plastic sheet. Sig suggests adhering the pattern to the plastic with a thin spray of Spraymount™, then cutting it out. The adhesive residue can be removed from the plastic with denatured alcohol.
It's a workable technique, but it's rather messy and the thin paper pattern is too flexible to adequately hold its shape in the opening. Instead, adhere the pattern to a section of poster board, cut the pattern out, then sand it to fit if it is off a bit. When satisfied, Spraymount™ a section of the clear plastic to the other side of the poster board, and use this as a cutting pattern.
This pattern provides the advantage of fitting perfectly and providing enough thickness and body to guide the knife blade along its outline.
I prefer to adhere windows and canopies to the model with one of the canopy glues (RC 56, etc.); they are water-soluble before setting, which makes glue easier to clean, and they remain flexible when set.
The R/C Rascal has rather clever windows that are created by designing the lite-ply interior doubler slightly larger than the window cutouts in the balsa. Although the clear plastic is much thinner than lite ply, the treatment looks really nice.
A thin bead of canopy glue is run along the sill with a toothpick, and the clear plastic is held in place with small sections of masking tape while the adhesive cures. This technique could very easily be adapted to most any cabin-type model. Try it; you're going to like it.
Canopy glue is also excellent for adhering exterior detail to small rubber- and electric-powered models. Its flexibility is very useful when attaching wing struts, dummy engines, steps, etc.; they will stay in place during encounters that would knock them off if they were attached with other adhesives.
How'd They Cover That?
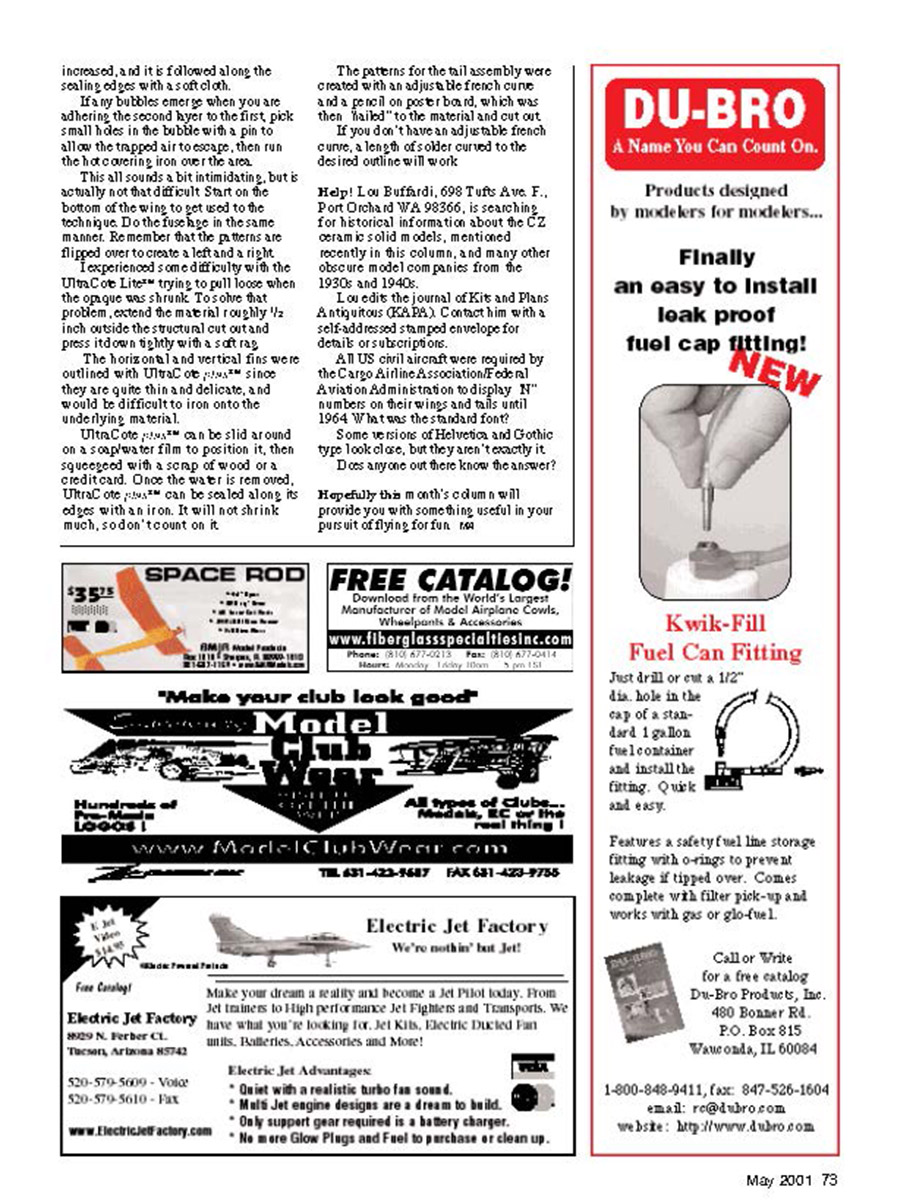
The first thing one might notice in the ads for the R/C Rascal is the beauty of the transparent colored covering surrounded by stark opaque white.
This is not done with spray paint and masking tape, as I used on the Coronet 150 and the Clipper Junior. It is accomplished by covering the open-frame areas with UltraCote LITE™, then cutting out the center of the opaque covering using a pattern.
Sig recommends cutting patterns for the wing and fuselage from Lite Ply, then adhering them to the opaque covering section with Spraymount™.
Being lazy, I cut the patterns from the plans, adhered them to Lite Ply with Spraymount™, then cut them out. I placed the pattern on the opaque covering material that had been cut oversize, and nailed it down on a hardwood surface.
I made the cutouts with a hobby blade held at a slightly divergent angle from the pattern. This would not work on the Celotex ceiling tile I use for a building surface; the Celotex gave too much and allowed the knife blade to wander.
Once the center cutout has been made, the opaque covering is positioned to align with the uncovered area and adhered with an iron set on low along the edges of the transparent material. The iron temperature is adjusted to properly bond and shrink the opaque material into a neat, tight edge. Trim and touch up as necessary.
If any bubbles emerge when you are adhering the second layer to the first, pick small holes in the bubble with a pin to allow the trapped air to escape, then run the hot-covering iron over the area.
This all sounds a bit intimidating, but is actually not that difficult. Start on the bottom of the wing to get used to the technique. Do the fuselage sides in the same manner. Remember that the patterns are flipped over to create a left and a right.
I experienced some difficulty with the UltraCote LITE™ trying to pull loose when the opaque was shrunk. To solve that problem, extend the material roughly 1/2 inch outside the structural cutout and press it down tightly with a soft rag.
The horizontal and vertical fins were outlined with UltraCote plus™, since they are quite thin and delicate, and would be difficult to iron onto the underlying material.
UltraCote plus™ can be slid around on a soapy-water film to position it, then squeezed with a scrap of wood or a credit card. Once the water is removed, UltraCote plus™ can be sealed along its edges with an iron. It will not shrink much, so don't count on it.
The patterns for the tail assembly were created with an adjustable French curve and a pencil on poster board, which was then "nailed" to the material and cut out.
If you don't have an adjustable French curve, a length of solder curved to the desired outline will work.
Help!
Lou Buffardi, 698 Tuth & Ave. F., Port Orchard WA 98366, is searching for technical information about the CZ ceramic solid models, mentioned recently in this column, and many other obscure model companies from the 1930s and 1940s.
I collect the journal of Kits and Plans Antiquities (KAPA). Contact him with a self-addressed stamped envelope for details or subscriptions.
All US civil aircraft were required by the Civil Aviation Authority/Federal Aviation Administration to display "N" numbers on their wings and tails until 1964. What was the standard font?
Some versions of Helvetica and Gothic type look close, but they aren't exactly the same.
Does anyone out there know the answer?
Hopefully this month's column will provide you with something useful in your pursuit of flying for fun.
Transcribed from original scans by AI. Minor OCR errors may remain.

