
Flying for Fun
Comes the revolution: that phrase comes from Al Capp's Lil' Abner comic strip; the citizens of Lower Slobovia thought that somehow a revolution would improve their icy weather.
There have been some revolutions in model-airplane building and finishing throughout the years. While they have not improved the weather, they have greatly simplified building tasks. I have three improvements in particular in mind:
- the introduction of die-cut sheet parts in kits,
- cyanoacrylate (CyA) adhesives, and
- iron-on covering materials.
The impact of these building aids can best be measured by the shift in modeling from builders to fliers. Many newcomers to the hobby during the last 25 years might not have stayed if it wasn't for this revolution.
Decorations
My January, February, and March columns centered around model-finishing techniques; that series was jump-started by my granddaughters decorating a birthday cake. I briefly mentioned techniques for designing a color pattern on a new model, such as drawing the pattern on a three-view, but I didn't go into much detail.
I hesitate to open the subject of finishing models, since I am certainly no expert. The following is my opinion and is not intended to be the last word.
A presumption might be that the following applies only to trimming Radio Control (RC) models. That's not the case; many Free Flight (FF) and Control Line (CL) models could also benefit from a little decoration. This overview is, however, limited to models covered with heat-applied precolored polyester film (Mylar™), although much of the following could be adapted to an all-painted project. Several alternative products are available and are favored by others; I will mention a few.
Instrumentation (Tools)
Presuming a decoration pattern has been sketched and the model covered with a heat-applied material, it's time to transfer that small-scale sketch onto the model. An engineer's or architect's scale (triangle-shaped, with scales on the edges) is preferred, although a calculator and a ruler will work.
Transfer the full-size measurements onto the model using a metal ruler. I use Fairgate 36- and 18-inch metal rules; these should be fairly heavy. Excellent nonruled straightedges are available in several lengths from Sig dealers. These straightedges should be as thick as possible, since the edge helps hold the blade vertical when cutting along it.
Make kit marks with a grease pencil (or a similar pencil used for overhead projectors) along the length and width of the area to be trimmed. These marks serve as a reference when positioning the trim material and can be removed later with alcohol.
A wide range of trim materials is available; I prefer UltraCote Plus, since it can be lightly ironed down after one or two days of setting. Transfer measurements onto the trim, cut it slightly smaller than the measurements, and use a multilayer pad of newsprint underneath. Use a sharp #11 blade and the metal straightedge to cut along the lines. Plastic-headed pins will stretch the trim material tight and hold it steady while cutting.
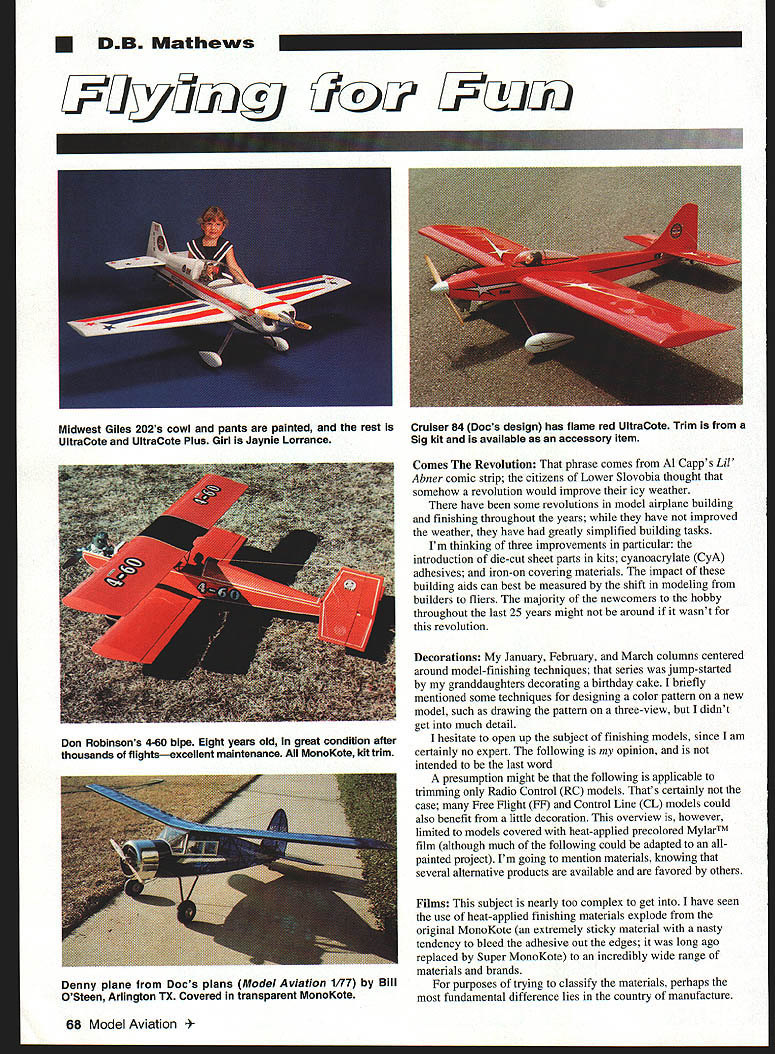
Irregular shapes are easily developed using nylon patterns (see the stars on the Giles in the photo). Numbers and letters can be obtained precut in vinyl at an office supply or from Sig's line of sticky-back numbers.
Tapered trim stripes are made by marking the widest point at the front and the narrowest at the back, then drawing and cutting the taper on both edges — you cannot get an even taper by cutting only one side.
For straight strips, I prefer a Smartstripe™ to cut strips up to two inches wide from UltraCote Plus. It is essential that the initial section of the trim material be tightly fastened to the roller; if the starter point slips, the whole process fails. The first cut should be just wide enough to cut into all of the roll — you cannot start on the very outside edge and get a clean cut. Change blades frequently; most bunching and tearing result from dull edges.
I also prefer trim tapes cut from UltraCote Plus on the Smartstripe. Scraps can be used for economy, and the ability to seal them with low heat is a definite advantage.
Films
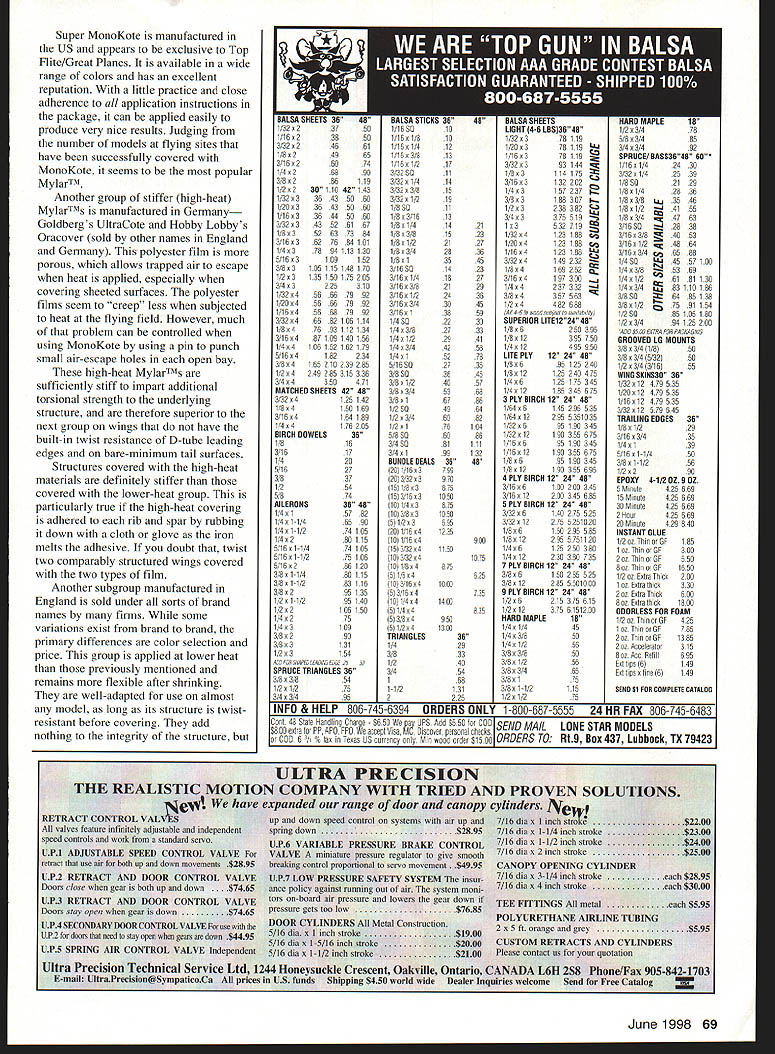
This subject is nearly too complex to get into in one article. Heat-applied finishing materials have proliferated since the original MonoKote (which tended to bleed adhesive at the edges) was replaced by Super MonoKote. Below is a practical classification and comparison.
Super MonoKote (U.S.)
Super MonoKote, manufactured in the U.S. and available from Top Flite/Great Planes, comes in a wide range of colors and has an excellent reputation. With practice and close adherence to the package application instructions, it can be applied easily and produce very nice results. Judging by the number of models at flying sites successfully covered with MonoKote, it is popular.
A pin can be used to punch small air-escape holes over an open bay when using MonoKote to help trapped air escape.
High-heat polyester (England/Germany)
A group of stiffer, high-heat Mylar™ films is manufactured in Germany and England — examples include Goldberg's UltraCote and Hobby Lobby's Oracover (sold under various names). These polyester films are porous enough to allow trapped air to escape when heat is applied, especially on sheeted surfaces. They seem to "creep" less when subjected to heat at the flying field.
High-heat Mylar films are sufficiently stiff to impart additional torsional strength to the underlying structure and are therefore superior for wings without built-in twist resistance (for example, wings lacking D-tube leading edges) and for minimal tail surfaces. Structures covered with high-heat materials are definitely stiffer than those covered with lower-heat films, particularly if the covering is adhered to each rib and spar and rubbed down with a cloth or glove as the iron melts the adhesive.
Lower-heat polyester (various English brands)
Another subgroup, manufactured in England and sold under many brand names, is applied at lower heat, remains more flexible after shrinking, and is usually easier to handle and less expensive. These films are well adapted for use on almost any model where the structure is twist-resistant before covering and where you do not want to add stiffness to the structure. Their primary differences among brands are color selection and price.
I am skipping iron-on fabrics for now, except to note that they can range from very strong and heavy to very light, resembling clear-doped Japanese tissue.
Ready-Made Decorations
Many contemporary kits include sheets of sticky-backed Mylar™ trim, which are superior to the soak-and-slide decals of yesterday. However, these decorations are rarely ready to use as supplied (with some rare die-cut exceptions). Cut them from the sheet leaving only about 1/16" of clear carrier material; otherwise a large, unsightly edge that reflects light differently than the covering will show. A metal straightedge, sharp #11 blade, and a newspaper pad will greatly help the procedure.
Some kit manufacturers sell trim sheets separately. The AMA Merchandise Catalog is another source for decorations. Several firms supply high-quality computer-generated custom vinyl designs; check their catalogs and ads for details.
Application
The battle is against surface tension — the attraction of molecules between two surfaces. Break surface tension and decorations will slide around easily when being positioned, and it becomes simple to remove underlying bubbles.
Surface tension is overcome with an emulsifier; dishwashing detergent in water works well. Put a bit of detergent in a spray bottle of water, apply the mixture to the surface, then slide the trim into position using the reference tick marks made earlier. The soapy water makes it possible to accurately position the decoration, since nothing is sticking.
Carefully blot off excess water with paper towels, then "trowel" from the decoration's center outward to the edges. I prefer strips of balsa sheet for a trowel since they absorb some water as they are used; others prefer a plastic credit card. The goal is to push trapped air out through the edges. Dry expelled water as you go and gradually work out all bubbles. If small bubbles remain, pinhole them all the way through and rub them out after the surface has dried.
Maintenance
An all-painted model will generally hold up better over the years than one covered in heat-shrink film. However, careful postflight cleaning and good maintenance will greatly extend the life of a film-covered model.
Many airplane cleaners are available. A household cleaner such as Fantastik™ mixed with two ounces of denatured alcohol per pint works well for a thorough detailed cleaning. Cleaners containing ammonia, such as Windex™, work well but the ammonia is hazardous to engine and radio parts, so avoid them around those components.
Areas requiring special attention are:
- hinges,
- landing gear seats,
- engine compartments,
- engines and fuel lines, and
- exposed control horns.
A few extra minutes cleaning these critical areas after each flying session can save days of rebuilding later. Clean the airplane immediately at the end of the flying session because the longer one waits, the more tenacious the oil becomes. Once home and dry, a good spray and wipe with Pledge™ or similar furniture wax is beneficial.
Trim edges attract dirt; I like to seal edges with clear epoxy. For years I've used Super Poxy™ applied along the edges with a tiny camel-hair brush. I prefer it to clear urethanes because it sets more quickly and does not yellow with time. Remove body oils from the edges with denatured alcohol before applying. The epoxy is nearly invisible and adhesion is not a problem.
A Final Bit of Trivia
At the 1986 Toledo show, Goldberg Models and Sig Manufacturing both arrived with heat-shrink materials to introduce. By coincidence, both firms had selected UltraCote as the name for their new materials. How the issue was resolved I do not know, but Sig scrambled during the night to change its product's name to Supercoat.
Transcribed from original scans by AI. Minor OCR errors may remain.

