
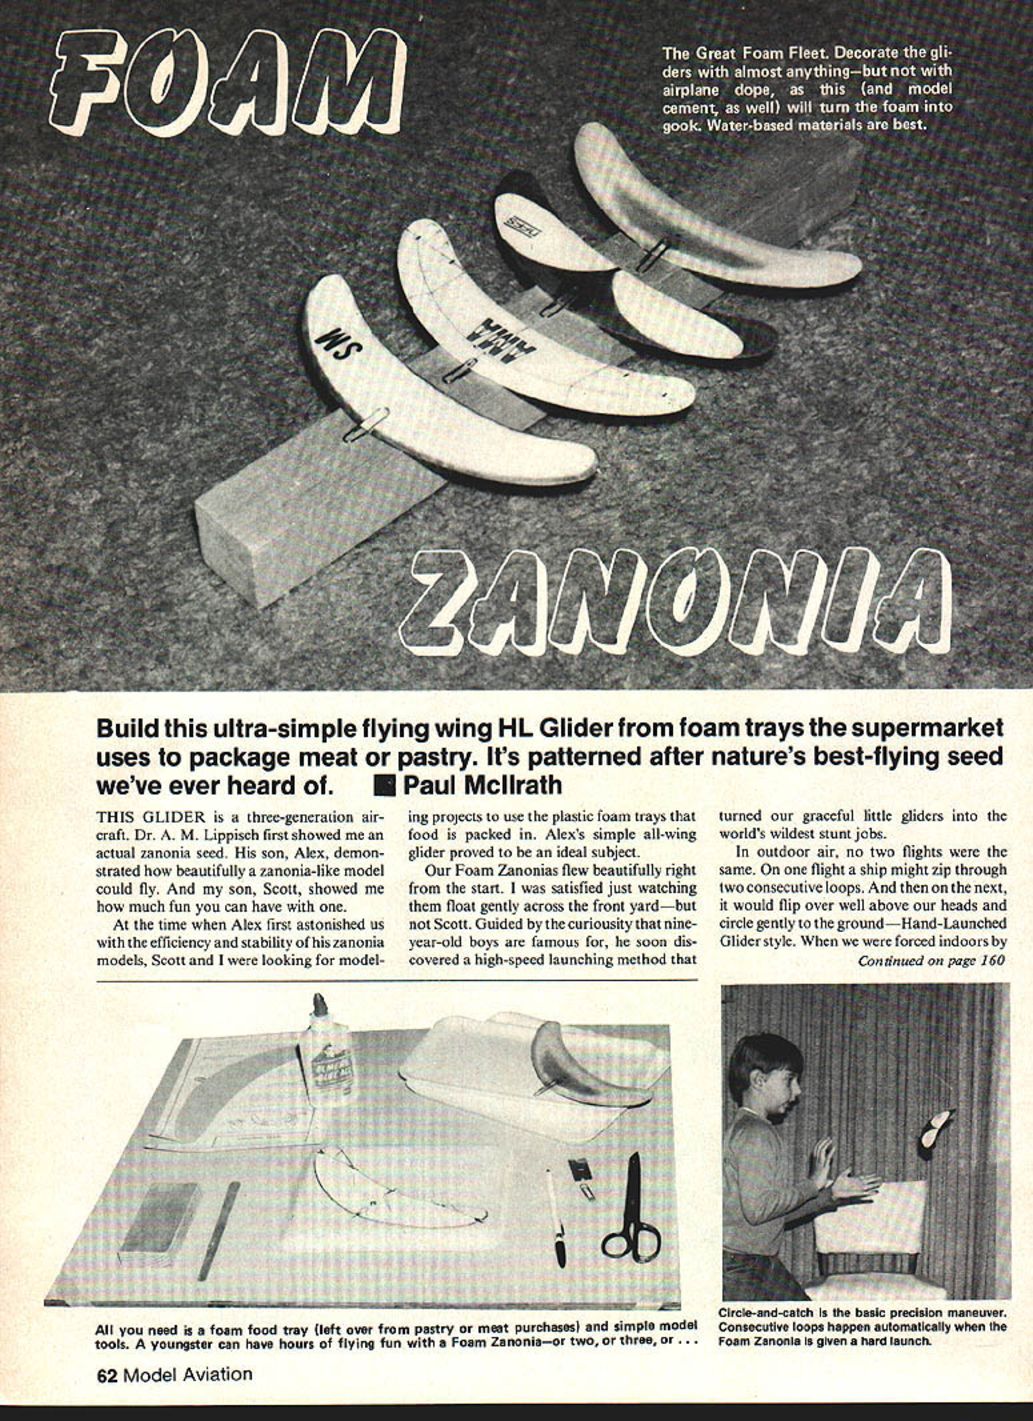
Foam Zanonia
Paul McIlrath
This glider is a three-generation aircraft. Dr. A. M. Lippisch first showed me an actual zanonia seed. His son, Alex, demonstrated how beautifully a zanonia-like model could fly. And my son, Scott, showed me how much fun you can have with one.
At the time Alex first astonished us with the efficiency and stability of his zanonia models, Scott and I were looking for modeling projects to use the plastic foam trays that food is packed in. Alex's simple all-wing glider proved to be an ideal subject.
Our Foam Zanonias flew beautifully right from the start. I was satisfied just watching them float gently across the front yard—but not Scott. Guided by the curiosity that nine-year-old boys are famous for, he soon discovered a high-speed launching method that turned our graceful little gliders into the world's wildest stunt ships.
In outdoor air, no two flights were the same. On one flight a ship might zip through two consecutive loops. On the next, it would flip over well above our heads and circle gently to the ground—Hand-Launched Glider style. When we were forced indoors by cold weather, Scott soon developed a whole bag of parlor tricks with our fleet of "seeds."
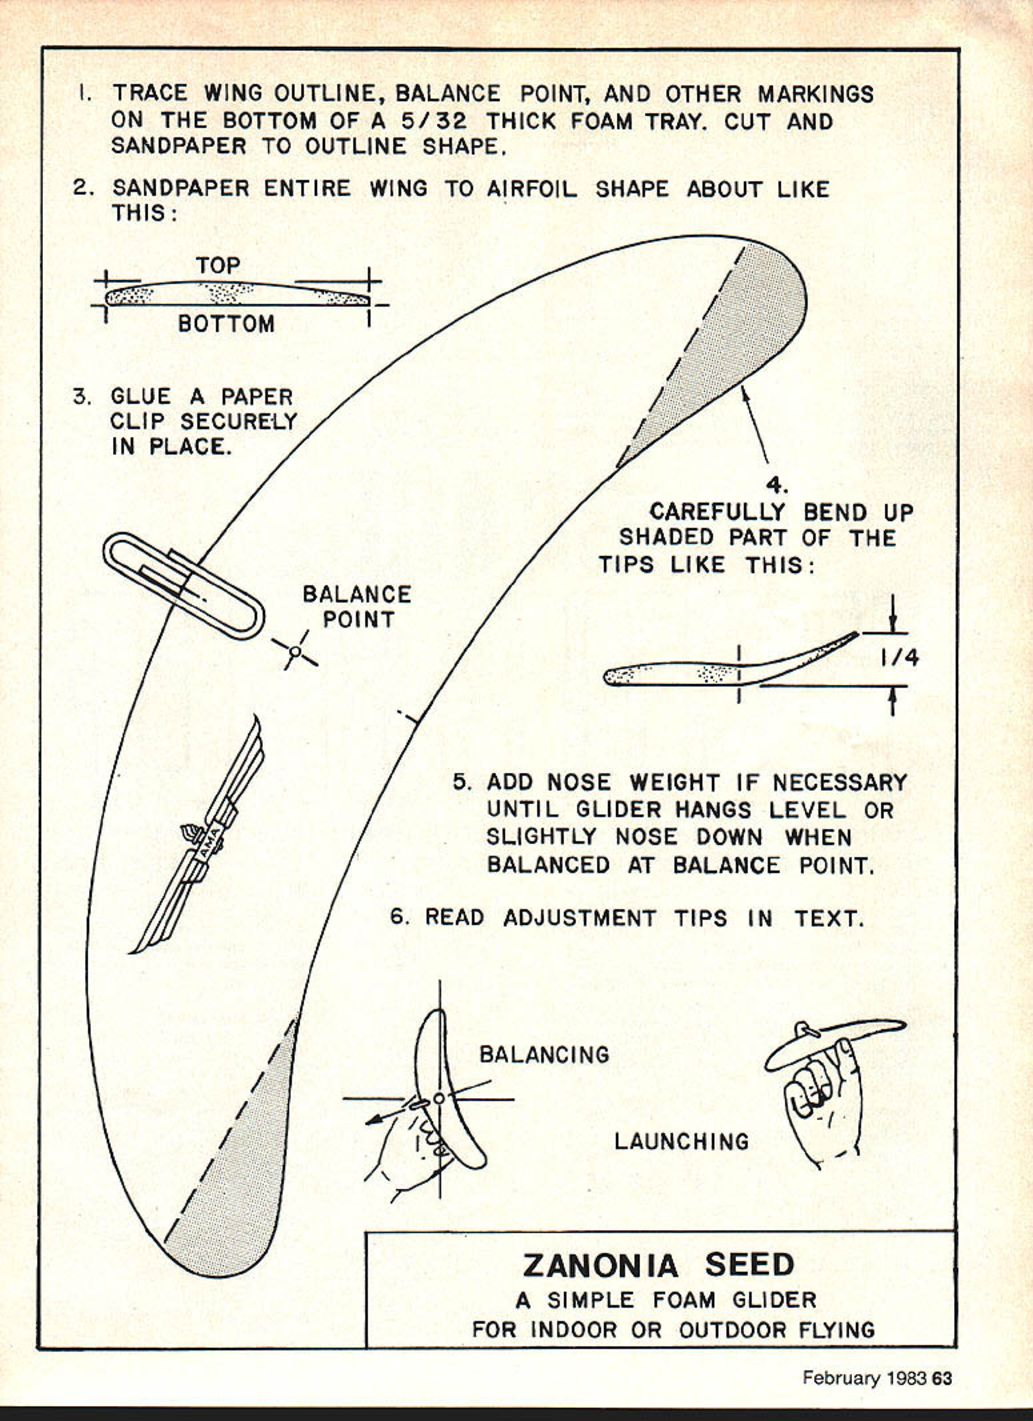
A Simple Foam Glider
FOR INDOOR OR OUTDOOR FLYING
- Trace the wing outline, balance point, and other markings on the bottom of a 5/32 in. thick foam tray. Cut and sand to the outline shape.
- Sandpaper the entire wing to an airfoil-like shape: rounded top, flatter bottom. (Use medium or fine sandpaper glued to a block for best results.)
- Glue a paper clip securely in place at the shown balance point to serve as a hook or mounting point.
- Carefully bend up the shaded part of the tips in a gentle curve about 1/4 in. Do not make a sharp crease; that will crush and weaken the plastic.
- Add nose weight if necessary until the glider hangs level or slightly nose down when balanced at the balance point.
- Read the adjustment tips in the text below.
Tricks to Try
Here are some tricks to try after your zanonias are built and adjusted.
Simple Loops
Launch sharply forward and down for two or even three consecutive loops.
Circle and Catch
Bank right or left and toss slightly upward. Adjust the angle of launch so your ship circles and returns to your hand consistently. Then try for two complete circles.
Elvis Loops
Hold your Zanonia upside down, and thrust it straight forward. With practice, it will make a diving loop between your legs, zoom up behind you, and recover above your head.
Take-offs
Place your glider on a smooth floor and kneel beside it. Rest your fingertips on top of the wing and whip it quickly forward for a looping takeoff.
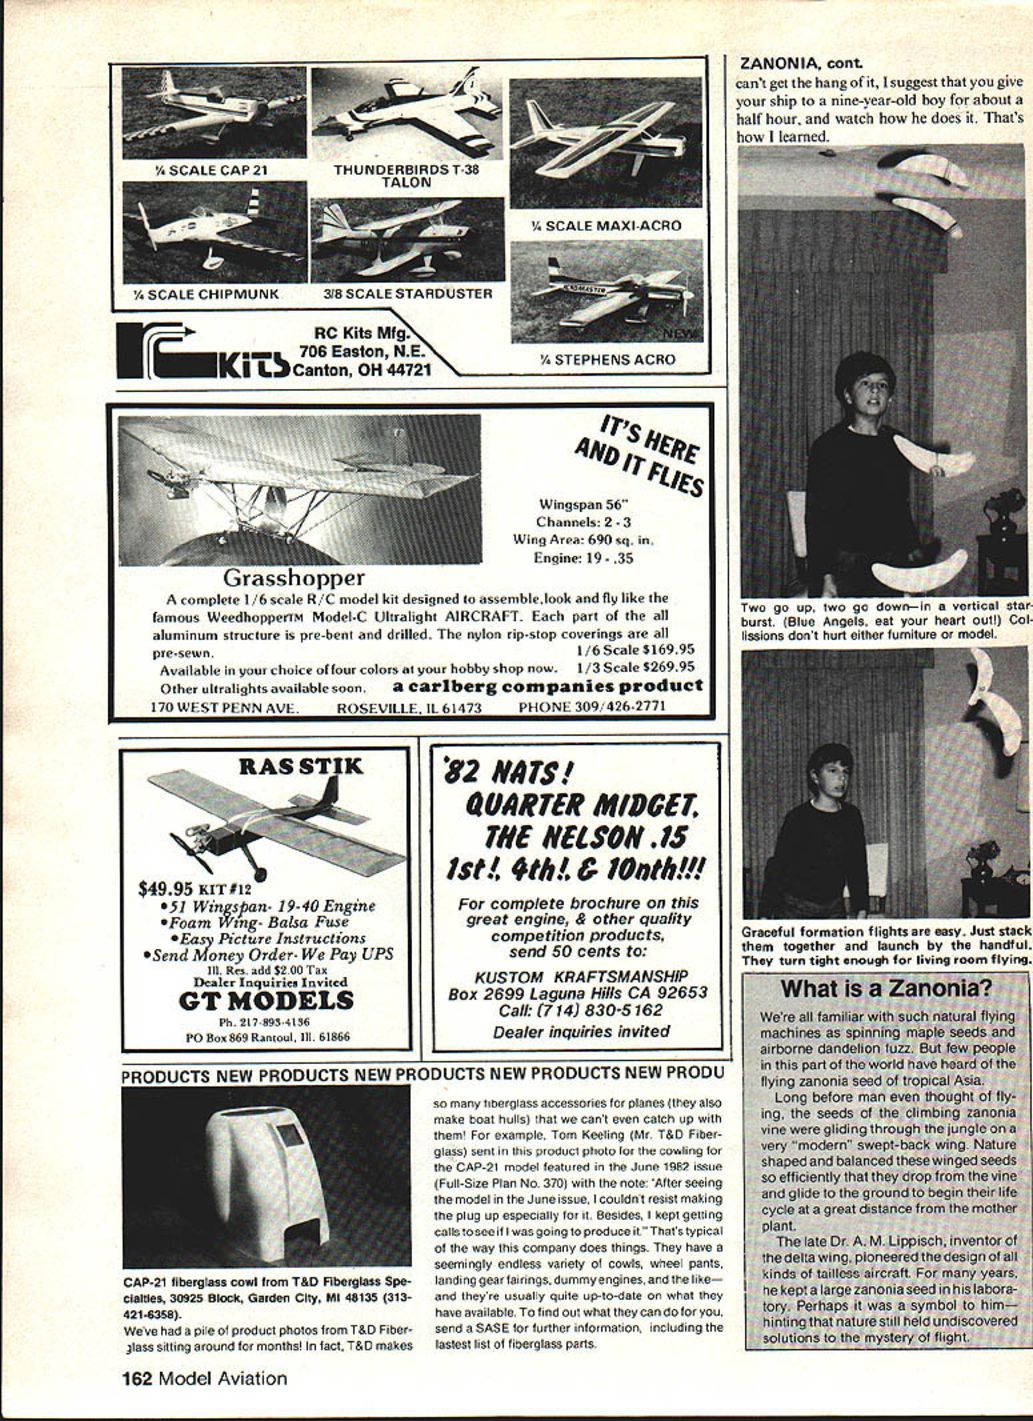
Formation Flying
When you have these stunts perfected, try this: stack two or more gliders top-to-bottom or bottom-to-bottom, and launch them all at once. Very pretty formation maneuvers and starbursts are possible with up to four ships that are well matched and adjusted.
Working with Foam
At the supermarket, look for fine-grained foam plastic trays used for packaging meat and pastry. They are smooth, feather-light, and about 5/32 in. thick. You will need one that is about 9 or 10 in. long.
This foam cuts and sandpapers very easily. Cut it with any modeling tool, and sandpaper with medium or fine sandpaper glued to a block.
Model airplane glue and dope will dissolve the plastic. Always use epoxy or white glue. Decorate with decals, felt-tip or ball-point pens, plastic model enamel, or almost anything except dope. If ink or paint doesn't stick evenly, sand the plastic lightly to remove the surface gloss.
Building Notes
Simple instructions are given on the plan. Building is easy, but exact balancing is important.
When your glider is complete, push a pin through the balance point and hold the pin horizontally, letting the model rotate freely on the pin like a propeller. One wing will be heavier and will swing to the bottom, but don't worry about that. If the model hangs with the wing straight up and down, or if the nose tilts very slightly down, that's fine. But if the nose points up, add a little clay, a pin, or any handy weight to the nose until the wing hangs vertically.
Now bend the shaded part of the wing tips up about a quarter of an inch in a gentle curve. Don't make a sharp crease, as that will crush and weaken the plastic.
Balancing and Adjustment
Try a few gentle glides. If your Zanonia dives quickly to the floor, bend the rear edge of the tips up a little more. If it swoops upward, stalls, and then dives, lower them a bit.
If the ship wallows around—up and down or side to side—add a touch more weight to the nose. Once the balance is exactly right, adjustment isn't touchy.
Bending one trailing edge up more than the other will cause (or correct) a turn. Bend the tip up more on the side that you want the model to turn toward.
You'll find that stunts are easier with the "tail" bent up a little more than for plain gliding.
A little practice will quickly develop the knack for launching and adjusting. If you just can't get the hang of it, I suggest that you give your ship to a nine-year-old boy for about a half hour, and watch how he does it. That's how I learned.
What is a Zanonia?
We're all familiar with such natural flying machines as spinning maple seeds and airborne dandelion fuzz. But few people in this part of the world have heard of the flying zanonia seed of tropical Asia.
Long before man even thought of flying, the seeds of the climbing zanonia vine were gliding through the jungle on a very modern swept-back wing. Nature shaped and balanced these winged seeds so efficiently that they drop from the vine and glide to the ground to begin their life cycle at a great distance from the mother plant.
The late Dr. A. M. Lippisch, inventor of the delta wing, pioneered the design of all kinds of tailless aircraft. For many years he kept a large zanonia seed in his laboratory. Perhaps it was a symbol to him—hinting that nature still held undiscovered solutions to the mystery of flight.
Transcribed from original scans by AI. Minor OCR errors may remain.

