
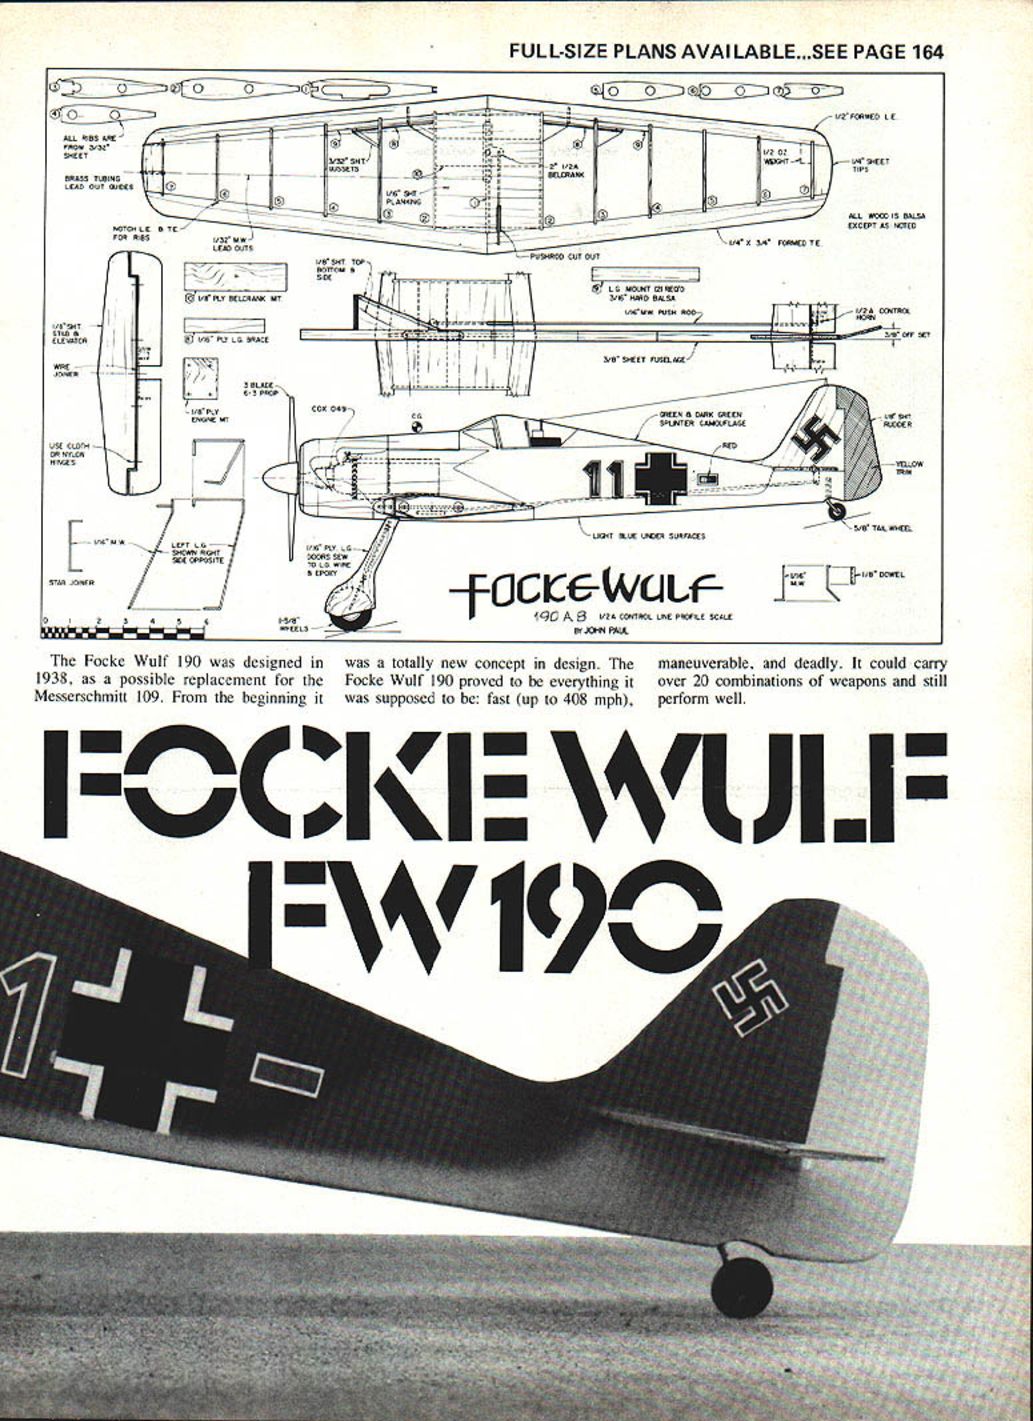

Focke Wulf FW190
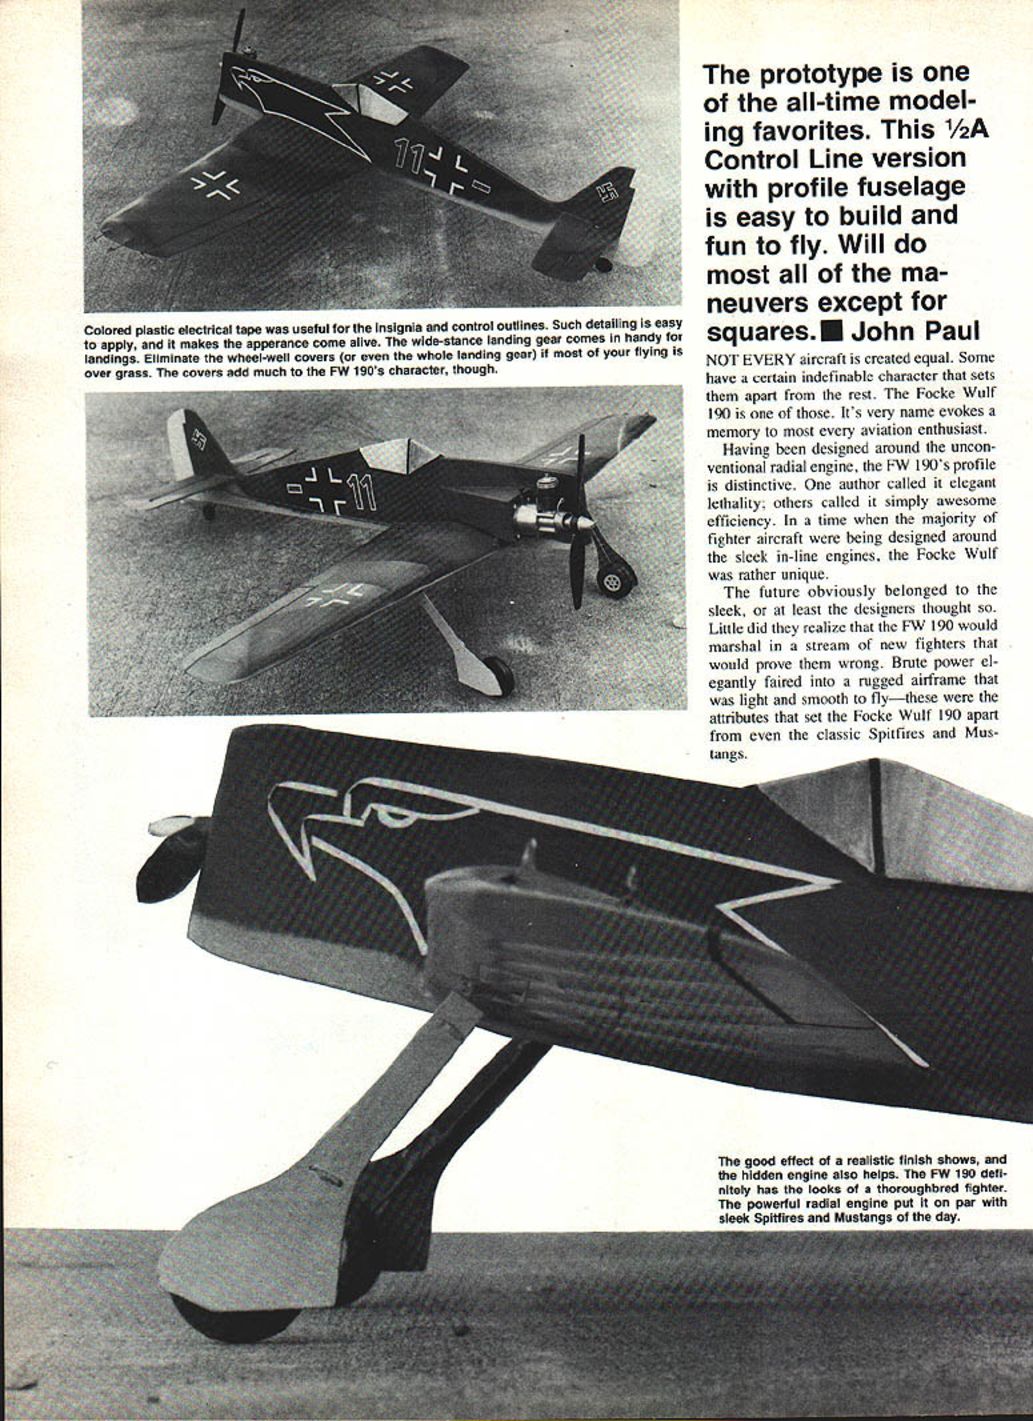
The prototype is one of the all-time modeling favorites. This 1/2A control-line version with profile fuselage is easy to build and fun to fly. Will do most all of the maneuvers except for squares. — John Paul
Introduction
Not every aircraft is created equal. Some have a certain indefinable character that sets them apart from the rest. The Focke Wulf 190 is one of those. Its very name evokes a memory to most every aviation enthusiast.
Designed around the unconventional radial engine, the FW190's profile is distinctive. One author called it "elegant lethality"; others called it simply awesome efficiency. In a time when the majority of fighter aircraft were being designed around sleek inline engines, the Focke Wulf was rather unique. Brute power faired into a rugged airframe that was light and smooth to fly — attributes that set the FW190 apart from even classic Spitfires and Mustangs.
Designed in 1938 as a possible replacement for the Messerschmitt Bf 109, the FW190 began as a totally new concept. It proved everything it was meant to be: fast (up to 408 mph), maneuverable, deadly, and able to carry over 20 combinations of weapons while still performing well.
One notable episode: the RAF devised several plans to capture an FW190. Ironically, one was unexpectedly delivered during a foggy English evening in 1942 when a disoriented German pilot landed in England after a dogfight. The RAF gave the FW190 thorough testing and found its performance nearly matched the best Spitfire of the date. The RAF determined the best way to beat the FW190 was skill — a lot of tight turning.
Model overview
The FW190 has always been a favorite design for modelers. When a friend proposed building combat models in profile scale, the choice was quick: the Focke Wulf 190. The 1/2A combat model presented here is fun and exciting. At this size the models are not too fast to keep up with but retain the thrill of close combat flying. Two fully decorated warbirds in the same circle is very entertaining.
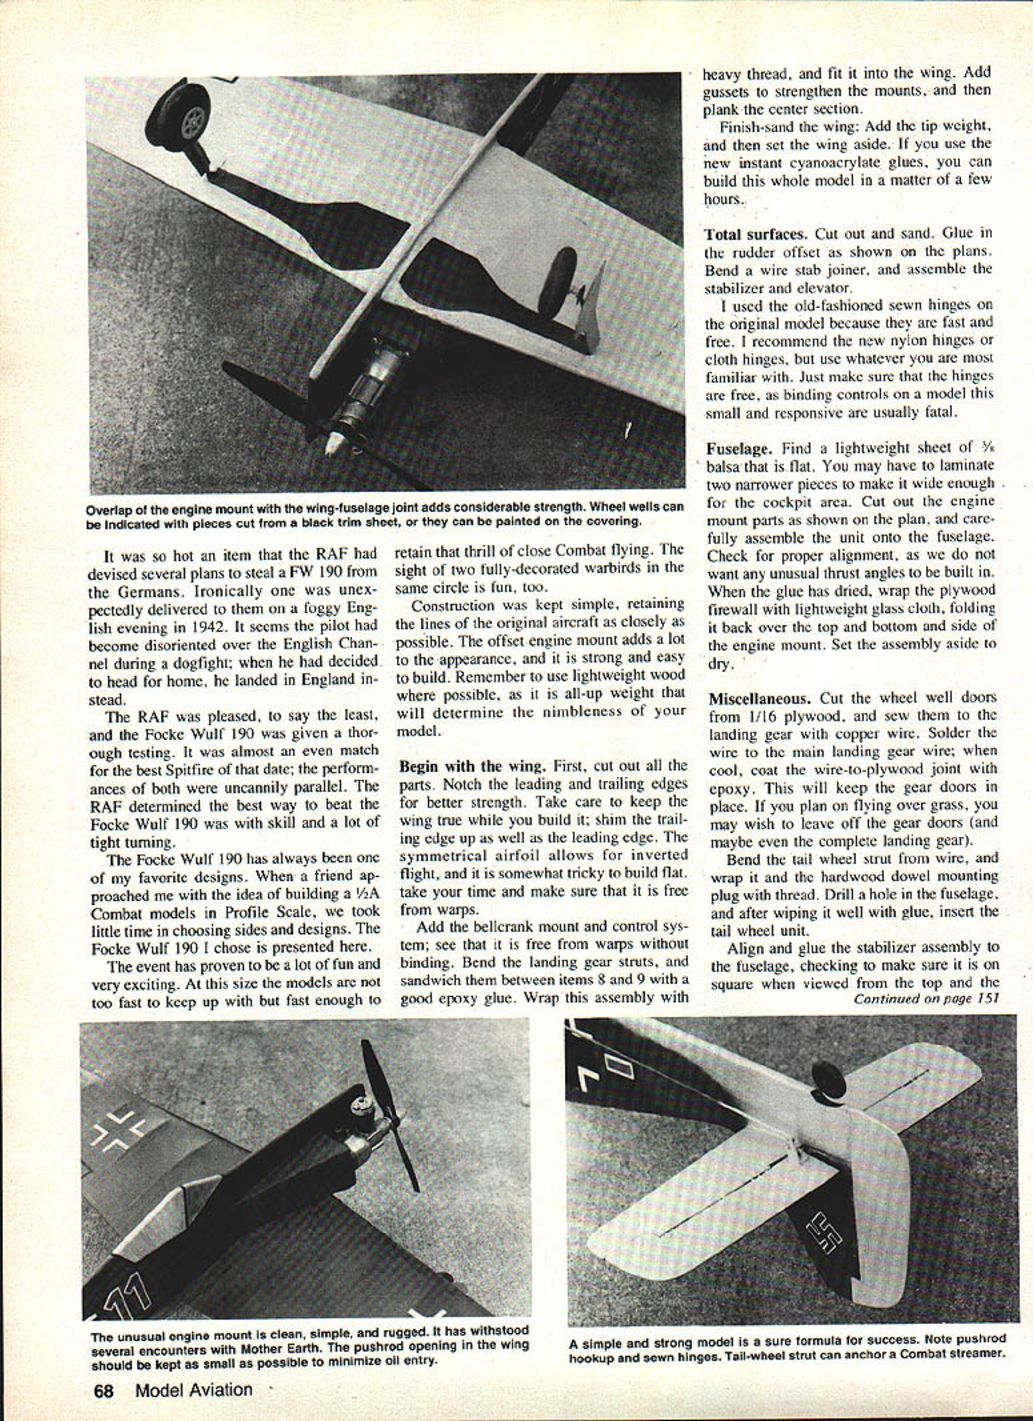
Construction is kept simple, retaining the lines of the original aircraft as closely as possible. An offset engine mount adds to the appearance, and it is strong and easy to build. Use the lightest wood possible — the all-up weight determines how nimble the model will be.
Construction
Wing
- Cut out all wing parts and notch the leading and trailing edges for added strength.
- Keep the wing true while building; shim the trailing edge and leading edge as required.
- The symmetrical airfoil allows inverted flight but is somewhat tricky to build flat — take time to ensure the wing is free of warps.
- Add the bellcrank mount for the control system and check for free movement with no binding.
- Bend the landing-gear struts and sandwich them between the parts shown on the plan (items 8 and 9) using good epoxy.
- Wrap the landing-gear assembly with heavy thread and fit it to the wing.
- Add gussets to strengthen the mounts and plank the center section.
- Finish-sand the wing and add tip weights. Set the wing aside.
- Using modern instant cyanoacrylate glues, you can build the whole model in a matter of a few hours.
Tail surfaces
- Cut out and sand all tail parts.
- Glue in the rudder with the offset shown on the plans.
- Bend the wire stab joiner and assemble the stabilizer and elevator.
- Hinges: the original model used sewn cloth hinges; recommended options are nylon hinges or cloth hinges if you are familiar with them. Ensure hinges operate freely — binding controls on a small, responsive model are usually fatal.
Fuselage
- Find lightweight, flat sheet balsa (3/16" suggested). You may need to laminate two narrower pieces for cockpit width.
- Cut out the engine-mount parts as shown on the plan and carefully assemble the unit onto the fuselage.
- Check alignment carefully to avoid unusual thrust angles.
- When glue is dry, wrap the plywood firewall with lightweight glass cloth, folding it over top, bottom, and sides of the engine mount. Allow to dry.
Miscellaneous assembly
- Cut wheel well doors from 1/16" plywood and sew them to the landing gear with copper wire. Solder the wire to the main landing-gear wire; when cool, coat the joint with epoxy to secure the doors. If flying over grass, consider leaving off the gear doors or the entire landing gear.
- Bend the tailwheel strut from wire, wrap it and the hardwood dowel mounting plug with thread, and glue into a drilled hole in the fuselage after wiping the hole with glue.
- Align and glue the stabilizer assembly to the fuselage. Check that it is square when viewed from the top and front. Add the rudder, square it, and set aside to dry.
Finishing
- Give the wing assembly a final sanding.
- Apply two coats of dope to seal the wood; sand rough spots.
- Cover the wing with lightweight silkspan. Applying the silkspan wet helps conform to any irregular curves. Cover each panel separately and the tips.
- Spray the finished wing lightly with water to shrink the covering and set aside to dry.
- Fit the wing to the fuselage to add strength. When the fit is good, epoxy the wing to the fuselage and check for squareness. A model built true will fly true and will not have strange habits upright or inverted.
- After epoxy cures, give the entire model five coats of clear dope, sanding between coats.
- Finish and markings: look for a color scheme you like and try to copy authentic schemes. Military flats are recommended for background colors; plastic tape works well for insignia, trim, numbers, and control outlines.
- Add wheels, engine, and propeller. Hook up the pushrod and balance the model carefully. Do not attempt to fly without proper balance — add weight as needed before flying.
Flying
- The original model is flown on 35-ft steel lines, which markedly improve a 1/2A's performance over cloth Dacron lines and are much safer.
- At the field, hook up the control lines and check movement. Adjust the handle to ensure neutral control when the handle is neutral.
- First flights: feel the model out slowly. Begin with climbs and dives, then progress to loops, figure eights, and inverted flight.
- The FW190 model will perform most stunts (except squares) without difficulty.
- Before attempting combat matches, learn the model's minimum and maximum turning radius to avoid pulling out too late during a duel.
- Get to know your FW190 intimately, then recruit a flying buddy to build a Spitfire and enjoy combat.
Transcribed from original scans by AI. Minor OCR errors may remain.

