
Free Flight
Duration
Harry Murphy
ANOTHER PENNY (or two)
I received lotsa comments and mail on the "Getting My 10¢ Worth" article in my last column. Most of the missives were from those who are apparently old enough to have listened to the Lone Ranger on the radio right along with "Boss Ross" and myself as we meticulously labored in constructing those wondrous "dime scale" beauties of yesteryear. Typical was the nice letter received from Bruce Ihde of Tulsa, OK. Bruce sez:
"I enjoyed your article on the 10¢ kits. Dad and I built my first model in 1933. It was an Ideal kit, 12-in.-span Boeing biplane fighter; 25¢ mail order. We built it one Saturday on the basement workbench. Of course we ran out of the glue supplied in the kit and finished it with Duco cement; and it took years to develop the skill to build a complete model with just the glue supplied in that little bottle.
"The next year a local bookstore stocked Comet and Megow kits, and I built a bunch of the dime ones. I, too, made a mess of the covering with flour and water paste. Then we discovered banana oil which was stocked in bulk by a drug store. We supplied our own bottle and bought it for a nickel an ounce. A very superior product for both adhering the paper and coating it after shrinking for rubber-powered models—and I wish I could get some today.
"Remember the fineness of the Japanese tissue in those days? You could tear it in a strip as narrow as 1/16 in. with the grain. Did you ever catch a fly and glue one of these strips on his tail and turn him loose? Great fun watching the strips of paper buzz around the room. (Now you will get letters from the Humane Society, RMcM.) Eventually these cheap models began to fly quite well as our skills improved, and we went to bigger props, better rubber, and used winders.
"I got back into modeling (RC) a few years ago, but I recently started on the rubber-powered ones again with my grandson. I, too, seem to have a lot to relearn in building these small ones."
Thanks, Bruce! I never built an Ideal kit. I guess they must have been before my time—but then, I seldom had a whole quarter to spend back then, anyway.
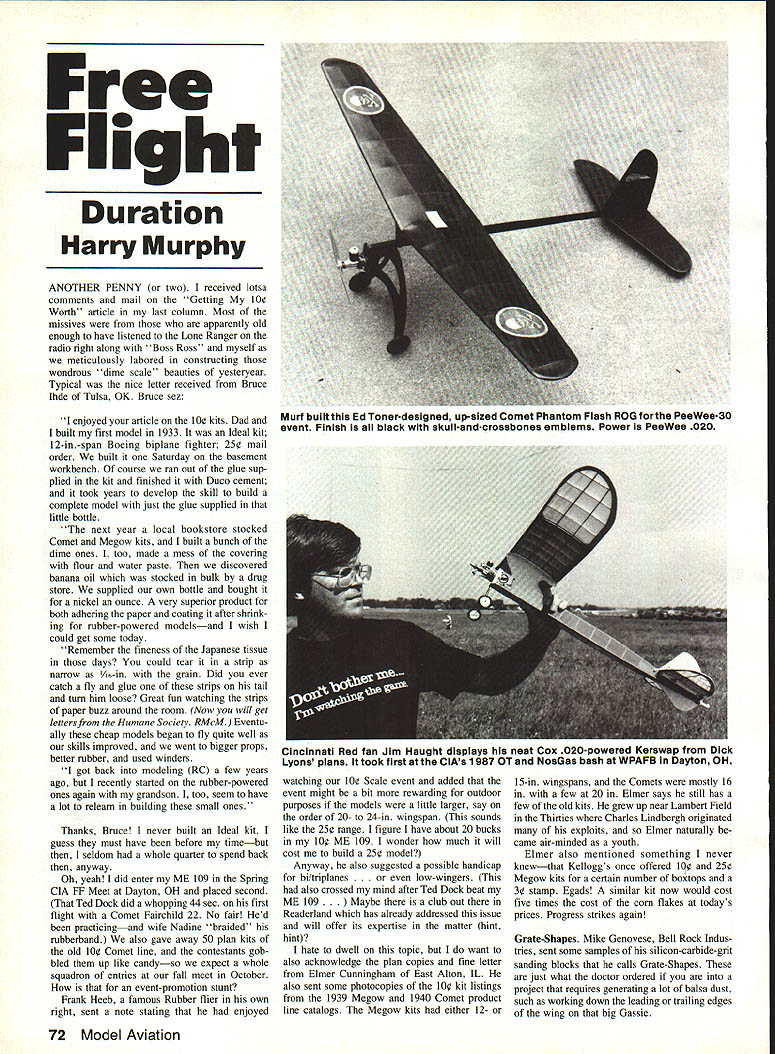
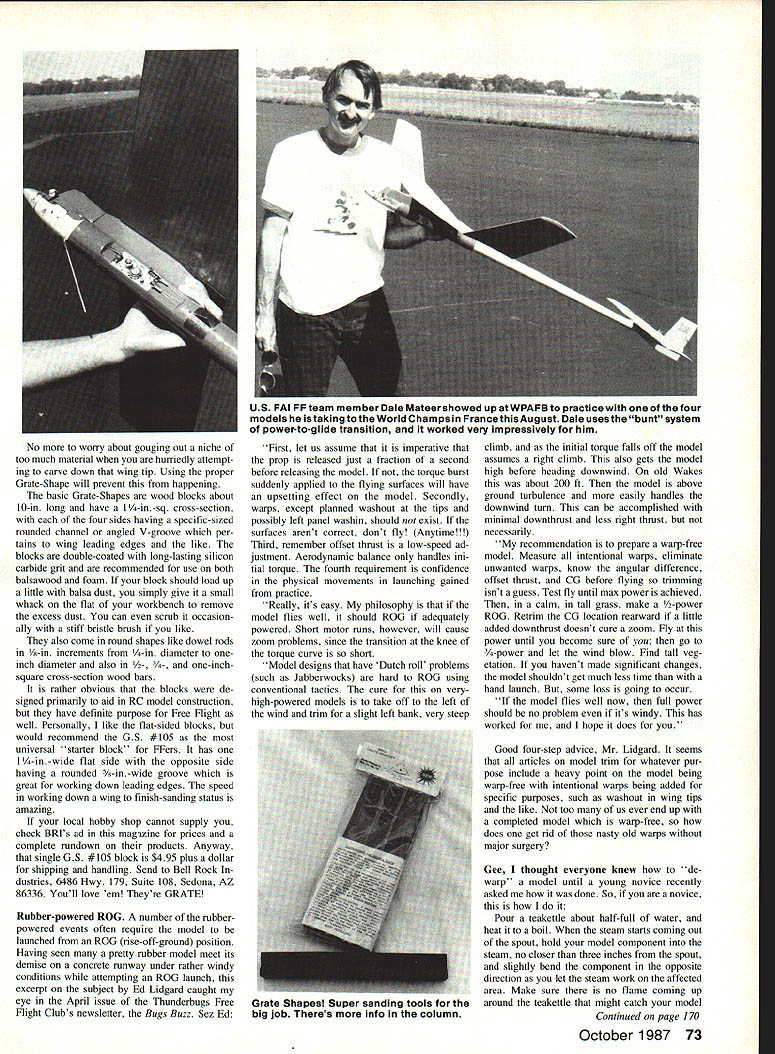
Oh, yeah! I did enter my ME 109 in the Spring CIA FF Meet at Dayton, OH and placed second. (That Ted Dock did a whopping 44 sec. on his first flight with a Comet Fairchild 22. No fair! He'd been practicing and his wife Nadine "braided" his rubberband.) We also gave away 50 plan kits of the old 10¢ Comet line and the contestants gobbled them up like candy—so we expect a whole squadron of entries for our fall meet in October, event-promotion stunt.
Frank Heeb, a famous rubber flier in his own right, sent a note stating that he had enjoyed watching our 10¢ Scale event and added that the event might be a bit more rewarding for outdoor purposes if the models were a little larger, say on the order of 20–24 in. wingspan. (This sounds like the 25¢ range. I figure I have about $20 in my 10¢ ME 109. I wonder how much it will cost me to build a 25¢ model?)
Anyway, he also suggested a possible handicap for bi/triplanes ... or even low-wingers. (This had also occurred to me after Ted Dock beat my ME 109...) Maybe there is a club out there in Readerland which has already addressed this issue and will offer its expertise in the matter — hint! hint!
I hate to dwell on this topic, but I do want to also acknowledge the plan copies and fine letter Elmer Cunningham of East Alton, IL, sent. He sent some photocopies of the old kit listings from the 1939 Megow and 1940 Comet product line catalogs. The Megow kits had either 12- or 15-in. wingspans, and the Comets were mostly 16 in. with a few of 20. Elmer says he still has a few of the old kits. He grew up near Lambert Field in the Thirties where Charles Lindbergh originated air-mindedness in many of his exploits, and so Elmer naturally became air-minded as a youth.
Elmer also mentioned something I never knew—that Kellogg's once offered 10¢ and 25¢ Megow kits for a certain number of box tops and a 3¢ stamp. Egads! A similar kit now would cost five times the cost of the corn flakes at today's prices. Progress strikes again!
Grate-Shapes
Mike Genovese of Bell Rock Industries sent some samples of silicon-carbide-grit sanding blocks—calls them "Grate-Shapes"—just what the doctor ordered for a project which requires generating a lot of balsa dust, such as working down the leading or trailing edges of the wing on that big Gassie.
Basic Grate-Shapes wood blocks about 10 in. long have 1-in. square cross-sections. Four sides having specific-sized rounded channels and an angled V-groove pertain to wing leading edges. The blocks are double-coated with long-lasting silicon-carbide grit. Recommended to use both sizes; balsa wood should load up a little with balsa dust—simply give a small whack on the workbench to remove excess dust.
They also come in round shapes like dowel rods in 1/8-in. increments from 1/4-in. diameter to 1-in. diameter, and also in 1/2-, 3/4-, and 1-in.-square cross-section wood bars.
It is rather obvious that the blocks were designed primarily to aid in R/C model construction, but they have definite purpose for Free Flight as well. Personally, I like the flat-sided blocks, but would recommend the G.S. #105 as the most universal "starter block" for Free Flighters. It has one 1/4-in.-wide flat side with the opposite side having a rounded 3/32-in.-wide groove which is great for working down leading edges. The speed in working down a wing to finish-sanding status is amazing.
If your local hobby shop cannot supply you, check BRI's ad in this magazine for prices and a complete rundown on their products. That single G.S. #105 block is $4.95 plus a dollar for shipping and handling. Send to Bell Rock Industries, 6486 Hwy. 179, Suite 108, Sedona, AZ 86336. You'll love 'em! They're GRATE!
Rubber-powered R.O.G.
A number of the rubber-powered events often require the model to be launched from an ROG (rise-off-ground) position. Having seen many a pretty rubber model meet its demise on a concrete runway under rather windy conditions while attempting an ROG launch, this excerpt on the subject by Ed Lidgard caught my eye in the April issue of the Thunderbugs Free Flight Club's newsletter, the Bugs Buzz. Sez Ed:
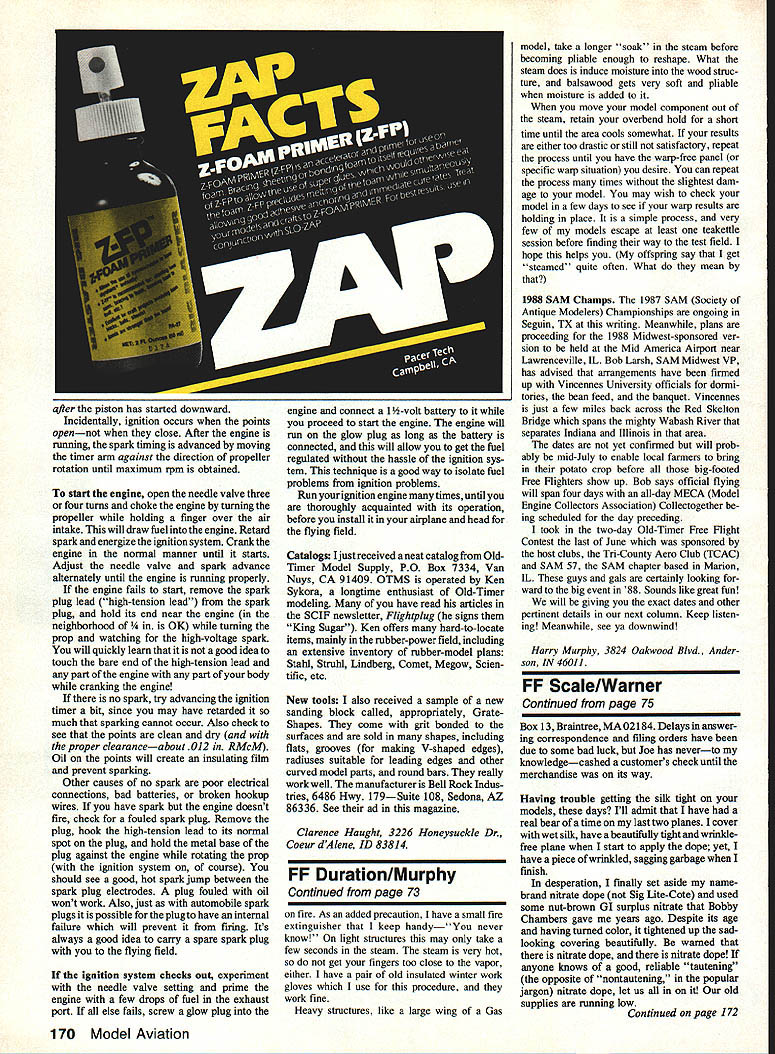
"First, let's assume that it is imperative that the prop is released just a fraction of a second before releasing the model. If not, the torque burst suddenly applied to the flying surfaces will have an upsetting effect on the model. Secondly, warps, except planned washout at the tips and possibly left panel wash-in, should not exist. If the surfaces aren't correct, don't fly! (Anytime!!!) Third, remember offset thrust is a low-speed adjustment. Aerodynamic balance only handles initial torque. The fourth requirement is confidence in the physical movements in launching gained from practice.
"Really, it's easy. My philosophy is that if the model flies well, it should ROG if adequate. Short motor runs, however, will cause zoom problems, since the transition at the knee of the torque curve is so short.
"Model designs that have 'Dutch roll' problems (such as Jabberwock?) are hard to ROG using conventional tactics. The cure for this on very high-powered models is to take off to the left of the wind and trim for a slight left bank, very steep climb, and as the initial torque falls off the model assumes a right climb. This also gets the model high before heading downwind. On old Wakes this was about 200 ft. Then the model is above ground turbulence and more easily handles the downwind turn. This can be accomplished with minimal downthrust and less right thrust, but not necessarily.
"My recommendation is to prepare a warp-free model. Measure all incidental warps, eliminate unwanted warps, know the angular difference, offset thrust, and CG before flying so trimming isn't a guess. Test fly until max power is achieved. Then, in a calm, still grass, make a 1/2-power ROG. Retrim the CG location rearward if a little added downthrust doesn't cure a zoom. Fly at this power until you become sure of your trim and power and let the wind blow. Find the tailweight? If you haven't made significant changes the model shouldn't get much less time than with a hand launch. But, some loss is going to occur.
"If the model flies well now, then full power should be no problem even if it's windy. This has worked for me, and I hope it does for you."
Good four-step advice, Mr. Lidgard. It seems that all articles on model trim for whatever purpose include a heavy point on the model being warp-free with intentional warp being added for specific purposes, such as washout in wing tips and the like. Not too many of us end up with a completed model which is warp-free, so how does one get rid of those nasty old warps without major surgery?
Gee, I thought everyone knew how to 'de-warp' a model until a young novice recently asked me how it was done. So, if you are a novice, this is how I do it:
Pour a tea kettle about half-full of water, and heat it to a boil. When the steam starts coming out of the spout, hold your model component into the steam, no closer than three inches from the spout, and slightly bend the component in the opposite direction as you let the steam work on the affected area. Make sure there is no flame coming up around the tea kettle that might catch your model on fire. As an added precaution, I have a small fire extinguisher that I keep handy — you never know! On light structures this may only take a few seconds in the steam. The steam is very hot, so do not get your fingers too close to the vapor, either. I have a pair of old insulated winter work gloves which I use for this procedure, and they work fine.
Heavy structures, like a large wing of a gas model, take a longer "soak" in the steam before becoming pliable enough to reshape. What the steam does is induce moisture into the wood structure, and balsa wood gets very soft and pliable when moisture is added to it.
When you move your model component out of the steam, retain your overbend hold for a short time until the area cools somewhat. If your results are either too drastic or still not satisfactory, repeat the process until you have the specific panel (or specific wing situation) you desire. You can repeat the process many times without the slightest damage to your model. You may wish to check your model in a few days to see if your warp results are holding in place. It is a simple process, and very few of my models escape at least one week or so before finding their way to the test field. I suppose this helps you. (My offspring say that I get "steamed" quite often. What do they mean by that?)
1988 SAM Champs.
The 1987 SAM (Society of Antique Modelers) Championships are ongoing in Seguin, TX at this writing. Meanwhile, plans are proceeding for the 1988 Midwest-sponsored version to be held at the Mid-America Airport near Lawrenceville, IL. Bob Lesh, SAM Midwest VP, has advised that arrangements have been firmed up with Vincennes University officials for dormitory, the bean feed, and the banquet. Vincennes is only a few miles back across the Red Skelton Bridge which spans the mighty Wabash River that separates Indiana and Illinois in that area.
The dates are not yet confirmed but will probably be mid-July to enable local farmers to bring in their potato crop before all those big-booted free fighters show up. The first of June Free Flight contest, the Old-Timer Free Flight Contest, was sponsored by the host clubs, the Tri-County Aero Club (TCAC) and SAM 57, the SAM chapter based in Marion, IN. These guys gave out gas and diesel for the events last year and were certainly looking forward to the big event in '88. Sounds like great fun! We will be giving you the exact dates and other pertinent details in our next column. Keep listening! Meanwhile, see ya downwind!
Harry Murphy 3824 Oakwood Blvd. Anderson, IN 46011
Transcribed from original scans by AI. Minor OCR errors may remain.

