
Duration
Bob Meuser
Indoor World Champ:
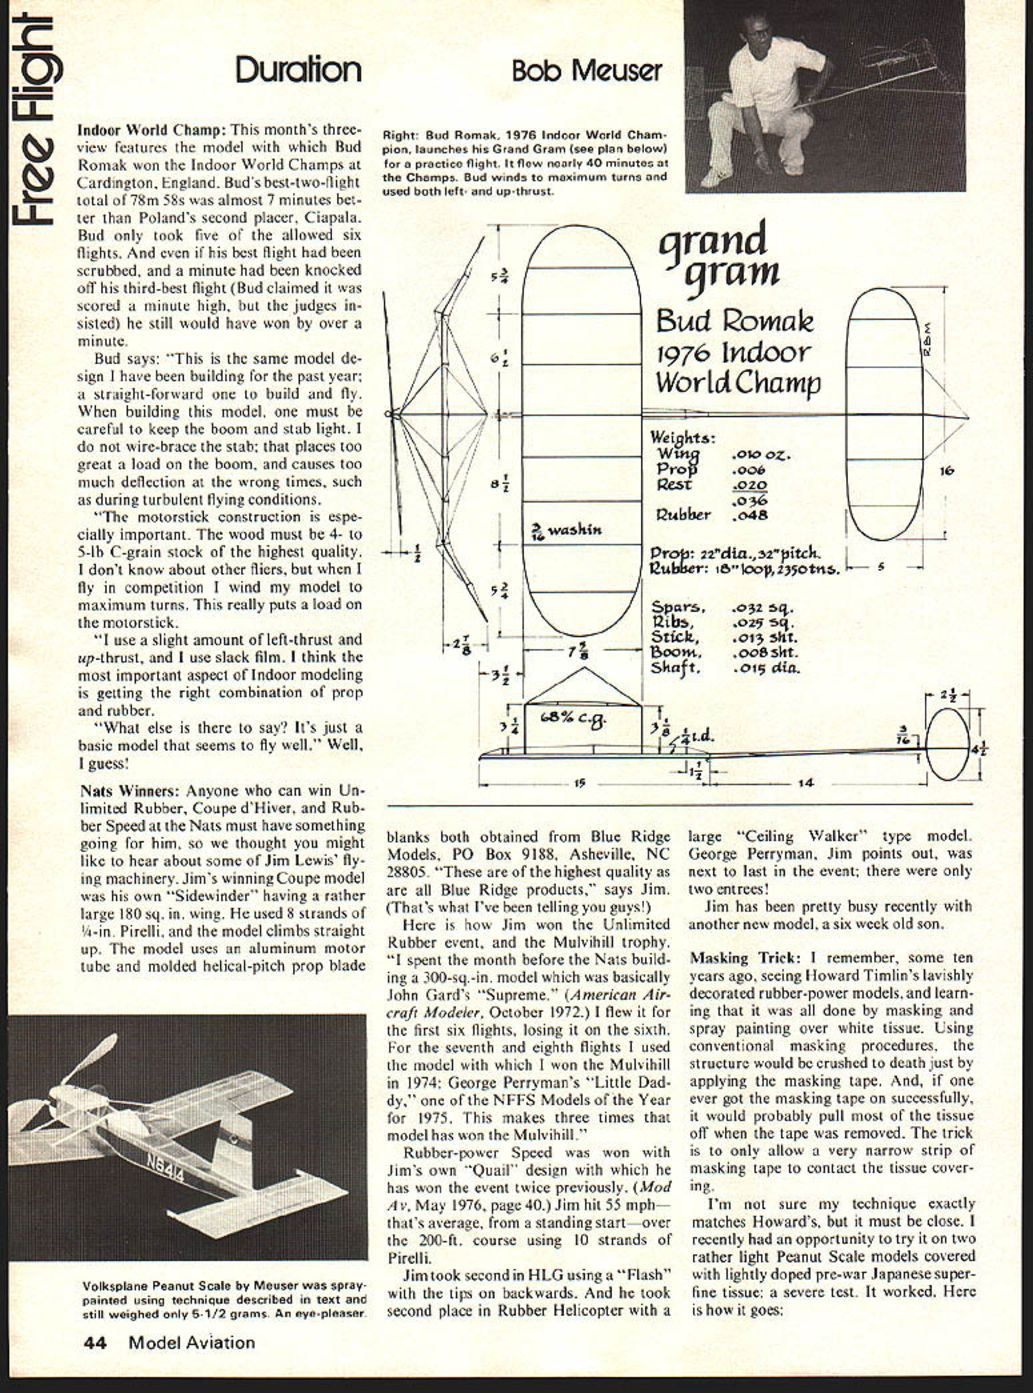
This month's three-view features the model with which Bud Romak won the Indoor World Champs at Cardington, England. Bud's best-two-flight total of 78m 58s was almost 7 minutes better than Poland's second placer, Ciapala. Bud only took five of the allowed six flights. And even if his best flight had been scrubbed, and a minute had been knocked off his third-best flight (Bud claimed it was scored a minute high, but the judges insisted) he still would have won by over a minute.
Bud says: "This is the same model design I have been building for the past year; a straight-forward one to build and fly. When building this model, one must be careful to keep the boom and stab light. I do not wire-brace the stab; that places too great a load on the boom, and causes too much deflection at the wrong times, such as during turbulent flying conditions.
"The motorstick construction is especially important. The wood must be 4- to 5-lb C-grain stock of the highest quality. I don't know about other fliers, but when I fly in competition I wind my model to maximum turns. This really puts a load on the motorstick.
"I use a slight amount of left-thrust and up-thrust, and I use slack film. I think the most important aspect of Indoor modeling is getting the right combination of prop and rubber.
"'What else is there to say? It's just a basic model that seems to fly well.' Well, I guess."
Nats Winners:
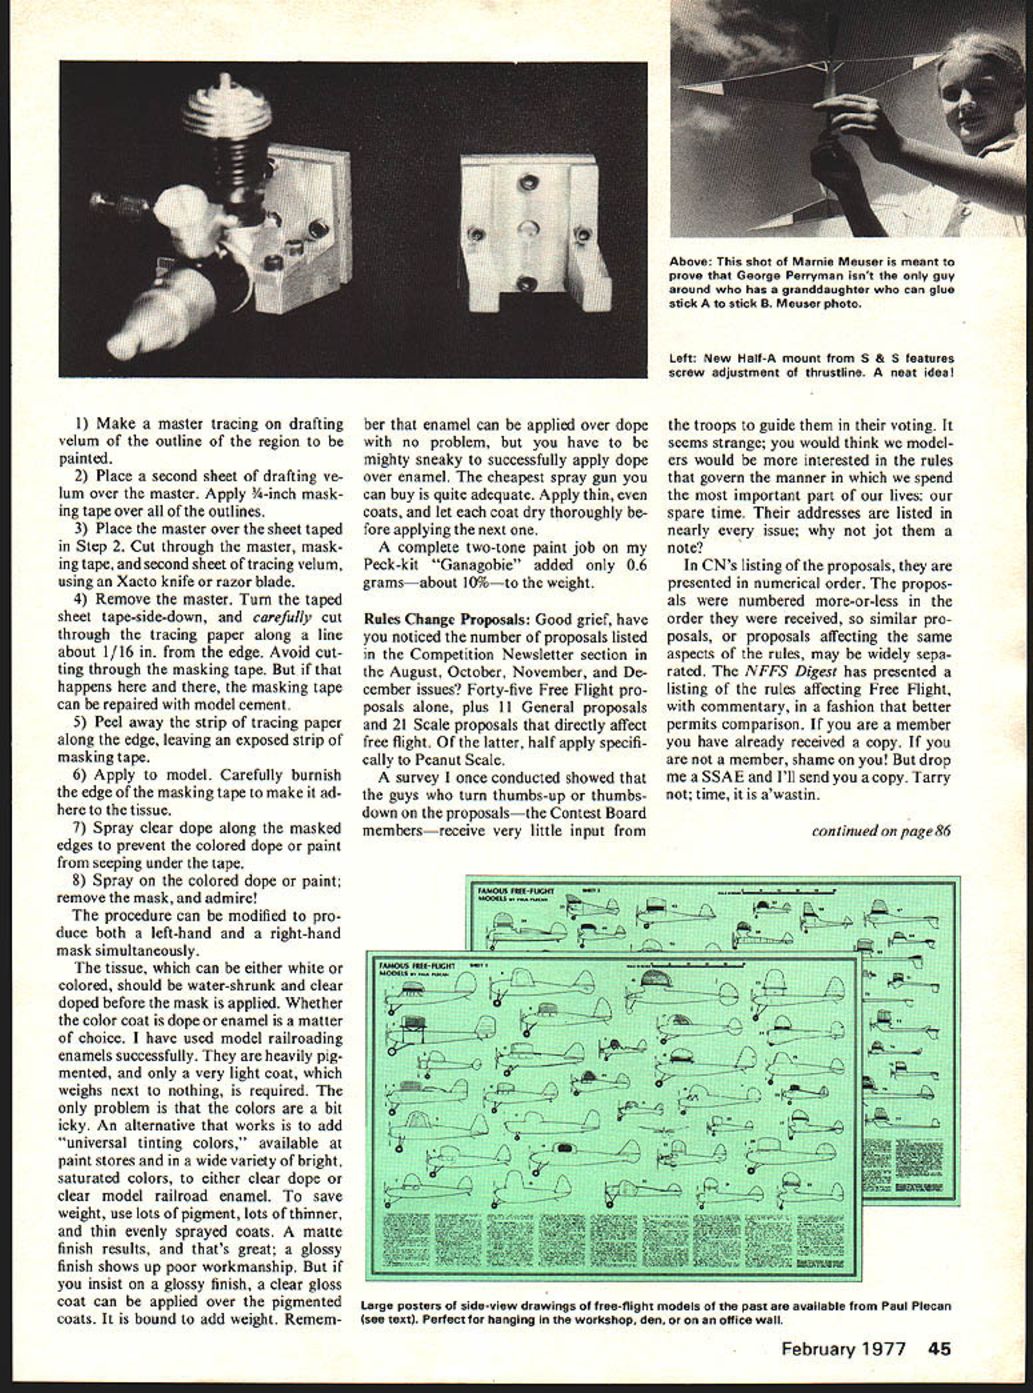
Anyone who can win Unlimited Rubber, Coupe d'Hiver, and Rubber Speed at the Nats must have something going for him, so we thought you might like to hear about some of Jim Lewis' flying machinery. Jim's winning Coupe model was his own "Sidewinder" having a rather large 180 sq. in. wing. He used 8 strands of 1/4-in. Pirelli, and the model climbs straight up. The model uses an aluminum motor tube and molded helical-pitch prop blade blanks both obtained from Blue Ridge Models, PO Box 9188, Asheville, NC 28805. "These are of the highest quality as are all Blue Ridge products," says Jim. (That's what I've been telling you guys!)
Here is how Jim won the Unlimited Rubber event, and the Mulvihill trophy. "I spent the month before the Nats building a 300-sq.-in. model which was basically John Gard's 'Supreme.' (American Aircraft Modeler, October 1972.) I flew it for the first six flights, losing it on the sixth. For the seventh and eighth flights I used the model with which I won the Mulvihill in 1974; George Perryman's 'Little Daddy,' one of the NFFS Models of the Year for 1975. This makes three times that model has won the Mulvihill."
Rubber-power Speed was won with Jim's own "Quail" design with which he has won the event twice previously. (Mod. Av., May 1976, page 40.) Jim hit 55 mph—that's average, from a standing start—over the 200-ft. course using 10 strands of Pirelli.
Jim took second in HLG using a "Flash" with the tips on backwards. And he took second place in Rubber Helicopter with a large "Ceiling Walker" type model. George Perryman, Jim points out, was next to last in the event; there were only two entrees!
Jim has been pretty busy recently with another new model, a six week old son.
Masking Trick:
I remember, some ten years ago, seeing Howard Timlin's lavishly decorated rubber-power models, and learning that it was all done by masking and spray painting over white tissue. Using conventional masking procedures, the structure would be crushed to death just by applying the masking tape. And, if one ever got the masking tape on successfully, it would probably pull most of the tissue off when the tape was removed. The trick is to only allow a very narrow strip of masking tape to contact the tissue covering.
I'm not sure my technique exactly matches Howard's, but it must be close. I recently had an opportunity to try it on two rather light Peanut Scale models covered with lightly doped pre-war Japanese superfine tissue; a severe test. It worked. Here is how it goes:
- Make master tracing on drafting velum outline of the region to be painted.
- Place a second sheet of drafting velum over the master. Apply 1/8-inch masking tape over the outlines.
- Place the master over the taped sheet from Step 2. Cut through the master, the masking tape, and the second sheet of tracing velum using an X‑Acto knife or razor blade.
- Remove the master. Turn the taped sheet tape-side-down and carefully cut through the tracing paper along the line about 1/16" from the edge. Avoid cutting through the masking tape; if the masking tape happens to be cut it can be repaired with model cement.
- Peel away the strip of tracing paper along the edge, leaving the exposed strip of masking tape.
- Apply model cement
7) Spray clear dope along the masked edges to prevent the colored dope or paint from seeping under the tape.
8) Spray on the colored dope or paint; remove the mask, and admire!
The procedure can be modified to produce both a left-hand and a right-hand mask simultaneously.
The tissue, which can be either white or colored, should be water-shrunk and clear-doped before the mask is applied. Whether the color coat is dope or enamel is a matter of choice. I have used model-railroading enamels successfully. They are heavily pigmented, and only a very light coat, which weighs next to nothing, is required. The only problem is that the colors are a bit icky. An alternative that works is to add "universal tinting colors," available at paint stores and in a wide variety of bright, saturated colors, to either clear dope or to clear model-railroad enamel. To save weight, use lots of pigment, lots of thinner, and thin evenly sprayed coats. A matte finish results, and that's great; a glossy finish shows up poor workmanship. But if you insist on a glossy finish, a clear gloss coat can be applied over the pigmented coats. It is bound to add weight. Remember that enamel can be applied over dope with no problem, but you have to be mighty sneaky to successfully apply dope over enamel. The cheapest spray gun you can buy is quite adequate. Apply thin, even coats, and let each coat dry thoroughly before applying the next one.
A complete two-tone paint job on my Peck-kit "Ganagobie" added only 0.6 grams — about 10% — to the weight.
Rules Change Proposals:
Good grief, have you noticed the number of proposals listed in the Competition Newsletter section in the August, October, November, and December issues? Forty-five Free Flight proposals alone, plus 11 General proposals and 21 Scale proposals that directly affect free flight. Of the latter, half apply specifically to Peanut Scale.
A survey I once conducted showed that the guys who turn thumbs-up or thumbs-down on the proposals — the Contest Board members — receive very little input from the troops to guide them in their voting. It seems strange; you would think we modelers would be more interested in the rules that govern the manner in which we spend the most important part of our lives: our spare time. Their addresses are listed in nearly every issue; why not jot them a note?
In CN's listing of the proposals, they are presented in numerical order. The proposals were numbered more-or-less in the order they were received, so similar proposals, or proposals affecting the same aspects of the rules, may be widely separated. The NFFS Digest has presented a listing of the rules affecting Free Flight, with commentary, in a fashion that better permits comparison. If you are a member you have already received a copy. If you are not a member, shame on you! But drop me a SASE and I'll send you a copy. Tarry not; time, it is a' wastin'.
FF Duration/Meuser
continued from page 45
Pearl Lives!: A few years back, Dick Mathis sold the free-flight end of his kit production business to the American Balsa Corporation. But ABC went belly-up recently, and we wondered what happened to the kit line. It turns out that the FF Power kits—Mini-Pearl, Midi-Pearl, Pearl Express, and Mother of Pearl—are now being produced by Gene Simpson's Kitco organization, 4327 McDermed Dr., Houston, TX 77035. The two smaller Pearls, Mini and Midi, can be supplied immediately; there might be a short delay on the larger ones. If your hobby shop can't supply them, write direct to Kitco.
The Kitco line also includes: a smallish, easily built hand-launch glider, designed by Nats champ Mark Valerius; some profile-scale .020-powered models sporting a completely different pinch-off engine timer that we wish we could say more about; and the Gulfcoaster sailplane, suitable for FF or RC.
The HLG kits formerly made by ABC—Bo-Weevil, Flash, Polly, etc.—are now being made by Matt and Gail Gewain, we hear. We'll tell you more about that later.
Model Boxes: I hate to admit how many model boxes I have built for shipping or carrying smallish models, and how much time and money I have wasted doing it. Save yourself the trouble, check out your local Salvation Army or Goodwill Industries store, or whatever is the equivalent in your area, for used suitcases. Ones adequate to serve as model boxes go for a buck or two. Overnighters are great for Peanuts, two-suiters for a gaggle of HLGs. Not suitable for shipping models, but quite adequate for carrying Indoor models and such are the storage boxes sold by Sears, Wards, and perhaps other department stores in your area. The key feature is the removable lid with stiff, folded edges. The flap-lids on ordinary cartons are often bad news for the models inside. Similar separate-lid boxes may often be purchased from florists. Or buy your gal a couple of dozen long-stem roses and get one "free." Check your local Bekins or Mayflower agent too. The price might seem like a rip-off. But compared to the alternatives, they are dirt cheap.
Engine Mount: The new engine mount for Cox .049-.051 engines, which features screw adjustments of downthrust and sidethrust, seems a lot neater than fiddling with wood shims. The mount is neatly machined, all necessary holes are drilled and tapped, and all screws are included, as are a proper Allen wrench and complete instructions. If your hobby shop is out of stock, order direct from S and S Hobby Products, 525 S. Cloverdale Blvd., Cloverdale, CA 95425. Price, $8.35 each, first class postpaid.
Mounts for .15 and .40 engines will be available soon.
Publications: Paul Plecan (Box 1810A, Garden Grove, CA 92642) might prove to be a handy source for some of the aero-publications you have been looking for. Write for his 4-page brochure. Included in his stock are: the books of the Paul Matt series—those that are not already out of print—containing excellent scale documentation and drawings; the series Racing Planes and Air Racers by Reed Kinnert; the Aero series, vols. 1 through 26, Mc-109 through F-16; the Collinwood books, including The Lightplane Since 1909 and Old Monocoques and Men; Frank Zaic's inimitable Model Aeronautics Yearbooks and other publications; and the new Model
Free Flight: Duration
Indoor World Champ Bud Romak won Indoor World Champs, Cardington, England. Bud's best-two-flight total was 78m 58s, almost 7 minutes better than Poland's second placer Ciapala. Bud took five of the allowed six flights; his best flight scrubbed a minute knocked off his third-best flight. Bud claimed he scored the minute high; the judges insisted he still would have won by over a minute. Bud says he has been building the same model design for the past year. It's a straightforward build and flies well. When building the model you must be careful to keep the boom and stab light; wire-brace the stab. Places that put too great a load on the boom cause too much deflection at the wrong times, such as during turbulent flying conditions. Motorstick construction is especially important — the wood must be 4- to 5-lb C-grain stock of the highest quality. I don't know about other fliers, but in competition wind the model's maximum turns really put loads on the motorstick. Use a slight amount of left-thrust and up-thrust. Use slack film. I think an important aspect of indoor modeling is getting the right combination of prop and rubber. What else to say? It's just a basic model; it seems to fly well.
Nats winners — anyone can win. Unlimited Rubber, Coupe d'Hiver, Rubber Speed Nats must have something going for him. Thought you might like to hear about some of Jim Lewis's flying machinery. Jim's winning Coupe model is his own Sidewinder, having a rather large 180 sq. in. wing. He used 8 strands of 1/8-in. Pirelli; the model climbs straight up. The model uses an aluminum motor tube and a molded helical-pitch prop blade.
Bob Meuser reports: Bud Romak, 1976 Indoor World Champion, launches Grand Gram (see plan below). In practice flights he flew nearly 40 minutes. At the Champs Bud wound maximum turns and used both left- and up-thrust.
Blank patterns and materials: CB blanks were obtained from Blue Ridge Models, P.O. Box 9188, Asheville, NC 28805. Blue Ridge supplies the highest quality products, says Jim. "That's what I've been telling guys," Jim says.
Jim won the Unlimited Rubber event (Mulvihill Trophy), having spent a month before the Nats building a 300-sq.-in. model, basically John Gard's Supreme (American Aircraft Modeler, October 1972). He flew the first six flights, losing on the sixth, seventh and eighth flights; the model won the Mulvihill in 1974. George Perryman's Little Daddy (NEES Models) in 1975 makes three times the model has won Mulvihill. Rubber-power speed: Jim's own Quail design has won the event twice previously (Model Aviation, May 1976, p. 40). Jim hit 55 mph — that's average from a standing start over a 200-ft course using 10 strands of Pirelli. Jim took second in HLG using Flash tips backwards, and took second place in Rubber Helicopter.
Masking Trick
Remember some ten years ago seeing Howard Timlin's lavishly decorated rubber-power models? The learning was done masking and spray painting over white tissue. Using conventional masking procedures the structure would be crushed to death just applying masking tape. If you ever got masking tape to stick successfully you would probably pull the tissue off when the tape was removed.
The trick is to allow only a very narrow strip of masking tape to contact the tissue covering. I'm sure the technique exactly matches Howard's, but I must admit I recently had the opportunity to try it on two rather light Peanut Scale models covered lightly with doped pre-war Japanese superfine tissue. It was a severe test and it worked. Here's how:
- Make a master by tracing on drafting vellum the outline of the region to be painted.
- Place a second sheet of drafting vellum over the master. Apply 1/8-inch masking tape over the outlines.
- Place the master over the sheet taped in Step 2. Cut through the master and the masking tape on the second sheet of tracing vellum using an X-Acto knife or razor blade.
- Remove the master. Turn the taped sheet tape-side-down and carefully cut through the tracing paper along the line about 1/16 inch from the edge. Avoid cutting through the masking tape. If you happen to cut the masking tape, it can be repaired with model cement.
- Peel away the strip of tracing paper along the edge, leaving an exposed strip of masking tape.
- Apply the mask to the model.
Apply a coat of contact cement to the plywood and to the respective fuselage side. Let dry and give each a second coat. Follow the manufacturer's directions in checking for dryness.
When the second coat is dry, carefully position the plywood with respect to the fuselage without making contact. When position is satisfied, touch plywood to the fuselage and rub firmly over the entire side. Excess sheeting can be trimmed away using regular scissors. Trim to about 3/16" to the fuselage sides, then using a Stanley utility knife or a heavy-duty X-Acto knife, trim away the remaining excess, using the adjacent uncovered balsa sides as a guide for the knife blade. Be sure to cut in the direction the plywood grain runs away from the fuselage. Repeat the above procedures for the opposite side of the fuselage.
After two sides have been covered and carefully trimmed, dress down the two uncovered sides with a sanding block, also dressing the edges of the plywood sides in the process.
In preparing the remaining sides, carefully cut out any holes or notches in the plywood before applying any glue. When the glued plywood is to be positioned, be extremely careful in aligning the cut-outs or notches.
Once the fourth side is applied, the fuselage takes on an added dimension in appearance and strength.
Transcribed from original scans by AI. Minor OCR errors may remain.

