
Free Flight: Duration
Harry Murphy 3824 Oakwood Blvd. Anderson, IN 46011
AT THIS WRITING the 1991 AMA Free Flight NATS has just been completed at the Mid American Air Center near Lawrenceville, Illinois. Since a complete review is scheduled for next month's issue, I shall only make a few comments in passing.
The five-day bash saw near-perfect flying weather with winds extremely light or nil for the entire week. The crop situation, while not the greatest, proved tolerable, and the planners and field operating crews get kudos for a smooth-running affair. This was another AMA/NFFS cooperative effort and included three days of S.A.M. events sponsored by the SAM 57 Chapter and FAC-staged flying scale events on a pair of days during the week. In toto, a great week of free flight.
Since it is desirable for most to schedule vacation time at least a year ahead for the purposes of attending the big meets, the morning line on the 1992 schedule places the NFFC in its usual slot over Memorial Day weekend at either Lost Hills or Taft, California. The SAM Champs go back to Lawrenceville in the second week of June with the AMA Nationals looking for a site out west. Should a western Nationals materialize, then a USOC is a distinct possibility for the Eastern U.S.A.—but probably not at Lawrenceville this year. Now you know what I know at this point in time.
NFFS Nostalgia Gas Rules
The newly formed NFFS Nostalgia Gas Advisory Board has been hard at work compiling a new booklet (No. 4) which contains event rules, the eligible designs, eligible engines, etc. The 34-page publication contains all you want to know about the events and answers to questions that you probably never thought of asking, as well. The initial one page of 1/2A rules that have governed the events up to now has been replaced with twelve pages of explanations, do's and don'ts, and loophole plugs. My first thought is to question whether or not this is progress—but, whatever.
Some additional engines have been made eligible, but not the Cox Medallion series. Two events have added a basic event category, bringing the total to seven:
- Small ignition .090–.280 cu. in. displacement
- Large ignition .281–1.20 cu. in. displacement
In addition, three special events are listed, two classes PAA, Load 1/2A, AR combined plus ROW. It would be great to get to fly some ROW (rise-off-water) events once again. The Cox TD glow head is approved for use with reed-valve Cox engines; replacement head Holland Hornet and other subtle revisions were made.
Listing No. 4 is now available. You can get yours by sending $2 (and a stamped, self-addressed envelope) to: Bob Larsh, Chairman NFFS Nostalgia Gas Advisory Board 45 South Whitcomb Avenue Indianapolis, Indiana 46241
Should you be dissatisfied with anything therein, remember you will be getting a chance to voice concerns via the formal rules-change cycle set to take place beginning in 1992. Meanwhile, let's go flying — the air's still good.
FIC Prop Brake
Aldrich Models is now offering the depicted new brake and installation cone for FIC engine installations. Proprietor George Aldrich advises they are made from 2024-T aluminum, go right on a Nelson, and are easily modified to a Rossi, Cox, etc. The price is $34 postpaid and they're readily available—or he has at least six as the accompanying photo would indicate. The address is 12822 Tarrytown, San Antonio, Texas 78233. Ask George for a copy of the list of all of his other custom-made products and services. There are few people who know more about model engines and how to make them run.
1/2A Electric Starters
Now, with this new brake, George is even offering us a method to stop those 1/2A electric starters.
Remember those little white-case electric starters that Astro Flite once produced for 1/2A-size engines? I am one of the more fortunate who purchased one of them back when they were readily available. I say fortunate, because there has been no alternate commercial source for the little finger-savers for the past ten years ever since Astro Flite ceased production—that is up to now.
The AF starter has proven to be a handy accessory over the years, as the larger starters are so overpowering that they have been known to bend connecting rods in both .020s and .049s if the small engines get fuel-locked from having too much fuel in the combustion chamber. Also, those reed-valve engines have a tendency to run backwards when you finger-start them, which is the reason Cox supplies a starter spring with all of their reed-valve versions. However, although quite effective, I always remove the starter springs for two reasons: they are excess weight, and they have a humbling effect on my machismo. Thus, my AF starter has seen lots of service.
There is now good news once again as a new 1/2A starter has hit the marketplace. Miller R/C Products is now offering a similar product for small-engine utility for $34.95 plus $5 shipping charges. These are most distinctive in contrast to the old AF devices in that they are black instead of white, and no parts are interchangeable. So sez Nancy Miller who represents the company producing the new starters. The address is P.O. Box 425, Kenwood, California 94952 and they are certainly a top-quality item.
Hank Nystrom recently wrote that he had been looking for one of the mini-AF starters for a number of years to no avail, and while attending the Toledo show last spring his interest was additionally tweaked when one of the exhibitors was showing a prototype of a similar machine to assess the market interest in their concept of a mini prop twister. When he discovered a box of old electric model car motors in the Swap Shop area at a dollar each, he decided he had waited around long enough to find an AF starter and grabbed up a few of the used motors with the idea of making a homebuilt version for his personal use.
Using a little free-flighter ingenuity, Hank stuffed a standard RS 540 model car motor into a 6½ inch length of 1½ inch PVC plastic pipe along with five AA-size Ni-Cd batteries wired in series (six volts). The photo shows a Radio Shack slide switch used to activate the packaged assembly, but this had been replaced with a momentary button pressure switch when I saw it at the FF NATS last week.
Foam rubber is stuffed around the motor, and the batteries have been taped-wound until each component is fitted snugly in place within the PVC pipe. An appropriately sized PVC pipe cap covers the non-business end serving as a dirt shield and retaining a battery charging connector.
All that remained was to find a way to attach one of the small Sullivan rubber prop drive cones to the motor shaft. Since the motor shaft is only 1/8 inch in diameter, Hank built up the diameter by soldering together successively larger pieces of K & S brass tubing until he got a diameter that would securely hold the rubber cone in place. He used a set screw to hold his homemade adapter to the motor shaft before slipping on the rubber cone. I am sure you guys with access to metal lathes would be able to produce a more professional adapter, but the tubing lamination procedure serves the purpose quite well.
Hank uses a low-cost universal battery eliminator as a charger. It costs about seven dollars and gives him about a 60 milliampere slow current on the 4.5 volt setting for overnight charging. That's about it — a scrap electric car motor for a dollar, and, assuming the other components were purchased new at retail, the total cost is well below $20, including the charger. Also, this starter is self-contained and does not need to be plugged into your 12 volt glow-driver battery or whatever. It's a portable device. Hank's handsome hand-held homebuilt will fan a TD .049 at about 7,000 rpm, and that should start any of those diminutive powerplants.
No, Hank says he isn't going into business making starters, but this one was quite satisfying to fabricate. As a footnote, he asks that since the Cox TD .010s are back — "How about a 1/4A Nos Gas event?" Maybe that mini-starter prompted that query, or maybe it didn't; I don't know.
Model Mag Indexes
Have you ever wished that someone would sit down and list all the plans and construction articles that have ever been published in the domestic model magazines since year one? How about just a list of the gas-powered jobs or just the rubber or glider subjects? How about all of those "How to do it" articles such as molding fiberglass, various engine hop-ups, the basics of electric power, or how to find thermals in the Antarctic? These articles are always beneficial to review and often furnish incentives to try new techniques or instigate new building projects.
Have you ever stood back and looked at the massive stacks of model magazines that are collecting and being shoved into someone's storage and wondered just what is within—or more important—how you would ever find a particular item if you ventured to dig into the monstrous heap and went looking for it? Have you ever added up the money you have invested in the collection thus far? Where would you be surprised?
I began indexing the construction articles that supported free flight beginning with the year 1958. Every winter I would faithfully attempt to bring my index up to date by binding each year's magazine issues into a hard-cover volume and adding the contents to my growing hand-written log. As time passed, my magazine collection grew, and the log—or index—got more bulky. I bought a computer about eight years ago to modernize this chore, but never found the time to even accomplish loading my hand-written and partially typed log into it. The computer finally got packed back into its box and shoved into a closet.
Well, be that as it may, the solution is at hand. Jim Patten of Urbana, Ohio has now done all this for us and is offering copies of various indexes of each model magazine publication and its contents from as far back as 1929. The entire index is broken up into eight individual books which total 179 pages and list 9,899 plans and articles at the last printing.
For example, Model Airplane News has been broken up into two volumes, the first from 1929 through 1956 — which coincidentally encompasses the Old Timer era and hits the Nostalgia Gas cutoff date squarely on the nose. There are single volumes for Model Builder, which came on the scene in 1971, and Model Aviation which was created in 1975. Flying Aces, which began in 1935 and has since been changed to Flying Models, is a two-volume book as is the old Air Trails, American Modeler, and American Aircraft Modeler progression which originated in 1937. Each volume costs $6.50 postpaid, or you can get all eight volumes for $45.
There are some special books made up from the contents of the original eight volumes which might be beneficial for the specialty modeler; an all free flight gas volume, for example, that includes hand launch and towline glider. There are volumes for Rubber models, Control Line, and RC as well as other volumes promised as soon as time permits. Each of these four current volumes is $10. A small fee to pay to transform that bulky inner stockpile of old magazines into a healthy vibrant tool to make the hobby more fun.
You can send your inquiries to Jimmy with a SASE or give him a phone call at 513/484-3158. The address is 5646 South Route 68 L-107, Urbana, Ohio 43078-9429. Support the man with the computer. He can make your old mags come alive!
Catalog Department
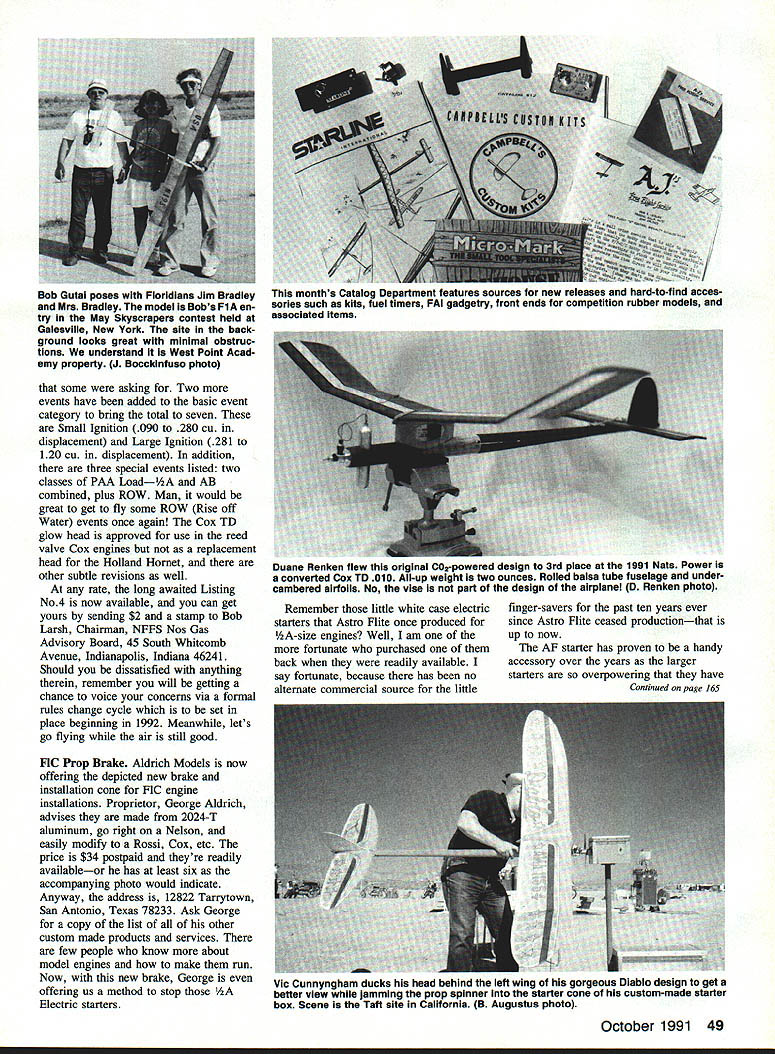
Catalog No. 12 is the current valid "model wish book" from Campbell's Custom Kits. It now supersedes all previous catalogs. This new 48-page booklet with sketches and descriptions of free flight supplies, kits, Cox engines and parts, plus various other associated items is a must for the modeler. Proprietor Lee Campbell produces his own line of kits for a variety of Free Flight disciplines including hand launch glider, competition Rubber, Old Timer and Nostalgia Gas, as well as modern AMA Gas. Many of his gas kits are re-issues of famous designs such as the Zeek, T-Bird, Rambunctious, Mavericks, etc.
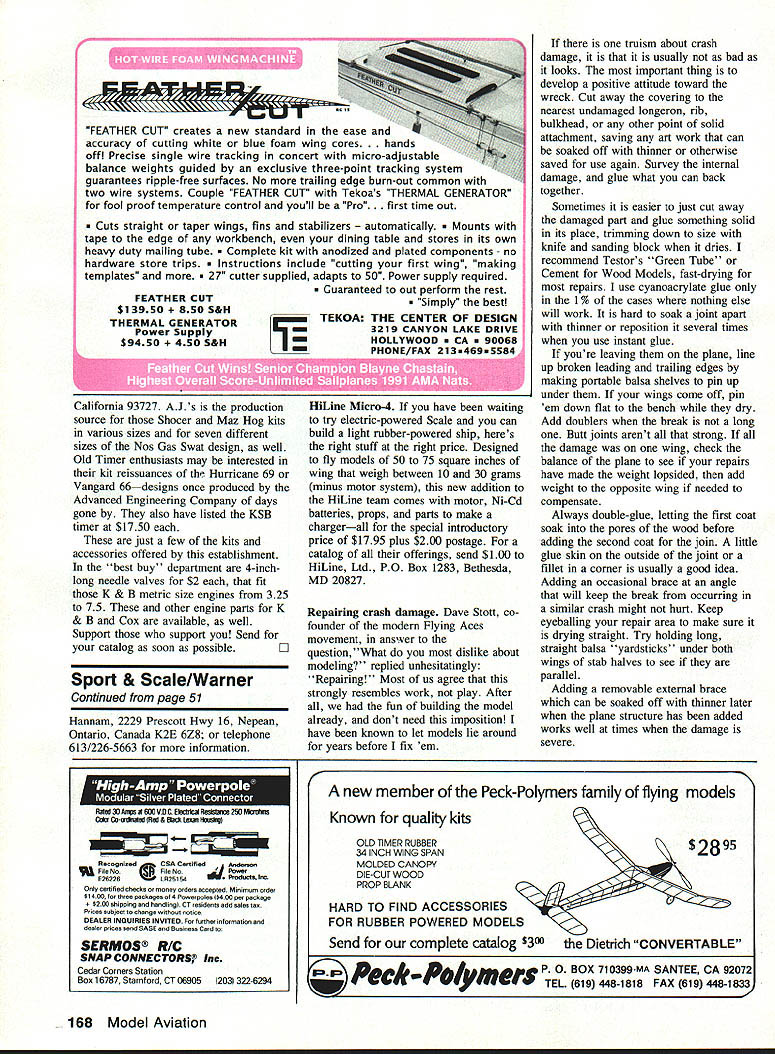
The latest item to be added to Lee's list of numerous accessories is a handsome black anodized aluminum hub assembly for Wakefield and Mulvihill rubber model usage. The hinge pins are drilled to the proper angles, and the high-quality 3-piece assembly sells for $25. He also carries the KSB 30-second fuel pinch-off timers. Send a dollar to receive your new catalog to Campbell Custom Kits, 401 Executive Center Drive Suite H-108, West Palm Beach, Florida 33401.
The serious Free Flight competitor will want Starline International's Catalog No. 3 which is chock-full of items primarily slated toward the needs of the FAI competitor. The pictured offerings include various versions of mechanical timers, aluminum engine pans, specially outrun front ends for rubber models, A2 glider pods, etc. — much of which is imported from European sources. Among the various items in the gadgetry department are complete thrust mechanisms, fuel cut-offs, timer start buttons, circle tow hooks, and hinged stab mounts. There is a new 1/4" timer being offered as well. Send a dollar to Starline International, 6146 E. Cactus Wren Rd., Scottsdale, Arizona 85253 and get yourself that catalog.
In addition, O/T buffs might be interested in Starline's close-out sale on Y & O props. They're $1.00 each in diameters of 12 to 18 inches and in various pitches.
You can receive a 20-page catalog from A.J.'s Free Flight Service by sending your inquiry to 4840 E. Leisure, Fresno, California 93727. A.J.'s is the production source for those Shocker and Maz Hog kits in various sizes and for seven different sizes of the Nos Gas Swat design, as well. Old timer enthusiasts may be interested in their kit re-issuances of the Hurricane 69 or Vanguard 66 — designs once produced by the Advanced Engineering Company of days gone by. They also have listed the KSB timer at $17.50 each.
These are just a few of the kits and accessories offered by this establishment. In the "best buy" department are 4-inch-long needle valves for $2 each, that fit those K & B metric size engines from 3.25 to 7.5. These and other engine parts for K & B and Cox are available as well. Support those who support you! Send for your catalog as soon as possible.
HiLine Micro-4
If you have been waiting to try electric-powered Scale and you can build a light rubber-powered ship, here’s the right stuff at the right price. Designed to fly models of 50 to 75 square inches of wing that weigh between 10 and 30 grams (minus motor system), this new addition to the HiLine team comes with motor, Ni-Cd batteries, props, and parts to make a charger — all for the special introductory price of $17.95 plus $2.00 postage. For a catalog of all their offerings, send $1.00 to HiLine, Ltd., P.O. Box 1283, Bethesda, MD 20827.
Repairing Crash Damage
Dave Stott, co-founder of the modern Flying Aces movement, in answer to the question, "What do you most dislike about modeling?" replied unhesitatingly: "Repairing!" Most of us agree that this strongly resembles work, not play. After all, we had the fun of building the model already, and don’t need this imposition! I have been known to let models lie around for years before I fix ’em.
If there is one truism about crash damage, it is that it is usually not as bad as it looks. The most important thing is to develop a positive attitude toward the wreck. Cut away the covering to the nearest undamaged longeron, rib, bulkhead, or any other point of solid attachment, saving any artwork that can be soaked off with thinner or otherwise saved for use again. Survey the internal damage, and glue what you can back together.
Sometimes it is easier to just cut away the damaged part and glue something solid in its place, trimming down to size with a knife and sanding block when it dries. I recommend Testors' "Green Tube" Cement for wood models, fast-drying for most repairs. I use cyanoacrylate glue only in the 1% of cases where nothing else will work. It is hard to soak a joint apart with thinner or reposition it several times when you use instant glue.
If you’re leaving them on the plane, line up broken leading and trailing edges by making portable balsa shelves to pin them under. If your wings come off, pin them flat to the bench with nails while they dry. Add doublers when the break is not a long one. Butt joints aren’t all that strong. If all the damage was on one wing, check the balance of the plane to see if your repairs have made the weight lopsided, then add weight to the opposite wing if needed to compensate.
Always double-glue, letting the first coat soak into the pores of the wood before adding the second coat for the join. A little glue skin on the outside of the joint or a fillet in an arc is usually a good idea. Adding an occasional brace at an angle that will keep the break from occurring in a similar crash might not hurt. Keep a sizeable repair area to make sure it is drying straight. Try holding long, straight balsa "yardsticks" under both wings or stab halves to see if they are parallel.
Adding a removable external brace which can be soaked off with thinner later when the plane structure has been added works well at times when the damage is severe.
Transcribed from original scans by AI. Minor OCR errors may remain.

