
FREE FLIGHT DURATION
Louis Joyner, 4257 Old Leeds Road, Birmingham, AL 35213
STAYING IN SIGHT
At my last contest I launched into the same thermal with two other Wakefields. The other models had similar color schemes—red or orange D-box with white tissue covering the rest of the wing. My model had a solid black underside. The difference was amazing: in the bright sun the other two were hard to pick up overhead, while the black really popped out.
I've been using black undersides on wings for several years and I'm convinced it is the easiest to see when the model is overhead. I even started using black for the pylon and rudder so the model could be seen longer downwind. The only problem is when the model is silhouetted against dark trees; I think I'll try a white pylon next. One thing I won't use is a fancy, multicolored covering job on the bottom—a solid, dark color works much better.
Although the top of the wing is not that important for visibility during flight, it can be very important if you lose the model and have to do an aerial search. In that situation white is probably the best choice, perhaps with a touch of fluorescent orange. The white upper surface also helps by reflecting heat when the model sits out in the sun.
TAN II
In a December column I mentioned FAI Model Supply's new Tan II rubber. The new stuff seemed a bit stretchier than the familiar Tan rubber. The word was that a 40-gram Wakefield motor needed to be only about 15.5 inches long for 400 turns maximum (the older Tan motors need to be about 17.5 inches long for the same number of turns).
A week before the regional semifinals I made up a couple of motors to flight-test: one 15.5 inches long and the other my usual 17.5 inches. The shorter motor felt great during winding, but at 404 turns it broke right at the winding hook.
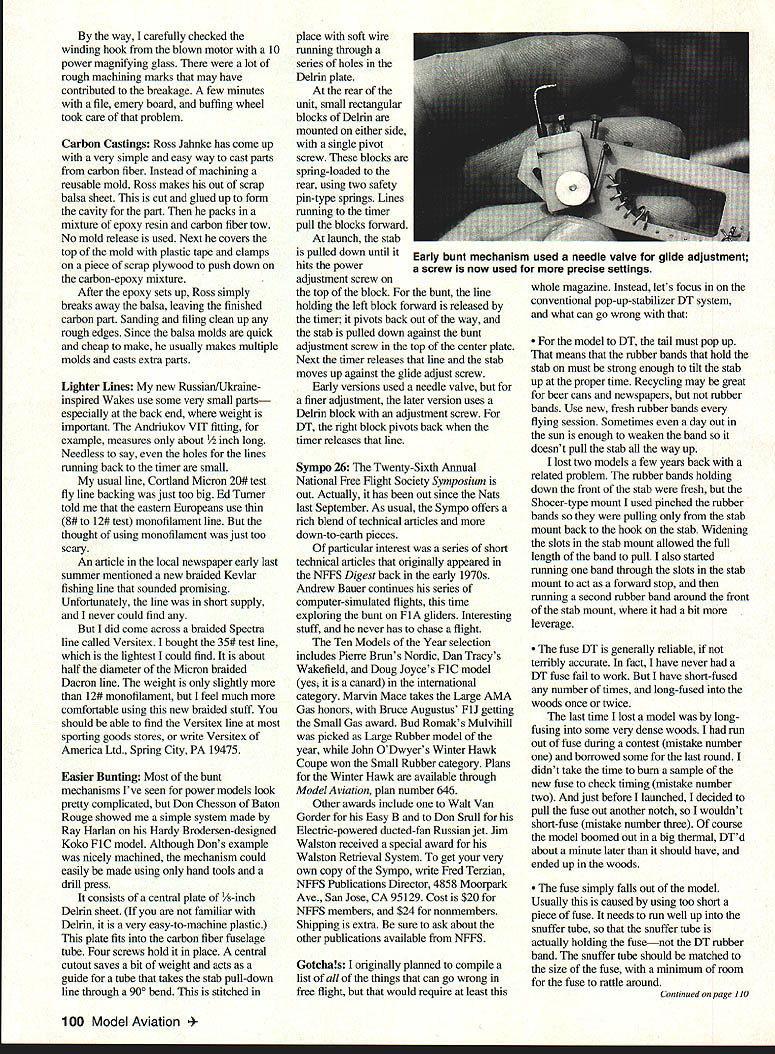
To be on the safe side I stayed with the old reliable Tan (which never seems to break) for the semifinals. I did bring along another Tan II motor, however. The Tan worked fine for the first five rounds on Saturday, but for the early-morning (210-second) round on Sunday I decided to try the Tan II again. The 17.5-inch-long motor wound safely to 474 turns and about 105 inch-ounces of torque (about 80 more turns than my typical Tan motors) and produced about 10 inch-ounces less peak torque. The burst was a bit less with the Tan II (solid-balsa wings didn't flutter quite as much), the cruise looked better, and the motor run was about 10 seconds longer.
This flatter torque curve would seem to make Tan II a good choice for Mulvihill and Coupe, as well as for non-auto Wakefields. The gentler burst is easier to control without the need for autosurfaces.
CARBON CASTINGS
Ross Jahnke has come up with a very simple, easy way to cast parts from carbon fiber. Instead of machining a reusable mold, Ross makes one out of scrap balsa sheet, cut and glued up to form the cavity. He packs a mixture of epoxy resin and carbon fiber tow into the mold. No mold release is used.
Next he covers the top of the mold with plastic tape, clamps a piece of scrap plywood on top, and pushes down on the carbon-epoxy mixture. After the epoxy sets, Ross simply breaks away the balsa, leaving the finished carbon part. Sanding and filing clean up the rough edges. Since balsa molds are quick and cheap to make, he usually makes multiple molds and casts extra parts.
LIGHTER LINES
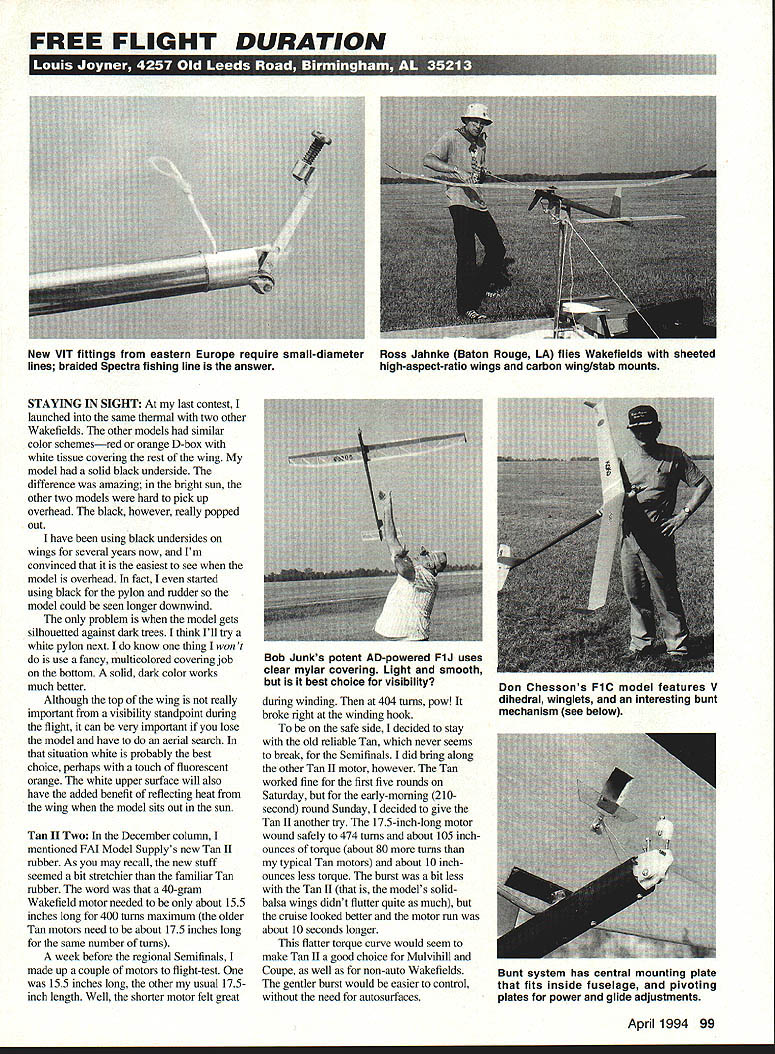
New Russian/Ukraine-inspired Wakefields use some very small parts, especially in the back end where weight is important. An Andriukov VIT fitting, for example, measures about 1/2 inch long. Needless to say, the holes for the lines running back to the timer are smaller than usual. Cortland Micron 20# test fly line is just too big.
Ed Turner told me eastern Europeans use thin 8#–12# test monofilament line. I thought using monofilament was just too scary. An article in the local newspaper early last summer mentioned a new braided Kevlar fishing line that sounded promising, but it was in short supply and I never could find any.
I did come across a braided Spectra line called Versitex and bought 35# test—the lightest I could find. It's about half the diameter of Micron braided Dacron line and weighs slightly more than 12# monofilament. I feel much more comfortable using the new braid. You should be able to find Versitex at most sporting goods stores, or write Versitex of America Ltd., Spring City, PA 19475.
By the way, I carefully checked the winding hook from the blown motor with a 10× magnifier and found a lot of rough machining marks that may have contributed to the breakage. A few minutes with a file, an emery board, and a buffing wheel took care of that problem.
EASIER BUNTING
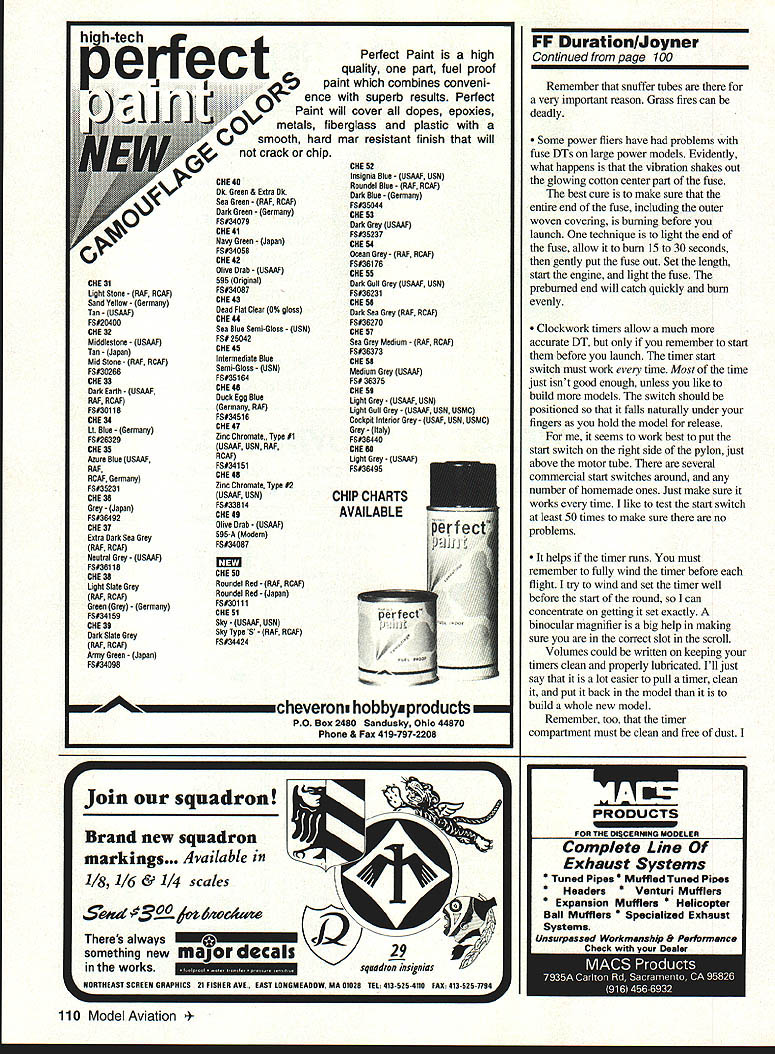
Most of the bunt mechanisms I've seen for power models look pretty complicated, but Don Chesson of Baton Rouge showed me a simple system made by Ray Harlan on his Hardy Brotensen–designed Koko F1C model. Although Don's example was nicely machined, the mechanism could easily be made using only hand tools and a drill press.
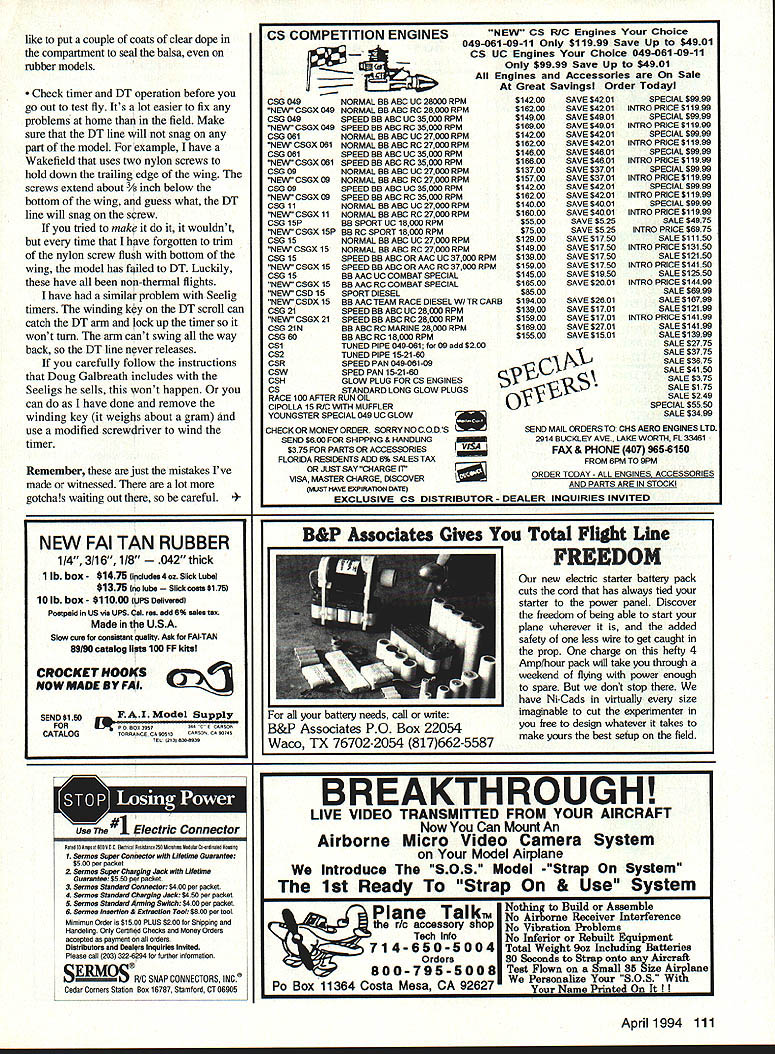
It consists of a central plate of 5/8-inch Delrin sheet (Delrin is very easy to machine). This plate fits into the carbon-fiber fuselage tube and is held by four screws. A central cutout saves weight and acts as a guide for a tube that takes the stab pull-down line through a 90° bend. The tube is stitched in place with soft wire running through a series of holes in the Delrin plate.
At the rear of the unit, small rectangular Delrin blocks are mounted on either side with a single pivot screw. These blocks are spring-loaded to the rear using two safety-pin-type springs. Lines running to the timer pull the blocks forward.
At launch the stab is pulled down until it hits the power adjustment screw on top of the block. For the bunt, the line holding the left block forward is released by the timer; it pivots back out of the way and the stab is pulled down against the bunt adjustment screw in the top of the center plate. Next the timer releases that line and the stab moves up against the glide-adjust screw.
Early versions used a needle valve, but later versions use a Delrin block with a finer adjustment screw. For DT the right block pivots back when the timer releases that line.
SYMPO 26
The Twenty-Sixth Annual National Free Flight Society Symposium is out (it has been available since last September). As usual, the Sympo offers a rich blend of technical articles and more down-to-earth pieces.
Of particular interest is a series of short technical articles that originally appeared in the NFFS Digest in the early 1970s. Andrew Bauer continues his series of computer-simulated flights, this time on tuning F1A gliders. The Ten Models of the Year selection includes Pierre Brun's Nordic, Dan Tracy's Wakefield, and Doug Joyce's F1C model (a canard) in the international category. Marvin Mace takes the Large AMA Gas honors, with Bruce Augustus' F1J getting the Small Gas award. Bud Romak's Mulvihill was picked as Large Rubber model of the year, while John O'Dwyer's Winter Hawk Coupe won the Small Rubber category. Plans for the Winter Hawk are available through Model Aviation, plan number 646.
Other awards include one to Walt Van Gorder for his Easy B and to Don Shull for his electric-powered ducted-fan Russian jet. Jim Watson received a special award for his Walnut Retrieval System. To get a copy of the Sympo, write Fred Terzian, NFFS Publications Director, 4858 Moorpark Ave., San Jose, CA 95129. Cost is $20 for NFFS members and $24 for nonmembers. Shipping is extra. Be sure to ask about other publications available from NFFS.
GOTCHAS
I originally planned to compile a list of all the things that can go wrong in free flight, but that would require at least this whole magazine. Instead, here are common problems with the conventional pop-up stabilizer DT system and related issues:
- Rubber bands must be strong enough to tilt the stab up for DT. Use new, fresh rubber bands every flying session. Even a day in the sun can weaken bands.
- I lost two models when a shock-absorber-type mount pinched the rubber bands so they only pulled from the stab mount back to the hook. Widening the slots in the stab mount allowed the full length of the band to pull. I also started running one band through the slots in the stab mount to act as a forward stop, and then running a second band around the front of the stab mount for more leverage.
- The fuse DT is generally reliable, though not terribly accurate. I have never had a fuse DT fail to work, but I have short-fused and long-fused fuses. One loss occurred after I ran out of fuse during a contest and borrowed some for the last round (mistake 1). I didn't burn a sample to check timing (mistake 2). And just before launch I pulled the fuse out another notch to avoid short-fusing (mistake 3). The model DT'd about a minute later than it should have and ended up in dense woods.
- The fuse can fall out of the model if it is too short. It needs to run well up into the snuffer tube so the tube actually holds the fuse, not the DT rubber band. The snuffer tube should be matched to the fuse size, with a minimum amount of room for the fuse to rattle slightly. Remember, snuffer tubes are important—grass fires can be deadly.
- Some power fliers have had problems with fuse DTs on large power models: vibration can shake out the glowing cotton center of the fuse. The best cure is to make sure the entire end of the fuse, including the outer woven covering, is burning before launch. One technique is to light the end, allow it to burn 15–30 seconds, then gently pull the fuse out, set the length, start the engine, and light the fuse—the prebrowned end will catch quickly and burn evenly.
- Clockwork timers allow much more accurate DTs, but only if you remember to start them before launch. The timer start switch must work every time. Position the switch so it falls naturally under your fingers as you hold the model for release. I prefer the right side of the pylon, just above the motor tube. Test the start switch thoroughly—I've tested mine at least 50 times to be sure.
- Make sure the timer runs and is fully wound before each flight. Wind and set the timer well before the start of the round so you can concentrate on precise settings. A binocular magnifier helps ensure you are in the correct slot in the scroll. Keep timers clean and properly lubricated. It's far easier to pull a timer, clean it, and put it back than to build a whole new model.
- Keep the timer compartment clean and free of dust. I like to put a couple of coats of clear dope in the compartment to seal the balsa, even on rubber models.
- Check timer and DT operation before you go out to test fly. Make sure the DT line will not snag on any part of the model. For example, I had a Wakefield that used two nylon screws to hold down the trailing edge of the wing; the screws extended about 3/16 inch below the bottom of the wing and the DT line snagged on them. Every time I forgot to trim the screws flush, the model failed to DT (luckily these were non-thermal flights).
- Seelig timers: the winding key on the DT scroll can catch the DT arm and lock up the timer so it won't turn. If the arm can't swing all the way back, the DT line never releases. If you follow the instructions Doug Galbreath includes with Seeligs, this won't happen. Alternatively, remove the winding key (it weighs about a gram) and use a modified screwdriver to wind the timer.
These are just the mistakes I've made or witnessed—there are many more gotchas waiting out there, so be careful.
Transcribed from original scans by AI. Minor OCR errors may remain.

