
FREE FLIGHT: DURATION
Louis Joyner 4257 Old Leeds Road, Birmingham, AL 35213
COVERING CONFUSION
Back in the 1950s there were just two choices — Japanese tissue or silkspan. Some used silk, but it soaked up dope; silkspan colors were limited to white, red, and yellow. Most of us used tissue: light, lots of colors, and cheap.
Plastic wraps arrived in the mid‑1950s but were initially too flimsy or messy. Made‑for‑models plastic films were too heavy. I tried clear Micafilm a few years ago; weight was acceptable, but it didn't give the wing the same stiffness that tissue-and-dope provided.
What changed my opinion of plastics was not the coverings themselves but composite construction. Kevlar and carbon‑fiber D‑box wings are very rigid and do not need tissue for torsional strength — they only need something light to cover the spaces between ribs. That has led many modelers to reconsider plastic film coverings. Below is a rundown of options and techniques.
Plastic films and Mylar
- Clear Mylar is available in quarter- and half‑mil thicknesses. Quarter‑mil is very light and works well for stabs; you can leave it clear or dye it with RIT dye.
- Some Russian glider fliers use half‑mil Mylar on wings and then double‑cover with Japanese tissue for color and a slightly rougher surface, which they feel helps glide.
Handling notes:
- Thin Mylar can be messy to handle. Taping a sheet to a frame and covering as indoor modelers do with microfilm works well.
- Like most light plastic films, Mylar has no adhesive backing, which saves weight but requires a heat‑sensitive adhesive on the framework.
- Many adhesives are used; I’ve had good luck with Sig Stix‑It straight from the can. Use as little as possible to minimize creep.
Covering technique:
- For rectangular stabs, run the film around the trailing edge. Shrink the bottom first, hold the stab down, then shrink the top — don’t overdo it. A few small wrinkles won’t matter at altitude.
- For wings, lap the film up and over the trailing edge. This is especially important with carbon‑fiber trailing edges, which offer little gluing surface.
Micafilm (Coverite) and finishing
- I’ve used clear Micafilm by Coverite. The name is a bit of a misnomer; the film is more translucent white with a random fiber texture reminiscent of silkspan.
- Following Jim Parker’s glider construction suggestions, I covered the bottom of the wing first, then used thin CA from the inside to assure a permanent bond to undercambered ribs.
- Covering goes quickly with no wait for water‑shrinking or doping. The result can look bland, so I doped on tissue numbers and a few large colored tissue panels:
- Apply clear dope to the outline, attach the tissue smoothly, watershrink where appropriate, and finish with one coat of clear.
- Total weight gain for a 16.2 square decimeter wing (about 250 square inches) was slightly less than 11 grams, including tissue decoration.
Coloring tips:
- Felt‑tipped markers can add color to Micafilm. Use the marker on the dull side or break open the marker and use the felt directly.
- Yellow highlighter goes on evenly; red may streak; black can be light.
- Walt Rozelle reports success using a black felt marker on the inside (dull side) of the film, covering the model, and then coloring the outer (smooth) side as well. Fuelproofing is uncertain, so avoid heavy use in areas exposed to fuel.
Other advantages:
- Plastic films are puncture‑resistant and waterproof. On a damp, foggy morning, Mylar‑covered wings and stabs were drum‑tight and looked even better than tissue.
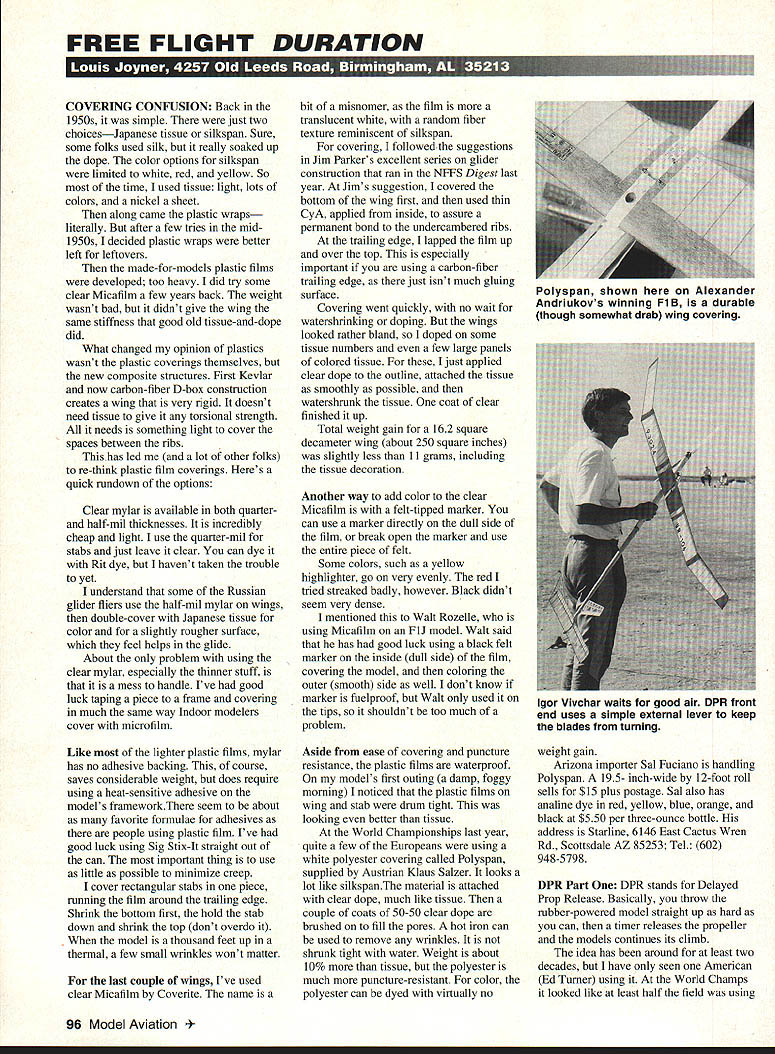
Polyspan (polyester covering)
- Polyspan is a white polyester covering supplied by Klaus Salzer (Austria). It looks like silkspan and is attached with clear dope like tissue.
- Finish: Brush on a couple of coats of 50/50 clear dope to fill pores; a hot iron can remove wrinkles. It is not water‑shrink tight.
- Weight: about 10% more than tissue, but much more puncture‑resistant.
- Coloring: Polyspan can be dyed with virtually no weight gain.
Supplier (Arizona importer Sal Fuciano / Starline):
- Polyspan roll: 19.5 in. wide × 12 ft — $15 plus postage.
- Aniline dye (red, yellow, blue, orange, black) — $5.50 per 3‑oz bottle.
- Starline, 6146 East Cactus Wren Rd., Scottsdale, AZ 85253; Tel: (602) 948‑5798.
DPR (Delayed Prop Release) — Part One
Definition:
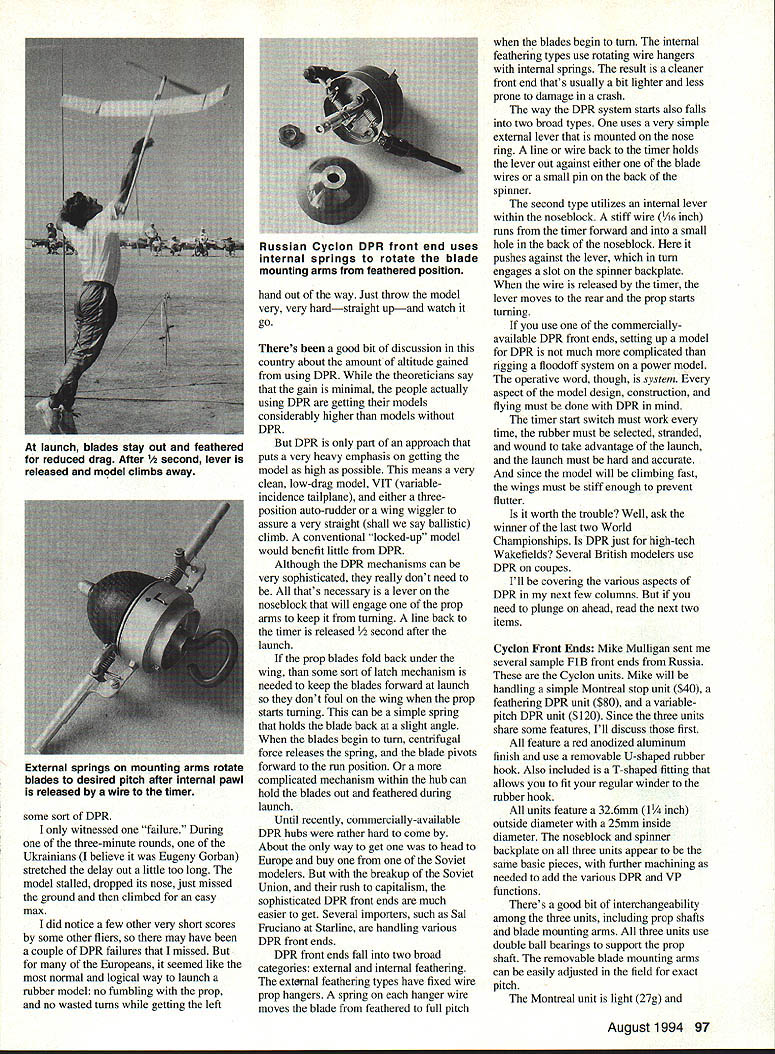
- DPR (Delayed Prop Release) means launching a rubber‑powered model straight up hard, with a timer that releases the propeller after a delay so the model can continue to climb in a thermal.
General approach:
- DPR is part of an approach that emphasizes maximum altitude: a very clean, low‑drag airframe, variable‑incidence tailplane (VIT), and either a three‑position auto‑rudder or a wing wiggler to ensure a very straight (ballistic) climb. A conventional "locked‑up" model benefits little from DPR.
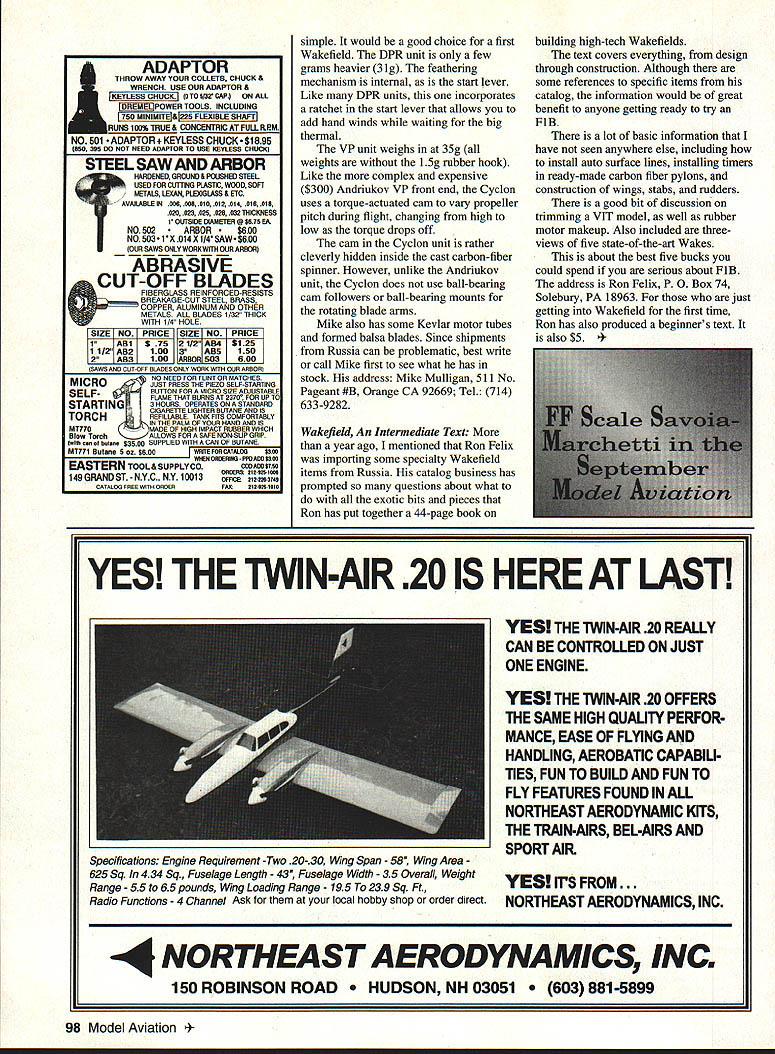
Mechanisms:
- Basic requirement: a lever on the noseblock that engages one prop arm to prevent turning; a line to the timer is released about 1/2 second after launch.
- If prop blades fold under the wing, a latch is needed to keep blades forward at launch. Solutions include:
- A simple spring that holds the blade at a slight angle until centrifugal force moves it to the run position.
- More complex hub mechanisms that hold blades out and feathered during launch.
Availability:
- Commercial DPR hubs were formerly hard to find outside Europe. With geopolitical changes, sophisticated DPR front ends have become easier to obtain; several importers (including Sal Fuciano at Starline) handle various DPR front ends.
DPR front end categories:
- By feathering method:
- External feathering: fixed wire prop hangers with springs on each hanger wire that move blades from feathered to full pitch when turning starts.
- Internal feathering: rotating wire hangers with internal springs — cleaner, usually lighter, and less prone to crash damage.
- By start mechanism:
- External lever: mounted on the nose ring with a line or wire to the timer that holds the lever against a blade wire or pin.
- Internal lever: a stiff wire (about 1/16 in.) runs from the timer forward into the noseblock, pushing a lever that engages a slot on the spinner backplate; release allows the lever to move and the prop to start.
Setup considerations:
- Using a commercial DPR front end is similar to rigging a floodoff system on a power model, but DPR requires a system approach:
- The timer start must be reliable.
- Rubber must be selected, stranded, and wound to take advantage of the launch.
- The launch must be hard and accurate.
- Wings must be stiff enough to prevent flutter during the fast climb.
Worth it?
- DPR is used by top competitors — it can be worth the trouble. It’s not just for high‑tech Wakefields; some British modelers use DPR on coupes as well.
I’ll cover more aspects of DPR in future columns. If you need to dive in now, read the next items.
Cyclon Front Ends
- Mike Mulligan sent sample F1B front ends from Russia — the Cyclon units. Mike will handle:
- A simple Montreal stop unit (S40),
- A feathering DPR unit ($80),
- A variable‑pitch DPR unit ($120).
- Shared features:
- Red anodized aluminum finish.
- Removable U‑shaped rubber hook and a T‑fitting to connect a regular winder.
- 32.6 mm (1 1/4 in) outside diameter, 25 mm inside diameter.
- Common noseblock and spinner backplate design, with machining for DPR/VP functions.
- Interchangeable prop shafts and blade mounting arms.
- Double ball bearings supporting the prop shaft.
- Removable blade mounting arms adjustable in the field for exact pitch.
- The Montreal unit is light (27 g).
Transcribed from original scans by AI. Minor OCR errors may remain.

