
FREE FLIGHT DURATION
Louis Joyner, 4257 Old Leeds Road, Birmingham, AL 35213
BOXING IT UP
You don't need to be a jet-set modeler, flying all over the country, to take advantage of a model box. Even if you only travel by car or van, a model box provides a great way to safely store and organize your models. If you have ever gone to a contest and started putting one of your models together, only to discover you left the stab at home, then you need a model box.
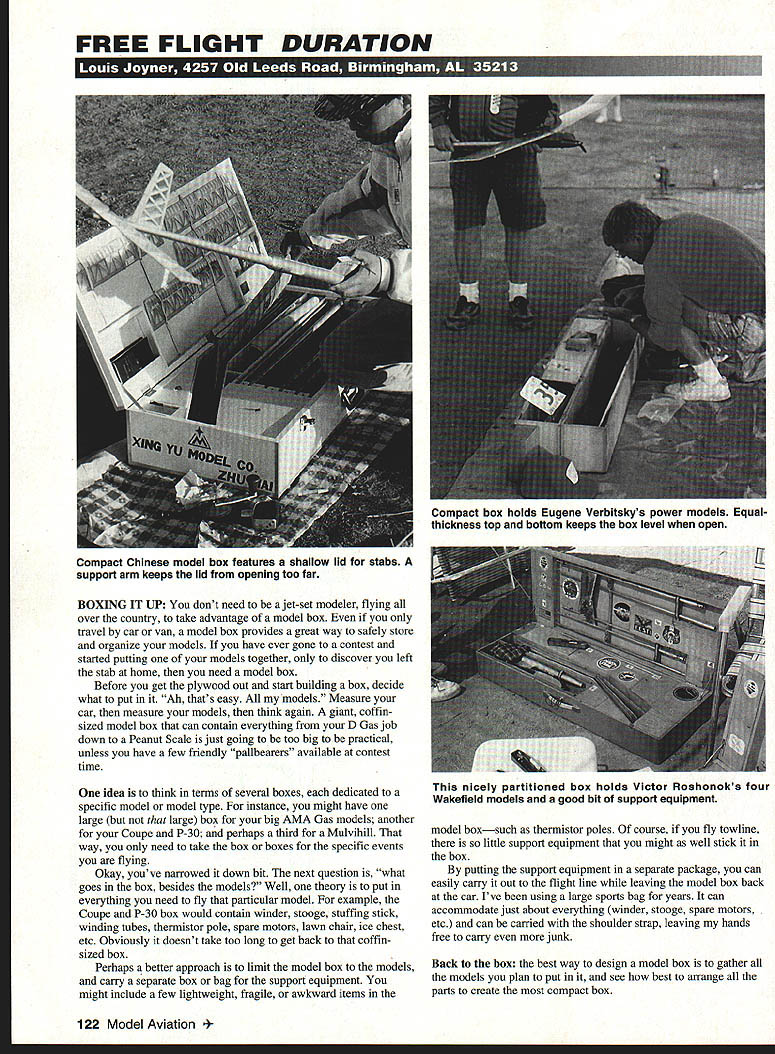
Before you get the plywood out and start building a box, decide what to put in it. Measure your car, then measure your models, then think again. A giant, coffin-sized model box that can contain everything from your D Gas job down to a Peanut Scale is just going to be too big to be practical, unless you have a few friendly "pallbearers" available at contest time.
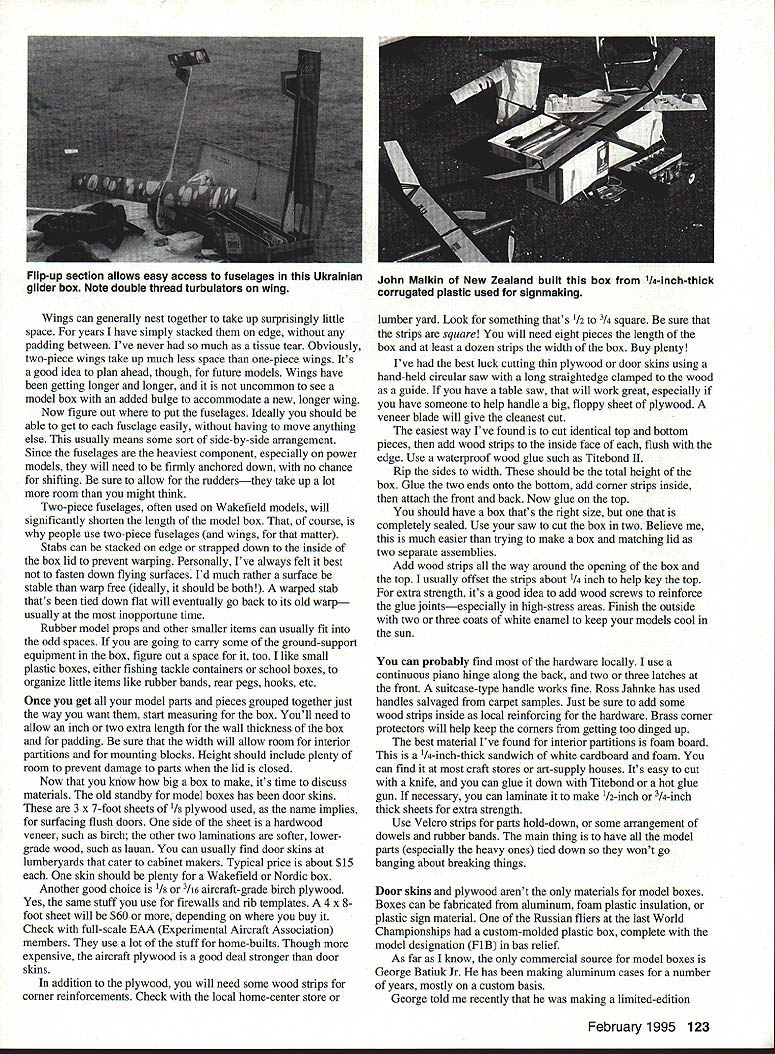
One idea is to think in terms of several boxes, each dedicated to a specific model or model type. For instance, you might have:
- One large (but not huge) box for big AMA Gas models.
- A second box for Coupe and P-30.
- A third box for a Mulvihill.
That way you only take the boxes for the specific events you are flying.
What to put in the box (besides the models)? One approach is to pack everything needed to fly that particular model. For example, a Coupe and P-30 box might contain:
- Winder, stooge, stuffing stick, winding tubes
- Thermistor pole, spare motors
- Lawn chair, ice chest
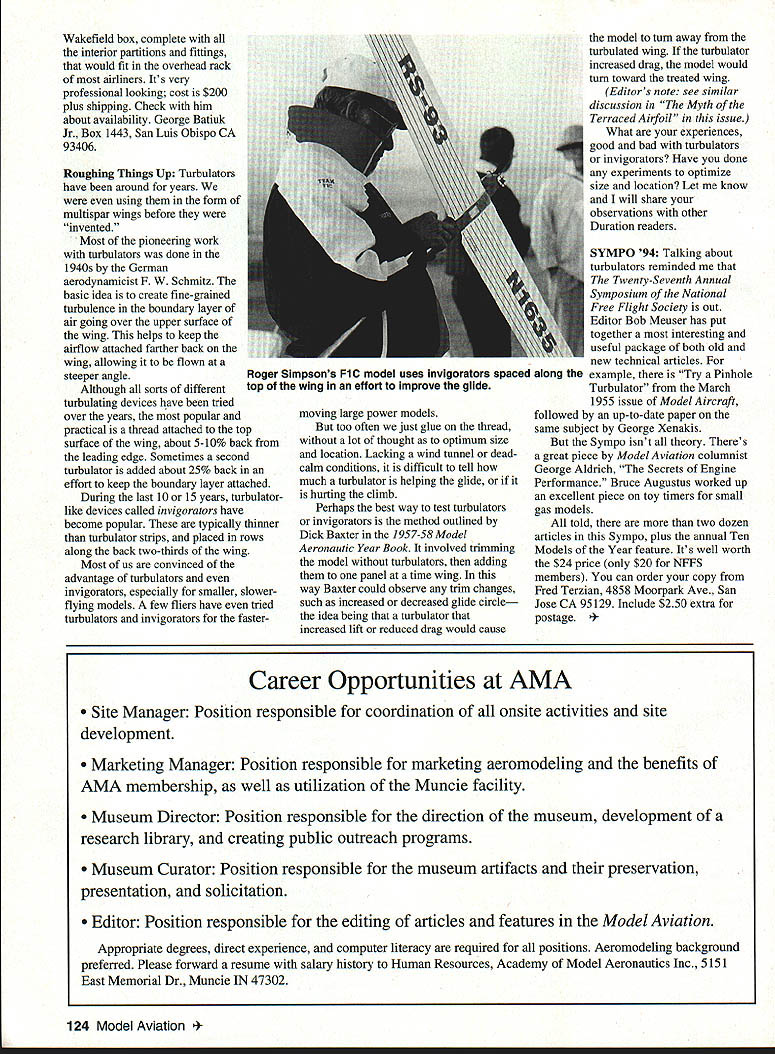
A drawback of that approach is you quickly return to the coffin-sized box problem. A better approach may be to limit the model box to models only, and carry support equipment in a separate bag or box. You might include a few lightweight, fragile, or awkward items in the model box—such as thermistor poles. If you fly towline, there is so little support equipment that you might as well stick it in the model box.
By putting support equipment in a separate package you can easily carry it out to the flight line while leaving the model box at the car. A large sports bag works well: it can accommodate winder, stooge, spare motors, etc., and can be carried with a shoulder strap, leaving hands free.
Design the model box by gathering all the models and arranging parts to make the most compact package. Consider these guidelines:
- Allow 1/2 to 1 inch extra length for wall thickness and padding.
- Ensure width allows room for interior partitions and mounting blocks.
- Include enough height to prevent damage when the lid is closed.
- Plan for longer future wings—models have been getting longer and you may need to add a bulge.
Wings can generally nest together and take up surprisingly little space. Two-piece wings take less room than one-piece wings; plan for that option. Arrange fuselages so you can access each one without moving others—usually a side-by-side arrangement. Because fuselages are heavy, especially on power models, anchor them firmly so they cannot shift. Remember to allow room for rudders.
Stabs can be stacked on edge or strapped to the inside of the lid to prevent warping. I prefer not to fasten flying surfaces flat; a warped stab tied down flat will often revert to its warp later. Small items—rubber props, pegs, hooks—fit into odd spaces; use small plastic boxes (fishing-tackle or school boxes) to organize them.
Materials and construction
- Common materials:
- Door skins: 3 x 7 ft sheets of 1/8" plywood (hardwood veneer one side, softer laminations other). Usually about $15 each; one skin is often enough for a Wakefield or Nordic box.
- Aircraft-grade birch plywood: 1/8" or 3/16" (stronger but pricier; a 4 x 8 ft sheet can be $60+).
- Wood strips for corner reinforcements: 1/4" to 3/8" square; buy plenty.
- Tools and cutting:
- Hand-held circular saw with a long straightedge works well for cutting thin plywood or door skins.
- A table saw is good if you have help handling large sheets; use a veneer blade for clean cuts.
- Basic assembly steps:
- Cut identical top and bottom pieces; add wood strips to the inside face of each, flush with the edge.
- Rip the sides to width (total height of the box). Glue the two ends onto the bottom and add corner strips inside.
- Attach the front and back, then glue on the top.
- Cut the assembled box in two to create matching box and lid—easier than making separate top and bottom assemblies.
- Add wood strips around the opening and the top, offset about 1/4" to help key the top.
- For extra strength, add wood screws to reinforce glue joints, especially in high-stress areas.
- Finish the outside with two or three coats of white enamel to keep models cooler in the sun.
Hardware and interior fittings
- Use a continuous piano hinge along the back and two or three latches at the front.
- A suitcase-type handle works fine; you can also salvage handles from carpet sample cases—be sure to add internal wood reinforcement for hardware.
- Brass corner protectors help prevent corner damage.
- Interior partitions: foam board (1/4" sandwich of cardboard and foam) is easy to cut and glue; laminate to make 1/2" or 3/4" sheets if stronger partitions are needed.
- Use Velcro strips, or dowels and rubber bands, to hold parts down. The crucial point is to secure heavy parts so they won't bang and break.
Alternatives and commercial sources
- Boxes can also be made from aluminum, foam plastic insulation, or plastic sign material. Custom-molded plastic cases exist.
- Commercial aluminum cases have been made by George Batuk Jr. He was producing a limited-edition Wakefield box with interior partitions sized to fit in airline overhead racks. Price was about $200 plus shipping; check current availability with:
- George Batuk Jr., Box 1443, San Luis Obispo, CA 93406.
ROUGHING THINGS UP: TURBULATORS AND INVIGORATORS
Turbulators have been used for years (we even used multispar wings before the name appeared). Most pioneering work was done in the 1940s by German aerodynamicist F. W. Schmitz. The basic idea is to create fine-grained turbulence in the boundary layer over the upper wing surface so the airflow stays attached farther back, allowing the wing to be flown at a steeper angle.
Common practical turbulator
- A thread attached to the top surface of the wing, about 5–10% back from the leading edge.
- Sometimes a second turbulator is added about 25% back to help keep the boundary layer attached.
Invigorators
- Thinner than turbulator strips and placed in rows along the back two-thirds of the wing.
- Have become popular over the last 10–15 years, especially on smaller, slower-flying models. Some have tried them on larger, faster power models.
Testing and trimming
- Too often we glue on turbulators without optimizing size or location. Without a wind tunnel or dead-calm conditions, it is hard to know whether a turbulator helps glide or hurts climb.
- A useful test method (Dick Baxter, Model Aeronautic Year Book, 1957–58): trim the model without turbulators, then add them to one panel at a time and observe trim changes. A turbulator that increases lift or reduces drag will cause the model to turn away from the turbulated wing; a turbulator that increases drag will make the model turn toward the treated wing.
Have you tried turbulators or invigorators? What are your good and bad experiences? Have you experimented to optimize size and location? Let me know and I will share observations with other Duration readers.
(Editor's note: see similar discussion in "The Myth of the Terraced Airfoil" in this issue.)
SYMPO '94
The Twenty-Seventh Annual Symposium of the National Free Flight Society (Sympo '94), edited by Bob Meuser, is out. It includes a mix of historical and current technical articles—for example:
- "Try a Pinhole Turbulator" (Model Aircraft, March 1955) followed by an up-to-date paper by George Xenakis on the same subject.
- "The Secrets of Engine Performance" by George Aldrich.
- An excellent piece by Bruce Augsburger on tiny timers for small gas models.
The Sympo contains more than two dozen articles plus the annual Ten Models of the Year feature. Price: $24 ($20 for NFFS members). Order from:
- Fred Terzian, 4858 Moorpark Ave., San Jose, CA 95129.
Include $2.50 extra for postage.
Transcribed from original scans by AI. Minor OCR errors may remain.

