
FREE FLIGHT DURATION
Louis Joyner, 4257 Old Leeds Road, Birmingham AL 35213
CAMPBELL KITS
Lee Campbell sent along two new 1/2A kits for review. One is the Frank Garcher-designed Fortastrop for Nostalgia. I vaguely remember the Midwest kit of the Fortastrop from the mid-1950s, but can't recall ever seeing one built. It was probably one of those designs that was left behind in the horsepower and square-inch race that started with the Cox and Holland engines.
The Fortastrop is a nice-looking, though rather typical, 247-square-inch model with tapered tips, a medium-height pylon, and a 33% stab. I especially like the diagonal rib construction on the stab and the rudder firmly mounted on the fuselage. Construction is simple and straightforward. About the only unusual feature is the built-up, sheeted pylon. Price for the kit is $29.98.
The other new kit from Lee is a half-A version of Dave Platt's Slow Worm. The larger A version of the Slow Worm has been in the Campbell lineup for several years. The smaller version, at 300 square inches, should work well with a Tee Dee or one of the lighter Russian 1/2A engines.
As you would expect from Dave, a transplanted Englishman living in Florida, the Slow Worm uses a lot of the typical British Open Power model features. The pylon is fairly high, though not as high as on George Fuller's Dixielander. But the rudder is back where it should be: behind the stab and firmly mounted to the fuselage.
The wing construction is conventional: straight ribs with a single main spar on the bottom and three small spars on top. It's probably best to use the tissue supplied in the kit, rather than opt for one of the plastic films. Tissue will give the wing the extra torsional strength it needs.
The stab uses a full-depth spar with diagonal ribs aft, which should help provide some torsional rigidity. The fuselage construction looks stiff, with full-width diagonal formers all the way to the rear. The Slow Worm 300 sells for $34.98. You can order direct from Campbell's Custom Kits, 4402 Weddel, Dearborn Heights MI 48125.
One of the best features of the Slow Worm kit is Dave Platt's very complete set of instructions. These consist of four single-spaced 8 1/2 x 11 sheets. Construction takes up little more than the first sheet; the rest is devoted to adjustments and test flying. These are the best instructions on trimming I have ever seen in a kit. Dave Platt is to be commended.
Much of what Dave discusses applies to just about any type of non-autosurface model, so it bears repeating here:
- Rudder: Most effective during the second half of the power run, say from the 3-second point on. As speed increases, effect increases. Small wedges used for power adjustment have little or no effect on the glide.
- Wing Warp: Similar to rudder, in that its effectiveness rises with extra speed, but provides a roll couple, not a yaw. Slight effect on glide. What little there is makes the model glide toward the washin. On typical pylon models (including this Slow Worm) this means to the right, which is what we want.
- Side Thrust / Downthrust: Used to correct direction during the first 2–3 seconds of the power run. Effect diminishes during acceleration; becomes zero at full speed. Incidentally, the effectiveness of thrustline adjustments is nowhere near as great on power ships as it is on rubber-powered jobs. Every Slow Worm I've ever seen has needed a degree or two of left thrust, but downthrust seems to have the strange (and undesirable) effect of producing a nose-up "jump" as the engine stops. Therefore, avoid if possible.
- Tail Incidence: Positive or negative, will influence both power and glide. More during the power run, as speed is greater.
- Tail Tilt: Controls the size of the glide circle — more tilt, smaller circle. The model turns toward the high side of the stab. Little or no effect under power, because tilt only works under high-lift conditions. During the power run, angle of attack, and thus lift, of the stab is at a minimum.
- CG Shift: Very critical adjustment affecting both power and glide. Change only when imperative. Most kit or plan models have their optimum CG position marked, and will fly well at this trim. Looping is a sign of too-forward CG, while the sign of too-aft CG is a model with slow (or no) recovery from a dive at the point of motor cut or during the glide.
It is a very basic concept that some adjustments are more effective at high speeds while others are more effective at low speeds that allows us to fly free, without a radio to make adjustments during flight. Simple, but still amazing when you stop to think about it.
Rubber Ramblings
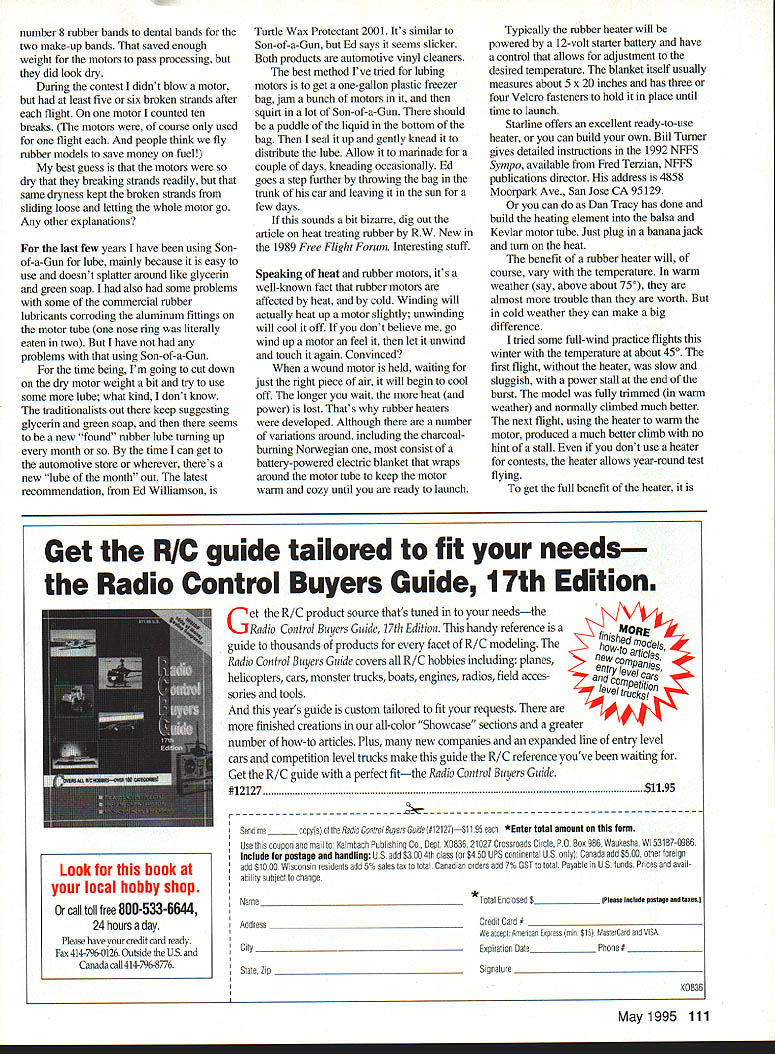
It seems that quite a few people are still trying to figure out FAI Tan II rubber, though it has been out for a couple of years. Perhaps some of this is due to the time it takes for folks to use up their stock of the old Tan and get the hang of the newer Tan II. But some of it must be that the Tan II is a lot different from the other rubber we've been using for the last dozen or so years (FAI Gray and Tan, mostly).
Tan II has a lot more stretch—something around 9:1, versus about 7.5:1 for the older stuff. Surprisingly, it has very high energy storage, approaching 4,000 foot-pounds per pound—a good 20% better than the old rubber. But the high-end torque is lower, with less of a dramatic spike in the torque curve.
These differences in the stretch and torque curve are what cause some of the problems in switching over from Tan to Tan II. If you simply made up new motors with the same number of strands as before, you could pack in a lot more turns, but the burst would be rather anemic.
The cure is simple: increase the number of strands, and shorten the overall motor length. For example:
- Old: 26 strands of Tan, about 17 inches long.
- New: 30 strands of Tan II, about 15 inches long.
Turns went up only slightly, from about 400 to around 420 for the new rubber. The burst is about the same, but the cruise is much better.
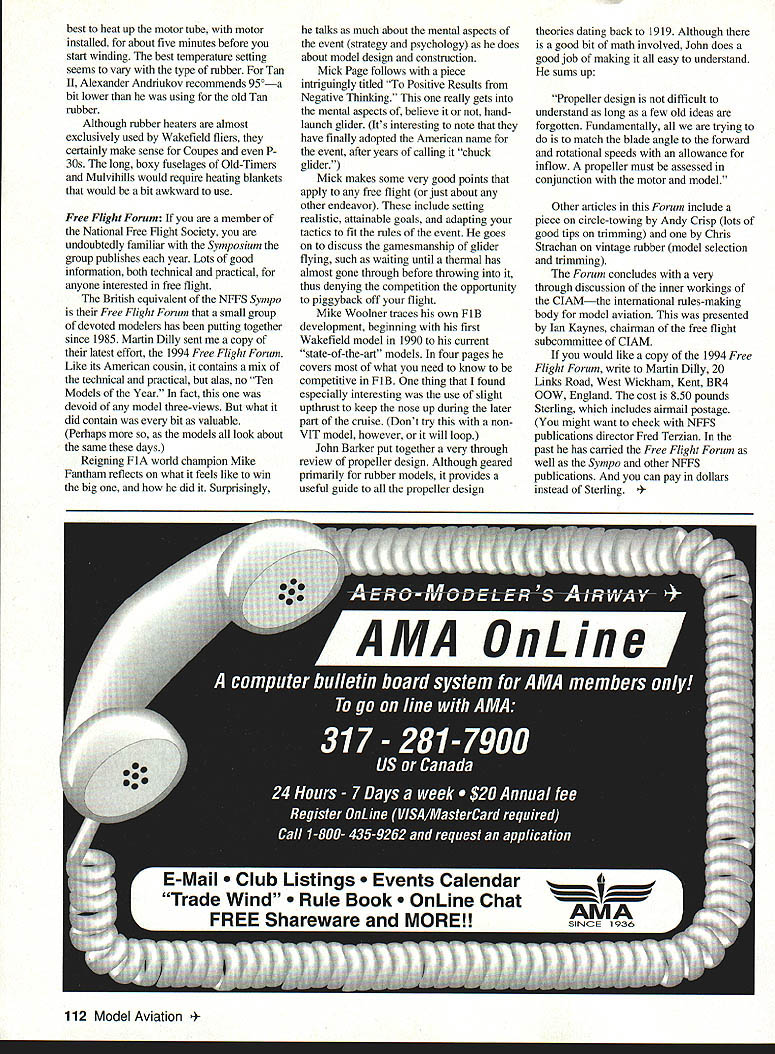
Of course, for Wakefield, as well as Coupe or P-30, the motor weight is fixed, so the motor has to be shortened as the number of strands are increased. But for Mulvihill or even Free Flight Scale, the shorter Tan II motor would reduce the amount of slack and eliminate some of the CG shift from a too-long motor.
Since I had a good stock of the Tan rubber, I have been using it for testing. I figure that if the model can handle the higher initial torque and more rapid falloff of the Tan rubber, it will behave just fine with the flatter torque curve of the Tan II. For the last Finals, I made up Tan II motors to a dry weight of 39 grams, instead of the more usual 38.5 grams. After lacing, the motors were coming out just as heavy, so I wiped off some of the lube and switched from number 8 rubber bands to dental bands for the two make-up bands. That saved enough weight for the motors to pass processing, but they did look dry.
During the contest I didn't blow a motor, but had at least five or six broken strands after each flight. On one motor I counted ten breaks. (The motors were, of course, only used for one flight each. And people think we fly rubber models to save money on fuel!) My best guess is that the motors were so dry that they broke strands readily, but that same dryness kept the broken strands from sliding loose and letting the whole motor go. Any other explanations?
For the last few years I have been using Son-of-a-Gun for lube, mainly because it is easy to use and doesn't splatter around like glycerin and green soap. I had also had some problems with some of the commercial rubber lubricants corroding the aluminum fittings on the motor tube (one nose ring was literally eaten in two). But I have not had any problems with that using Son-of-a-Gun.
For the time being, I'm going to cut down on the dry motor weight a bit and try to use some more lube; what kind, I don't know. The traditionalists out there keep suggesting glycerin and green soap, and then there seems to be a new "lube of the month" turning up every month or so. By the time I can get to the automotive store or wherever, there's a new "lube of the month" out. The latest recommendation, from Ed Williamson, is Turtle Wax Protectant 2001. It's similar to Son-of-a-Gun, but Ed says it seems slicker. Both products are automotive vinyl cleaners.
The best method I've tried for lubing motors is to get a one-gallon plastic freezer bag, jam a bunch of motors in it, and then squirt in a lot of Son-of-a-Gun. There should be a puddle of the liquid in the bottom of the bag. Then I seal it up and gently knead it to distribute the lube. Allow it to marinate for a couple of days, kneading occasionally. Ed goes a step further by throwing the bag in the trunk of his car and leaving it in the sun for a few days.
If this sounds a bit bizarre, dig out the article on heat treating rubber by R.W. New in the 1989 Free Flight Forum. Interesting stuff.
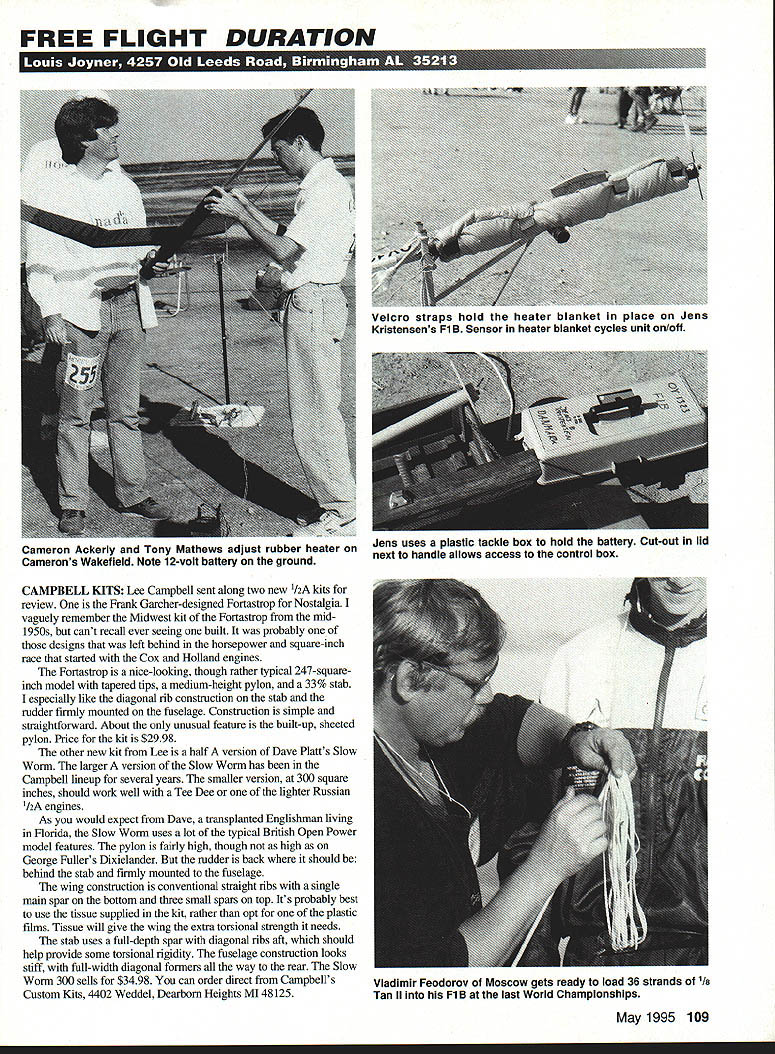
Speaking of heat and rubber motors, it's a well-known fact that rubber motors are affected by heat and by cold. Winding will actually heat up a motor slightly; unwinding will cool it off. If you don't believe me, go wind up a motor on a reel, then let it unwind and touch it again. Convinced? When a wound motor is held, waiting for just the right piece of air, it will begin to cool off. The longer you wait, the more heat (and power) is lost. That's why rubber heaters were developed. Although there are a number of variations around, including the charcoal-burning Norwegian one, most consist of a battery-powered electric blanket that wraps around the motor tube to keep the motor warm and cozy until you are ready to launch.
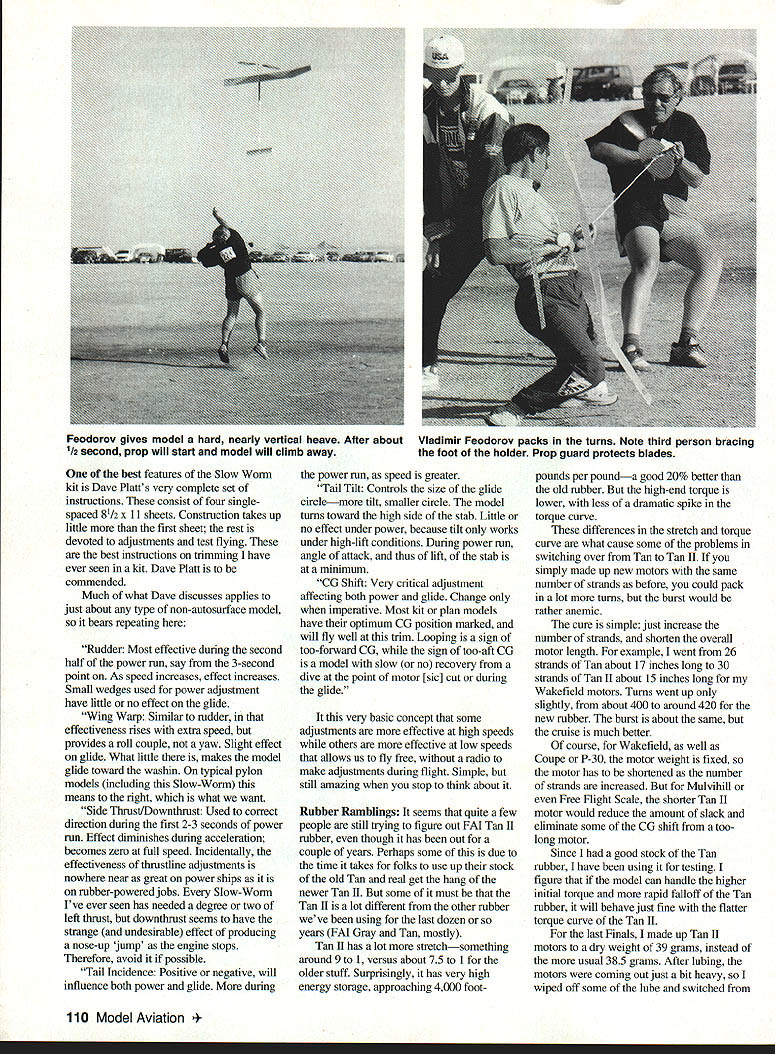
Typically the rubber heater will be powered by a 12-volt starter battery and have a control that allows for adjustment to the desired temperature. The blanket itself usually measures about 5 x 20 inches and has three or four Velcro fasteners to hold it in place until time to launch.
Starline offers an excellent ready-to-use heater, or you can build your own. Bill Turner gives detailed instructions in the 1992 NFFS Symposium, available from Fred Terzian, NFFS publications director. His address is 4858 Moorpark Ave., San Jose, CA 95129.
Or you can do as Dan Capps has done and build the heating element into the balsa and Kevlar motor tube. Just plug in a banana jack and turn on the heater.
The benefit of a rubber heater will, of course, vary with the temperature. In warm weather (say, above about 75°), they are almost more trouble than they are worth. But in cold weather they can make a big difference.
I tried some full-wind practice flights this winter with the temperature at about 45°. The first flight, without the heater, was slow and sluggish, with a power stall at the end of the burst. The model was fully trimmed (in warm weather) and normally climbed much better. The next flight, using the heater to warm the motor, produced a much better climb with no hint of a stall. Even if you don't use a heater for contests, the heater allows year-round test flying.
To get the full benefit of the heater, it is best to warm the motor tube for a few minutes before winding, and keep it warm until launch. Avoid leaving wrapped motors in the sun for long periods; they can overheat.
Free Flight Forum
If you are a member of the National Free Flight Society, you are undoubtedly familiar with the Symposium the group publishes each year. Lots of good information, both technical and practical, for anyone interested in free flight.
The British equivalent of the NFFS Symposium is their Free Flight Forum that a small group of devoted modelers has been putting together since 1985. Martin Dilly sent me a copy of their latest effort, the 1994 Free Flight Forum. Like its American cousin, it contains a mix of the technical and practical, but alas, no "Ten Models of the Year." In fact, this one was devoid of any model three-views. But what it did contain was every bit as valuable. (Perhaps more so, as the models all look about the same these days.)
Contents of interest in the 1994 Forum include:
- Mike Fantham: The reigning F1A world champion reflects on what it feels like to win the big one, and how he did it. Surprisingly, he talks as much about the mental aspects of the event (strategy and psychology) as he does about model design and construction.
- Mick Page: "To Positive Results from Negative Thinking." This article delves into the mental aspects of handlaunch glider (now adopting the American name). Mick discusses setting realistic goals, adapting tactics to the event rules, and gamesmanship such as timing throws to deny competitors a piggyback.
- Mike Wooller: Traces his F1B development from his first Wakefield in 1990 to current state-of-the-art models. In four pages he covers most of what you need to know to be competitive in F1B. One interesting tip: the use of slight upthrust to keep the nose up during the later part of the cruise (don't try this with a non-VIT model, or it will loop).
- John Barker: A thorough review of propeller design. Although geared primarily for rubber models, it provides a useful guide to propeller design theories dating back to 1919. Despite some math, the ideas are made easy to understand. He sums up: "Propeller design is not difficult to understand as long as a few old ideas are forgotten. Fundamentally, all we are trying to do is to match the blade angle to the forward and rotational speeds with an allowance for inflow. A propeller must be assessed in conjunction with the motor and model."
- Other articles: Andy Crisp on circle-towing (lots of good trimming tips) and Chris Strachan on vintage rubber (model selection and trimming). The Forum concludes with a thorough discussion of the inner workings of CIAM, presented by Ian Kaynes, chairman of the free flight subcommittee of CIAM.
If you would like a copy of the 1994 Free Flight Forum, write to Martin Dilly, 20 Links Road, West Wickham, Kent, BR4 0OW, England. The cost is 8.50 pounds sterling, which includes airmail postage. (You might want to check with NFFS publications director Fred Terzian. In the past he has carried the Free Flight Forum as well as the Symposium and other NFFS publications. And you can pay in dollars instead of sterling.)
Transcribed from original scans by AI. Minor OCR errors may remain.

