

FREE FLIGHT DURATION
Louis Joyner, 4257 Old Leeds Road, Birmingham AL 35213
Randy Weiler's #16 F1A
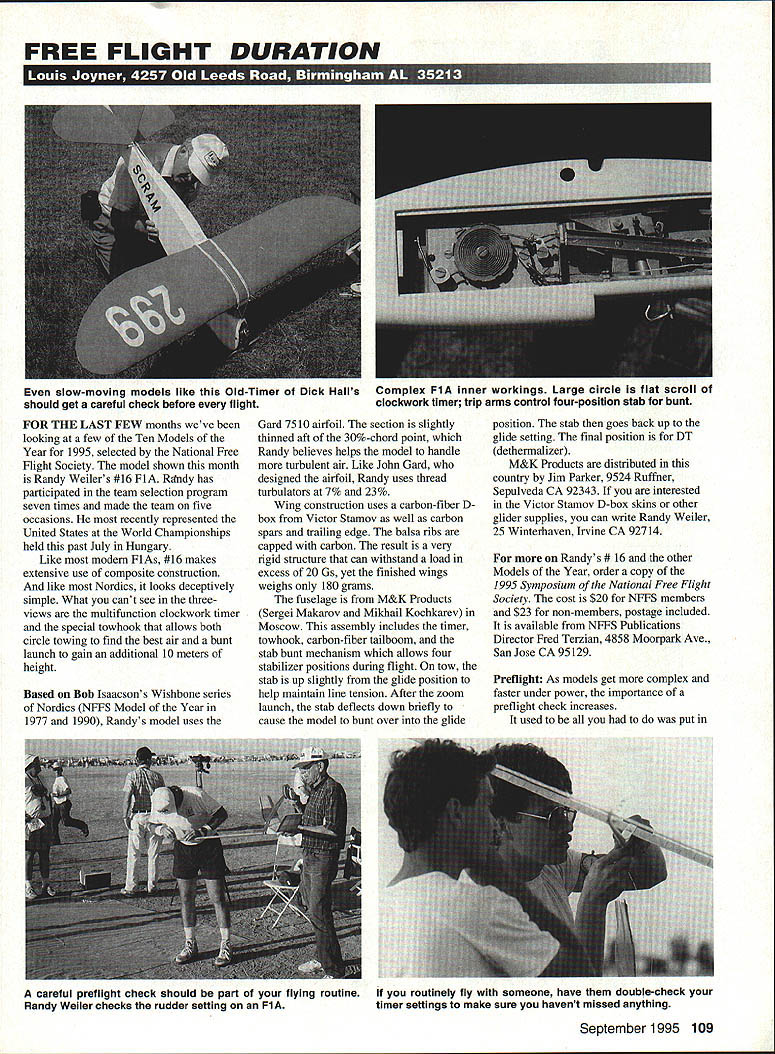
For the last few months we've been looking at a few of the Ten Models of the Year for 1995, selected by the National Free Flight Society. The model shown this month is Randy Weiler's #16 F1A. Randy has participated in the team selection program seven times and made the team on five occasions. He most recently represented the United States at the World Championships held this past July in Hungary.
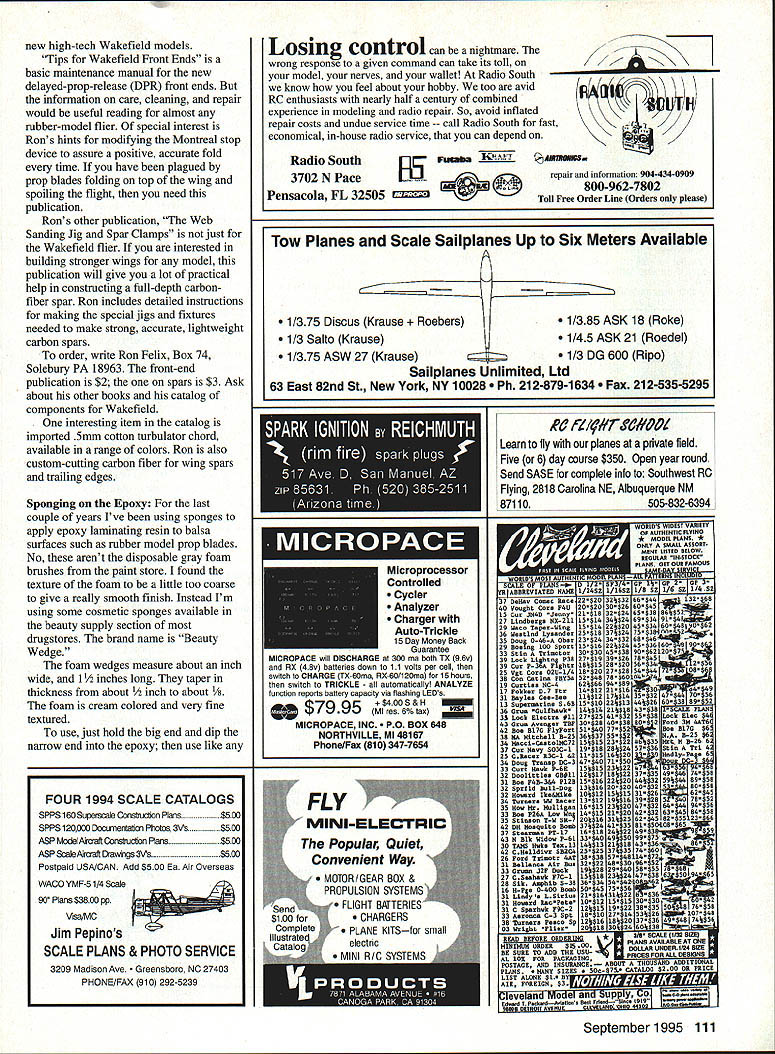
Like most modern F1As, #16 makes extensive use of composite construction. And like most Nordics, it looks deceptively simple. What you can't see in the three-views are the multifunction clockwork timer and the special towhook that allows both circle towing to find the best air and a bunt launch to gain an additional 10 meters of height.
Based on Bob Isaacson's Wishbone series of Nordics (NFFS Model of the Year in 1977 and 1990), Randy's model uses the Gard 7510 airfoil. The section is slightly thinned aft of the 30%-chord point, which Randy believes helps the model to handle more turbulent air. Like John Gard, who designed the airfoil, Randy uses thread turbulators at 7% and 23%.
Wing construction uses a carbon-fiber D-box from Victor Stamov as well as carbon spars and trailing edge. The balsa ribs are capped with carbon. The result is a very rigid structure that can withstand a load in excess of 20 Gs, yet the finished wings weigh only 180 grams.
The fuselage is from M&K Products (Sergei Makarov and Mikhail Kochkarev) in Moscow. This assembly includes the timer, towhook, carbon-fiber tailboom, and stab bunt mechanism which allows four stabilizer positions during flight. On tow, the stab is up slightly from the glide position to help maintain line tension. After the zoom launch, the stab deflects down briefly to cause the model to bunt over into the glide position. The stab then goes back up to the glide setting. The final position is for DT (dethermalizer).
M&K Products are distributed in the U.S. by Jim Parker, 9524 Ruffner, Sepulveda CA 91343. If you are interested in the Victor Stamov D-box skins or other glider supplies, you can write Randy Weiler, 25 Winterhaven, Irvine CA 92714.
For more on Randy's #16 and the other Models of the Year, order a copy of the 1995 Symposium of the National Free Flight Society. The cost is $20 for NFFS members, and $23 for non-members, postage included. It is available from NFFS Publications Director Fred Terzian, 4858 Moorpark Ave., San Jose CA 95129.
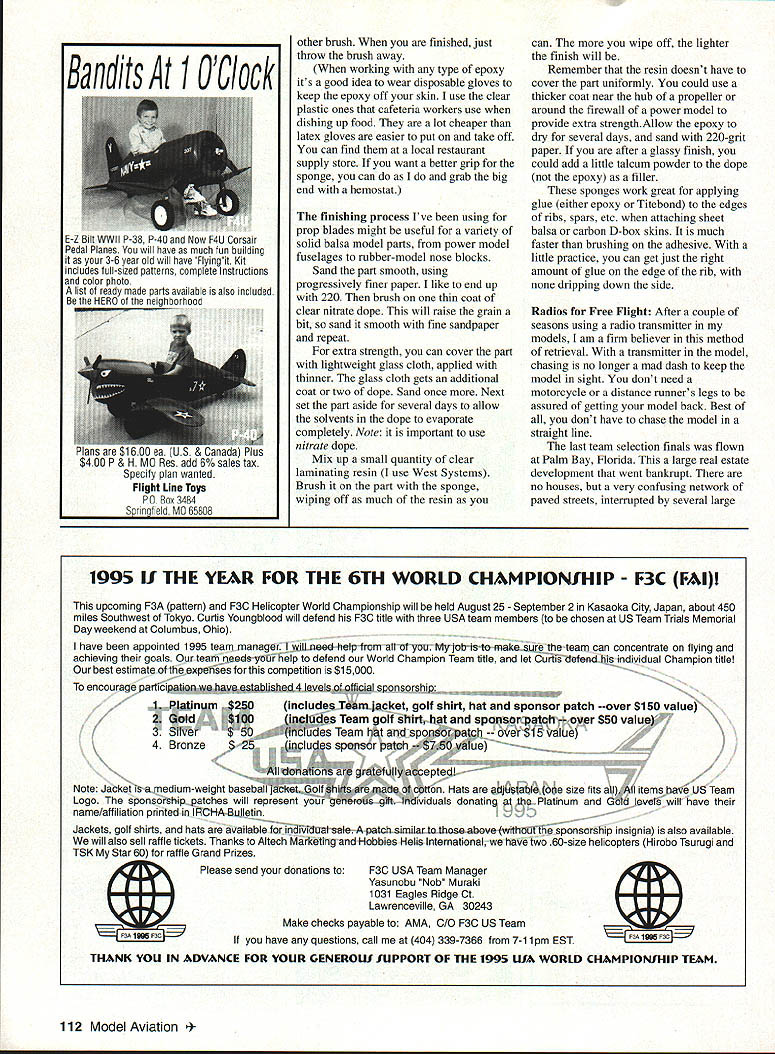
Preflight
As models get more complex and faster under power, the importance of a preflight check increases. Today's high-performance models require quite a few more steps to get ready for the next flight. Any mistake, such as hooking up one of the timer lines incorrectly, will usually result in a crash.
The preflight check should become a routine—almost a ritual. You can use a written checklist (write it on the model so you don't lose it) or trust it to memory. My flying buddy Jim Larkin recites his checklist out loud while he is prepping his power models. This has the advantage of letting bystanders know that he is concentrating on the model and helps discourage idle conversation. It only takes a moment's distraction to cause a major disaster.
At the very least, the preflight check should include a thorough visual inspection of the entire model. Pay particular attention to wing dihedral joints, the tailboom just in front of the stab, and other high-stress areas. (You know where your models break, so check those spots before every flight.)
- Check wing and tail hold-down bands; they will weaken over the course of a day's flying. When in doubt, replace them.
- Make sure the stab will pop up for DT. Many models are lost because of old rubber bands or stabs glued in place along with an incidence shim.
- Check all hooks to make sure they are firmly attached.
- Inspect lines for any signs of fraying. A 10x pocket loupe is great for this.
- Wind the timer all the way up and let it run for a few seconds. If it sounds funny, stop and investigate.
- Set the timer for the desired run, then hook up the lines. If you have more than one line, color-code them.
- Install fuse and DT band immediately after winding so there's plenty of time to fix problems or assemble a backup model.
I like to do all this immediately after a flight, so there is plenty of time to fix any problem or assemble a backup model. There are usually fewer distractions than just before the next flight, so you can concentrate better.
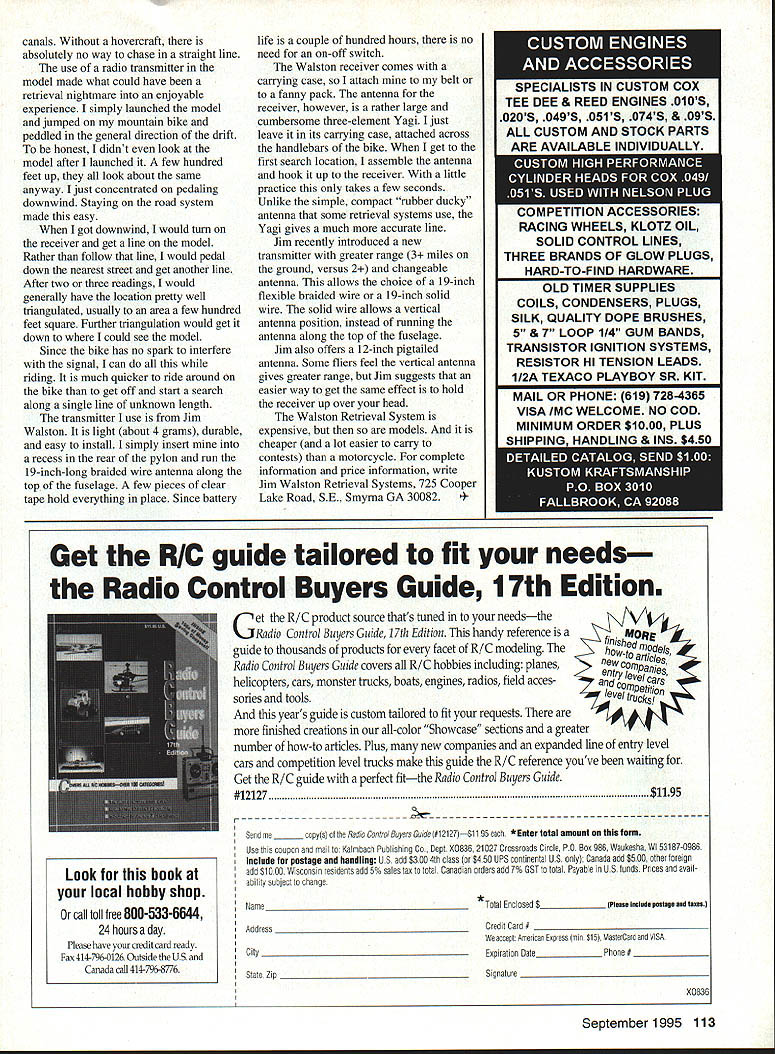
When you get ready to fly, double-check all the timer hookups one last time. A quick visual check of the entire model just before winding the motor or starting the engine should help prevent gross mistakes, such as launching the model with the stab up in the DT position.
Make a preflight check part of your flying routine. You'll probably end up spending a lot less time picking up the pieces from broken models.
New high-tech Wakefield models
"Tips for Wakefield Front Ends" is a basic maintenance manual for the new delayed-prop-release (DPR) front ends. The information on care, cleaning, and repair would be useful reading for almost any rubber-model flier. Of special interest are Ron's hints for modifying the Montreal stop device to assure a positive, accurate fold every time. If you have been plagued by prop blades folding on top of the wing and spoiling the flight, then you need this publication.
Ron's other publication, "The Web Sanding Jig and Spar Clamps," is not just for the Wakefield flier. If you are interested in building stronger wings for any model, this publication gives practical help in constructing a full-depth carbon-fiber spar. Ron includes detailed instructions for making the special jigs and fixtures needed to make strong, accurate, lightweight carbon spars.
To order, write Ron Felix, Box 74, Solebury PA 18963. The front-end publication is $2; the one on spars is $3. Ask about his other books and his catalog of components for Wakefield.
One interesting item in the catalog is imported 0.5 mm cotton tubular rubber cord, available in a range of colors. Ron is also custom-cutting carbon fiber for wing spars and trailing edges.
Sponging on the Epoxy
For the last couple of years I've been using sponges to apply epoxy laminating resin to balsa surfaces such as rubber model prop blades. No, these aren't the disposable gray foam brushes from the paint store—the texture of that foam is a little too coarse to give a really smooth finish. Instead I'm using some cosmetic sponges available in the beauty supply section of most drugstores. The brand name is "Beauty Wedge."
The foam wedges measure about an inch wide and 1-1/2 inches long. They taper in thickness from about 3/16 inch to about 1/8 inch. The foam is cream colored and very fine textured.
To use, hold the big end and dip the narrow end into the epoxy; then use like any other brush. When you are finished, just throw the sponge away.
When working with any type of epoxy it's a good idea to wear disposable gloves to keep the epoxy off your skin. I use the clear plastic ones that cafeteria workers use when dishing up food. They are a lot cheaper than latex gloves and easier to put on and take off. You can find them at a local restaurant supply store. If you want a better grip for the sponge, you can grab the big end with a hemostat.
The finishing process
The finishing process I've been using for prop blades might be useful for a variety of solid balsa model parts, from power model fuselages to rubber-motor nose blocks.
- Sand the part smooth, using progressively finer paper. I like to end up with 220 grit.
- Brush on one thin coat of clear nitrate dope. This will raise the grain a bit; sand it smooth with fine sandpaper and repeat.
- For extra strength, cover the part with lightweight glass cloth applied with thinner. The glass cloth gets an additional coat or two of dope. Sand once more.
- Set the part aside for several days to allow solvents in the dope to evaporate completely. Note: it is important to use nitrate dope.
- Mix a small quantity of clear laminating resin (I use West System). Brush it on the part with the sponge, wiping off as much resin as you can. The more you wipe off, the lighter the finish will be.
- Allow the epoxy to dry for several days, then sand with 220-grit paper. If you want a glassy finish, you can add a little talcum powder to the dope (not the epoxy) as a filler.
The resin doesn't have to cover the part uniformly—you can use a thicker coat near the hub of a propeller or around the firewall of a power model for extra strength.
These sponges also work great for applying glue (either epoxy or Titebond) to the edges of ribs, spars, etc., when attaching sheet balsa or carbon D-box skins. It is much faster than brushing on the adhesive. With a little practice, you can get just the right amount of glue on the edge of the rib with none dripping down the side.
Radios for Free Flight
After a couple of seasons using a radio transmitter in my models, I am a firm believer in this method of retrieval. With a transmitter in the model, chasing is no longer a mad dash to keep the model in sight. You don't need a motorcycle or a distance runner's legs to be assured of getting your model back. Best of all, you don't have to chase the model in a straight line.
When I got downwind, I would turn on the receiver and get a line on the model. Rather than follow the line, I would pedal down the nearest street and get another bearing. After two or three readings, I would generally have the location pretty well triangulated, usually to an area a few hundred square feet. Further triangulation would get it down to where I could see the model.
Since the bike has no spark to interfere with the signal, I can do all this while riding. It is much quicker to ride around on the bike than to get off and start a search along a single line of unknown length.
The transmitter I use is from Jim Walston. It is light (about 4 grams), durable, and easy to install. I simply insert mine into a recess in the rear of the pylon and run the 19-inch braided wire antenna along the top of the fuselage. A few pieces of clear tape hold everything in place. Since battery life is a couple of hundred hours, there is no need for an on-off switch.
The Walston receiver comes with a carrying case, so I attach mine to my belt or to a fanny pack. The antenna for the receiver, however, is a rather large and cumbersome three-element Yagi. I leave it in its carrying case, attached across the handlebars of the bike. When I get to the first search location, I assemble the antenna and hook it up to the receiver. With a little practice this only takes a few seconds. Unlike the simple, compact "rubber ducky" antenna that some retrieval systems use, the Yagi gives a much more accurate bearing.
Jim recently introduced a new transmitter with greater range (7+ miles on the ground versus about 2 miles) and changeable antennas. This allows the choice of a 19-inch flexible braided wire or a 19-inch solid wire. The solid wire allows a vertical antenna position, instead of running the antenna along the top of the fuselage. Jim also offers a 12-inch pigtailed antenna. Some fliers feel the vertical antenna gives greater range, but Jim suggests that an easier way to get the same effect is to hold the receiver over you or over your head.
The Walston Retrieval System is expensive, but so are models. It is cheaper (and a lot easier to carry to contests) than a motorcycle.
For complete information and prices, write: Jim Walston Retrieval Systems 725 Cooper Lake Road, S.E. Smyrna GA 30082
Transcribed from original scans by AI. Minor OCR errors may remain.

