
FREE FLIGHT DURATION
Louis Joyner, 4257 Old Leeds Road, Birmingham, AL 35213
COUPE PLANS
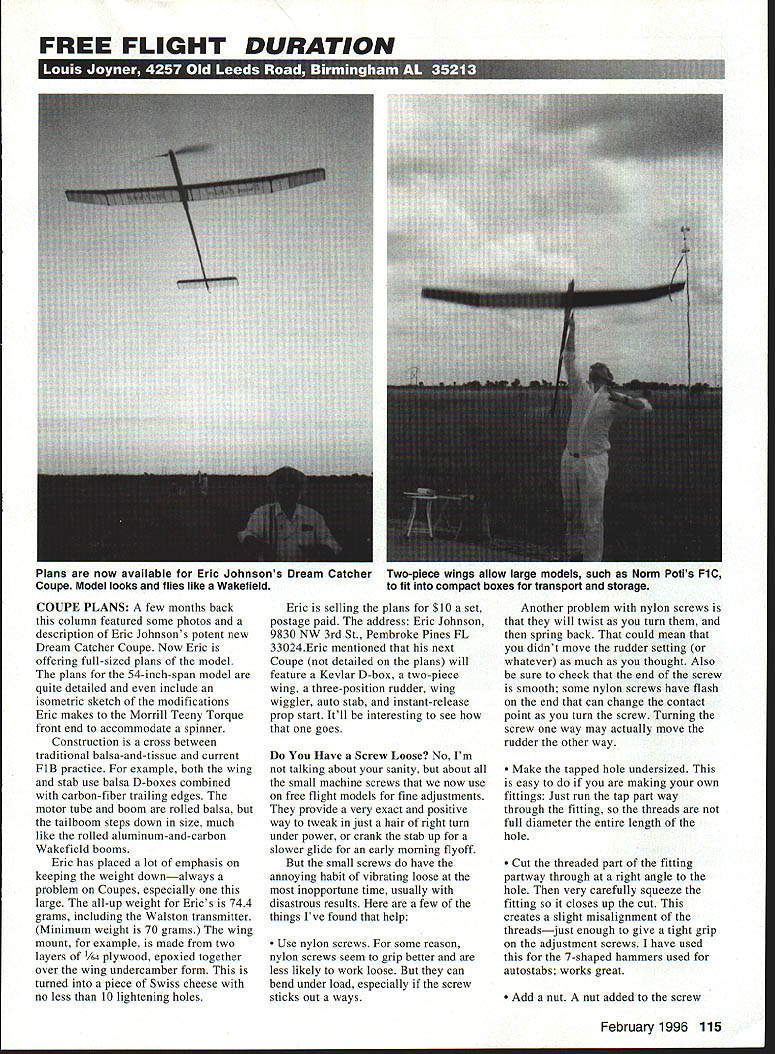
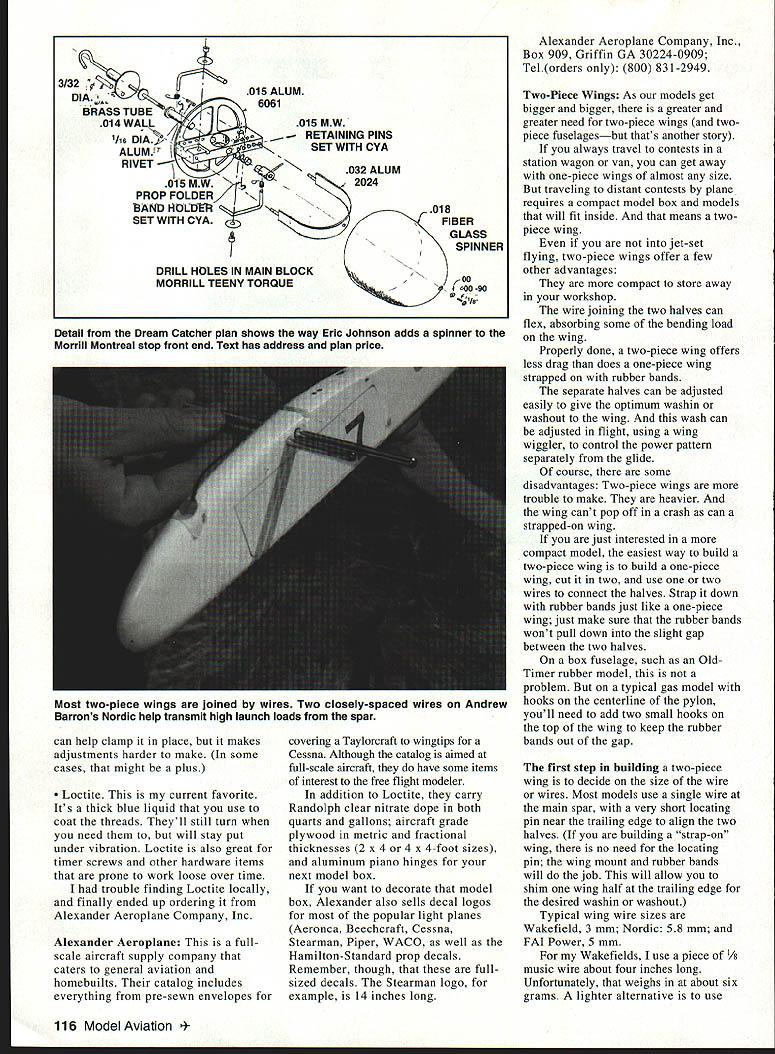
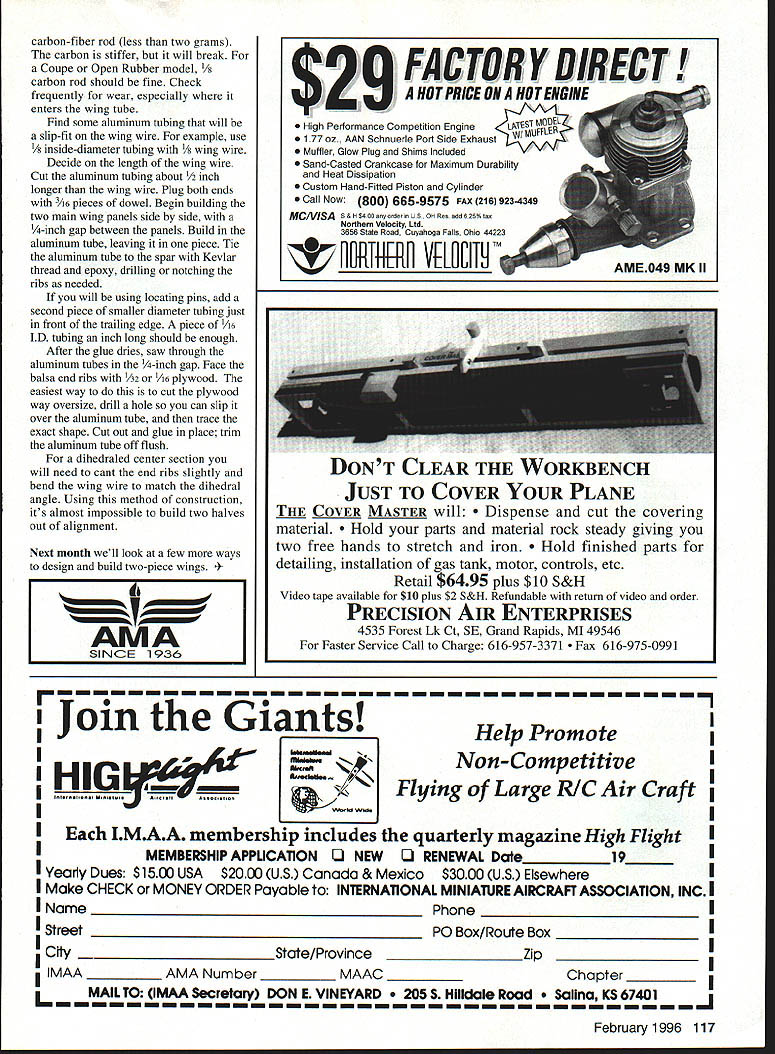
A few months back this column featured photos and a description of Eric Johnson's potent new Dream Catcher Coupe. Now Eric is offering full-sized plans of the model. The plans for the 54-inch-span model are quite detailed and even include an isometric sketch of the wing modifications Eric makes to the Morrill Teeny Torque front end to accommodate a spinner.
Construction is a cross between traditional balsa-and-tissue and current F1B practice. For example, both the wing and stab use balsa D-boxes combined with carbon-fiber trailing edges. The motor tube and boom are rolled balsa, but the tailboom steps down in size, much like the rolled aluminum-and-carbon Wakefield booms.
Eric has placed a lot of emphasis on keeping the weight down—always a problem on Coupes, especially one this large. The all-up weight for Eric's is 744 grams, including the Walston transmitter. (Minimum weight is 70 grams.) The wing mount, for example, is made from two layers of 1/64 plywood, epoxied together over the wing undercamber form. This is turned into a piece of Swiss cheese with no less than 10 lightening holes.
Eric is selling the plans for $10 a set, postage paid. Address: Eric Johnson, 9830 NW 3rd St., Pembroke Pines, FL 33024. Eric mentioned that his next Coupe (not detailed on the plans) will feature a Kevlar D-box, a two-piece wing, a three-position rudder, wing wiggler, auto stab, and instant-release prop start. It'll be interesting to see how that one goes.
DO YOU HAVE A SCREW LOOSE?
No, I'm not talking about your sanity, but about the small machine screws that we now use on free flight models for fine adjustments. They provide a very exact and positive way to tweak in just a hair of right turn under power, or crank the stab up for a slower glide for an early morning flyoff. But the small screws do have the annoying habit of vibrating loose at the most inopportune time, usually with disastrous results. Here are a few things I've found that help:
- Use nylon screws. For some reason, nylon screws seem to grip better and are less likely to work loose. But they can bend under load, especially if the screw sticks out a ways.
- Make the tapped hole undersized. This is easy to do if you are making your own fittings. Just run the tap partway through the fitting so the threads are not full diameter the entire length of the hole.
- Cut the threaded part of the fitting partway through at a right angle to the hole. Then very carefully squeeze the fitting so it closes up the cut. This creates a slight misalignment of the threads—just enough to give a tight grip on the adjustment screws. I have used this for the L-shaped hammers used for autostabs; works great.
- Add a nut. A nut added to the screw makes it harder to turn and in some cases might be just the ticket.
Loctite is my current favorite. It's a thick blue liquid; use a coat on the threads. They'll still turn when you need them to, but will stay put under vibration. Loctite is also great for timer screws and other hardware items prone to working loose over time.
Having some trouble finding Loctite locally, I finally ended up ordering from Alexander Aeroplane Company, Inc. Alexander Aeroplane is a full-scale aircraft supply company that caters to general aviation and homebuilts. Their catalog includes everything from pre-sewn envelopes of covering to Taylorcraft wingtips and Cessna items. Although the catalog is aimed at full-scale aircraft, there are some items of interest to the free flight modeler. In addition to Loctite, they carry Randolph clear nitrate dope (both quarts and gallons), aircraft-grade plywood in metric and fractional thicknesses and 2 x 4 and 4 x 4-foot sizes, aluminum piano hinges, and decals and logos for popular light planes. Remember, though, that full-sized decals can be large—the Stearman logo, for example, is 14 inches long.
Alexander Aeroplane Company, Inc. Box 909 Griffin, GA 30224-0909 Tel-orders: 800-831-2949
TWO-PIECE WINGS
As our models get bigger and bigger, there is a greater and greater need for two-piece wings (and two-piece fuselages—but that's another story). If you always travel to contests in a station wagon or van, you can get away with one-piece wings of almost any size. But trips to distant contests by plane require a compact model box and models that will fit inside. And that means a two-piece wing.
Even if you are not into jet-set flying, two-piece wings offer a few other advantages:
- They are more compact to store away in your workshop.
- The wire joining the two halves can flex, absorbing some of the bending load on the wing.
- Properly done, a two-piece wing offers less drag than does a one-piece wing strapped on with rubber bands.
- The separate halves can be adjusted easily to give the optimum wash-in or washout to the wing. And this wash can be adjusted in flight, using a wing wiggler, to control the power pattern separately from the glide.
Of course, there are some disadvantages:
- Two-piece wings are more trouble to make.
- They are heavier.
- The wing can't pop off in a crash as can a strapped-on wing.
If you are just interested in a more compact model, the easiest way to build a two-piece wing is to build a one-piece wing, cut it in two, and use one or two wires to connect the halves. Strap it down with rubber bands just like a one-piece wing; just make sure that the rubber bands won't pull down into the slight gap between the two halves.
On a box fuselage, such as an Old-Timer rubber model, this is not a problem. But on a typical gas model with hooks on the centerline of the pylon, you'll need to add two small hooks on the top of the wing to keep the rubber bands out of the gap.
The first step in building a two-piece wing is to decide on the size of the wire or wires. Most models use a single wire at the main spar, with a very short locating pin near the trailing edge to align the two halves. (If you are building a "strap-on" wing, there is no need for the locating pin; the wing mount and rubber bands will do the job. This will allow you to shim one wing half at the trailing edge for the desired wash-in or washout.)
Typical wing wire sizes are:
- Wakefield: 3 mm
- Nordic: 5.8 mm
- FAI Power: 5 mm
For my Wakefields, I use a piece of 1/8-inch music wire about four inches long. Unfortunately, that weighs in at about six grams. A lighter alternative is to use carbon-fiber rod (less than two grams). The carbon is stiffer, but it will break. For a Coupe or Open Rubber model, 1/8-inch carbon rod should be fine. Check frequently for wear, especially where it enters the wing tube.
Find some aluminum tubing that will be a slip-fit on the wing wire. For example, use 1/8-inch-diameter tubing with 1/8-inch wing wire.
Decide on the length of the wing wire. Cut the aluminum tubing about 1/2 inch longer than the wing wire. Plug both ends with 3/16-inch pieces of dowel. Begin building the two main wing panels side by side, with a 1/4-inch gap between the panels. Build in the aluminum tube, leaving it in one piece. Tie the aluminum tube to the spar with Kevlar thread and epoxy, drilling or notching the ribs as needed.
If you will be using locating pins, add a second piece of smaller-diameter tubing just in front of the trailing edge. A piece of 1/16-inch I.D. tubing an inch long should be enough.
After the glue dries, saw through the aluminum tubes in the 1/4-inch gap. Face the balsa and ribs with 1/32- or 1/16-inch plywood. The easiest way to do this is to cut the plywood way oversize, drill a hole so you can slip it over the aluminum tube, and then trace the exact shape. Cut out and glue in place; trim the aluminum tube off flush.
For a dihedraled center section you will need to cant the end ribs slightly and bend the wing wire to match the dihedral angle. Using this method of construction, it's almost impossible to build two halves out of alignment.
Next month we'll look at a few more ways to design and build two-piece wings.
Transcribed from original scans by AI. Minor OCR errors may remain.

