
FREE FLIGHT DURATION
Louis Joyner, 4257 Old Leeds Road, Birmingham AL 35213
MINI-MASTER F1H
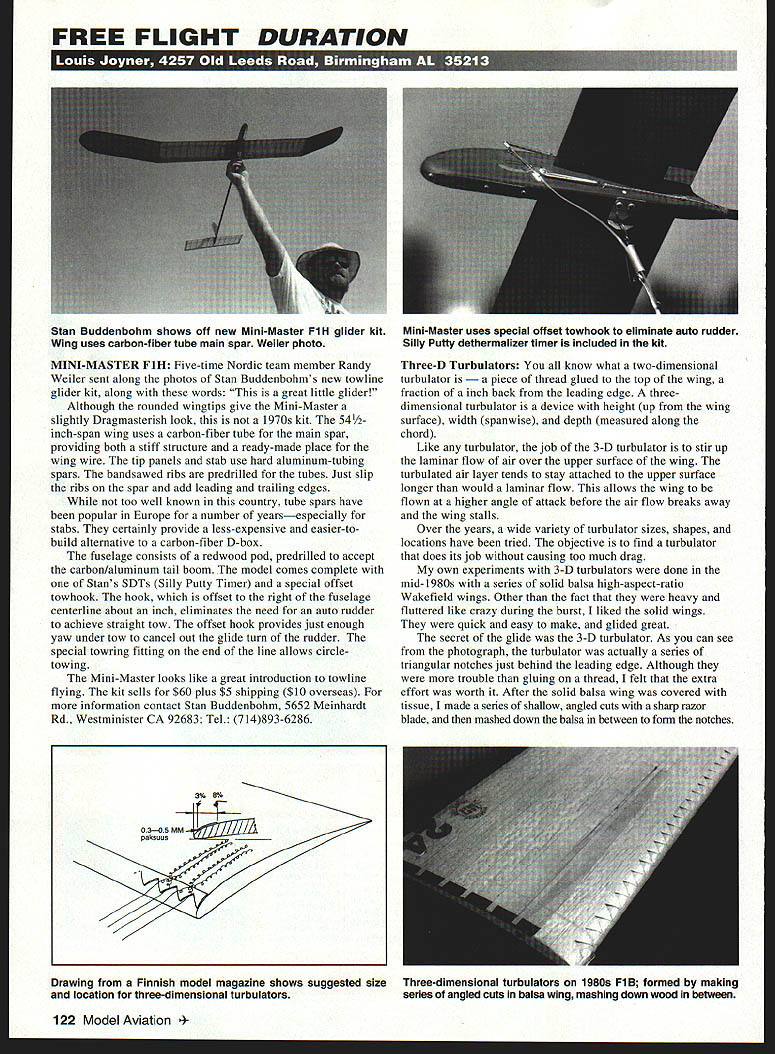
Five-time Nordic team member Randy Weiler sent along photos of Stan Buddenbohm's new towline glider kit, along with these words: "This is a great little glider!"
Although the rounded wingtips give the Mini-Master a slightly Dragmaster-ish look, this is not a 1970s kit. The 54-1/2-inch-span wing uses a carbon-fiber tube for the main spar, providing both a stiff structure and a ready-made place for the wing wire. The tip panels and stab use hard aluminum-tubing spars. The bandsawed ribs are predrilled for the tubes — just slip the ribs on the spar and add leading and trailing edges.
While not too well known in this country, tube spars have been popular in Europe for a number of years—especially for stabs. They certainly provide a less-expensive and easier-to-build alternative to a carbon-fiber D-box.
The fuselage consists of a redwood pod, predrilled to accept the carbon/aluminum tail boom. The model comes complete with one of Stan's SDTs (Silly Putty Timer) and a special offset tow hook. The hook, which is offset to the right of the fuselage centerline about an inch, eliminates the need for an auto rudder to achieve straight tow. The offset hook provides just enough yaw under tow to cancel out the glide turn of the rudder. The special tow-ring fitting on the end of the line allows circle-towing.
The Mini-Master looks like a great introduction to towline flying. The kit sells for $60 plus $5 shipping ($10 overseas). For more information contact Stan Buddenbohm, 5652 Meinhardt Rd., Westminster CA 92683; Tel.: (714) 893-6286.
Three-D Turbulators
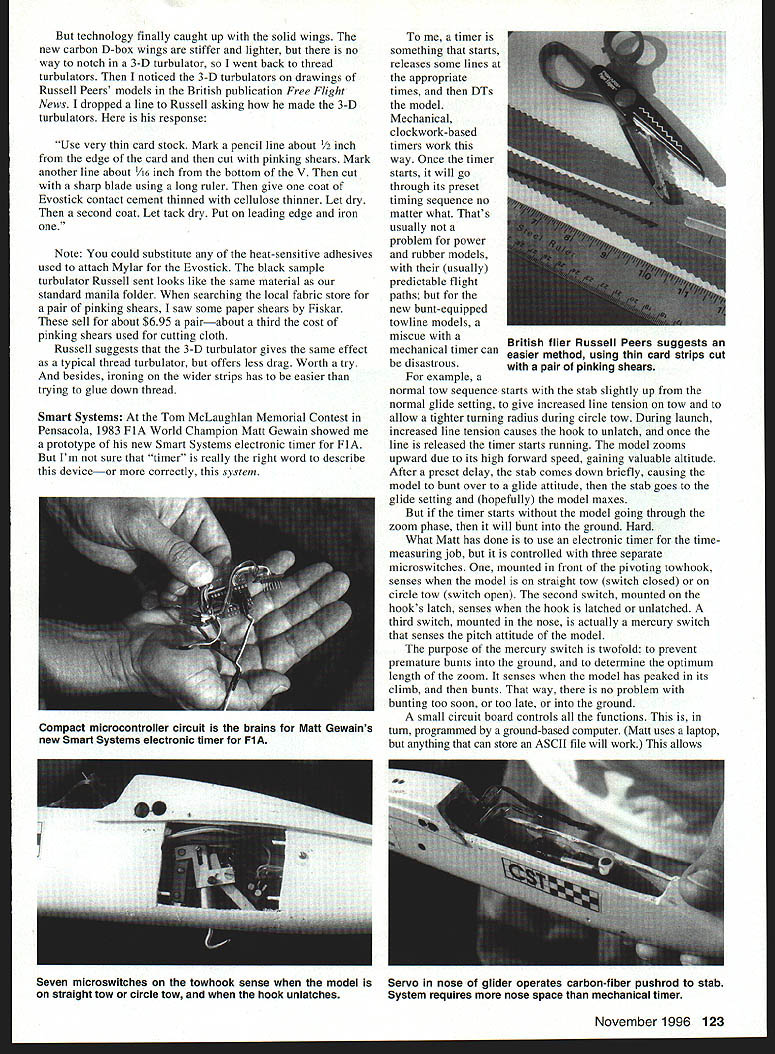
You all know what a two-dimensional turbulator is — a piece of thread glued to the top of the wing, a fraction of an inch back from the leading edge. A three-dimensional turbulator is a device with height (up from the wing surface), width (spanwise), and depth (measured along the chord).
Like any turbulator, the job of the 3-D turbulator is to stir up the laminar flow of air over the upper surface of the wing. The turbulated air layer tends to stay attached to the upper surface longer than would a laminar flow. This allows the wing to be flown at a higher angle of attack before the airflow breaks away and the wing stalls.
Over the years, a wide variety of turbulator sizes, shapes, and locations have been tried. The objective is to find a turbulator that does its job without causing too much drag.
My own experiments with 3-D turbulators were done in the mid-1980s with a series of solid balsa high-aspect-ratio Wakefield wings. Other than the fact that they were heavy and fluttered like crazy during the burst, I liked the solid wings. They were quick and easy to make, and glided great.
The secret of the glide was the 3-D turbulator. As you can see from the photograph, the turbulator was actually a series of triangular notches just behind the leading edge. Although they were more trouble than gluing on a thread, I felt that the extra effort was worth it. After the solid balsa wing was covered with tissue, I made a series of shallow, angled cuts with a sharp razor blade, and then mashed down the balsa in between to form the notches.
As technology finally caught up with solid wings, new carbon D-box wings became stiffer and lighter. There was no way to notch a 3-D turbulator into these wings, so I went back to thread turbulators.
I noticed 3-D turbulator drawings in Russell Peers' Models, a British publication. I dropped Russell a line asking if he made 3-D turbulators. His response:
"Use very thin card stock. Mark a pencil line about 1/2 inch from the edge of the card. Cut with pinking shears. Mark another line about 3/16 inch up from the bottom V. Cut with a sharp blade using a long ruler. Give a coat of Evostik contact cement thinned with cellulose thinner. Let dry. Give a second coat. Let tack dry. Put the leading edge on with an iron." Note: one could substitute heat-sensitive adhesives used to attach Mylar.
The Evostik black sample turbulator Russell sent looks like the same material as standard manila folder. In searching my local fabric store I found a pair of paper pinking shears. Fiskars sell about a $6.95 pair — about a third the cost of the pinking shears used for cutting cloth.
Russell suggests a 3-D turbulator gives the same effect as the typical thread turbulator but with less drag. Worth a try; besides, ironing wider strips has made gluing down thread easier.
Smart Systems
At the Tom McLaughlan Memorial Contest in Pensacola, 1983 F1A World Champion Matt Gewain showed me a prototype of his new Smart Systems electronic timer for F1A. But "timer" isn't really the right word to describe this device — or more correctly, this system.
A timer, to me, is something that starts, releases some lines at the appropriate times, and then DTs the model. Mechanical, clockwork-based timers work this way. Once the timer starts, it will go through its preset timing sequence no matter what. That's usually not a problem for power models and rubber (usually) predictable flight paths; but for the new bunt-equipped towline models, a miscue with a mechanical timer can be disastrous.
For example, a normal tow sequence starts with the stab slightly up from the normal glide setting, to give increased line tension on tow and to allow a tighter turning radius during circle tow. During launch, increased line tension causes the hook to unlatch, and once the line is released the timer starts running. The model zooms upward due to its high forward speed, gaining valuable altitude. After a preset delay, the stab comes down briefly, causing the model to bunt over to a glide attitude, then the stab goes to the glide setting and (hopefully) the model maxes.
But if the timer starts without the model going through the zoom phase, then it will bunt into the ground. Hard.
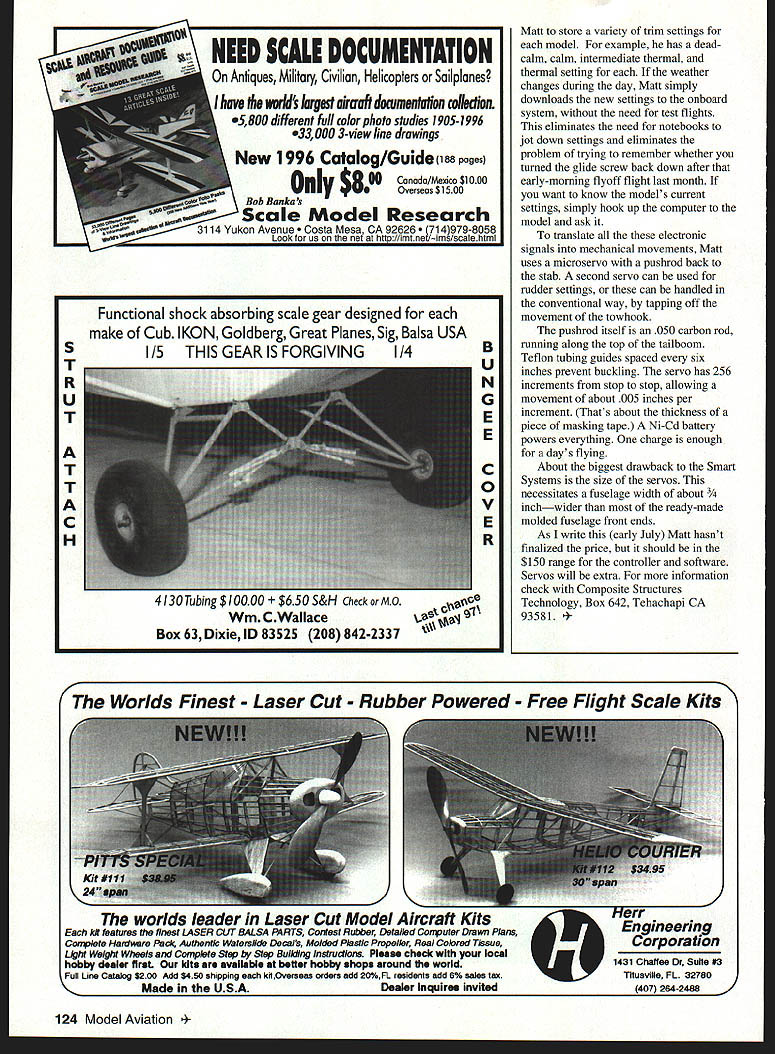
What Matt has done is to use an electronic timer for the time-measuring job, but it is controlled with three separate microswitches:
- One switch, mounted in front of the pivoting tow hook, senses when the model is on straight tow (switch closed) or on circle tow (switch open).
- A second switch, mounted on the hook's latch, senses when the hook is latched or unlatched.
- A third switch, mounted in the nose, is a mercury switch that senses the pitch attitude of the model.
The purpose of the mercury switch is twofold: to prevent premature bunts into the ground, and to determine the optimum length of the zoom. It senses when the model has peaked in its climb, and then bunts. That way, there is no problem with bunting too soon, too late, or into the ground.
A small circuit board controls all the functions. This is, in turn, programmed by a ground-based computer (Matt uses a laptop, but anything that can store an ASCII file will work). This allows Matt to store a variety of trim settings for each model. For example, he has:
- dead-calm
- calm
- intermediate thermal
- thermal
If the weather changes during the day, Matt simply downloads the new settings to the onboard system without the need for test flights. This eliminates the need for notebooks to jot down settings and the problem of trying to remember whether you turned the glide screw back down after that early-morning flyoff last month. If you want to know the model's current settings, simply hook up the computer to the model and ask it.
To translate all these electronic signals into mechanical movements, Matt uses a microservo with a pushrod back to the stab. A second servo can be used for rudder settings, or these can be handled in the conventional way, by tapping off the movement of the tow hook.
The pushrod itself is a .050 carbon rod, running along the top of the tailboom. Teflon tubing guides spaced every six inches prevent buckling. The servo has 256 increments from stop to stop, allowing a movement of about .005 inches per increment (about the thickness of a piece of masking tape). A Ni-Cd battery powers everything; one charge is enough for a day's flying.
About the biggest drawback to the Smart Systems is the size of the servos. This necessitates a fuselage width of about 3/4 inch — wider than most of the ready-made molded fuselage front ends.
As I write this (early July) Matt hasn't finalized the price, but it should be in the $150 range for the controller and software. Servos will be extra. For more information check with Composite Structures Technology, Box 642, Tehachapi CA 93581.
Transcribed from original scans by AI. Minor OCR errors may remain.

