
Free Flight: Duration
Bob Meuser
FREE FLIGHT an Art Form? Awhile back, at a Taft meet, I opened a conversation with an almost total stranger in my usual delicate manner: "How come an apparently sane person travels a third of the way around the world just to run all over the desert in a track suit, followed by a toy airplane on the end of a string?" Tam Thompson, avid Canadian towline-glider enthusiast replied: "It's like an art form. If I could paint, or write music, I would. I can't. So I fly Nordic." Not verbatim, but close. But is it art?
Recently the following item appeared on the program of the Fortieth Annual Meeting of the Mid-America College Arts Association: "1:00-3:00 Machines that Fly: Ornithopteria, Aesthetics in Engineering," by Walter Erbach.
At the University of Northern Iowa, a course in building and flying model aircraft from the aesthetic viewpoint is taught in the Art Department. (The greater the backward slope of the rudder, and the more different colors of stripes you put on the wings, the more aesthetic it is, right?)
Recently, at San Francisco's Hyatt-Regency—14 stories to the ceiling—we pondered how neat it would be to put up a microfilm model to the accompaniment of the soft violin music that was playing. Then, while we have their attention, Ron Wittman steps out in a sequined leotard. Bathed in a flashing strobe-light, and to the accompaniment of a roll and a ka-boom on the drums, he chucks a hand-launch glider up for a 1:30 flight.
We cast Bud Romak's world champ indoor model in a three-foot cube of crystal clear acrylic for presentation to the Milpitas International Museum of Modern Art. We tried to cast Bud launching the model in an eight-foot cube, but he kept blowing bubbles in the uncured plastic. No cooperation.
Is it art? Sure it's art! I don't know anything about what I like, but I know art!
Lightweight Leading Edge:
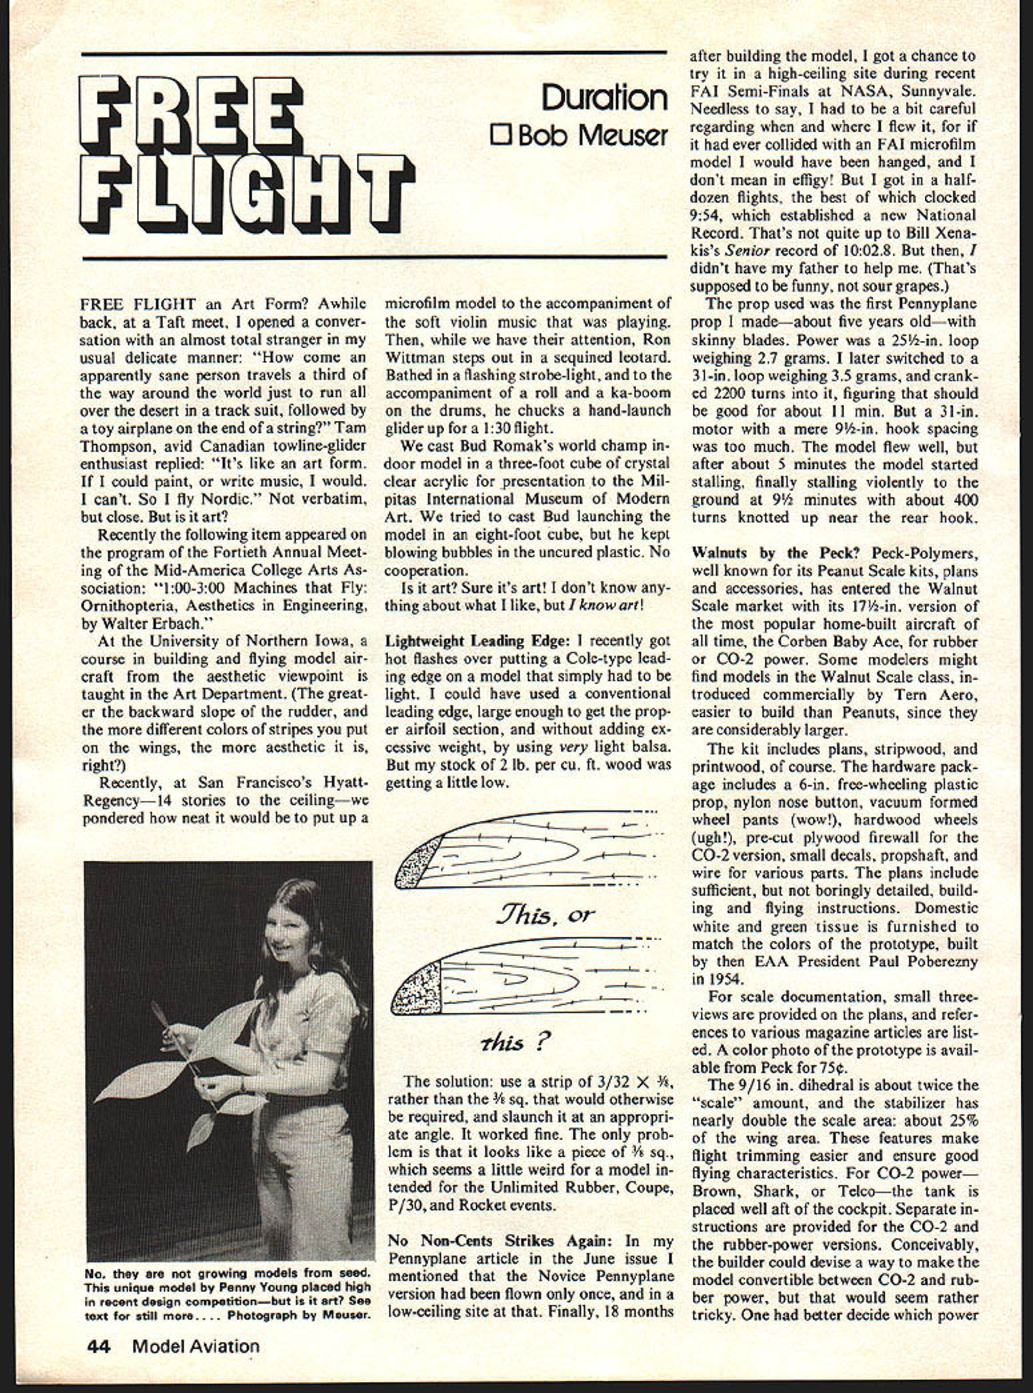
I recently got hot flashes over putting a Cole-type leading edge on a model that simply had to be light. I could have used a conventional leading edge, large enough to get the proper airfoil section, and without adding excessive weight, by using very light balsa. But my stock of 2 lb. per cu. ft. wood was getting a little low.
This, or this?
The solution: use a strip of 3/32 x 3/8, rather than the 3/8 sq. that would otherwise be required, and slant it at an appropriate angle. It worked fine. The only problem is that it looks like a piece of 3/8 sq., which seems a little weird for a model intended for the Unlimited Rubber, Coupe, P/30, and Rocket events.
No Non-Cents Strikes Again:
In my Pennyplane article in the June issue I mentioned that the Novice Pennyplane version had been flown only once, and in a low-ceiling site at that. Finally, 18 months after building the model, I got a chance to try it in a high-ceiling site during recent FAI Semi-Finals at NASA, Sunnyvale. Needless to say, I had to be a bit careful regarding when and where I flew it, for if it had ever collided with an FAI microfilm model I would have been hanged, and I don't mean in effigy! But I got in a half-dozen flights, the best of which clocked 9:54, which established a new National Record. That's not quite up to Bill Xenakis's Senior record of 10:02.8. But then, I didn't have my father to help me. (That's supposed to be funny, not sour grapes.)
The prop used was the first Pennyplane prop I made—about five years old—with skinny blades. Power was a 25-1/2-in. loop weighing 2.7 grams. I later switched to a 31-in. loop weighing 3.5 grams, and cranked 2200 turns into it, figuring that should be good for about 11 min. But a 31-in. motor with a mere 9-1/2-in. hook spacing was too much. The model flew well, but after about 5 minutes the model started stalling, finally stalling violently to the ground at 9-1/2 minutes with about 400 turns knotted up near the rear hook.
Walnuts by the Peck?
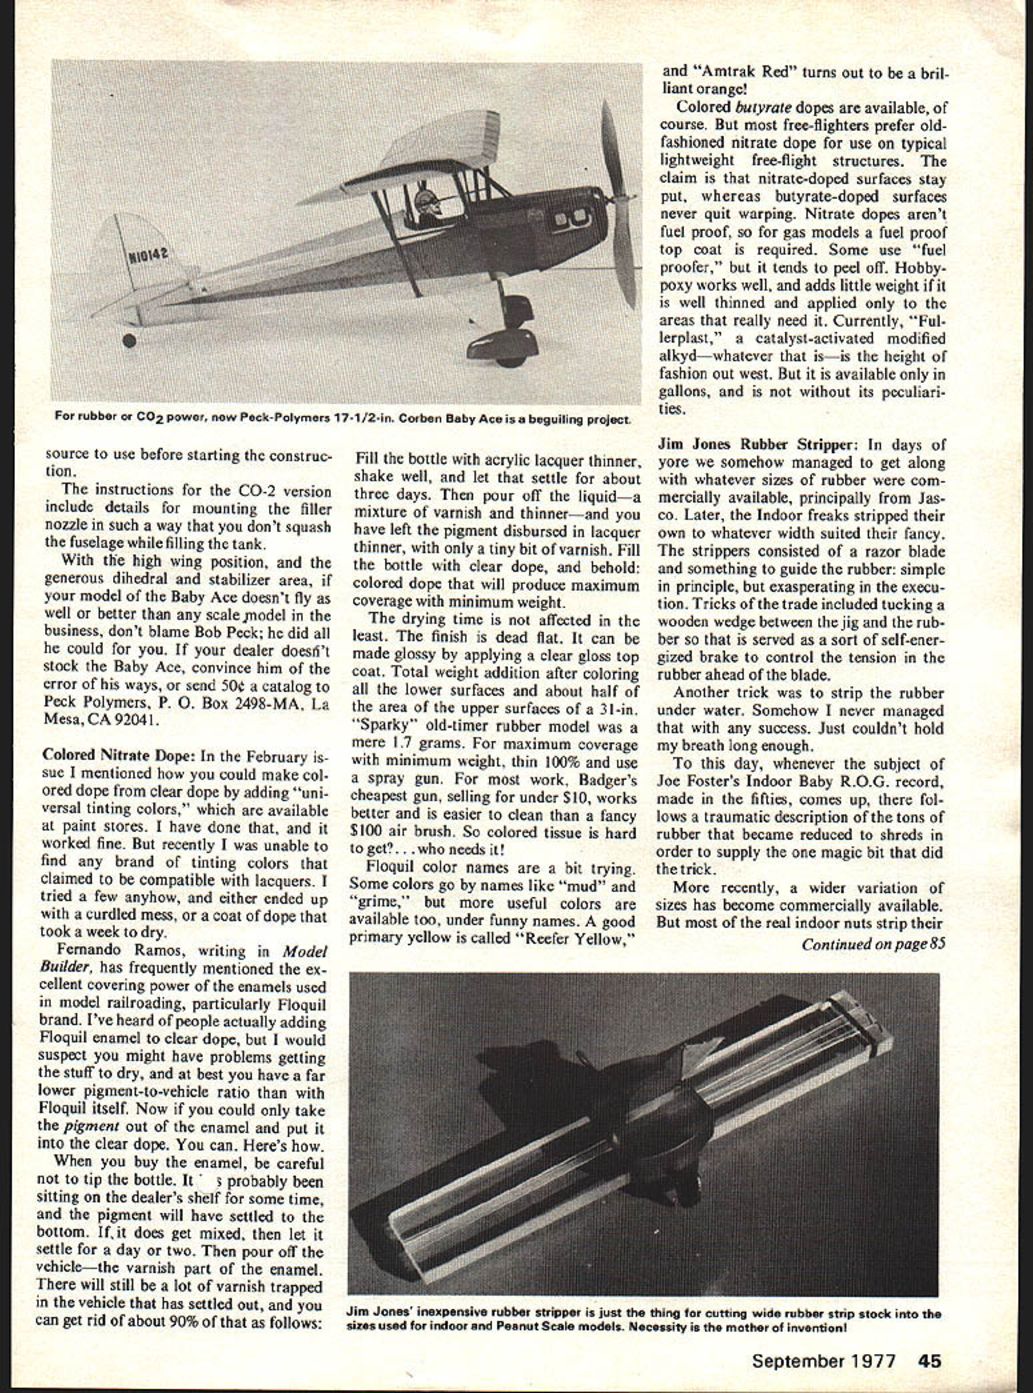
Peck-Polymers, well known for its Peanut Scale kits, plans and accessories, has entered the Walnut Scale market with its 17-1/2-in. version of the most popular home-built aircraft of all time, the Corben Baby Ace, for rubber or CO-2 power. Some modelers might find models in the Walnut Scale class, introduced commercially by Tern Aero, easier to build than Peanuts, since they are considerably larger.
The kit includes plans, stripwood, and printwood, of course. The hardware package includes a 6-in. free-wheeling plastic prop, nylon nose button, vacuum formed wheel pants (wow!), hardwood wheels (ugh!), pre-cut plywood firewall for the CO-2 version, small decals, propshaft, and wire for various parts. The plans include sufficient, but not boringly detailed, building and flying instructions. Domestic white and green tissue is furnished to match the colors of the prototype, built by then EAA President Paul Poberezny in 1954.
For scale documentation, small three-views are provided on the plans, and references to various magazine articles are listed. A color photo of the prototype is available from Peck for 75¢.
The 9/16 in. dihedral is about twice the "scale" amount, and the stabilizer has nearly double the scale area, about 25% of the wing area. These features make flight trimming easier and ensure good flying characteristics. For CO-2 power—Brown, Shark, or Telco—the tank is placed well aft of the cockpit. Separate instructions are provided for the CO-2 and the rubber-power versions. Conceivably, the builder could devise a way to make the model convertible between CO-2 and rubber power, but that would seem rather tricky. One had better decide which power source to use before starting the construction.
The instructions for the CO-2 version include details for mounting the filler nozzle in such a way that you don't squash the fuselage while filling the tank.
With the high wing position, and the generous dihedral and stabilizer area, if your model of the Baby Ace doesn't fly as well or better than any scale model in the business, don't blame Bob Peck; he did all he could for you. If your dealer doesn't stock the Baby Ace, convince him of the error of his ways, or send 50¢ a catalog to Peck Polymers, P.O. Box 2498-MA, La Mesa, CA 92041.
Colored Nitrate Dope:
In the February issue I mentioned how you could make colored dope from clear dope by adding "universal tinting colors," which are available at paint stores. I have done that, and it worked fine. But recently I was unable to find any brand of tinting colors that claimed to be compatible with lacquers. I tried a few anyhow, and either ended up with a curdled mess, or a coat of dope that took a week to dry.
Fernando Ramos, writing in Model Builder, has frequently mentioned the excellent covering power of the enamels used in model railroading, particularly Floquil brand. I've heard of people actually adding Floquil enamel to clear dope, but I would suspect you might have problems getting the stuff to dry, and at best you have a far lower pigment-to-vehicle ratio than with Floquil itself. Now if you could only take the pigment out of the enamel and put it into the clear dope. You can. Here's how.
When you buy the enamel, be careful not to tip the bottle. It's probably been sitting on the dealer's shelf for some time, and the pigment will have settled to the bottom. If it does get mixed, then let it settle for a day or two. Then pour off the vehicle—the varnish part of the enamel. There will still be a lot of varnish trapped in the vehicle that has settled out, and you can get rid of about 90% of that as follows:
Fill the bottle with acrylic lacquer thinner, shake well, and let that settle for about three days. Then pour off the liquid—a mixture of varnish and thinner—and you have left the pigment disbursed in lacquer thinner, with only a tiny bit of varnish. Fill the bottle with clear dope, and behold: colored dope that will produce maximum coverage with minimum weight.
The drying time is not affected in the least. The finish is dead flat. It can be made glossy by applying a clear gloss top coat. Total weight addition after coloring all the lower surfaces and about half of the area of the upper surfaces of a 31-in. "Sparky" old-timer rubber model was a mere 1.7 grams. For maximum coverage with minimum weight, thin 100% and use a spray gun. For most work, Badger's cheapest gun, selling for under $10, works better and is easier to clean than a fancy $100 air brush. So colored tissue is hard to get? — who needs it!
Floquil color names are a bit trying. Some colors go by names like "mud" and "grime," but more useful colors are available too, under funny names. A good primary yellow is called "Reefer Yellow," and "Amtrak Red" turns out to be a brilliant orange!
Colored butyrate dopes are available, of course. But most free-flighters prefer old-fashioned nitrate dope for use on typical lightweight free-flight structures. The claim is that nitrate-doped surfaces stay put, whereas butyrate-doped surfaces never quit warping. Nitrate dopes aren't fuel proof, so for gas models a fuel proof top coat is required. Some use "fuel proofer," but it tends to peel off. Hobbypoxy works well, and adds little weight if it is well thinned and applied only to the areas that really need it. Currently, "Fullerplast," a catalyst-activated modified alkyd—whatever that is—is the height of fashion out west. But it is available only in gallons, and is not without its peculiarities.
Jim Jones Rubber Stripper:
In days of yore we somehow managed to get along with whatever sizes of rubber were commercially available, principally from Jasco. Later, the Indoor freaks stripped their own to whatever width suited their fancy. The strippers consisted of a razor blade and something to guide the rubber: simple in principle, but exasperating in the execution. Tricks of the trade included tucking a wooden wedge between the jig and the rubber so that it served as a sort of self-energized brake to control the tension in the rubber ahead of the blade.
Another trick was to strip the rubber under water. Somehow I never managed that with any success. Just couldn't hold my breath long enough.
To this day, whenever the subject of Joe Foster's Indoor Baby R.O.G. record, made in the fifties, comes up, there follows a traumatic description of the tons of rubber that became reduced to shreds in order to supply the one magic bit that did the trick.
More recently, a wider variation of sizes has become commercially available. But most of the real indoor nuts strip their
FF Duration/Meuser
continued from page 45
own, from Pirelli hoarded away for centuries, using expensive shear-disc strippers spirited away from Europe in the hollowed-out heel of an FAI-Team member's shoe, in all probability. (More of that later.)
For both Indoor and Peanut Scale nuts who find commercially available widths, and perhaps quality, not to their liking, there is an alternative: The Jim Jones Handy-Dandy Adjustable Rubber Stripper. The price is $8.30, postpaid, including tracks for 3-, 4-, 5-, or 6-mm. rubber. An additional $2.50 will bring you tracks for true 1/4- and 1/16-in. rubber.
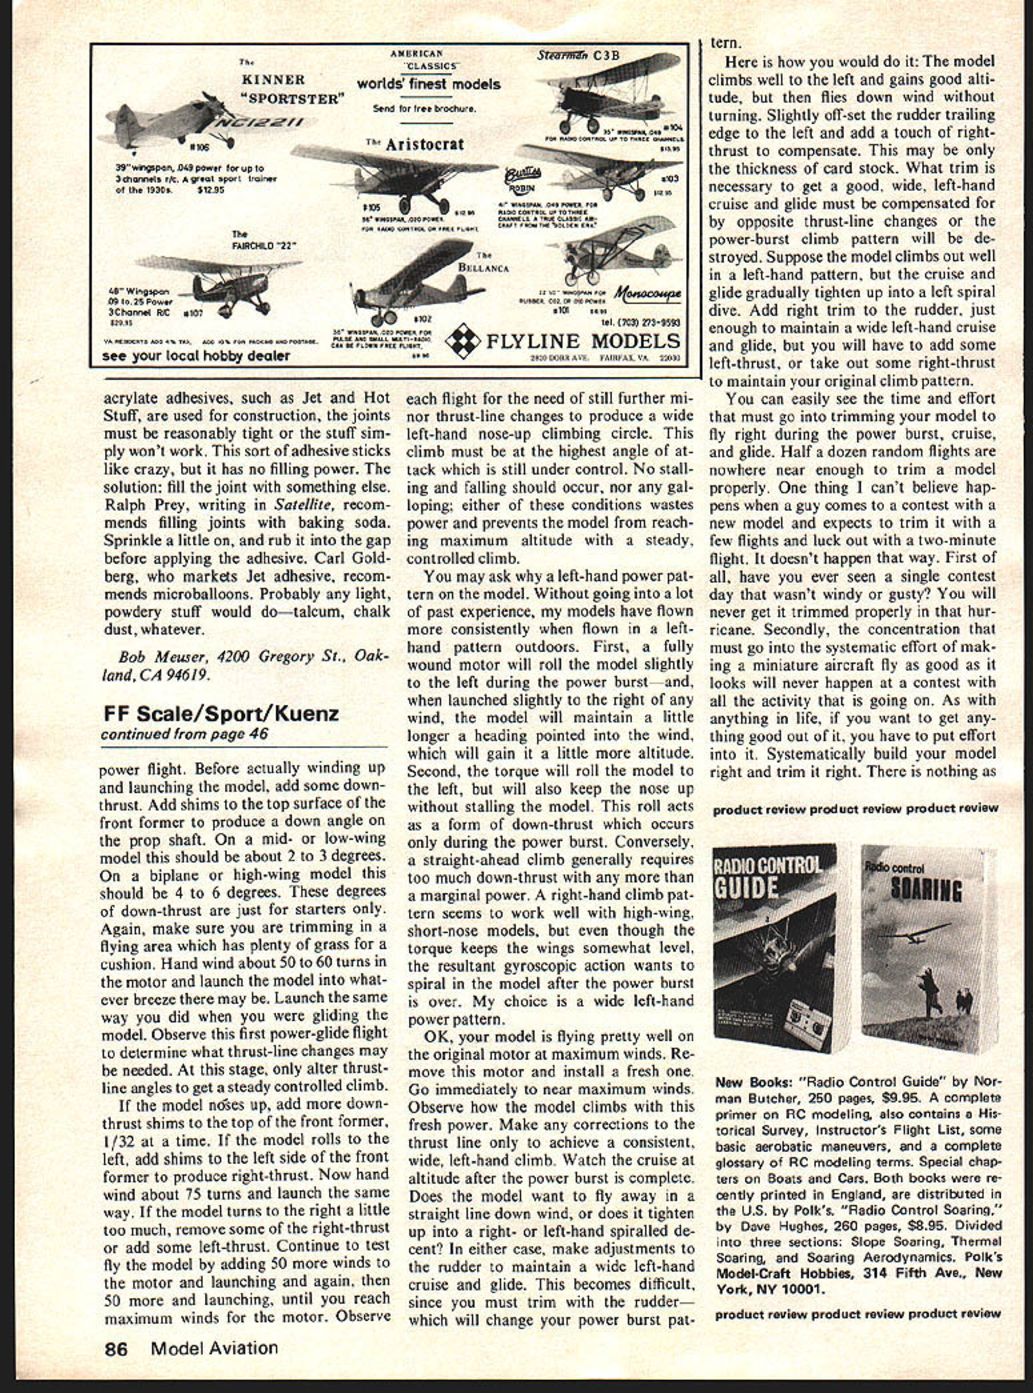
Essentially it uses the time-honored razor-blade trick. But the "razor blade" is, in real life, a Stanley utility-knife blade, which sells for around 20¢. That gives you two cutting tips at a dime each. Each blade can be snapped or cut off to provide additional cutting tips.
The rubber-guiding tracks (see photo) run diagonally across the guide. This feature allows a fine adjustment of the rubber width by sliding the blade-holding block along the guide. Rubber tension is controlled by the width of the guide groove—slightly less than the rubber—and by an O-ring that clamps the rubber into the groove. It takes a little skill to operate the thing, but anyone who has sufficient manual dexterity to build a model plane can develop the necessary skill in short order.
If you are interested, write to Jim Jones, 36631 Ledgestone, Mt. Clemens, MI 48043.
Mamco Lives! The concept of gearing several parallel rubber motors to a single prop goes back to the earliest days of model aviation. While many of the claims for such systems were a bit outlandish, the fact remains that such systems offer a potential advantage for model classes where the motor length is limited; namely, the flying scale events.
In 1931, Al Hovsepian invented and patented a system of cranks and connecting rods that gave the effect of geared motors, but without actually using gears. These were marketed under the name of the Mamco Gearless Transmission. Up to six motors were used to drive a single prop. Production ceased prior to World War II.
Recently a small hoard of Mamco transmissions was uncovered, and they are now being peddled off. A two-motor unit sells for $2, and a three-motor unit for $3. Shipping and handling is 75¢ per order. Write to Jim O'Reilly, 4760 N. Battin, Wichita, KS 67220. Quantities are limited.
Leaky Wheels? We all know that it is the squeaky wheel that gets the grease, but did you know that it is the leaky wheel that gets the "Duro" brand plastic rubber, obtainable at your friendly auto-supply emporium? That is what you are supposed to use if your Trexler air wheels have the leaks, according to Flightplug and Batsheer. A bit of the black goop smeared with loving care over the leak is alleged to seal it invisibly forevermore.
OK, guys, what the heck is a Trexler air wheel? Anyhow.
In days of old, we used to plug the slow leaks in our bike tires by squirting a bit of canned milk into them. (Remove the valve first, kiddo.) The canned milk would seep out through the leak, hit the air, coagulate, and seal the leak. Nowadays you can buy tubes of goop that allegedly do the same thing, and probably almost as well, at your local motorcycle supply mongery. It should work on any inflatable wheels, including those used on toy airplanes.
Tight Joints the Easy Way: When cyano-
Free Flight: Duration
Here is how you would do it: The model climbs well to the left and gains good altitude, but then flies down wind without turning. Slightly off-set the rudder trailing edge to the left and add a touch of right-thrust to compensate. This may be only the thickness of card stock. What trim is necessary to get a good, wide, left-hand cruise and glide must be compensated for by opposite thrust-line changes or the power-burst climb pattern will be destroyed. Suppose the model climbs out well in a left-hand pattern, but the cruise and glide gradually tighten up into a left spiral dive. Add right trim to the rudder, just enough to maintain a wide left-hand cruise and glide, but you will have to add some left-thrust, or take out some right-thrust to maintain your original climb pattern.
You can easily see the time and effort that must go into trimming your model to fly right during the power burst, cruise, and glide. Half a dozen random flights are nowhere near enough to trim a model properly. One thing I can't believe happens when a guy comes to a contest with a new model and expects to trim it with a few flights and luck out with a two-minute flight. It doesn't happen that way. First of all, have you ever seen a single contest day that wasn't windy or gusty? You will never get it trimmed properly in that hurricane. Secondly, the concentration that must go into the systematic effort of making a miniature aircraft fly as good as it looks will never happen at a contest with all the activity that is going on. As with anything in life, if you want to get anything good out of it, you have to put effort into it. Systematically build your model right and trim it right. There is nothing as
Transcribed from original scans by AI. Minor OCR errors may remain.

