
Free Flight: Duration
Bob Meuser
Observations
The gentlemanly art of whittling — virtually every book concerning woodsy lore will admonish the reader: always cut away from yourself, never toward yourself. If you follow that advice you will minimize the chances of slicing a finger. Holding the work in your left hand above the part being whittled and pushing the knife away with your right hand makes it very difficult to cut a finger. However, you might sever some other portion of your anatomy from its time‑honored place of residence, or commit mayhem on an innocent bystander.
Good advice, but it doesn't go far enough. Cutting toward yourself is an absolute necessity under some circumstances — prop carving, for example — so you better learn to do it safely. The key to avoiding getting cut up is to think. (Editor's note: How do you cut and think at the same time? RMcM.)
The instant a chip is about to break loose is rather unpredictable, and usually there is still some force applied to the blade when the chip breaks free. Think about what can happen if the chip breaks loose and the blade goes sailing forth uninhibited. Be certain that the forward motion of the blade — or, particularly, the hand that holds it — can continue only a short distance and can do no damage to man or beast in the process. Usually, simply bracing the right hand with the thumb of the left hand takes care of the whole problem. It would be prudent to have a supply of adhesive bandages on hand. When I speak of my bloody props, I'm not using that adjective in the usual British sense.
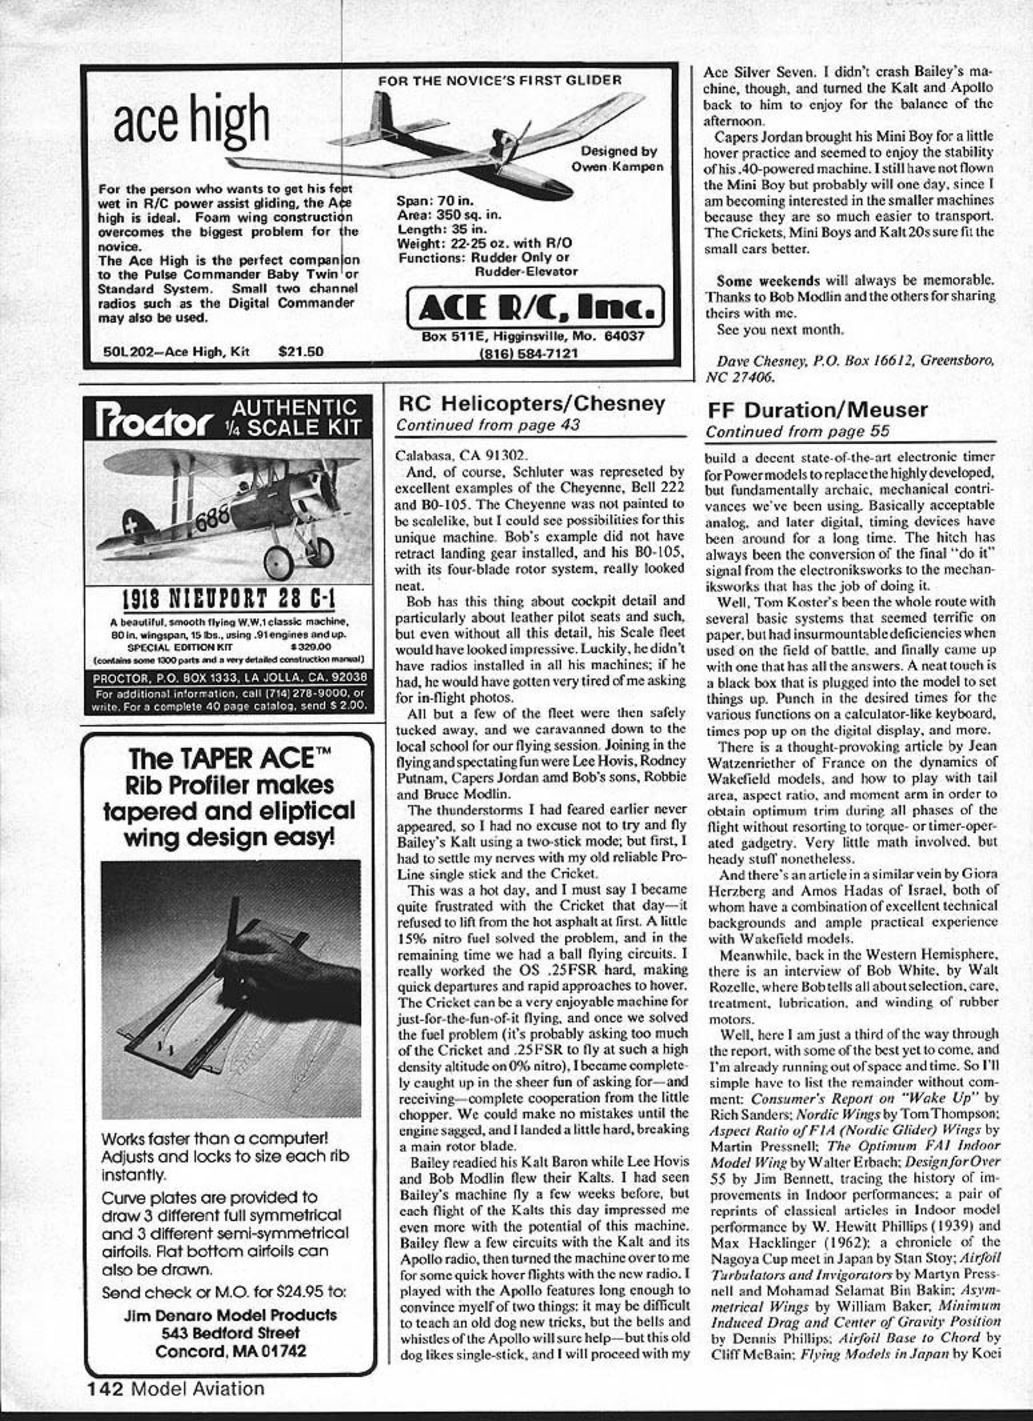
Two rib‑cutting schemes
Two other ways to skin a rib follow. The first is almost identical to a scheme used by world‑class Nordic glider flier Jim Walters on his A/2s, and is similar to one used by Robert B. Meuser on a scale model or two (see sketches).
- Make a stretched‑out rib template: the top and bottom surfaces replicate the rib surfaces, but leave a good distance between them. That makes filing the template easier — there's a good chunk of metal to stick in the bench vise, and the trailing edge of the template doesn't go squirrely when the file teeth catch metal.
- Cut a "negative" of the lower‑surface shape in hard balsa or plywood using the lower‑surface template, and glue that (with cyanoacrylate) to the back of the template in the correct position.
- Cut sheet stock to the correct width (not overwidth — sketches may show overwidth for clarity). Position the template as in Sketch 3 and cut the lower profile.
- Position the template as in Sketch 4, with the guide glued to the template pushed against the surface cut in Step 3. That yields Rib 1; repeat to cut the rest.
The second scheme, used with success by Ted Colby of the Ryukyuan Aeromodelers Society, uses pins (3/32 in. suggested for ribs with about a 5‑in. chord; scale up or down as appropriate).
- Make a conventional template from sheet aluminum, and drill two well‑separated holes in low‑stress regions of the template.
- Using the template as a guide, drive two music‑wire pins through the holes into a wooden cutting board so the pins protrude about 1/4 in.
- Remove the template, position the rib stock with proper regard for grain direction, and drill holes in the rib stock using the template as a guide (drill several while you're at it).
- Plop the rib stock over the pins in the cutting board, plop the template over that, cut around the template, and you have yourself a rib.
We've presented several rib‑cutting schemes before. I haven't told you about the "best" scheme of all — unless you have a computer‑controlled laser profiler it wouldn't do you much good. What's best depends on the shape and size of the rib and on your capabilities, skills, tools, and whims. Read, think, then follow your own nose.
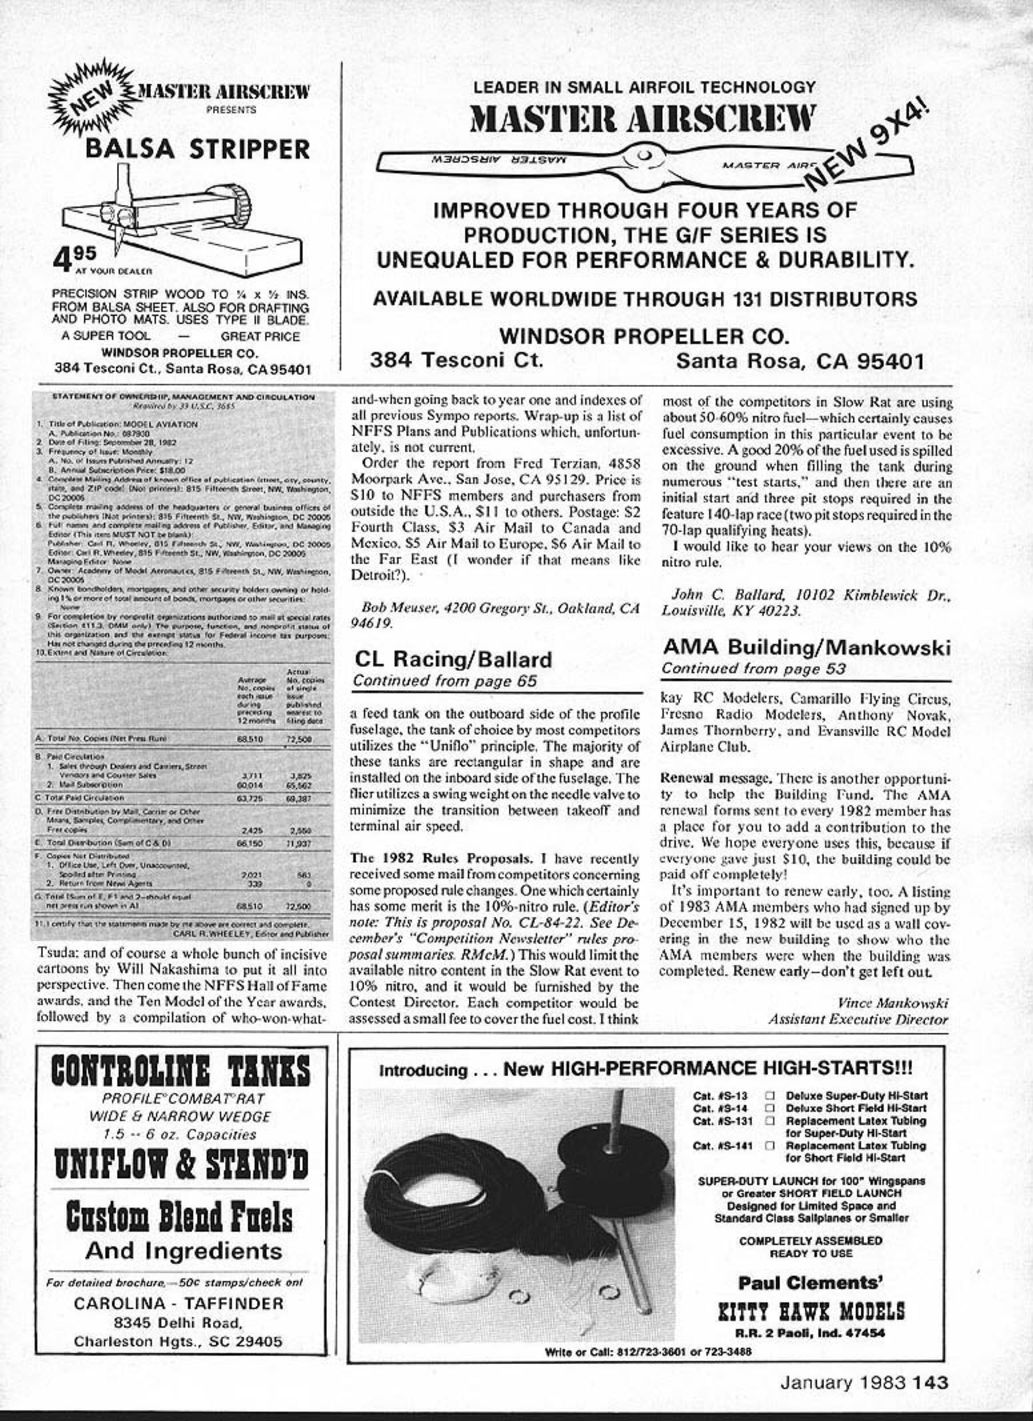
Record Pennyplane
After looking at the front and side views of Dave Hagen's record‑setting Pennyplane (and vomiting appropriately), I find it difficult to realize that I had anything to do with Pennyplane becoming an official AMA event. A beginners' event, hah! Later, I tried to get the rules changed to outlaw biplanes from the event, but by then the event was firmly entrenched among expert indoor fliers, and I became an "outsider" trying to impose my personal whims. It has now become abundantly clear (with a few minor exceptions) that biplanes win! Winning ain't everything, but it sure beats losing.
David Hagen, the only person in the universe I've conned into building a model of my design which I'd never built myself, used the model shown in the sketch to establish a new Category II record of 10 minutes, 42 seconds. Dave explains:
"It was built in a couple of days the week before the Record Trials and built strong with a solid motor stick and tail boom. To save weight, it was covered with 'heavy' green microfilm. It came out at 2.9 grams, requiring 0.2 grams of ballast."
You can't knock heavy microfilm as the easiest available covering to use, provided you have a good "Mike" liquid. If all else fails, try plain old nitrate dope!
Black Japanese tissue available again
Mike Mulligan passes along the unconfirmed rumor that Oldtimer Models was expecting, and by now should have received, a large supply of genuine black Japanese tissue. That should be good news to those who have been doctoring other colors with a Sharpie pen to produce trim strips. (That works well, but it is a bit of a nuisance.) It goes for 40¢ a sheet; Oldtimer Models, P.O. Box 913, Westminster, CA 92683.
(The subtle humor, if it escaped you, is that Mike Mulligan is Chief Honcho down at the Oldtimer Model Works.)
Unlim‑Mulvihill model
You've no doubt heard of the Unlimited Mulvihill event I run at the U.S. Free Flight Champs each Memorial Day: one flight at dawn for AMA Mulvihill models; Bob White always wins; and all that. Loren Williams and his cohorts have been working on the event for a couple of years and have come up with a gorgeously engineered design that should pay off even against White's skill and dedication.
After the 1982 USFFC I wrote to Loren suggesting some modifications to the design. It turns out he had already thought of those mods and a lot more; they're incorporated into the 1983 designs, examples of which are now under construction. The point of departure for the Team Williams design was the now‑traditional English open rubber design — a fine example is the McGillivray/Alnutt Blimp. Perhaps by next month I'll be able to give you a three‑view of the new design, or last year's, which would make an excellent general‑purpose Mulvihill model. I might even give you a source of plans — provided I manage to get the clutch on my typewriter engaged.
NFFS publishes biggest‑ever Sympo Report
The 1982 Sympo Report contains 167 pages (8½ x 11 in.) chock full of material ranging from practical how‑to articles to advanced theoretical pieces.
Highlights:
- A kick‑off article by Hardy Broderson (NFFS Executive Director, AMA Vice President) advocating that the FAI fliers continue administering team selection for the World Championships using their established system rather than turning big decisions over to the AMA Executive Council.
- An introduction by perennial Sympo editor Jim Bennett.
- Mario Rocca and Alberto Dall'Oglio (both former World Champions in FAI Power) discuss experiments with models, engines, and one‑blade folding props. (Dall'Oglio is also the builder of the AD‑15 engine.)
- Andy Bauer ties propeller performance (using formulas from previous Sympos by Eugene Larrabee) to engine performance and explains the difference in rpm heard by someone at the launch point versus someone far away.
- Dave Benepe presents wind‑tunnel measurements of model prop characteristics.
- Dave Sugden performs a first‑order structural analysis of a two‑blade folding FAI Power prop and discusses practical construction problems.
- Harry Murphy offers a down‑home discussion about airfoils — what you think you get when you slice out ribs versus what you really get when the covering does what it does.
- A half‑page jewel by Reid Hull on carving power props.
- Tom Koster describes a state‑of‑the‑art electronic timer for power models that finally addresses the conversion of an electronic "do it" signal to the mechanical action required. A neat touch is a black setup box that plugs into the model; times are entered on a calculator‑like keypad and shown on a digital display.
- Jean Watzeneichter (France) on Wakefield dynamics: how tail area, aspect ratio, and moment arm affect trim during all flight phases without torque‑ or timer‑operated gadgetry.
- Giora Herzberg and Amos Hadas (Israel) on similar Wakefield topics, combining strong technical background with practical experience.
- An interview of Bob White by Walt Rozelle covering selection, care, treatment, lubrication, and winding of rubber motors.
Other contents listed without comment:
- "Wake Up" Consumer's Report by Rich Sanders
- Nordic Wings by Tom Thompson
- Aspect Ratio of FAI (Nordic Glider) Wings by Martin Pressnell
- The Optimum FAI Indoor Model Wing by Walter Eberbach
- Design for Over‑55 by Jim Bennett (tracing the history of improvements in indoor performance)
- Reprints of classical indoor performance articles by W. Hewitt Phillips (1939) and Max Hacklinger (1962)
- A chronicle of the Nagoya Cup meet in Japan by Stan Stoy
- Airfoil Turbulators and Investigations by Martyn Pressnell and Mohammad Sistani Bak
- Asymmetrical Winglets by William Baker
- Minimum Induced Drag and Center of Gravity Position by Dennis Phillips
- Airfoil Base to Chord by Cliff McBain
- Flying Models in Japan by Koei
Rib‑template technique
The rib‑template technique described above — stretched‑out metal template, glued lower‑surface guide, and the pinned‑template method — will handle most rib shapes used in free flight. Choose the scheme that fits the rib size, shape, and your available tools. Read, think, and then cut.
Transcribed from original scans by AI. Minor OCR errors may remain.

