

Free Flight: Indoor
Bud Tenny
Indoor Props:
Indoor duration models are almost the only kind of free-flight model that use (and depend on) the prop for the whole flight. It is small wonder that the indoor prop is considered to be almost the most important part of the model; a poor prop will hold the model back for the whole flight! What makes a bad prop? That is hard to define, since a particular prop may be good on one model and almost a disaster on another model. The best we can do is to examine all the factors and learn to select the best prop for each model.
Prop Pitch:
This is a measurement of the distance a prop pulls the model through the air in one revolution, and is related to the blade angle. Think of a machine screw turning in its nut—the pitch of the screw is given as threads per inch. For 40 threads per inch, the screw moves 1/40 inch per revolution. Propellers have been called airscrews, for obvious reasons, and a similar measurement can be made for a propeller. The distance a model moves forward with each revolution of the prop is called the effective pitch. The reason this distinction is made is that, because air isn't solid like the nut, props slip a little each revolution and the effective pitch is lower than the design pitch. The design pitch is what most people talk about in regard to props, and this is usually set by the shape of the prop block or jig used to build the prop.
Prop Blocks:
For many years now, almost all props have been built on carved wood blocks like the one shown in Fig. 1. These blocks are usually carved from balsa, and the design formula is shown in Fig. 1. Since the design pitch is related to the dimensions of the carved part of the block, it should be possible to check the prop blade later to see if it has warped.
The formula in Fig. 1 can be changed when it is noted that T/W is the tangent (remember trigonometry) of the angle of the end of the block. Similarly, T'/W' is the tangent of the angle shown in the middle of the block. Using the new formula, Pitch = 3.14 x D x tan blade angle, it is possible to check the pitch of an unknown prop or check an old prop for warps. A simple fixture can be made to measure the blade angle during field repairs—very handy.
Block Carving Hints:
For many people, carving prop blocks is a bug-a-boo. It isn't hard, and maybe these hints will help:
- Don't make the block too small! Start with at least a 10"-long block unless you never plan to make a model larger. One block will do for many pitches; the same 30° pitch block can be used to build a 15 x 30 prop as well as a 20 x 30 prop.
- Design 28°–32° pitch. 30° pitch usually works very well for models with wing spans between 20" and 30".
- Be sure to make the block wide enough! The block should be at least 4" wide for 20" diameter props—which means that the block would also need to be about 2" thick. If the block is less than 3" wide to begin with, there probably won't be enough room near the hub end of the block for a suitably wide blade.
- Lay out the dimensions of the carved area on the balsa block with a marker pen, and work very carefully. The working surface of the block must be very flat after carving is finished. Do not plane and sandpaper alternately, since grit from the sandpaper will catch in the wood and ruin the blade. Carve very close to the proper shape with a very sharp knife, removing very thin layers. Get the surface as flat as possible, then sandpaper to final shape.
Prop Building:
After carving is finished, draw the blade outline and rib locations on the block. Fig. 2 gives an idea of how this would look. Fig. 2 also shows two important things about prop construction. First, the prop spar and hook are assembled before the prop blades are begun. Second, the spar is laid on the block with the hook exactly at the vertical edge of the block. The hook must be exactly vertical; if the hook isn't even with the end of the block, the two blades will be different length. If the hook isn't vertical, the blade angles will be different. Either way, the prop is guaranteed to wobble!
What Size Prop:
It used to be that indoor fliers used 50% of the wing span as a good diameter prop. In recent years, that has increased to 60% or even 65% for microfilm models. In 1972 Indoor World Champion Pete Andrews was one of the first to begin using 20" props on FAI models (65 cm or 25½" wing span), which is 74% of the wing span. Even that isn't the top—Pete test-flew FAI models with 24" props at the 1974 Indoor World Championships. If a prop 94% of the wing span boggles your mind, consider PennyPlane. It was quickly found that PennyPlanes flew better with more rubber, and more rubber (up to about 1½ times the bare model weight) makes models fly better. Since PennyPlanes are heavy, they need a lot of rubber. Lately, it has been common for PennyPlane props to be about 95% of the wing span, and times have nearly doubled those logged earlier. Basically, a heavy model with lots of rubber needs large props—sometimes much larger; and if the same design is built very lightly, good times are expected. Prop pitch also crucial, and not everyone agrees on how much pitch is too much. The most important thing is to have enough pitch. Luckily, it is fairly easy to determine if the prop pitch is too low for any particular model. Simply measure the prop just after the model stops climbing. As a general rule, the properly adjusted microfilm model, even a heavy one, should have cruise rpm between 45 and 55. Lighter models will (or should) have the lower range of rpm.
How to Measure RPM: Indoor props, except for PennyPlane and Easy B, usually turn slower than 80 rpm and some go as low as 35 rpm. That is, you can see the prop turning. The most common method of measuring rpm is to time how long it takes the prop to make 10 revolutions. Begin the count with "0" as you start the watch, count "1" the next time the same blade comes up (count only every other blade) and continue to 10. Count "10" just as the blade passes the start position for the 10th time. Divide the time in seconds into 600 and get rpm.
For example, 8 seconds for 10 revs is 600/8 or 75 rpm. That's too high. Strive for 12 seconds (48 rpm) or even 15 seconds (40 rpm).
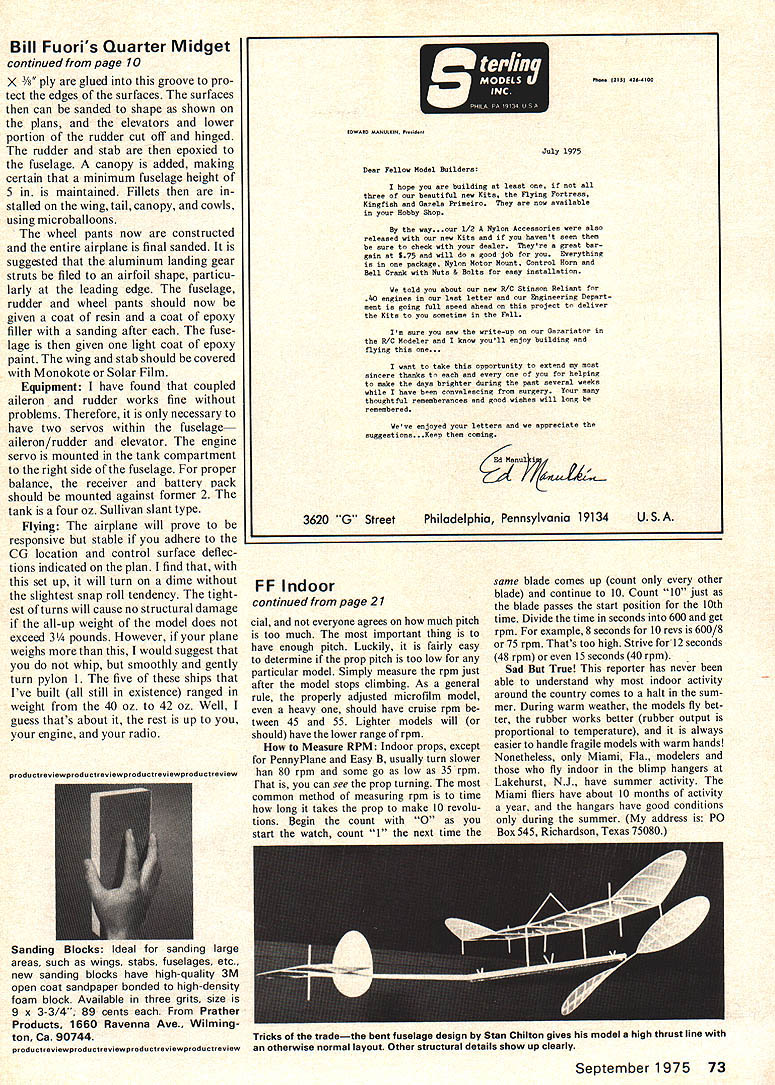
Sad But True! This reporter has never been able to understand why most indoor activity around the country comes to a halt in the summer. During warm weather, the models fly better, the rubber works better (rubber output is proportional to temperature), and it is always easier to handle fragile models with warm hands! Nonetheless, only Miami, Fla., modelers and those who fly indoor in the clump hangars at Lakehurst, N.J., have summer activity. The Miami fliers have about 10 months of activity a year, and the hangars have good conditions only during the summer. (My address is: PO Box 545, Richardson, Texas 75080.)
Transcribed from original scans by AI. Minor OCR errors may remain.

