
Free Flight: Indoor
Bud Tenny
CONTEST Season Underway: The South West Ohio Free Flighters (SWOFF) kicked off the indoor season for the Midwest with a contest on October 30. The site, the Union Terminal in Cincinnati, Ohio, is a domed building with 105' maximum ceiling, which is one of the highest ceilings in the area. Perhaps other Halloween activities were a reason for fairly low attendance, but the contestants who showed up didn't lack for quality.
Bucky Servaites won HLG with 103.0 seconds. Jim Miller won Easy B with 13:01.6 (as times soar, Easy B gets less easy?). Junior Mike Van Gorder beat both his father and Jim Miller in Novice Pennyplane with a record flight of 10:08.6, and Walt Van Gorder won Manhattan Cabin with 7:47.0. In Peanut Scale, Jim Miller's Fike trounced Martin Richardson's Mosquito and Jim Miller's J-3 Cub.
The Junior Problem: There seems to be two problems with Juniors; either there aren't any around, or the good ones like Mike Van Gorder wind up beating everyone! Seriously speaking, Mike just didn't happen. Walt Van Gorder is also a novice indoor flier, but he is very supportive of Mike's efforts, and a strong competitor in whatever activity he undertakes. With this background, and willing help from a number of more experienced fliers, Mike has come a long way very quickly. The key is help—answered questions, good advice, and willingness to demonstrate new techniques or one's personal solutions to particular problems. When is the last time you have helped a Junior? For that matter, when is the last time you took time to help a beginner of any age? It is so easy to get into the rut of flying at the contests without looking up, and most of us get there.
Sponsor Junior Activity: A number of model clubs make it a regular practice to hold special events for Juniors, such as the AMA Club event held by the SWOFF at the indoor meet reported above. This type of event makes a good steppingstone for younger fliers, with two benefits for the contestants. First, it is their very own event (and should be limited to groups of the same relative experience). Second, they are exposed to the other contest activity, and can learn about events they otherwise would never have seen. Much of the problem with recruiting new modelers is related to the relative inaccessibility of all the contests. RC and FF contests are by necessity located at remote sites, and most CL activity is fairly remote because of the noise. Indoor contests don't exactly thrive on hordes of spectators, especially in small sites. So we all go off and do our things, and people who would add immeasurably to our activity don't hear about the events except by accident. Anyone got any ideas? If so, share! How can we get exposure so more people know about our activity without ruining the flying conditions from having too many people around?
One Solution: Some groups find a (relatively) quiet corner in a shopping mall and run flying demonstrations all day, with or without AMA Club building sessions for onlookers. Although the overall results have been mixed, some groups have gained a few members after such demonstrations. A similar effect can be obtained if model flying demonstrations are made on military bases which have open house activity for Armed Services Day. This type of activity can sometimes develop far enough that regular flying sessions or contests. One way to make a hole for a pushrod through the wing is to cut it in the core with the cutting bow. This must be done before sheeting. Make root and tip templates with a hole drilled in the desired location, and cut a thin slot in the template just large enough for the cutting wire. Pass the hot wire down through the slot around the hole and back out the slot.
Another way is to cut a channel with a saw, a Dremel tool, or even an Xacto knife, using a guide. If you want to eliminate the bellcrank and use a flexible control rod, cut a slot that curves back to the trailing edge, large enough for a piece of Nyrod.
Inset Ailerons: One method is to install a hinge mount in the foam core prior to sheeting. First, lay out the aileron on the core with a fine tip marking pen. Cut a hard piece of 1/8 x 3/4 to 1" balsa, about 1/2" shorter than the aileron. Lay this in place and trace around it with the marking pen. Rout out a 1/8" deep slot so that it fits flush and glue it in place. It must be flush with the foam because you will sheet over it.
Cut the aileron out of the wing after sheeting. A number of methods can be used to complete the aileron. One is to remove sufficient material and sheet the exposed foam edges. Another is to remove sufficient material and install concave-convex mating hardwood aileron strips. Another approach is to use a rod through the foam near the leading edge of the aileron, which can be used as a combination hinge and control arm.
Applying Finishes and Coatings
After the wing is sheeted you are ready to apply a finish or coating for looks and protection of the sheeting material from fuel, moisture, etc. The easiest and fastest coating is Solarfilm, Monokote, etc. Preparation consists of sanding the balsa sheeting, and edges of plywood and cardboard sheeting.
If you plan to cover unsheeted foam wings with iron-on films, sand and put on a coat of water-based paint to insure a smooth job. Use extra care with the iron, keeping it moving to avoid softening the foam.
Preparation for other finishes involves a bit more sanding for balsa and plywood, ending with about 320 wet-or-dry if you want a higher quality finish.
You can use almost any type of paint to cover the cardboard, balsa, or plywood sheeting, provided you take certain precautions with the materials that attack foam. When using airplane dope, lacquer, spray paints containing solvents, etc., the following precautions must be taken or the foam core may be ruined. First, make sure that all cracks and edges are sealed. Second, apply the first two or three coats in very thin coatings and allow to dry thoroughly between coats. That doesn't mean just to the touch; the solvents that soaked into the surface of the balsa, cardboard, or even plywood, must have time to completely evaporate before the next coat. Otherwise, the trapped solvents will soak through and may attack the foam core. It is preferable to apply a primer coat of a material that won't attack the foam, and that is also compatible with the finish coats. With all materials, several light coats are better than one heavy coat to get a hard, smooth, high gloss, durable finish.
The information presented in this series of articles is a serious effort to provide you with sufficient detail which, when used as described, will enable you to enjoy the advantages of foam wing construction. For handy use, you may wish to cut out the text and place it in a folder.
are permitted at times other than open house activity.
Field Accessories
One of the most interesting things about attending indoor contests is to note the many gadgets dreamed up by the fliers to make it easier to handle and fly the models. Winders, torquemeters, repair jigs, rubber strippers, etc.—all either necessary or very desirable—and demonstrating even more ingenuity than the models.
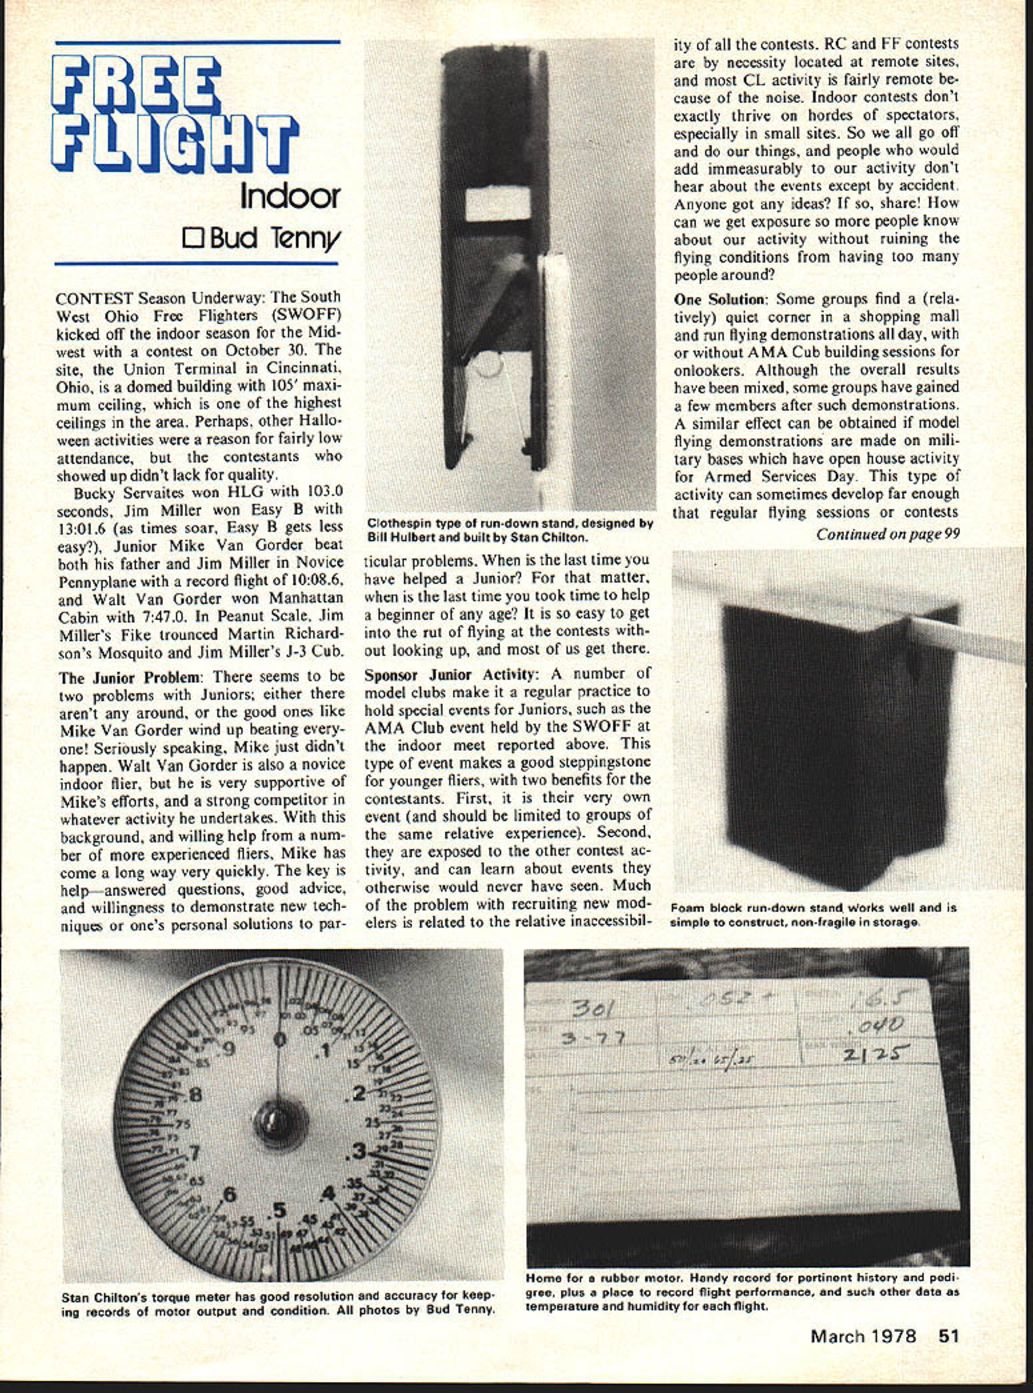
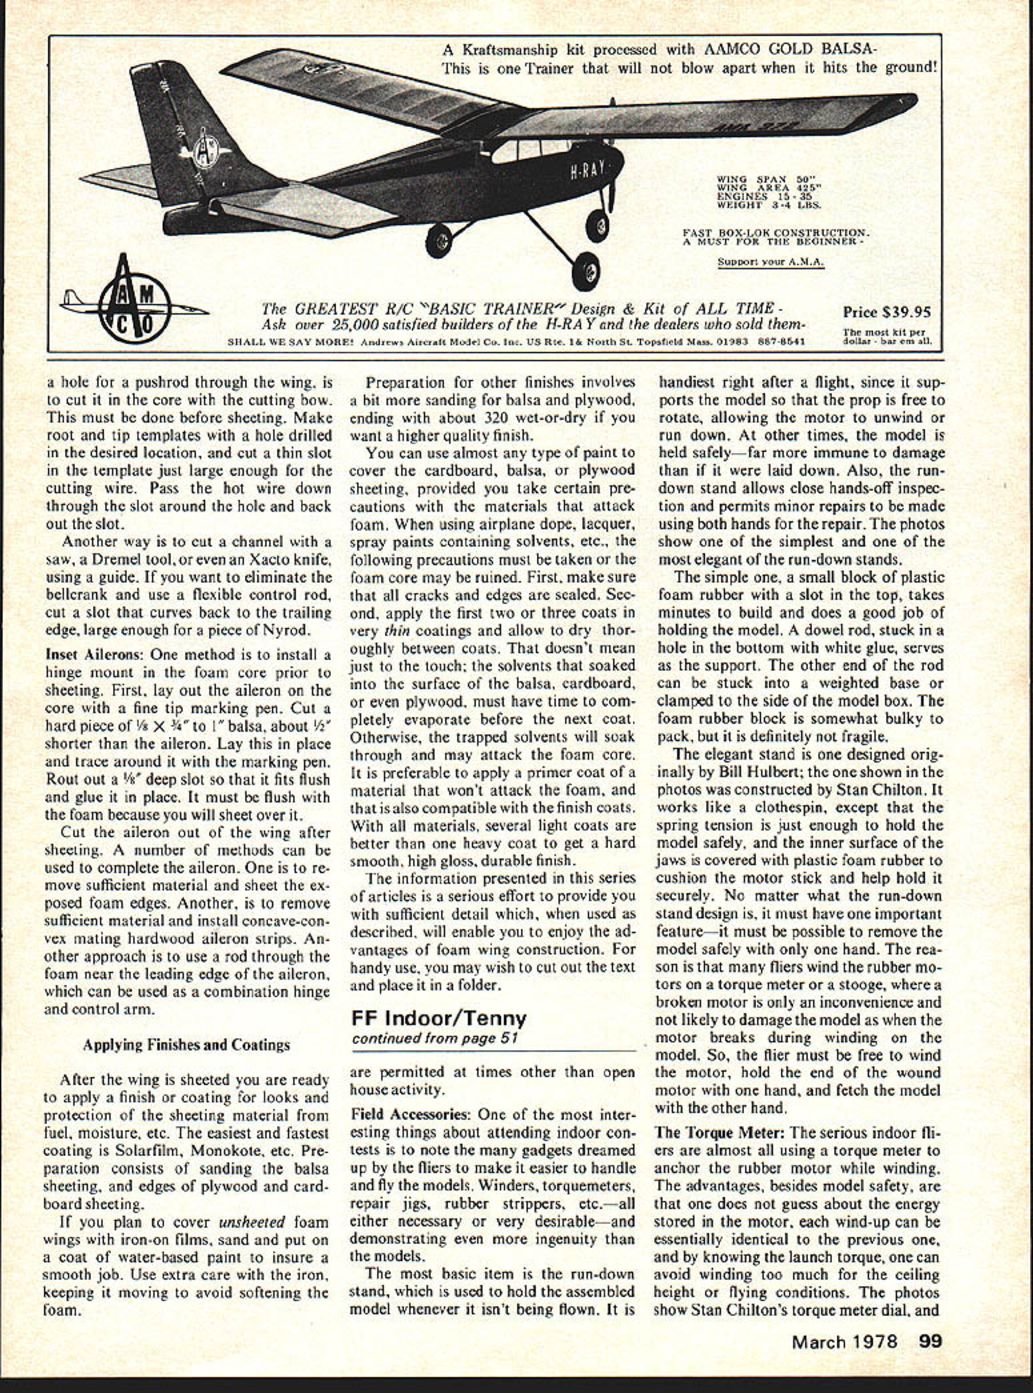
The most basic item is the run-down stand, which is used to hold the assembled model whenever it isn't being flown. It is handiest right after a flight, since it supports the model so that the prop is free to rotate, allowing the motor to unwind or run down. At other times, the model is held safely—far more immune to damage than if it were laid down. Also, the run-down stand allows close hands-off inspection and permits minor repairs to be made using both hands for the repair.
The simple one, a small block of plastic foam rubber with a slot in the top, takes minutes to build and does a good job of holding the model. A dowel rod, stuck in a hole in the bottom with white glue, serves as the support. The other end of the rod can be stuck into a weighted base or clamped to the side of the model box. The foam rubber block is somewhat bulky to pack, but it is definitely not fragile.
The elegant stand is one designed originally by Bill Hulbert; the one shown in the photos was constructed by Stan Chilton. It works like a clothespin, except that the spring tension is just enough to hold the model safely, and the inner surface of the jaws is covered with plastic foam rubber to cushion the motor stick and help hold it securely. No matter what the run-down stand design is, it must have one important feature—it must be possible to remove the model safely with only one hand. The reason is that many fliers wind the rubber motors on a torque meter or a stooge, where a broken motor is only an inconvenience and not likely to damage the model as when the motor breaks during winding on the model. So, the flier must be free to wind the motor, hold the end of the wound motor with one hand, and fetch the model with the other hand.
The Torque Meter
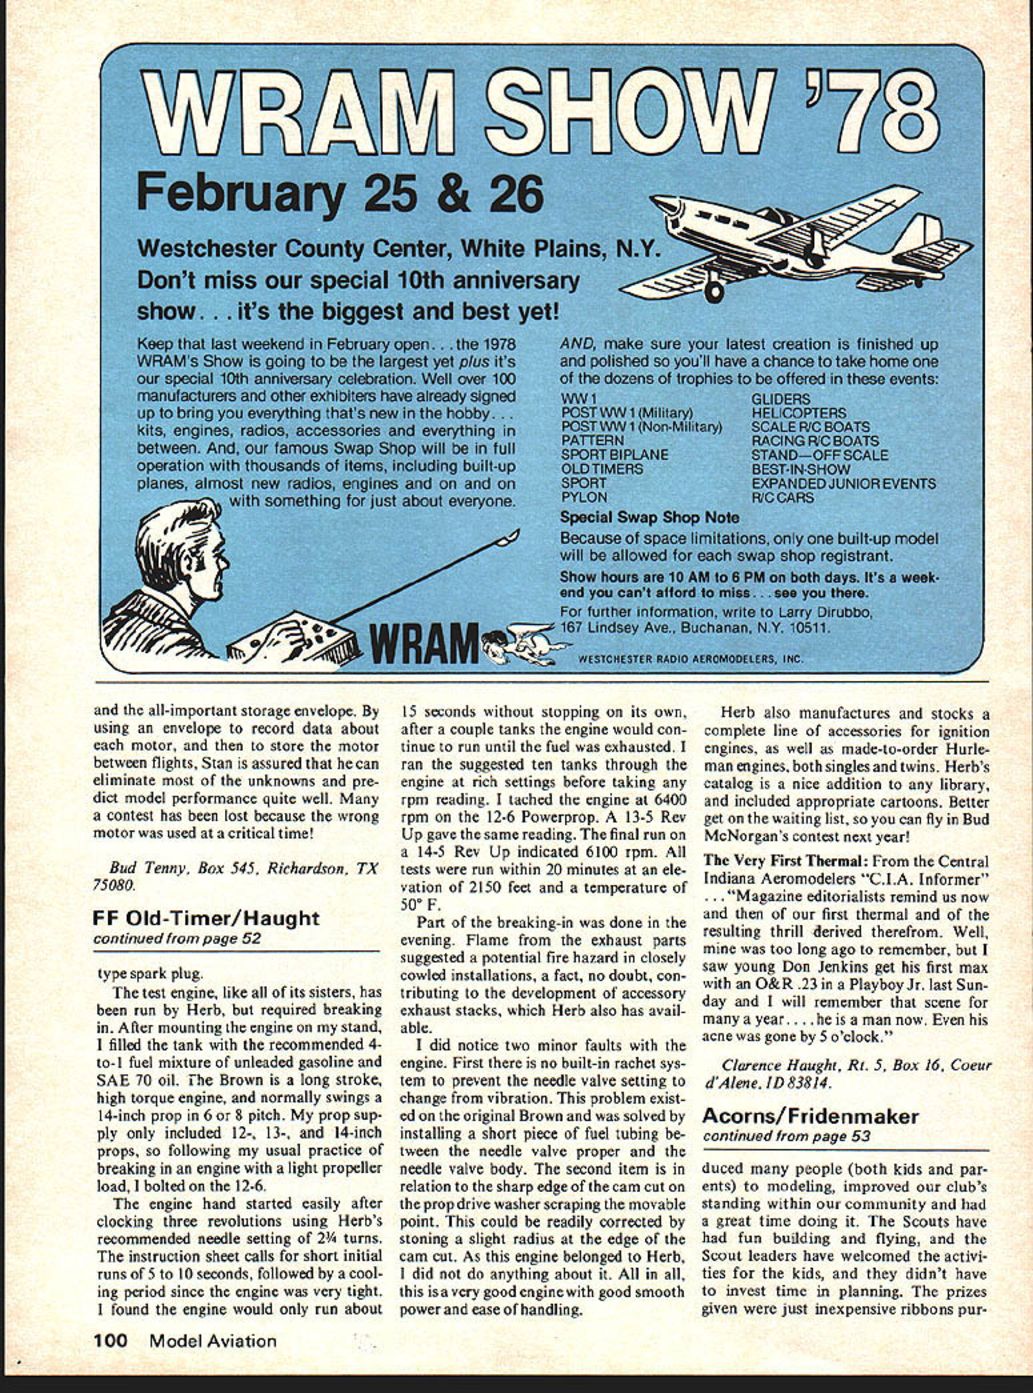
The Torque Meter: The serious indoor fliers are almost all using a torque meter to anchor the rubber motor while winding. The advantages, besides model safety, are that one does not guess about the energy stored in the motor, each wind-up can be essentially identical to the previous one, and by knowing the launch torque, one can avoid winding too much for the ceiling height or flying conditions. The photos show Stan Chilton's torque meter dial, and and the all-important storage envelope. By using an envelope to record data about each motor, and then to store the motor between flights, Stan is assured that he can eliminate most of the unknowns and predict model performance quite well. Many a contest has been lost because the wrong motor was used at a critical time!
Bud Tenny, Box 545, Richardson, TX 75080.
Transcribed from original scans by AI. Minor OCR errors may remain.

