
Free Flight: Indoor
Bud Tenny
FOLLOW-UP: A couple of columns back, Stan Stoy's controversial HLG flights in very high turbulence were reported. By the time that issue hit the stands, a number of things had happened. First, some HLG fliers protested the flights, and FF Contest Board Chairman Joe Boyle expressed an opinion that the flights were illegal in spite of careful supervision by a number of AMA officials. Ultimately, the matter was referred to the Contest Board for a vote, which upheld the record. Then, in early December, 1977, Stan's new, slightly larger Coot set a two-flight total of 79 4/5 seconds to exceed the same record his controversial flights beat. The new mark was set in dead calm air in a St. Louis, Mo., site, where the high temperature for the day was 50°F. Outside, the weather was cloudy and 30°F.
Later in January, 1978, Stan requested that his turbulent air record be withdrawn. His reasons were (quoted from Stan's letter to Frank Ehling, Technical Director of AMA):
"1. I feel that its continued presence will only serve to irritate some competitive fliers and will not provide a constructive goal for competitors to better. Isn't this the real purpose of keeping records?
"2. Modelers have decided that the tactic of turbulence rectification is not an option they want available to the indoor flier, at least not for the purpose of establishing records.
"3. It has served its purpose of bringing up for discussion the rather vague rules for indoor competition and record establishment. Its continued presence on the books will not further this goal."
At first glance, Stan's record withdrawal would seem to negate all that went before. However, consider that he perceived a weakness in existing rules that no amount of rhetoric would have exposed half so well. Until he demonstrated the effect of proper use (or misuse?) of the "loophole" in the rules, no one would have paid serious attention. Stan is to be congratulated for his effective use of the rules and the AMA machinery for rules verification and review. His stature is that much greater after his highly sportsmanlike withdrawal of the record.
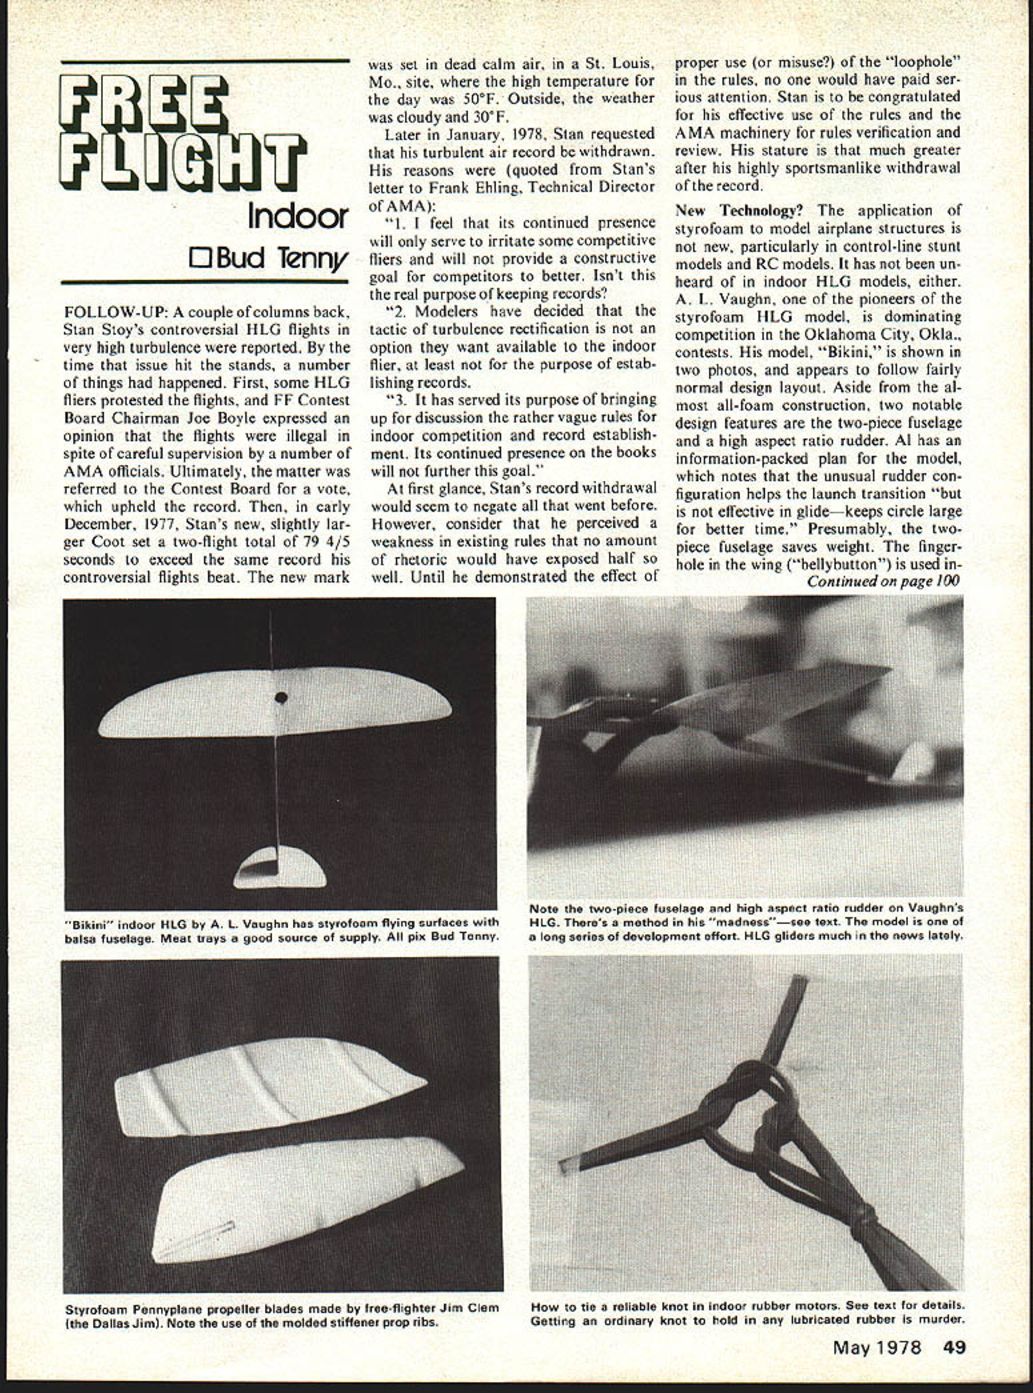
New Technology? The application of styrofoam to model airplane structures is not new, particularly in control-line stunt models and RC models. It has not been unheard of in indoor HLG models, either. A. L. Vaughn, one of the pioneers of the styrofoam HLG model, is dominating competition in the Oklahoma City, Okla., contests. His model, "Bikini," is shown in two photos, and appears to follow fairly normal design layout. Aside from the almost all-foam construction, two notable design features are the two-piece fuselage and a high aspect ratio rudder. Al has an information-packed plan for the model, which notes that the unusual rudder configuration helps the launch transition "but is not effective in glide—keeps circle large for better time." Presumably, the two-piece fuselage saves weight. The finger hole in the wing ("bellybutton") is used in stead of the more traditional reinforced trailing edge to apply the launching force ahead of the model's center of gravity.
The source of styrofoam for wings and tail surfaces is styrofoam meat trays. (Al cites the high price of good balsa for getting him started on foam, but who can afford meat these days?) The flying surfaces are shaped with a razor plane and garnet paper, then all surfaces (balsa included) are coated with a mixture of 50% water and 50% white glue. After the "paint" has dried, the surfaces are polished with 600 wet or dry paper. Wing reinforcement is of two forms—Tissue from hat or shoe boxes is applied in triangular pieces, with the triangle's base along the leading edge. The area immediately ahead of the bellybutton is reinforced with typing paper, applied wet with white glue.
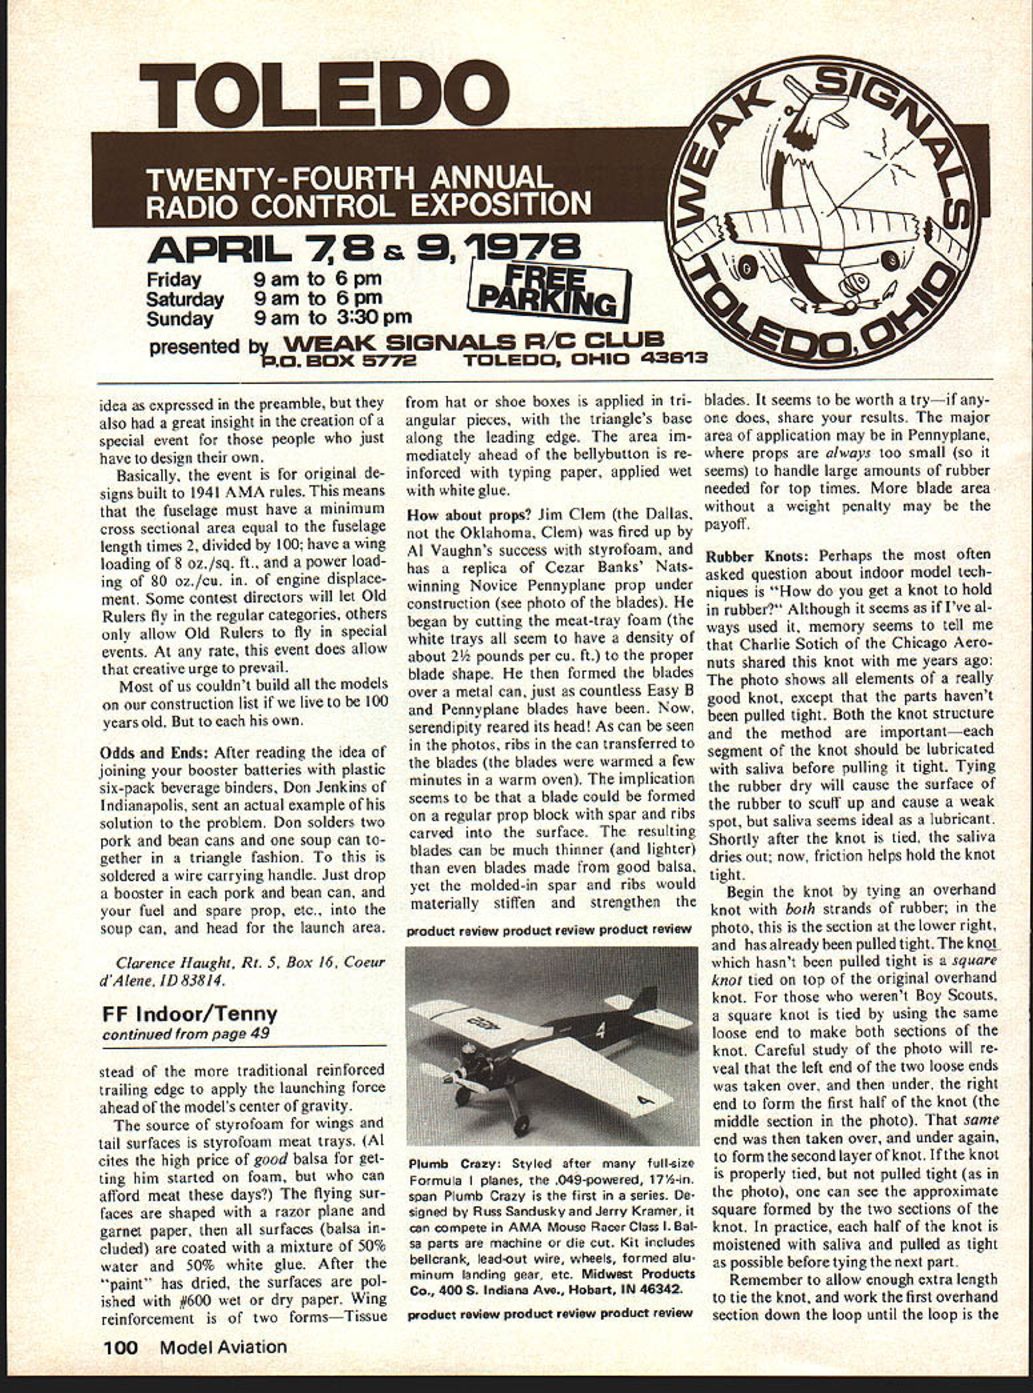
How about props? Jim Clem (the Dallas, not the Oklahoma Clem) was fired up by Al Vaughn's success with styrofoam, and has a replica of Cezar Banks' Nats-winning Novice Pennyplane prop under construction (see photo of the blades). He began by cutting the meat-tray foam (the white trays all seem to have a density of about 2½ pounds per cu. ft.) to the proper blade shape. He then formed the blades over a metal can, just as countless Easy B and Pennyplane blades have been. Now, serendipity reared its head! As can be seen in the photos, ribs in the can transferred to the blades (the blades were warmed a few minutes in a warm oven). The implication seems to be that a blade could be formed on a regular prop block with spar and ribs carved into the surface. The resulting blades can be much thinner (and lighter) than even blades made from good balsa, yet the molded-in spar and ribs would materially stiffen and strengthen the blades. It seems to be worth a try—if anyone does, share your results. The major area of application may be in Pennyplane, where props are always too small (so it seems) to handle large amounts of rubber needed for top times. More blade area without a weight penalty may be the payoff.
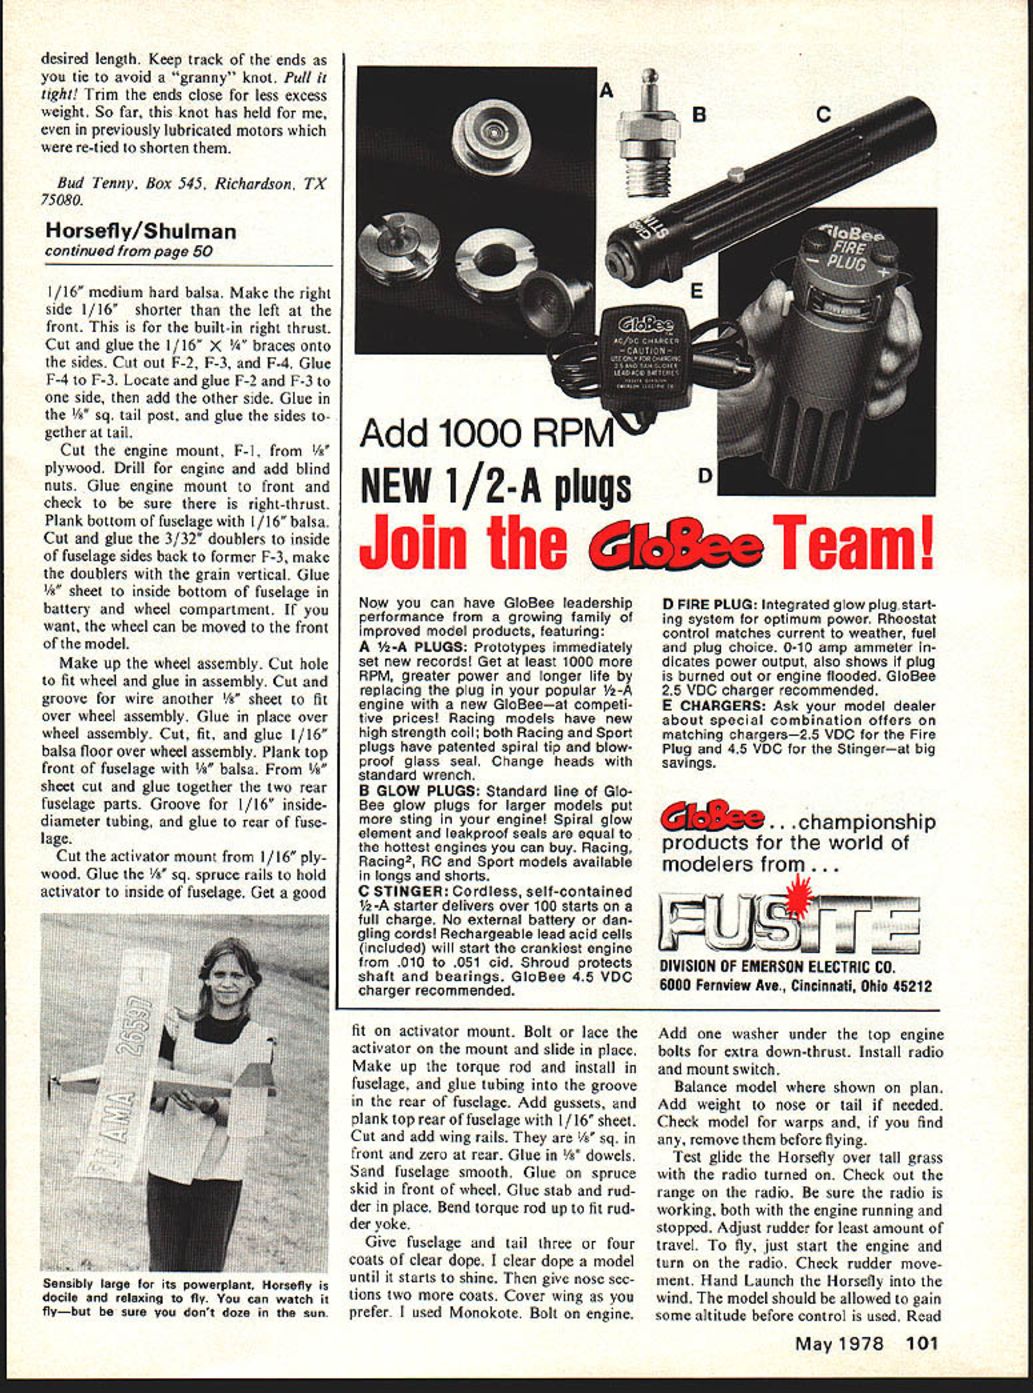
Rubber Knots: Perhaps the most often asked question about indoor model techniques is "How do you get a knot to hold in rubber?" Although it seems as if I've always used it, memory seems to tell me that Charlie Sotich of the Chicago Aeros shared this knot with me years ago. The photo shows all elements of a really good knot, except that the parts haven't been pulled tight. Both the knot structure and the method are important—each segment of the knot should be lubricated with saliva before pulling it tight. Tying the rubber dry will cause the surface of the rubber to scuff up and cause a weak spot, but saliva seems ideal as a lubricant. Shortly after the knot is tied, the saliva dries out; now, friction helps hold the knot tight.
Begin the knot by tying an overhand knot with both strands of rubber; in the photo, this is the section at the lower right, and has already been pulled tight. The knot which hasn't been pulled tight is a square knot tied on top of the original overhand knot. For those who weren't Boy Scouts, a square knot is tied by using the same loose end to make both sections of the knot. Careful study of the photo will reveal that the left end of the two loose ends was taken over, and then under, the right end to form the first half of the knot (the middle section in the photo). That same end was then taken over and under again, to form the second half of the knot. If the knot is properly tied, but not pulled tight (as in the photo), one can see the approximate square formed by the two sections of the knot. In practice, each half of the knot is moistened with saliva and pulled as tight as possible before tying the next part.
Remember to allow enough extra length to tie the knot, and work the first overhand section down the loop until the loop is the desired length. Keep track of the ends as you tie to avoid a "granny" knot. Pull it tight! Trim the ends close for less excess weight. So far, this knot has held for me, even in previously lubricated motors which were re-tied to shorten them.
Bud Tenny, Box 545, Richardson, TX 75080.
Transcribed from original scans by AI. Minor OCR errors may remain.

