
FREE FLIGHT INDOOR - 2001/01
Bud Tenny, Box 830545, Richardson TX 75083
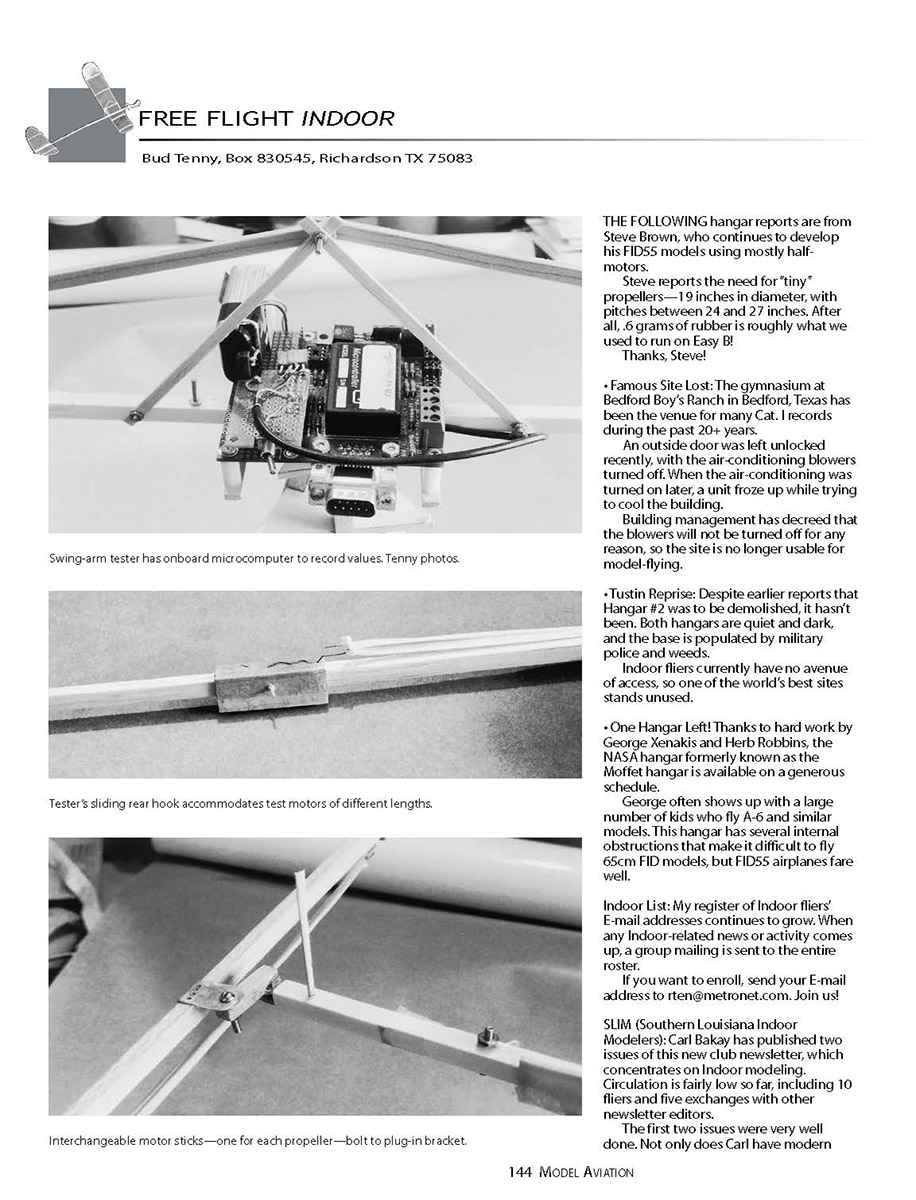
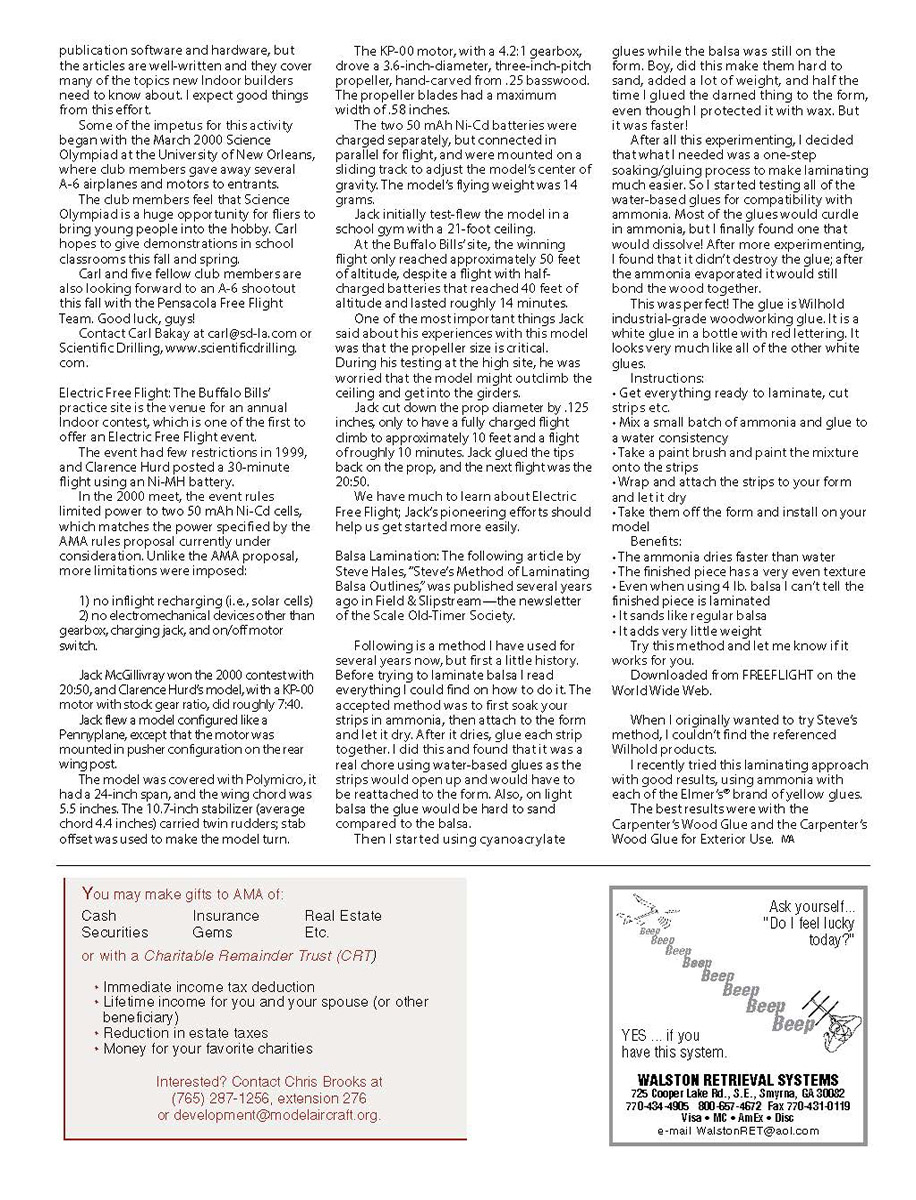
Hangar reports
The following hangar reports are from Steve Brown, who continues to develop his F1D55 models using mostly half-motors. Steve reports the need for "tiny" propellers—19 inches in diameter, with pitches between 24 and 27 inches. After all, 0.6 grams of rubber is roughly what we used to run on Easy B. Thanks, Steve!
- Famous Site Lost:
The gymnasium at Bedford Boys' Ranch in Bedford, Texas has been the venue for many Cat. I records during the past 20+ years. An outside door was left unlocked recently, with the air-conditioning blowers turned off. When the air-conditioning was turned on later, a unit froze up while trying to cool the building. Building management has decreed that the blowers will not be turned off for any reason, so the site is no longer usable for model-flying.
- Tustin Reprise:
Despite earlier reports that Hangar #2 was to be demolished, it hasn't been. Both hangars are quiet and dark, and the base is populated by military police and weeds. Indoor fliers currently have no avenue of access, so one of the world's best sites stands unused.
- One Hangar Left!
Thanks to hard work by George Xenakis and Herb Robbins, the NASA hangar formerly known as the Moffett hangar is available on a generous schedule. George often shows up with a large number of kids who fly A-6 and similar models. This hangar has several internal obstructions that make it difficult to fly 65 cm F1D models, but F1D55 airplanes fare well.
Indoor List
My register of indoor fliers' e-mail addresses continues to grow. When any indoor-related news or activity comes up, a group mailing is sent to the entire roster. If you want to enroll, send your e-mail address to rten@metronet.com. Join us!
SLIM (Southern Louisiana Indoor Modelers)
Carl Bakay has published two issues of this new club newsletter, which concentrates on indoor modeling. Circulation is fairly low so far, including 10 fliers and five exchanges with other newsletter editors. The first two issues were very well done. Not only does Carl have modern publication software and hardware, but the articles are well-written and they cover many of the topics new indoor builders need to know about.
Some of the impetus for this activity began with the March 2000 Science Olympiad at the University of New Orleans, where club members gave away several A-6 airplanes and motors to entrants. The club members feel that Science Olympiad is a huge opportunity for fliers to bring young people into the hobby. Carl hopes to give demonstrations in school classrooms this fall and spring. Carl and five fellow club members are also looking forward to an A-6 shootout this fall with the Pensacola Free Flight Team. Good luck, guys!
Contact Carl Bakay at carl@sd-la.com or Scientific Drilling, www.scientificdrilling.com.
Electric free flight
The Buffalo Bills' practice site is the venue for an annual indoor contest, one of the first to offer an Electric Free Flight event. The event had few restrictions in 1999, and Clarence Hurd posted a 30-minute flight using an Ni-MH battery. In the 2000 meet, the event rules limited power to two 50 mAh Ni-Cd cells, which matches the power specified by the AMA rules proposal then under consideration. Unlike the AMA proposal, more limitations were imposed: 1) no in-flight recharging (i.e., solar cells), and 2) no electromechanical devices other than gearbox, charging jack, and on/off motor switch.
Jack McGillivray won the 2000 contest with 20:50. Clarence Hurd's model, with a KP-00 motor with stock gear ratio, did roughly 7:40. Jack flew a model configured like a Pennyplane, except that the motor was mounted in pusher configuration on the rear wing post.
The model was covered with Polymicro. It had a 24-inch span and a 5.5-inch wing chord. The 10.7-inch stabilizer (average chord 4.4 inches) carried twin rudders; stab offset was used to make the model turn.
The KP-00 motor, with a 4.2:1 gearbox, drove a 3.6-inch-diameter, three-inch-pitch propeller, hand-carved from 0.25-inch basswood. The propeller blades had a maximum width of 0.58 inches.
The two 50 mAh Ni-Cd batteries were charged separately but connected in parallel for flight, and were mounted on a sliding track to adjust the model's center of gravity. The model's flying weight was 14 grams. Jack initially test-flew the model in a school gym with a 21-foot ceiling.
At the Buffalo Bills' site, the winning flight only reached approximately 50 feet of altitude, despite a flight with half-charged batteries that reached 40 feet of altitude and lasted roughly 14 minutes.
One of the most important things Jack said about his experiences with this model was that the propeller size is critical. During his testing at the high site, he was worried that the model might outclimb the ceiling and get into the girders. Jack cut down the prop diameter by 0.125 inches, only to have a fully charged flight climb to approximately 10 feet and last roughly 10 minutes. Jack glued the tips back on the prop, and the next flight was the 20:50.
We have much to learn about electric free flight; Jack's pioneering efforts should help us get started more easily.
Balsa Laminating
The following article by Steve Hales, "Steve's Method of Laminating Balsa Outlines," was published several years ago in Field & Slipstream—the newsletter of the Scale Old-Timer Society.
Following is a method I have used for several years now, but first a little history. Before trying to laminate balsa I read everything I could find on how to do it. The accepted method was to first soak your strips in ammonia, then attach to the form and let it dry. After it dries, glue each strip together. I did this and found that it was a real chore using water-based glues as the strips would open up and would have to be reattached to the form. Also, on light balsa the glue would be hard to sand compared to the balsa.
Then I started using cyanoacrylate glues while the balsa was still on the form. Boy, did this make them hard to sand, add a lot of weight, and half the time I glued the darned thing to the form, even though I protected it with wax. But it was faster!
After all this experimenting, I decided that what I needed was a one-step soaking/gluing process to make laminating much easier. So I started testing all of the water-based glues for compatibility with ammonia. Most of the glues would curdle in ammonia, but I finally found one that would dissolve. After more experimenting, I found that it didn't destroy the glue; after the ammonia evaporated it would still bond the wood together.
This was perfect! The glue is Wilhold industrial-grade woodworking glue. It is a white glue in a bottle with red lettering. It looks very much like all of the other white glues.
Instructions
- Get everything ready to laminate; cut strips, etc.
- Mix a small batch of ammonia and glue to a water consistency.
- Take a paint brush and paint the mixture onto the strips.
- Wrap and attach the strips to your form and let it dry.
- Take them off the form and install on your model.
Benefits
- The ammonia dries faster than water.
- The finished piece has a very even texture.
- Even when using 4 lb. balsa I can't tell the finished piece is laminated.
- It sands like regular balsa.
- It adds very little weight.
Try this method and let me know if it works for you.
Downloaded from FREEFLIGHT on the World Wide Web.
When I originally wanted to try Steve's method, I couldn't find the reference in Wilhold products. I recently tried this laminating approach with good results, using ammonia with each of the Elmer's-brand wood glues. The best results were with the Carpenter's Wood Glue and the Carpenter's Wood Glue for Exterior Use.
MA
Transcribed from original scans by AI. Minor OCR errors may remain.

