
Free Flight: Indoor
Bud Tenny
MORE on the West Baden bash. More details have been settled on the world's longest and biggest week of indoor flying! Beginning with the 1980 Indoor World Championships, followed by the First World Peanut Grand Prix and the National Indoor Model Airplane Society (NIMAS) Fifth Annual Record Trials (VNART), the total package runs from June 20, 1980, through June 28, 1980, with a good chance that a number of people will also stay over to leave on June 29 (Sunday). The schedule runs like this:
- Fri. June 20: FAI teams check in.
- Sat. June 21: FAI practice flying, teams only.
- Sun. June 22: Two flights per man for each team (between 9 a.m. and 9 p.m.).
- Mon. June 23: Same as Sunday.
- Tues. June 24: Same as Sunday & Monday; banquet and awards beginning 9:30 p.m.
- Wed. June 25: Peanut Scale Grand Prix (models in by 10 a.m. June 24 for judging). 9 a.m.–9 p.m.
- Thurs. June 26: All lightweight AMA classes in VNART Index competition. 9 a.m.–9 p.m.
- Fri. June 27: Pennyplane, Novice P/P, Easy B, Manhattan Cabin, Bostonian Cabin. 9 a.m.–9 p.m.
- Sat. June 28: Glider and Scale Day. 8 a.m.–7 p.m. VNART awards banquet beginning 8 p.m.
Anyone willingly missing that show will regret it! There will be many opportunities (and a strong necessity) for interested persons to help with timing and many other details. For anyone wishing to learn more about any phase of indoor modeling, there will be ample opportunity to observe some of the best fliers, both from the U.S. and from the whole world, do their thing. It has been pointed out here that we can greatly improve our own modeling competence by watching others fly our type of models in competition. Can you imagine the learning opportunities here!
For those who wish to help (or enter, or both), contact Bud Tenny, P.O. Box 545, Richardson, TX 75080 for entry blanks and more information about costs, etc. By the way, this can be the least expensive vacation you could take, since costs for food and lodging (assuming you stay at Northwood Institute and eat there) run less than $20 a day. Try to find expenses that low anywhere else these days!
More on Model Boxes
The April column had photos of a number of FAI model boxes and gave some idea of how the models were safely packed so they could withstand the rigors of intercontinental travel. Indoor models of all types require protective packing of some kind to survive travel more rigorous than an hour's drive across town to the local contest.
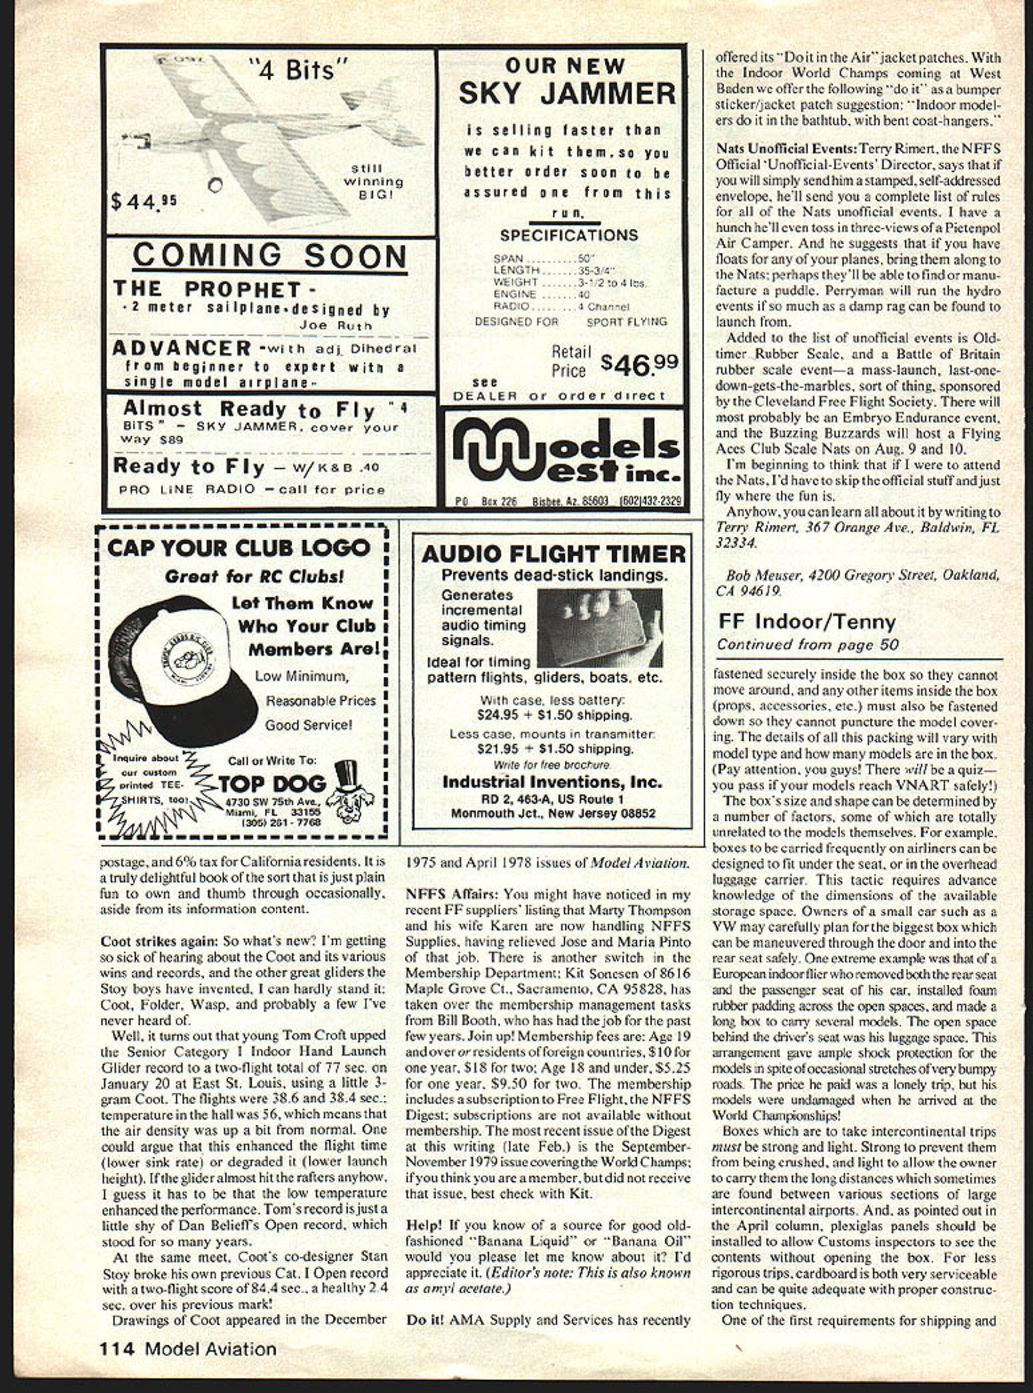
Any time the model boxes can be in the owner's exclusive custody, the packing can be rather casual. For any trip lasting several hours or longer, the models must be enclosed in a box strong enough to withstand other boxes, suitcases, etc., being placed on top of the model box or gouging into its side. The models must be fastened securely inside the box so they cannot move around, and any other items inside the box (props, accessories, etc.) must also be fastened down so they cannot puncture the model covering. The details of all this packing will vary with model type and how many models are in the box. (Pay attention, you guys! There will be a quiz — you pass if your models reach VNART safely!)
The box's size and shape can be determined by a number of factors, some of which are totally unrelated to the models themselves. For example, boxes to be carried on freighters or airlines can be designed to fit under the seat or in the overhead luggage rack. This factor requires advance knowledge of the dimensions of the available space. Owners of small cars such as a VW may carefully plan their packing for the biggest box which can be maneuvered through the door and into the rear seat safely. One extreme example was a European outdoor fancier who removed both the rear seat and the passenger seat of his car, installed foam rubber padding across the open spaces, and made a long box to carry several models. The open sides of the box were given a curve that matched his luggage space. This arrangement gave ample shock protection for models in spite of occasional stretches of very bumpy roads. The price he paid was a lonely trip, but his models were undamaged when he arrived at the World Championships!
Boxes which are to take intercontinental trips must be strong and light: strong to prevent them from being crushed, and light to allow the owner to carry them the long distances which sometimes are encountered between various sections of large intercontinental airports. As pointed out in the April column, plexiglas panels should be installed to allow customs inspectors to see the contents without opening the box. For less rigorous trips, cardboard is both very serviceable and can be made adequate with proper construction techniques.
One of the first requirements for shipping and storage containers for indoor models is that the box be essentially airtight; that is, there must be no cracks which can leak air gusts that would damage the model. The next requirement fits all boxes—there must be enough strength in the sides of the box to resist a reasonable amount of weight being piled on top of the box. External markings should specify which side of the box is to be facing up during transport, and the remarks that follow assume the box is in that position.
If possible, a model box built from corrugated cardboard should have double thickness on all sides. However, assuming that the box lid slips over the rest of the box like the lid of a shoebox, it is easy to get double-thickness sidewalls. Simply make the lid the same depth as the rest of the box as outlined below; double-thickness sidewalls come automatically. To maximize the load-bearing capacity of the top and bottom of the box, a center divider of double-thickness cardboard can be installed.
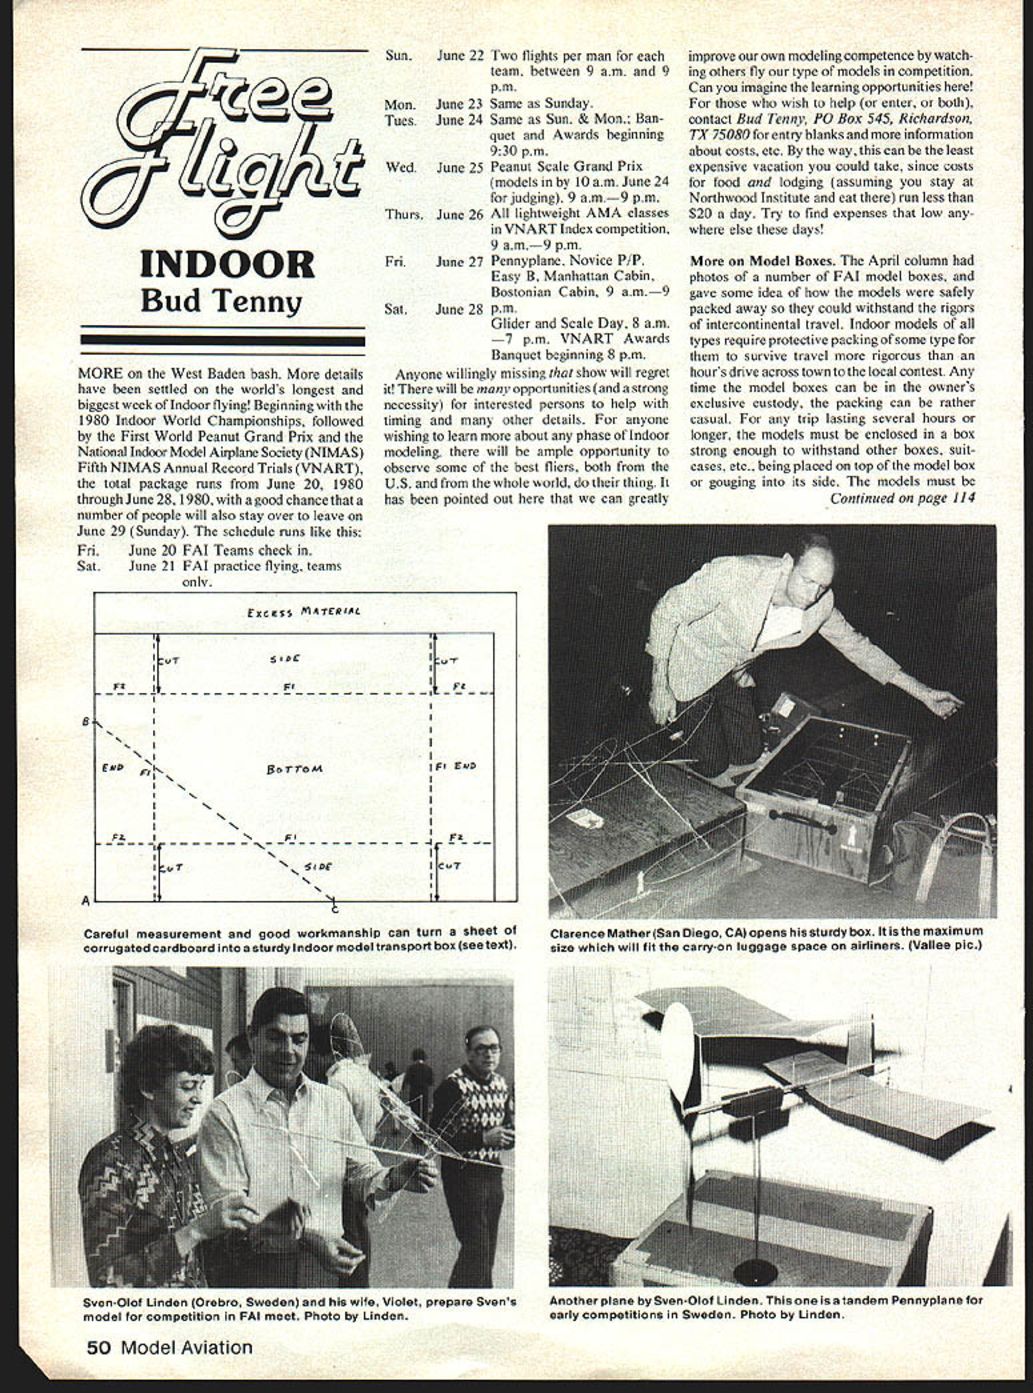
It is hard to realize how easy cardboard boxes are to build until you've tried it. Perhaps the hardest single part is finding a large sheet of flat (not warped or weathered) corrugated cardboard—without paying for it. (It spoils the fun if you have to buy it!) How big is big? The minimum dimension of the cardboard sheet required is equal to the width of the finished box plus twice the depth, plus some for working room. In the same fashion, the length of the finished box plus twice the box depth equals the length of cardboard needed. Fig. 1 shows the basic layout of the bottom of the box.
Three factors control how well the box parts will fit together: accurate measurements, straight lines and careful workmanship. Begin by being sure that you start with a 90° angle at one corner of the layout. The best way to do this is to measure three units along the end of the cardboard (from point "A" to "B") and four units ("A" to "C") along one adjacent side, as shown on the left end of Fig. 1. Make a trial measurement from "B" to "C" and move "C" on a line parallel to side AB until distance BC is exactly five units long when AC is four units long. Trim one side of the cardboard until lines AB and AC form a 90° angle on the cardboard. Extend the lines AB and AC with a good straightedge, then lay out the required cardboard size, being sure to keep the opposite sides parallel.
Mark out the dashed lines shown in Fig. 1 and cut the four short segments indicated. Use a long straightedge and a rounded rod or dowel (a plastic case from a ballpoint pen will work nicely) and crease the lines marked "F1". Fold the box bottom flat while each flap is bent up, one at a time. Careful work at this point will ensure that each fold is a single, straight line. Lay the sides flat again and offset lines "F2" by exactly the thickness of the cardboard. For the box bottom, these lines are offset toward the center of the sheet. When these new lines are scored and bent as before, these two flaps fold inside the box, leaving smooth sides and ends on the box.
Very carefully fold the box into shape, and tape it together with masking tape. Use white furniture glue to glue the flaps to the side, and hold things flat and straight with weights. Glue one flap at a time and be sure the glue is dry before removing the weights. After all four flaps are made, make the box top exactly like the bottom, except that you must allow enough extra length in all dimensions so the top will be a snug fit over the bottom. Note that the "F2" folds will be offset toward the edge of the cardboard for the box top—this allows the flaps to fold outside the box. It isn't pretty, but the doubled flap area also greatly strengthens the box so it will hold bigger weights piled on top. Next time—finishing the box and fixtures.
Models From Overseas
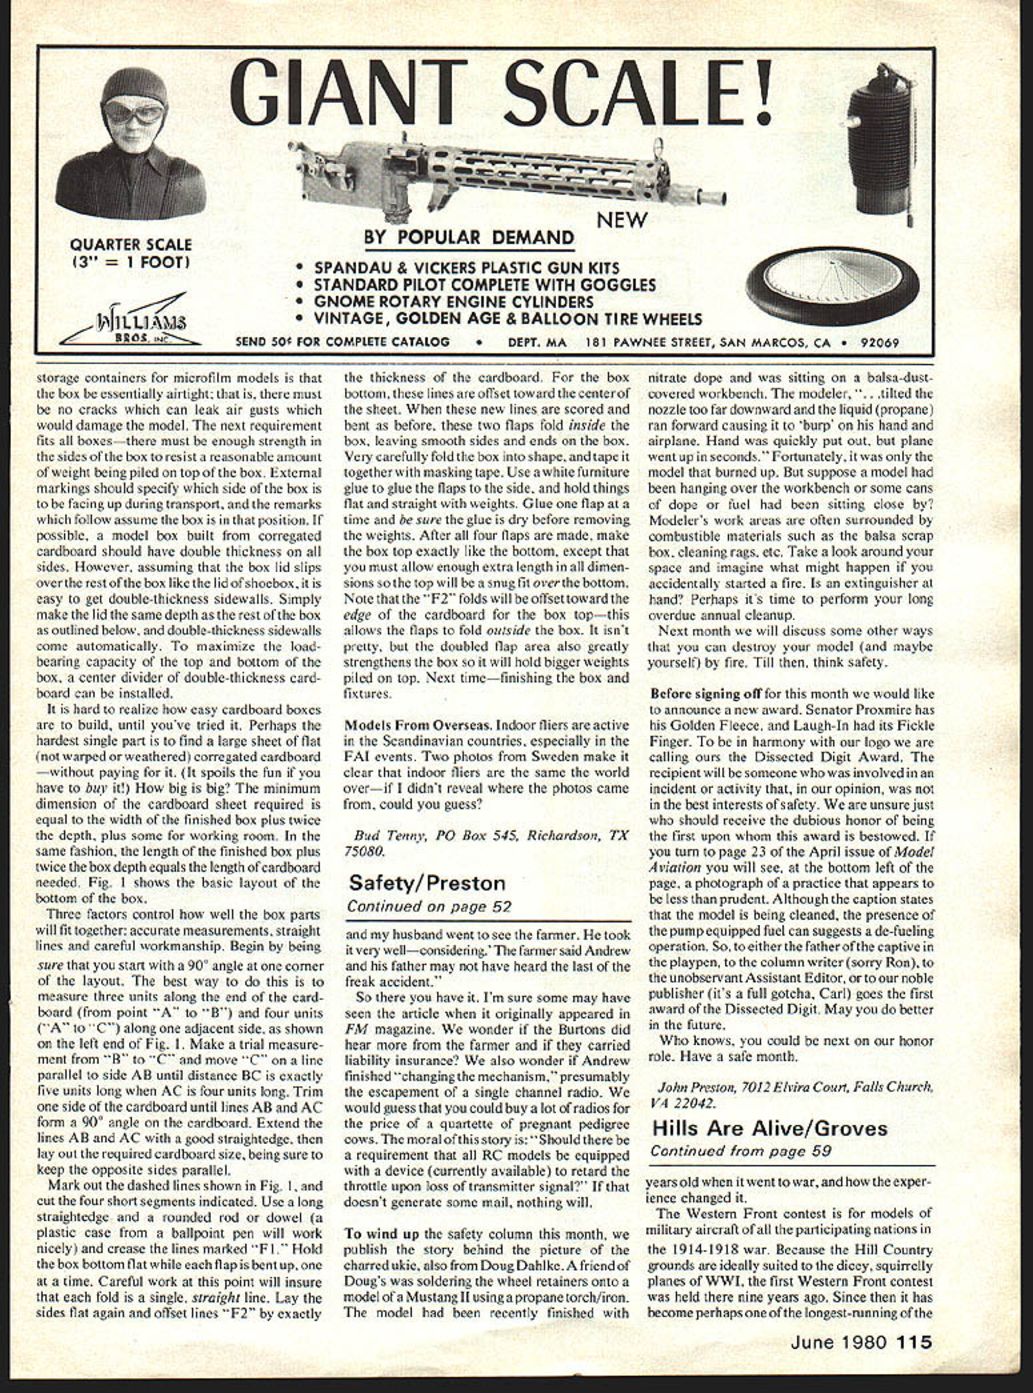
Indoor fliers are active in the Scandinavian countries, especially in the FAI events. Two photos from Sweden make it clear that indoor fliers are the same the world over—if I didn't reveal where the photos came from, could you guess?
Bud Tenny, P.O. Box 545, Richardson, TX 75080.
Transcribed from original scans by AI. Minor OCR errors may remain.

