

INDOOR
Bud Tenney
Finish the box
In the last episode we finished the top and bottom of a cardboard box hangar for indoor models. From here there are several things to do; at minimum, fixtures must be made to hold model parts securely. (I guarantee the models will not survive a trip if you just toss the parts into the box!)
First, consider external and internal finishes. Unless you live where it never rains, you should waterproof the outside of the box. Suitable finishes include clear varnish, model airplane dope, or similar sealants. You may also want handles, club decals, and other decorations.
Internal finish
The inside of a model box is often neglected, usually without ill effects. However, painting the interior flat black gives two benefits:
- White wood and shiny wire bracing show up much better in any light, making packing and unpacking easier and helping you find small items such as Teflon prop washers.
- Any dust on the box surface will be sealed in so it can't get on your model.
Caution: be sure the paint is completely dry before storing models in the box. Some paints, especially certain aerosol paints, outgas thinner fumes for weeks. The probable effect is that the film on your model might sag or loosen noticeably. In my experience, models often recover fairly quickly (24–36 hours), but if you plan to paint the inside of a new box, allow several weeks with the box open to the air before storing models in it. It is a good idea to have an old "junker" model that can be closed inside the box as a test before committing your best models. If the film doesn't sag in 36 hours, it's probably OK.
Fixtures
The type of fixtures used depends on the model and sometimes on model class.
- Scale models can often be anchored by wheels, tail skids, or similar points. If a scale model disassembles, wings and other removable parts must be anchored securely by fixtures that will not warp the parts.
- Many micofilm-covered models will shed the prop and wings; ROG (rise-off-ground) classes may also have removable landing gear.
- Indoor cabin models with built-up fuselages are the hardest to mount safely. Cabin fliers: please write in and share your fuselage mounting techniques!
The motor stick and tail boom assembly is almost always a single piece, except for cabin models which usually have removable tail boom/stabilizer groupings. There is a quandary in mounting the motor stick/tail group:
- If only two supports are used (near the thrust bearing and rear hook), the tail boom is free to bounce and may droop under its own weight during long storage.
- If a third support is used to support the tail boom, any misalignment during mounting can subtly bend the tail boom and spoil your trim.
My practice is to use a friction-fit slot just wide enough to hold the motor stick snugly without noticeable squeezing, and only two supports.
It is almost universal to mount wings in tissue tubes carefully spaced the same distance as the tubes on the motor stick. These mounting sockets are usually plugged into a balsa stick (3/16 x 3/16 or 1/8 x 1/8) which then slides into sockets or other fixtures mounted to the box.
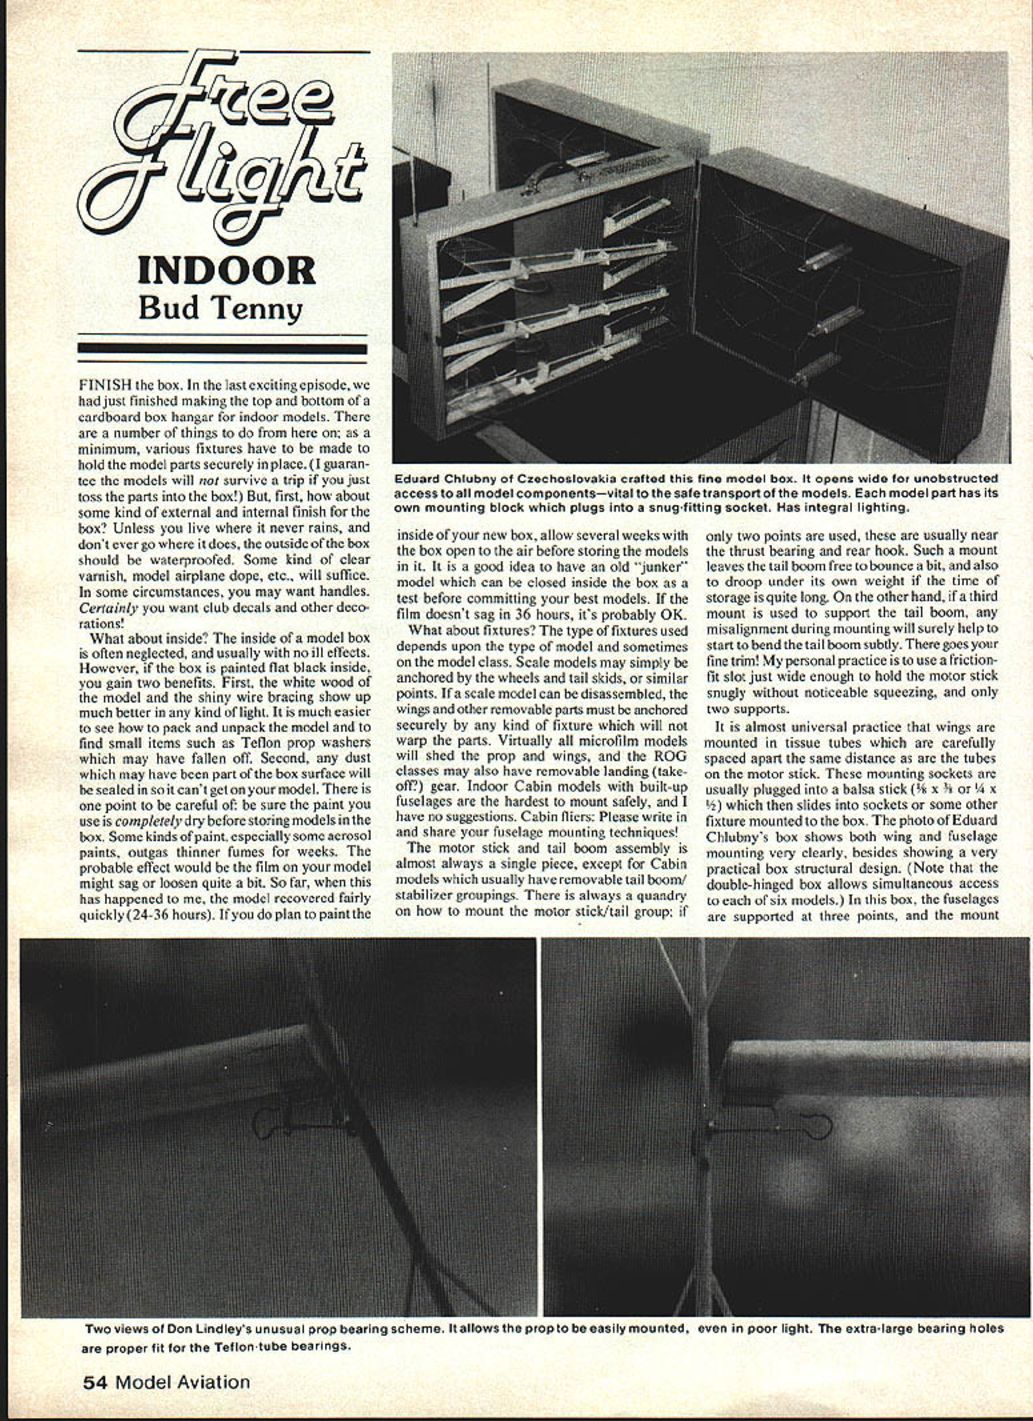
Chlubny's box design
Eduard Chlubny's box shows excellent wing and fuselage mounting and a practical structural design. Notable features:
- A double-hinged box allows simultaneous access to each of six models.
- Fuselages are supported at three points; the mounting points are fastened to a flat, yardstick-size piece of wood that can slide out clipped to the center web of the box.
- Wing mounts are snug-fit holders and sliding wing platforms mounted on the side of the box. Each part of a model is individually removable when the box is open, so no model part has to pass close to another part when removed or returned.
- The box has a reinforcing web around the edge of the mating surfaces, which helps ensure an airtight seal when closed and prevents warping as the box ages.
- The center web supports the fuselages and reinforces vertical load-bearing strength.
- Angled fuselage mounting allows tail groups to interweave at the business end of the fuselages; carefully planned stabilizer tips pass between wings with plenty of clearance.
The box is designed carefully, which helps Eduard handle his models safely even in fairly dark sites.
A neat prop bearing
Don Lindley (Naperville, IL) believes the prop bearing should support the prop firmly yet have minimum friction. His bearing is built as follows:
- The thrust bearing is made with what appear to be oversize holes for the prop shaft so the prop can be easily inserted in dim light.
- Short pieces of tiny Teflon tubing are slipped over the normal-sized prop shaft and fastened with cyanoacrylate glue.
- The prop shaft wire is inserted into the bearings where there is no Teflon tubing, then the tubing is inserted into the bearings. The prop becomes supported firmly and wiggle-free, while the Teflon minimizes friction.
- The bearing is reinforced by a few wraps of nichrome wire around the motor stick and bearing, glued in place with a thin film of glue.
The result is a smooth-running prop that always runs at the thrust angle set into the bearing.
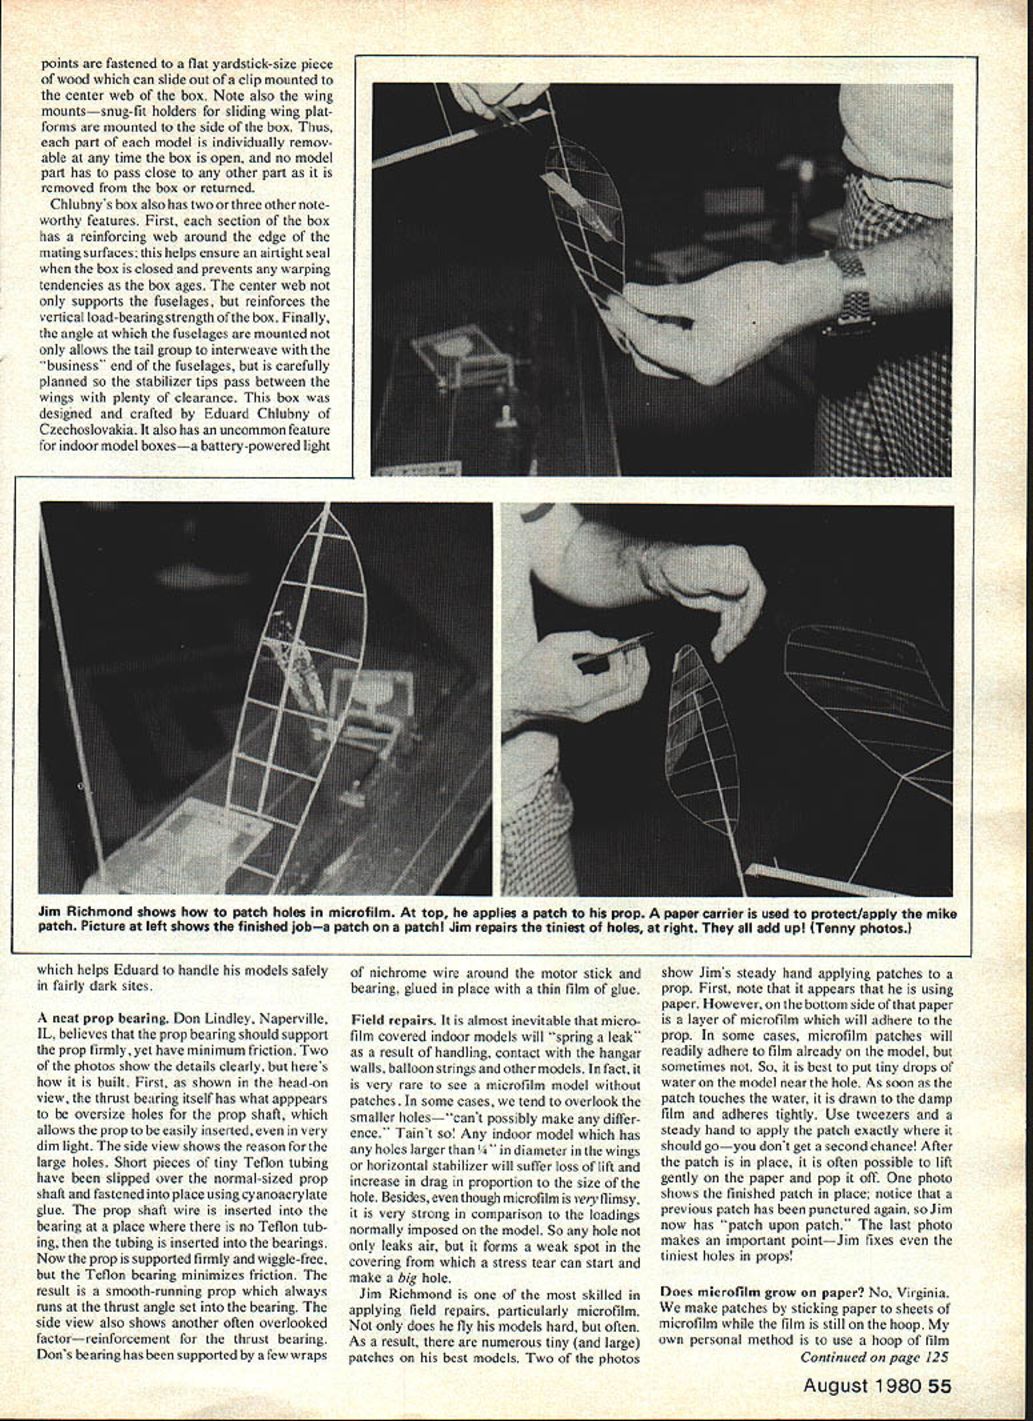
Field repairs
Micofilm-covered indoor models almost inevitably get holes from handling, contact with hangar walls, balloon strings, or other models. It is very rare to see a micofilm model without patches. Even small holes matter: any hole larger than 1/8" in a wing or horizontal stabilizer will cause loss of lift and increased drag proportional to the hole size. Moreover, a hole is a weak spot from which a stress tear can start and enlarge.
Jim Richmond is skilled at applying field repairs, particularly to micofilm. He flies his models hard and often, so his best models carry numerous tiny and large patches. His technique for patching a prop:
- He appears to use paper with a layer of micofilm on the underside, which will adhere to the prop.
- Sometimes micofilm patches will readily adhere to film already on the model, but sometimes they will not. It helps to put tiny drops of water on the model near the hole. As soon as the patch touches the water, it is drawn to the damp film and adheres tightly.
- Use tweezers and a steady hand to apply the patch exactly; you don't get a second chance.
- After the patch is in place, you can often lift gently on the paper and pop it off. Jim sometimes ends up with "patch upon patch." He fixes even the tiniest holes in props.
Does micofilm grow on paper?
No, Virginia. We make patches by sticking paper to sheets of micofilm while the film is still on the hoop. My method:
- Use a hoop of film specially poured for patches—at least 8 in. wide and up to 24 or 36 in. long.
- Cut pieces of typewriter paper that just fit between the edges of the hoop.
- Brush a thin line of rubber cement all around the edges of each paper piece and let it dry.
- Lay the individual pieces of paper carefully on the film and push down until they adhere all around the paper.
- Fill the hoop with pieces of paper, turn it over so the paper is on the table, and cut the patches loose.
- Store the patches in a thin flat box with pieces of paper separating them.
Then you're ready for field repairs—if you remember to take the box to the meet!
Bud Tenney P.O. Box 545 Richardson, TX 75080
Transcribed from original scans by AI. Minor OCR errors may remain.

