
Free Flight: INDOOR
Bud Tenny
Responsibility and the Easy B Rules
It's your responsibility! A number of fliers were quite upset when they found out what the new Easy B rules were. To make matters worse, the 1980 AMA Rule Book didn't come out until very late. For someone wishing to CD a contest in June, with a decision to be made about whether to hold one or two Easy B events, there was a definite problem. Discussions with friends about the contests which had been held to date left me confused about exactly what the new Easy B rules were.
I realized that the rules, as adopted by the Free Flight Contest Board (FFCB), were supposed to have been published in Model Aviation, but several searches of the mess which is referred to as my office failed to locate the proper issue. Finally, I was able to get a copy of the final FFCB submission from Chris Matsuno, and barely managed to get the sanction for the NIMAS VNART sent in. Only a Herculean effort by AMA HQ and the Contest Coordinator got me my documentation in time.
So, what went wrong? As an AMA contest director (CD), it was my responsibility to review the "Competition Newsletter" sections of Model Aviation and be abreast of the rules changes as they were enacted. As a contestant, interested in the rules I might fly under in 1980, it had been my responsibility to interact with the District VIII Free Flight Contest Board representative during the rules-making procedure, giving him feedback on what I thought he should do with the various proposals as the rules-making procedure progressed.
Actually, I blew it on several opportunities; I ignored the preliminary proposals, the cross-proposals, and the final vote. If I really had been on my toes and opposed to the new Easy B rules, I could possibly have stopped the whole thing by presenting a good enough case against the original proposal; however, I kept quiet. I barely noticed that the original proposal was accepted for consideration, and then proceeded to totally ignore the whole cross-proposal situation.
As it turned out, the final rule we now have to live with (until January 1982) was the product of a cross-proposal to the basic proposal.
Watching the Competition Newsletter
So, what's next? If you look back at the October 1980 Model Aviation, the "Competition Newsletter" section lists a great number of Free Flight rules proposals, with eight of them for Indoor. These are preliminary proposals, and if any of these proposals do not get enough votes to be accepted, they die on the vine.
The Free Flight Contest Board must vote on those proposals by sometime in December 1980, and you may not see these comments until after that. If so, do not despair! Continue to watch the "Competition Newsletter" section and wait for those proposals which survive the initial vote to be published again. You will have the opportunity to counsel your FFCB representative at that time, and you must also watch for cross-proposals which may drastically modify those proposals you originally liked. Cross-proposals may also change a proposal you didn't like into one which is OK. You can also submit your own cross-proposals; instructions on how to do that will be published along with some of the rules proposals. (See the article on Contest Board procedures in the August 1980 "Competition Newsletter" section of Model Aviation.) Be vigilant, and speak up—in writing!
Let's Fly!
Although there have been a number of contests held during the summer, including the NIMAS VNART and the Nats, most U.S. indoor fliers don't get a chance to limber up their models until the snow flies, or whatever passes for winter in their area. It has been my practice to list all the contests and flying sessions held anywhere in the U.S., but so far only one CD has let me know about his winter schedule.
In Miami, FL, the Miami Indoor Airplane Modelers Association (MIAMA) has announced their entire 1980–81 flying season. Note: these dates are considered firm, but last-minute circumstances can alter this. For your own convenience, confirm these dates on the day before the meet by calling (305) 858-6363. The contest dates are:
- Nov. 16, 1980
- Dec. 14, 1980
- Jan. 18, 1981
- Feb. 15, 1981
- Mar. 15, 1981
- Apr. 19, 1981
- May 17, 1981
MIAMA has lost their access to the Goodyear blimp hangar at Opa Locka Airport, and the contest reverts to Cat. I status since the site is the 28-foot gymnasium at Miami Dade South College. The new contest venue no longer has HLG and Paper Stick, and now includes Old-Time Baby ROG. This gem of an event uses the 1930 ALMA rules:
- Motor stick: 8 in. long maximum
- Rubber loop: 10 in. long maximum
- Wheels: two, 1/2 in. diameter (minimum) that turn
- Covering: model must be paper-covered
Repairs and Preparation
Just a reminder: since it is almost time for the contest season to start, we should be thinking about repairs for our models—before the first contest opens. From past experience, there is little enough time to re-trim the models to compensate for the warps which have accumulated over the summer. If I add repair time to that already-crowded schedule, I may well lose by default since my models won't be up to snuff.
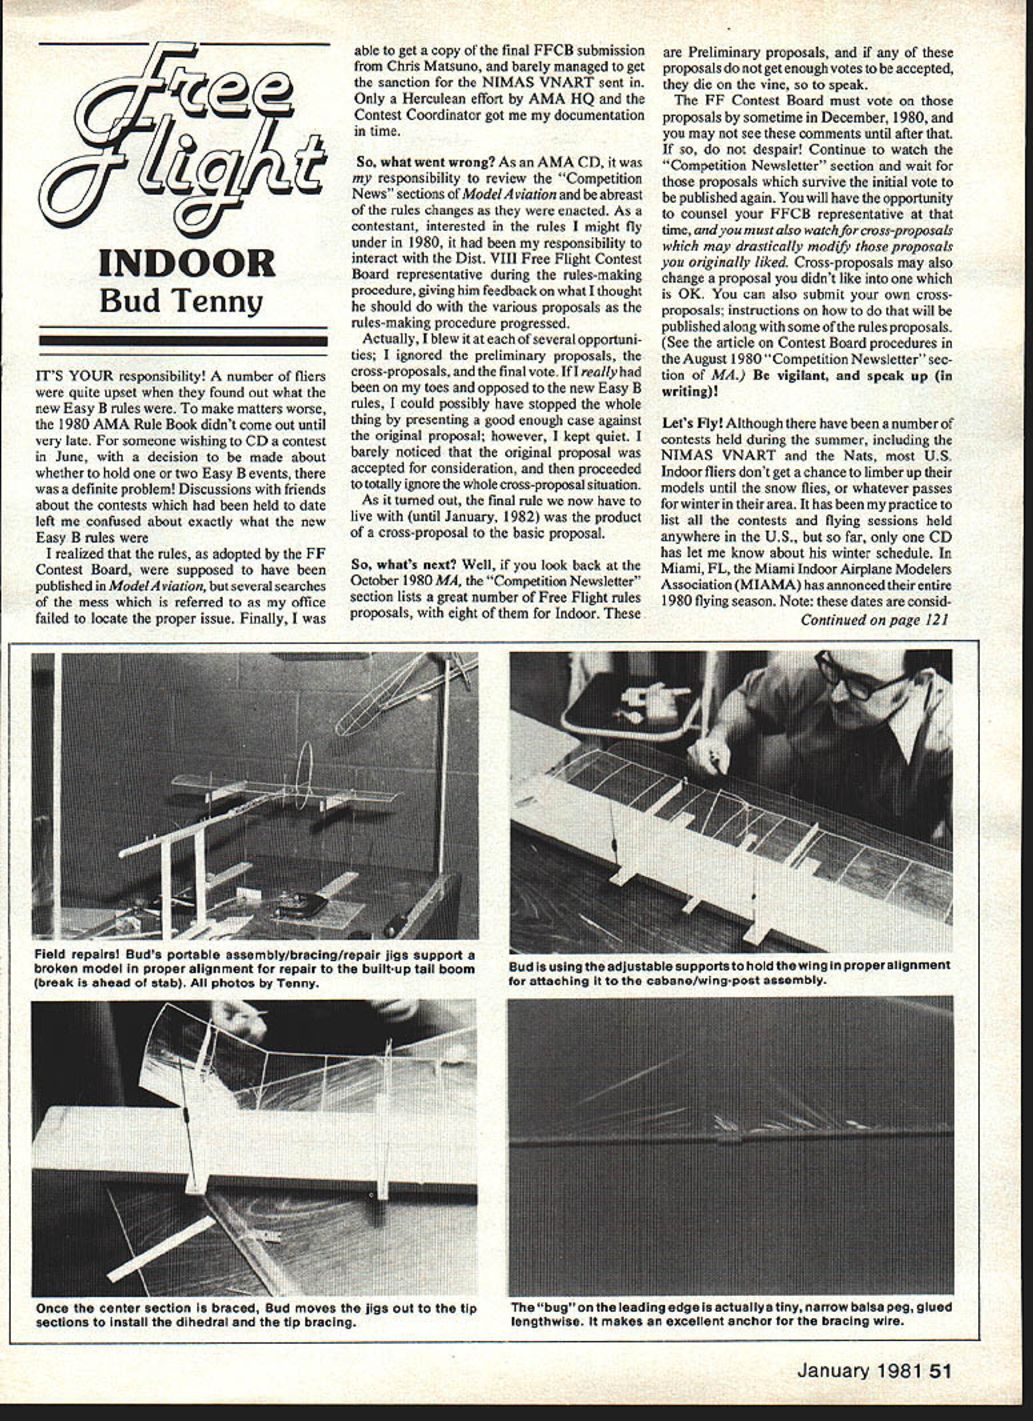
Suppose I forget? That's what I usually do, but I do remember to take my all-purpose repair jigs to the contest, no matter what. This set of jigs is modular and can easily be carried in a box measuring about 10 x 14 x 2-1/2 in. They are used mostly at home to assemble motor stick components, attach tail booms and tail surfaces to the fuselage assembly, brace tail surfaces, assemble and brace wings—in short, the whole model assembly job. Since these various parts are modular and easily carried, there really is little excuse not to bring them to the contest.
One of the photos shows three of the components in a field repair situation. If you look closely at the model on the stands, you will note that the built-up tail boom (a subject for future discussion) is fractured about an inch ahead of the stab. The two rear stands are supporting the tail group and the stub of the tail boom, while the fuselage is being supported by another stand.
How do I use them?
- Locate a flat surface (the top of my model box, in this case).
- Securely tape the primary jig (the fuselage cradle) to the surface.
- Anchor the motor stick using crossed straight pins to hold it in place.
- Position the two adjustable stands approximately where they should be and place the tail group on them, anchoring the stab with straight pins at an angle.
Note: It is usually evident that thin balsa indoor frames must not be anchored by sticking pins through the wood. However, it is possible to purchase insect-mounting pins which are tempered steel and have a diameter of only about 0.009 in. These are so sharp that they slide between the wood fibers and do no damage.
If it is necessary to anchor the stab, fasten it to only one support at a time. Otherwise, you may shatter the stab in the alignment phase which follows. The two rear stands are individually adjustable for height and tilt. Although the process of alignment is tedious, it is possible to precisely align the broken ends of the boom struts so they can be butt-glued. Move one thing at a time until the correct alignment is achieved, then glue the ends together. Allow this joint to dry thoroughly, then apply a thin parallel splint piece to bridge the joint.
Wing Bracing and Wire Mounting
What else can I do with the jigs? Two of the photos show a wing in two stages of bracing. In the first one, the wing is being fastened to the cabane/wing-post assembly, which is supported by the same mounting block the wing will use when it is stored in the model box.
Process highlights:
- Erect the cabane structure and tape the mount block to the work board. The block is not fastened to the table so it can be rotated for easy access to either side of the wing. The board should be straight and flat so it can be used as a reference to measure alignment during the bracing operation.
- Install the primary bracing, then add dihedral and tip bracing.
The last photo shows a typical wire mounting peg, which is installed on the wing leading and trailing edges wherever wires will attach to the framework. The reason for using a long, skinny piece glued lengthwise is so that the glue applied to anchor the wire will not soften the joint anchoring the peg. Also, if you need to adjust the bracing later, a small amount of thinner will allow you to loosen the wire without disturbing the peg.
Bud Tenny PO Box 545 Richardson, TX 75080
Transcribed from original scans by AI. Minor OCR errors may remain.

