
Free Flight: Indoor
Bud Tenney
How did that happen?
About this time last year I reported that AMA had made an extraordinary effort to get Nats planning input from indoor fliers. I then tracked the effort through a few evolutions to the point that it seemed the 1986 Indoor Nats would be a great meet.
Well, things kind of fell apart. First, AMA couldn't get solid clearance for the big Coliseum in Lake Charles, so the meet was shifted to the Municipal Auditorium downtown. We thought we had dibs on this site, but that turned out not to be true due to a communications problem. As a result, the meet had to be shifted to mid-week, creating a conflict with the outdoor events.
Meanwhile, advance entry had been poor (only 28 entries in all events). That dictated reducing the planned three-day meet to two days to cut costs for what appeared to be the smallest Indoor Nats in years. The final entry was only 42 for all events—not great. By the time you read this you will have seen the Nats results, so you know that, competitively, it was a good meet.
I tell you all this as background: advance entry at the Nats is critical. An advance entry of 28 for all indoor events is very close to the point at which the indoor portion could have been cancelled.
Completely aside from that possibility, there is no way the Nats can be operated effectively on even 60% late entry. The logistics of even a class AA indoor meet near home are bad enough, but here we're talking about 1,500 miles from the home office and in an unfamiliar site.
Often all meet personnel must be imported, with living expenses furnished by the Nats budget. All meet equipment (processing, timing, etc.) has to be brought in. The same problem exists with meet paperwork and awards—everything. At a local meet you can send someone back for what you forgot. Think about it: after all, your entry fee is applicable to your next-year license if you can't make it.
Incidentally, the same comments apply to other big meets like the U.S. Indoor Championships or any other major event. It is a lot of trouble to handle advance entry, but be assured the effort is well worth it.
Easy B rules interpretation
Note this: if you were paying attention, the "Competition Newsletter" section of last month's issue of the magazine carried a notice concerning the Easy B rules interpretation banning variable-pitch, variable-diameter props. The interpretation has passed the Contest Board procedures and will become part of the Rule Book in 1988.
The interpretation has been slightly modified compared to what had been published earlier—one sentence has been added: "Socketed propeller hubs which allow blade replacement and manual pitch adjustment are acceptable."
Anatomy of a rules interpretation: the Easy B interpretation grew out of a contest where Easy B was won with a model using a variable-pitch prop. The contest director permitted the model to fly since the existing rules did not specifically prohibit variable-pitch props. Another contestant, who happened to be a member of the Indoor Contest Board, requested a ruling by the ICB. (Note: any AMA member affected by a CD's decision can request the same ruling.)
Some contestants view "pushing" the rules (by using fancy Easy B props, for example) as cheating. It isn't necessarily cheating. Perhaps much of the design advancement in our hobby originates this way.
One purpose of the Contest Board is to refine the rules—both by rules proposals and by interpretation (when requested) to resolve fine points. The whole Contest Board activity is supposed to be an informed process, so experienced modelers are appointed to the Board and are guided by other AMA members. Personally, I applaud those who increase model performance via loopholes in imperfect rules. No one is smart enough to write perfect rules that outlast advances in technology. The system works to fix problems—use it!
Prop blocks
Figure 1 shows a sketch of the traditional block used to build indoor props. It is typically carved from a balsa block, and the pitch of props built on the block is fixed once the block is carved. A built-up block (described below) can be constructed with any kind of pitch distribution—either uniform or varying across the blade.
However, a carved block has a uniform pitch distribution defined by the block dimensions according to the formula below. This formula defines what is called "true" pitch or helical pitch. The reasoning behind using non-helical pitch distributions usually concerns blade loading, blade flutter, and the assumed inefficiencies of slow-turning props with very high blade angles.
Pitch = 3.14 × D × T / W
In the formula:
- D = prop diameter
- W = block width
- T = block thickness
In Figure 1, block length is shown as D/2, but the block can obviously be longer than the planned prop. If so, multiply the block length by two to use as D in the formula.
When starting to carve the block, mark guidelines "X" and "Y" on the block, then work very carefully. The final block surface must be flat and exactly in line with the guidelines. Warning: once you use a sanding block to finish up, grit from the sandpaper can remain embedded in the block surface and can damage your carving blade if you decide to carve more.
When the block is carved, transfer the blade template to the block as shown in Figure 2. Some builders glue small blocks outside the template to hold the blade outline in place during construction. Instead, small temporary strips can be pinned in place and removed after both blades have been built. This leaves the block clear for the blade to be covered right on the block.
If the prop is not covered on the block, the freshly covered blade should be returned to the block to cure before covering the second blade. Similarly, after repairs and recovering, return the blade to the block until completely dry.
Other alternatives
With the high cost of balsa—especially block balsa—there are other, less expensive approaches.
Figure 3 shows a way to build up the equivalent of the solid block shown in Figures 1 and 2. Start with a rectangular box with the top and front missing. Add the angled top and then build up the prop platform with narrow strips as shown. Trim off ragged ends, then sand and paint the work surfaces. In this case, the pitch is computed the same as with the solid block, so you need to take care in placing the top sheet so that the finished platform is at the correct angle.
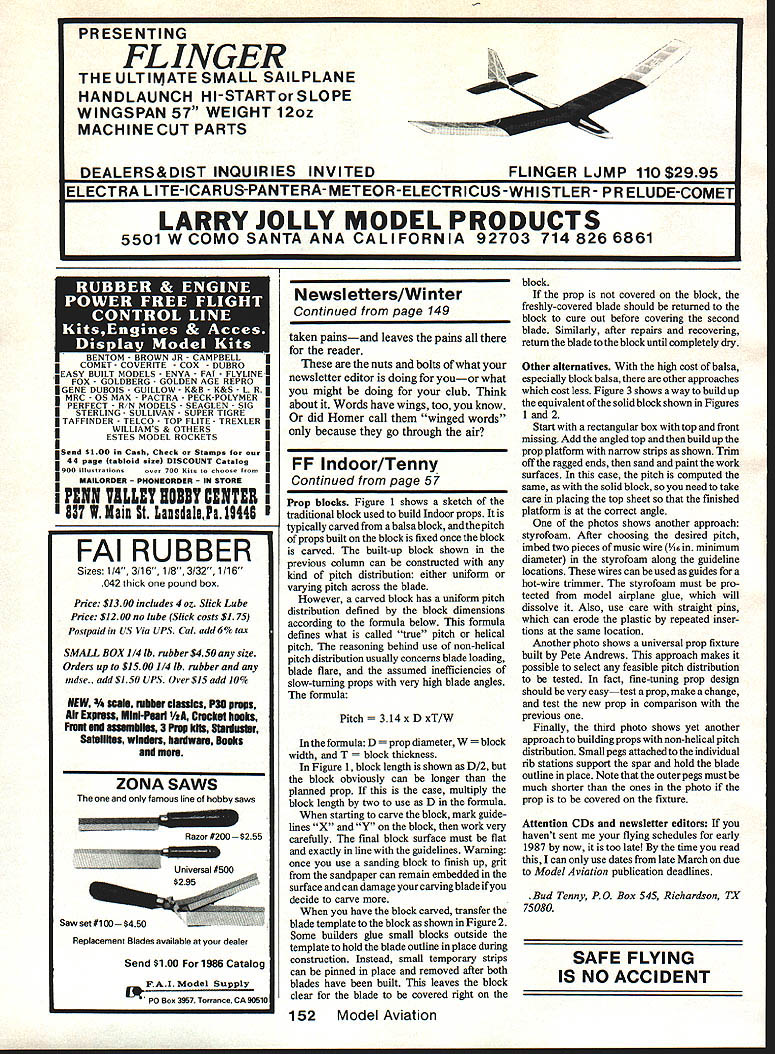
One photo shows another approach: styrofoam. After choosing the desired pitch, bind two pieces of muslin wire (6 in. minimum diameter) into the styrofoam along the guideline locations. These wires are used as guides for a hot-wire trimmer. The styrofoam must be pre-heated prior to applying model airplane glue, which will dissolve it. Also, use caution with straight pins, which can erode the plastic by repeated insertion at the same location.
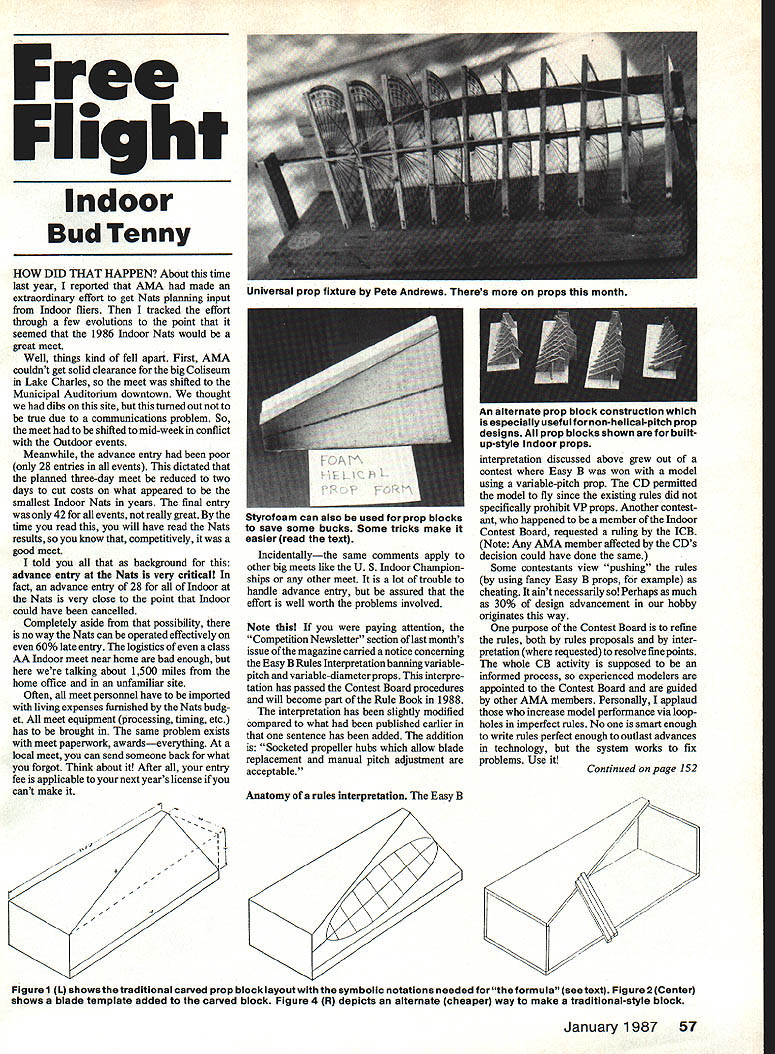
Another photo shows a universal prop fixture built by Pete Andrews. This approach makes it possible to select any feasible pitch distribution to be tested. Fine-tuning prop design should be very easy—set a prop, make a change, and test the new prop against the previous one.
Finally, a third photo shows another approach to building props with non-helical pitch distribution. Small pegs attached to the individual rib stations support the spar and hold the blade outline in place. Note that the outer pegs must be much shorter than those shown in the photo if the prop is to be covered on the fixture.
Final note to CDs and editors
Attention CDs and newsletter editors: if you haven't sent me your flying schedules for early 1987 by now, it is too late. By the time you read this, I can only use dates from late March onward for Model Aviation publication deadlines.
Bud Tenney, P.O. Box 545, Richardson, TX 75080.
Transcribed from original scans by AI. Minor OCR errors may remain.

