
Free Flight: Indoor
Bud Tenny Box 545 Richardson, TX 75080
Flying sessions
Just a reminder to CD's and club officials: I am happy to list your club sessions and contests if I find out about them in time. Assume that I need 11 weeks' notice — with proper timing, I can handle shorter notice. The dates I have are listed below; contacts for other areas are included.
- CALIFORNIA — Santa Ana: Curt Stevens, 25108 Marguerite Parkway, Mission Viejo, CA 92692; phone (714) 240-8433.
San Diego: Monthly sessions in Category I. Howard Haupt, 3860 Ecochee Ave., San Diego, CA 92117.
- COLORADO — Denver: Tentative dates — January 8 and 22, February 12 and 26, March 11 and 25, April 8 and 22, May 6 and 20, 1988. Les Shaw; phone (303) 499-0946.
- CONNECTICUT — Glastonbury: George Armstead, 89 Harvest Lane, Glastonbury, CT 06037.
- FLORIDA — Miami: Dr. John Martin, 2180 Tigertail Ave., Miami, FL 33133; phone (305) 858-6363.
Tampa: Contest at Delta hangar; January 3 and 4, 1988. Dick Obarski, 2349 Barcelona Ave., Ft. Myers, FL 33905.
- GEORGIA — Atlanta area: Regular site lost; an active search for a new site is ongoing. David Mills, 10-D Pine Circle NE, Atlanta, GA 30305; phone (404) 365-8655.
- MASSACHUSETTS — Cambridge: Ray Harlan, 15 Happy Hollow Rd., Wayland, MA 01778; phone (617) 358-4013.
- NEW YORK — NYC: Contact Ed Whitten, P.O. Box 176, Wall St. Station, New York, NY 10005; phone (212) 785-5327 for info about possible flying at Columbia University.
- OKLAHOMA — Oklahoma City: Indoor activity at the 23rd St. Armory January 17, 1988. Contact Bill Baker, P.O. Box 249, Norman, OK 73070-0249 for February and March dates.
- OREGON — Albany: January 10 and 31, 1988. Bob Stalick, 5066 NW Picadilly, Albany, OR 97321; phone (503) 928-8101.
- PENNSYLVANIA — Philadelphia: Joe Krush, 409 Warner Rd., Wayne, PA 19087; phone (215) 688-3927, or Doug Barber, 146 Stratton House, Maple Shade, NJ 08052; phone (609) 235-5318. For monthly Saturday Scale activity (probably at Memorial Hall) contact Cy Hanzely at (215) 948-3214.
- TEXAS — Ft. Worth/Dallas: Approximately monthly flying sessions at Bedford Boys Ranch, Bedford, TX. Contact Jesse Shepherd, 2713 Summit View, Bedford, TX 76021; phone (817) 282-3770.
- UTAH — Salt Lake City: Bimonthly sessions. Franklin Anderson, 6137 Dee Park Dr., Salt Lake City, UT 84118.
- WASHINGTON — Seattle: Monthly contests, low Category III; January 16, February 13, March 5, April 16, 1988. Indoor Rubber Speed: February 23, March 22, April 26, 1988. Kevin Collins, 2320 Sahalee Dr. E., Redmond, WA 98023; phone (206) 868-8273.
Site survey reminder
A few columns back I asked for data on currently active sites. What I need is the ceiling height (FAT measure), ceiling condition (clean or hang-up prone), average air conditions, floor area, site availability, etc. Send the information and I will catalog it and make it available.
Bracing philosophy
There are two common ways to install the primary bracing — in one piece or in two.
One-piece bracing
One-piece bracing starts at the front post near the socket, out to one dihedral joint, across the cabane to the opposite dihedral joint, to the rear post, to the next dihedral joint up to the cabane, then to the last dihedral joint and back to the front post. It is important that the wire not be anchored anywhere except at the start and finish until it is all in place and tensioned slightly. Double-check the center dihedral angle and wing twist before fastening the wire in place — it is very easy to accidentally make subtle changes in wing alignment during the bracing operation.
Two-piece bracing
The first section of wire used for two-piece bracing traces the following path: front post/dihedral joint to front cabane/dihedral joint on one side of the wing only. Check alignment before gluing the wire to that wing; then add the bracing to the other side. After that, the secondary bracing and tip bracing should be handled in the usual way.
If you need to remove bracing to patch the covering where the bracing passes close to the film, only one wing panel needs to be unbraced at a time. There is far less chance of additional damage during the patching operation if you follow this practice.
Anchoring bracing wires
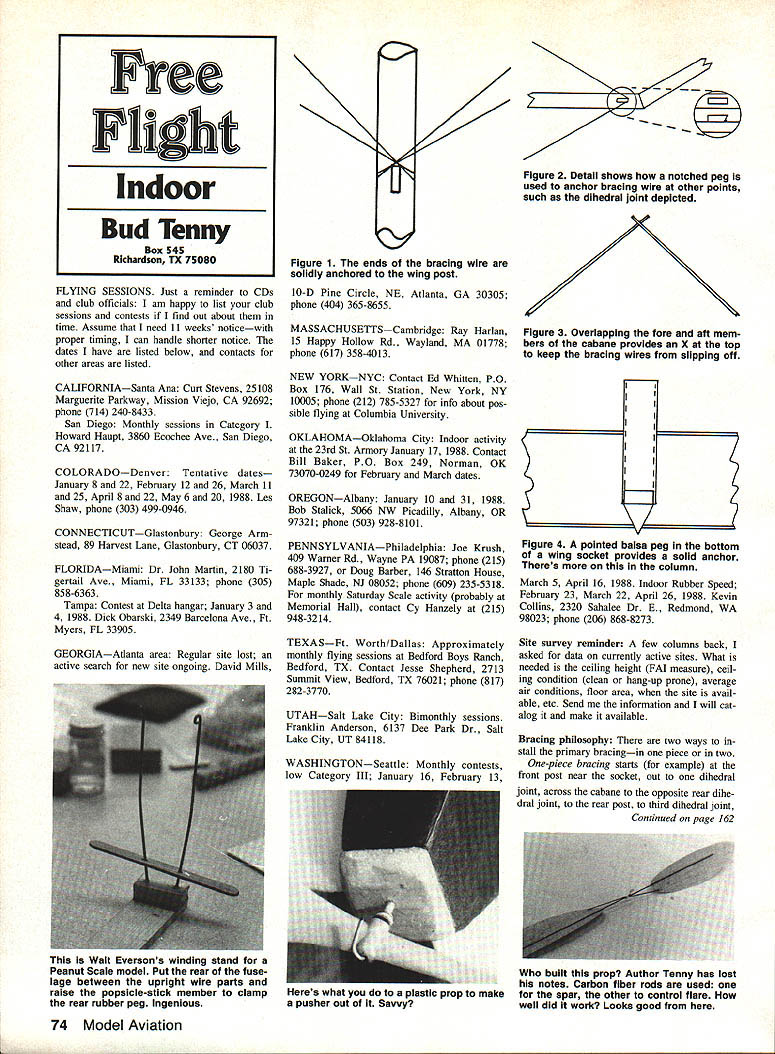
Blocks and notches
With either one-piece or two-piece primary bracing, only the ends are fastened to the posts. A tiny (1/64-inch) rectangular block is glued solidly to the post and the wire ends pass over the top in a small notch. A similar block is glued into the wing socket to keep the wire from cutting into the wood and to keep it from slipping off. These blocks are placed wherever the wire changes direction as it wraps around the wing (Figure 2).
Start and finish ends
The start end of the bracing wire is wrapped partway around the post and glued down. Leave a very short stub to grip with tweezers if you ever need to soak it loose. The finish end of the wire is draped over the block and allowed to hang down with a small weight attached to tension the bracing all over the wing. The amount of weight to use is just enough to remove any sag in the wire and to tighten any radius loops. (A radius loop is where the wire goes around a block; until it is snugged up, it will make a visible radius which effectively slackens the wire.)
When the wire has been strung around the circuit and the weight attached, use tweezers at every radius loop to help pull out slack. After the slack is removed, glue the wire at each place it touches the framework, but use a tiny drop of thin glue to minimize problems in removing bracing for repairs.
Cabane cradle
A different problem exists at the top of the cabane. It is easy to dislodge the wire unless something holds it in place. One easy way is to overlap the cabane pieces to form a wire cradle atop the cabane (Figure 3). Again, use only a small amount of glue to avoid needing extra solvent to soak the wire loose if repairs are needed.
Consistent adjustments
If your indoor model sometimes seems to need constant adjustment in order to fly well, you can have any of three problems:
- If you feel the structure has normal strength, check to see if a wing rib, spar, or other vital piece is cracked.
- If the structure is not damaged, try to determine if some of the structure may be too weak. In particular, be sure the tail boom isn't damaged and that it is strong enough to handle flight loads.
- If that doesn't help, check the wing posts for a snug fit in the sockets. The posts should bottom out in the sockets when flight adjustments are correct. The most reliable way to do this is to get the trim as close as possible by adjusting stab incidence, then make tiny trims on wing post length until the adjustment is correct. After that, make sure the posts fit snugly in the sockets, or spot-glue them in place during the contest!
Anchor wing sockets
Another possible cause of erratic flights is loose wing sockets. The solution is:
- Put a balsa plug in the bottom of each socket and sharpen it.
- Use a tiny drill to drill all the way through the motor stick.
- Enlarge the top hole just enough to pass the socket, and make the point of the plug stick through the bottom of the stick.
- Repeat with the second socket.
- Put wing posts in both sockets and check the alignment of both sockets before gluing them in.
Sight along the motor stick; the posts should be perpendicular to the motor stick when viewed from the side and parallel to each other when viewed from the front. Make any necessary adjustments, and glue the sockets in place. After the glue is dry, trim the plugs flush with the bottom of the motor stick and put a glue film over the stubs.
Photo gallery and miscellaneous notes
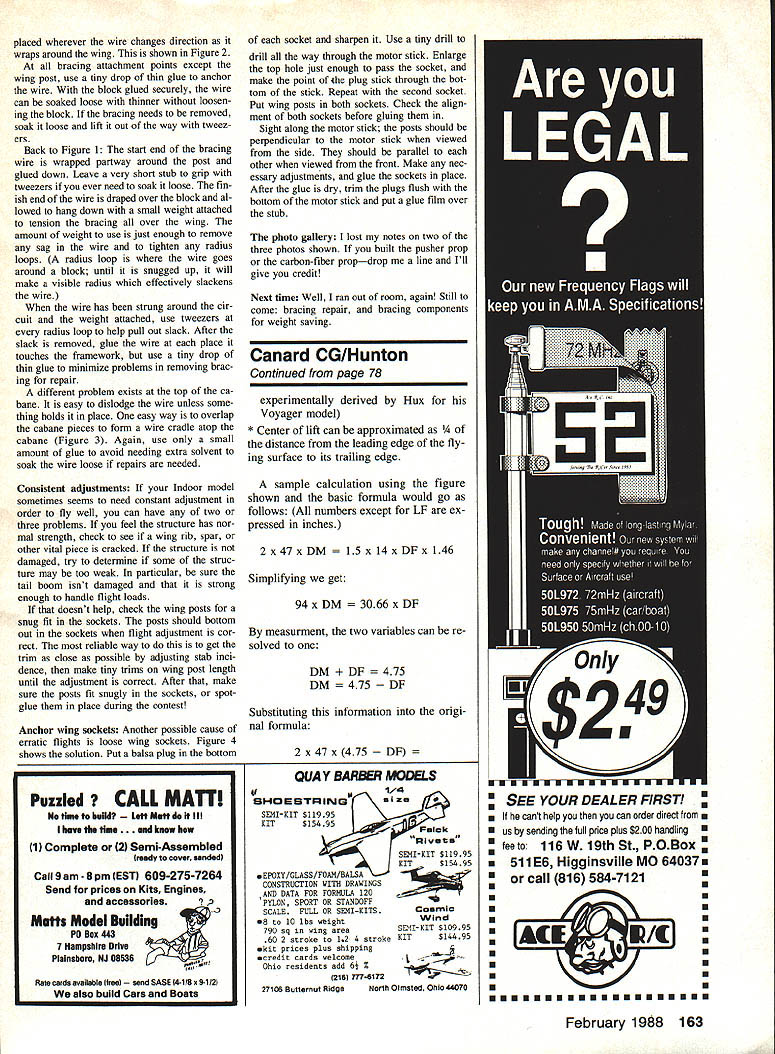
I lost my notes on two of the three photos shown. If you built the pusher or the carbon-fiber prop — drop me a line and I'll give you credit!
Miscellaneous tidbits:
- Keep pumping away at Pee Wee-30, et al. Meanwhile: "See ya downwind!"
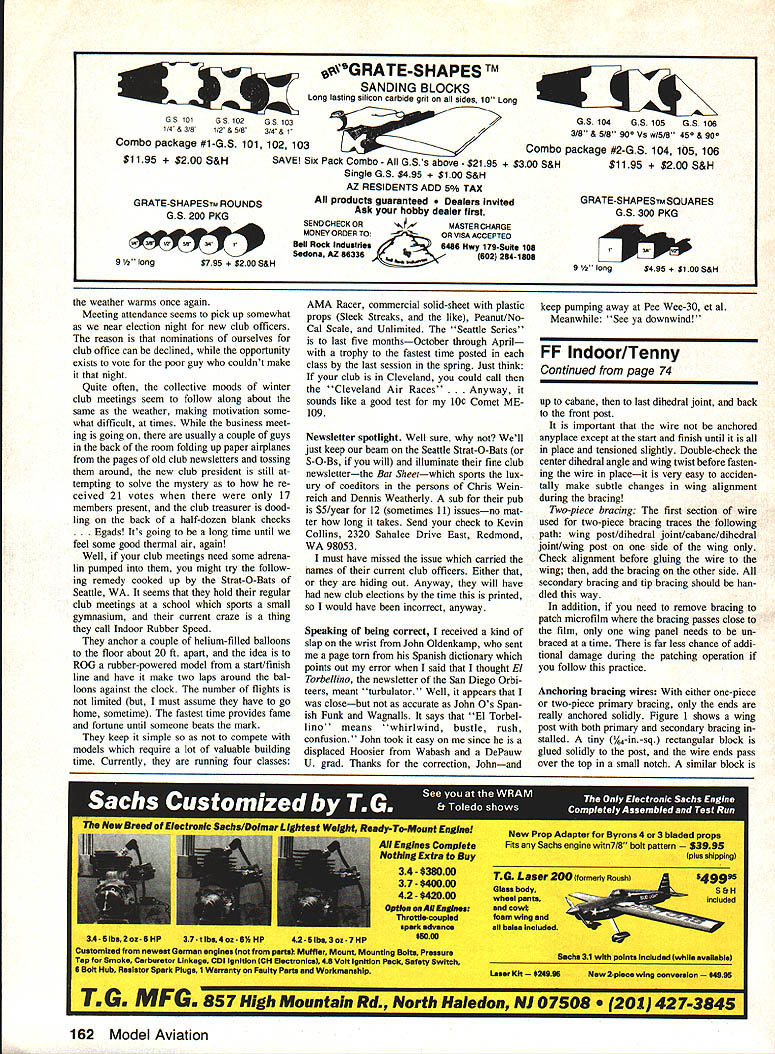
- Everson's winding stand — worth checking out.
- Peanut Scale model tip: put the rear fuselage between upright wire parts, raise a popsicle-stick member, and clamp the rear rubber peg — ingenious.
- Plastic props can be adapted to make a pusher configuration. Carbon-fiber rods used as spars worked well in some builds; I lost some notes but the results looked good.
Next time: bracing repair, and bracing components for weight saving.
Transcribed from original scans by AI. Minor OCR errors may remain.

