
Free Flight: Indoor
Bud Tenny Box 545 Richardson, TX 75080
THE BIG WEEK!
The AMA Executive Council approved the NFFS bid to host the 1988 Indoor World Championships at Johnson City, TN (site of the 1987 U.S. Indoor Championships)—and so did the FAI. This year the USIC will be back-to-back with the World Champs, like the 1980 WC at West Baden. The WC will be May 29–31, 1988, but the flying schedule may not be fixed. Similarly, the schedule for the USIC (June 1–4) is still in flux. For the latest information and a finalized schedule, send a business-sized SASE to Tony Italiano, 1655 Revere Dr., Brookfield, WI 53005.
Flying opportunities
The following dates are all I have for the remaining part of the 1987/88 indoor season. Obviously indoor flying doesn't stop—many FF clubs simply shift focus to outdoor FF during the warmer months.
A final reminder—this space is open to CDs and club officials for listing official and unofficial flying dates.
- California — Tustin (Santa Ana hangar): First weekend each month, but you must make arrangements with the CD, Curt Stevens, 25108 Marguerite Parkway, Mission Viejo, CA 92692; phone 714-240-8433. Arrange at least three days in advance.
- San Diego: Monthly sessions (fourth Friday). Category I. Howard Haupt, 3860 Ecochee Ave., San Diego, CA 92117.
- Colorado — Denver: Flying dates are March 11 and 25, April 8 and 22, May 6 and 20, 1988. Les Shaw; phone 303-499-0946.
- Connecticut — Glastonbury: George Armstead, 89 Harvest Lane, Glastonbury, CT 06037.
- Florida — Miami: MIAMA contest #4 at MacDill AFB, April 16–17, 1988. Dr. John Martin, 2180 Tigertail Ave., Miami, FL 33133; phone 305-858-6363.
- Iowa — Cedar Rapids: Approximately weekly flying sessions all winter; 34-ft ceiling. Contact Paul McIlrath, 1524 48th St. NE, Cedar Rapids, IA 52402; phone 319-393-4677.
- Massachusetts — Cambridge: MIT Tech Model Aircrafters flying sessions first Saturday each month through May; site is the Du Pont Gym at MIT (Vassar St. and Massachusetts Ave.), 6–9 pm. Ray Harlan, 15 Happy Hollow Rd., Wayland, MA 01778; phone (617) 358-4013.
- New Jersey — Glassboro: Philadelphia Sky Pirates indoor contest on April 24, 1988, at the Activities Center Ballroom (23-ft ceiling), Glassboro State College. Doug Barber, 146 Stratton House, Maple Shade, NJ 08052; phone (609) 235-5318.
- New York — NYC: Contact Ed Whitten, P.O. Box 176, Wall St. Station, New York, NY 10005; phone (212) 785-5327. Possible flying at Columbia University.
- Oklahoma — Oklahoma City: Indoor annual contest at the 23rd St. Armory in Oklahoma City, March 20, 1988. Contact William L. Baker, P.O. Box 249, Norman, OK 73070-0249.
- Pennsylvania — Philadelphia: Joe Krush, 409 Warner Rd., Wayne, PA 19087; phone (215) 688-3927, or Doug Barber, 146 Stratton House, Maple Shade, NJ 08052; phone (609) 235-5318.
- Texas — Ft. Worth/Dallas: Approximately monthly flying sessions at Bedford Boys Ranch, Bedford, TX. Contact Jesse Shepherd, 2713 Summit View, Bedford, TX 76021; phone (817) 282-3770.
- Utah — Salt Lake City: Bimonthly sessions. Franklin Anderson, 6137 Dee Park Dr., Salt Lake City, UT 84118.
- Washington — Seattle: Monthly contests, low ceiling. Category III events: March 5 and April 16, 1988. Indoor Rubber Speed: March 22 and April 26, 1988. Kevin Collins, 2320 Shalee Dr. E., Redmond, WA 98052; phone (206) 868-8273.
Using boron safely
The following material was published in Flapper Facts, the official newsletter of the Ornithopter Modelers Society.
"Cutting" Boron
By Frank Kieser — 3/28/87
Everyone using boron should already be knowledgeable of the safety hazards involved. The problem is that in cutting, loose slivers are sometimes generated which must be captured. This also can result in the piece being cut having an inaccurate length. To my knowledge, the method described here is original. Of the many ways tried, I have found it to be by far the best yet for precise, safe cutting. I hesitate to say that slivers never will be generated, but to date I have seen only slight traces of powder remaining.
The method is this:
- Obtain an empty insulin syringe and cut off the point squarely. The outside diameter (O.D.) should be about .014 in. The boron will be a tight, smooth-fitting fit in the bore of the needle. Remove the plunger from the syringe first.
- Obtain a metal ruler and attach it to a piece of tape, one to two inches long, preferably Scotch #230 Drafting Tape, with the sticky side up. This tape has low but adequate tack. I place the tape so I can use the ruler as a length measure.
- Insert a length of boron into the needle (from the tip is easier), with the desired length to be cut left protruding.
- With the needle at a very shallow angle to the ruler, press the tip of the needle and the boron onto the sticky tape.
- Gradually rotate the needle to a steeper angle, being sure to keep the tip pressing into the tape. The boron should snap when the needle is at about 45°. The cut piece is retained on the tape.
- Although I have never found extra loose pieces, after cutting, with the needle still over the tape, I push through about an inch of boron to be sure there isn't a loose piece in the tube.
I hope you are as successful with this method as I have been.
Bracing repair
Normally, bracing does not have to be repaired. However, this can be necessary in at least three circumstances: repair of flight damage (wing structure repair or film patching), repairing damaged brace wires, or warp removal.
Let's begin with warp removal and save the others for later. Warping can be caused by shrinking covering or by expansion of wood caused by humidity. If the covering has enough "give" or slack, the ribs may not be distorted. In that case the spars expand lengthwise, causing the whole wing to twist or develop a wave in the spar.
The problem: Use a bracing fixture, or do it freehand? The repair procedure is easier with a bracing stand; all but the lightest models can be braced unsupported following the technique described here. Remove the bracing from the front and back of one side of the wing by cutting the wires about 1.5 in. from the cabane and flush with the wing post. This will allow the spar to expand normally. Remove the remnants by soaking them loose with thinner or by snipping them flush with the edge of the spar.
A new piece of bracing can be substituted easily. Hold the free end of a new piece of wire close to one of the stubs at the cabane so that the wires overlap about one inch. Place a small drop of quick-drying glue on both wires and spread it along the overlap. Loop the free end around the bracing anchor at the dihedral break (or wing tip, depending on which piece you are replacing). Tack-glue it to the post with minimal slack.
Adjust the wire position so the wing is approximately straight. Repeat this operation with the matching wire on the opposite side of the wing. If you are using a bracing fixture, measure the dihedral and sand washout. Otherwise, you must "eyeball" the wing alignment. When the alignment is satisfactory, glue the wire to the wing post and then redo the joint at the wing post. If the joint does not go in right, cut and redo it correctly. If your wing has primary and secondary bracing, remove all the bracing on one side, then replace the secondary bracing first, followed by the dihedral bracing and then the tip bracing if you use it. The main thing about this whole procedure is to take your time—if you rush it, you may have to do some of it over.
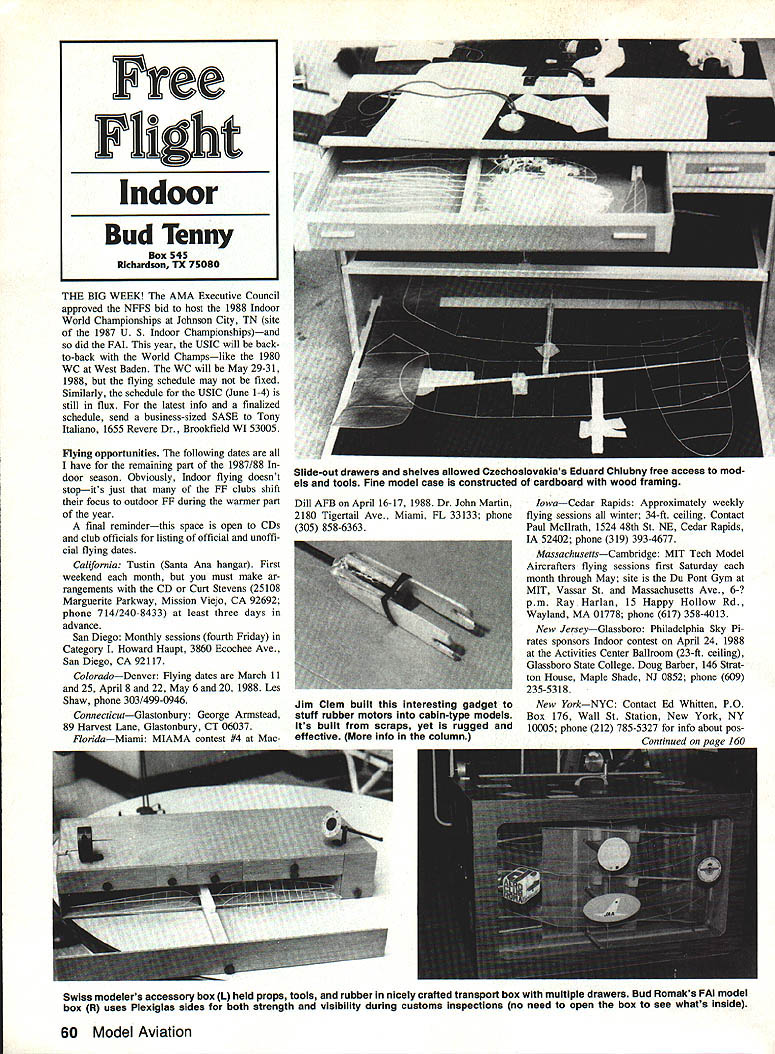
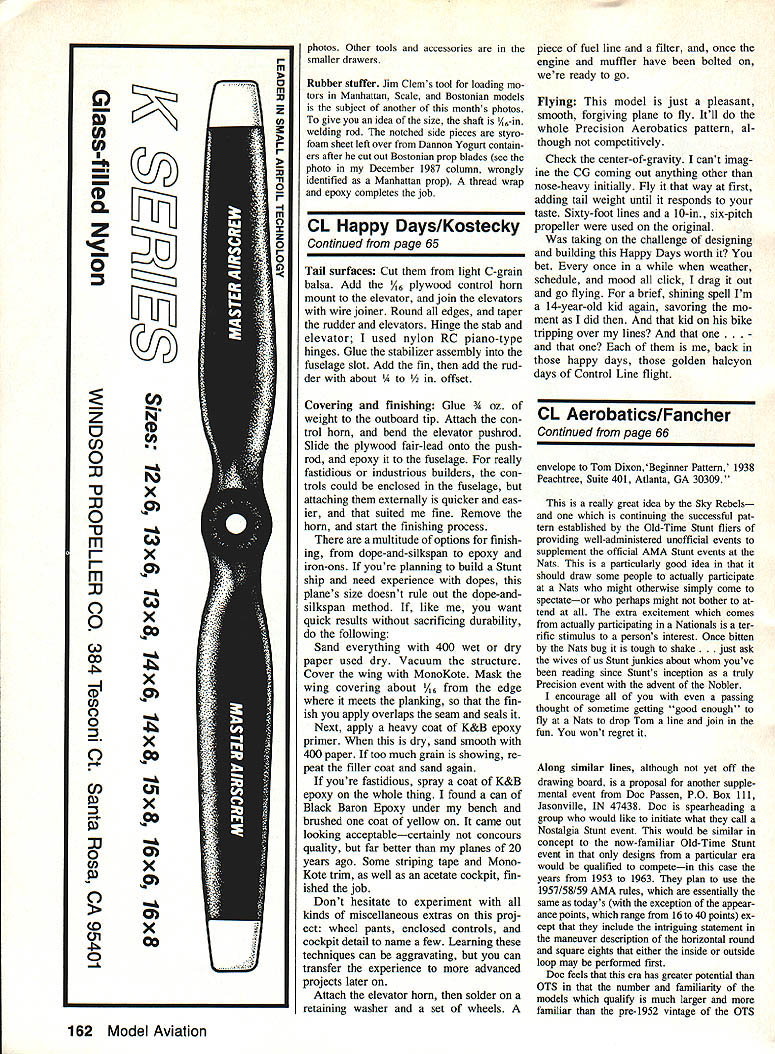
By request! I have been asked to review the science of model boxes, so that will be one of the topics for next time. There are many problems associated with safe transportation of indoor models, and I hope to share a lot of ideas which were used to solve them.
Photos: Other tools and accessories are shown in the smaller drawers.
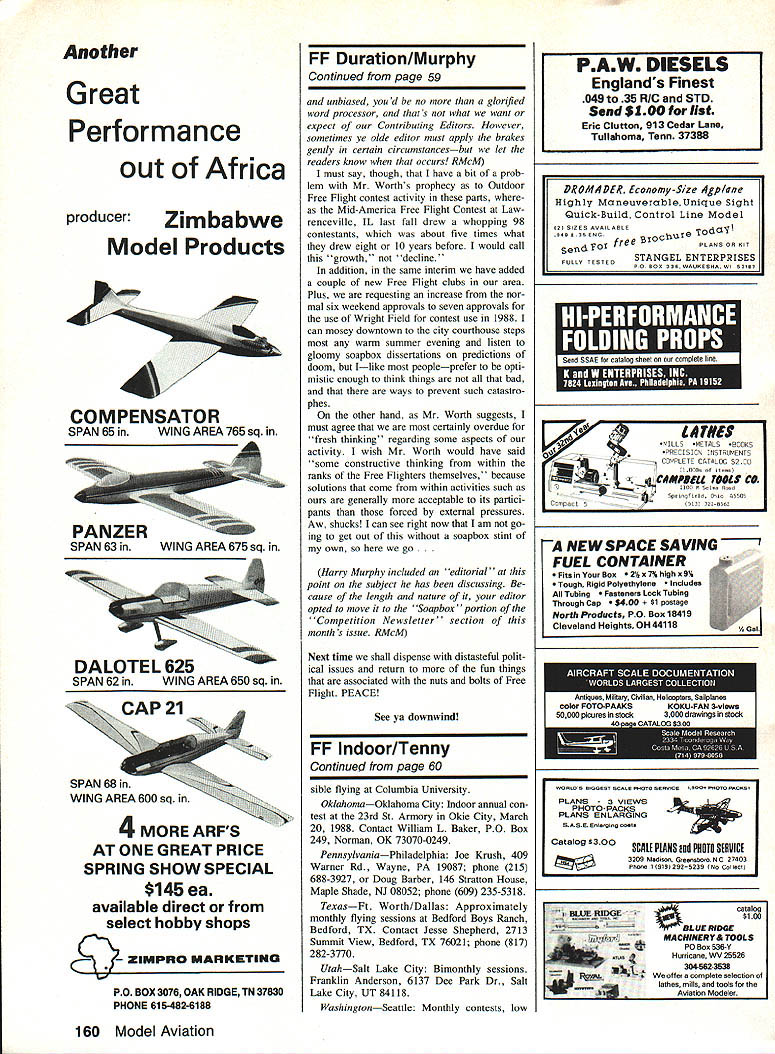
Rubber stuffer
Jim Clem's tool for loading motors in Manhattan, Scale, and Bostonian models is the subject of another of this month's photos. To give you an idea of the size, the shaft is 1/2-in. welding rod. The notched side pieces are styrofoam sheet left over from Dannon yogurt containers after he cut out Bostonian prop blades (see photo in my December 1987 column, where it was wrongly identified as a Manhattan prop). A thread wrap and epoxy completes the job.
Transcribed from original scans by AI. Minor OCR errors may remain.

