

Free Flight: Indoor
Bud Tenny Box 545 Richardson, TX 75080
Peanuts & Pistachios series (Number Four)
NUMBER FOUR is here! Bill Hannan has published another of the very well done Peanuts & Pistachios series, and each one seems to get better. Volume four has 18 pages and contains the usual mix of photos, plans, and letters from all over the world. Even for a non-scale person like myself, these minibooks make enjoyable reading. It is certainly easy to relate to the motto on the front cover: "Inspiration for builders of small scale flying models." Get your copy by sending $5.50 plus $1.50 for postage and handling to Hannan's Runway, P.O. Box A, Escondido, CA 92025.
Reader feedback: PVC pipe for jug prop forms
Ralph Turner (Avon, OH) notes that another source of forms for the so-called jug props is PVC pipe, in sizes used by plumbers. Here are his comments:
"I have not heard of anyone else using PVC pipe. I have done considerable work with it, and my method is highly successful. One drawback is that you do not have much latitude in choice of radius. The only sizes suitable for our use that are available locally are four-inch and six-inch inside diameter (I.D.). The wall thickness is around 1/4 in., so the radii are 2 1/4 in. and 3 1/4 in., respectively. PVC pipe can be obtained from plumbing suppliers. I suggest looking for a plumber who does sewer drain work. Ask for a small left-over piece from one of his jobs. A 12-in.-long piece is more than enough, and most plumbers will be happy to assist you. PVC can be easily cut with a saw, so you can make it any desirable length.
"My procedure for making prop blades is roughly similar to the traditional methods—wet the blade stock, lay it directly on the pipe at the correct angle, cover it with a piece of typing paper, and strap it down with masking tape. The next step is new (to me, anyway). I place the pipe assembly in the microwave oven for a few minutes to set the blades. For my oven it takes about four minutes at full power, but the time will vary with different ovens. Let the whole assembly cool to room temperature before removing the blades from the pipe. You should be careful when removing the pipe from the oven, since it will be very hot. It is safer to let the assembly cool in the oven. I am convinced that this is a better procedure than using the regular oven, because of the way microwaves work through the wood interior as well as on the outer layer. I believe this causes the change in structure to be more permanent."
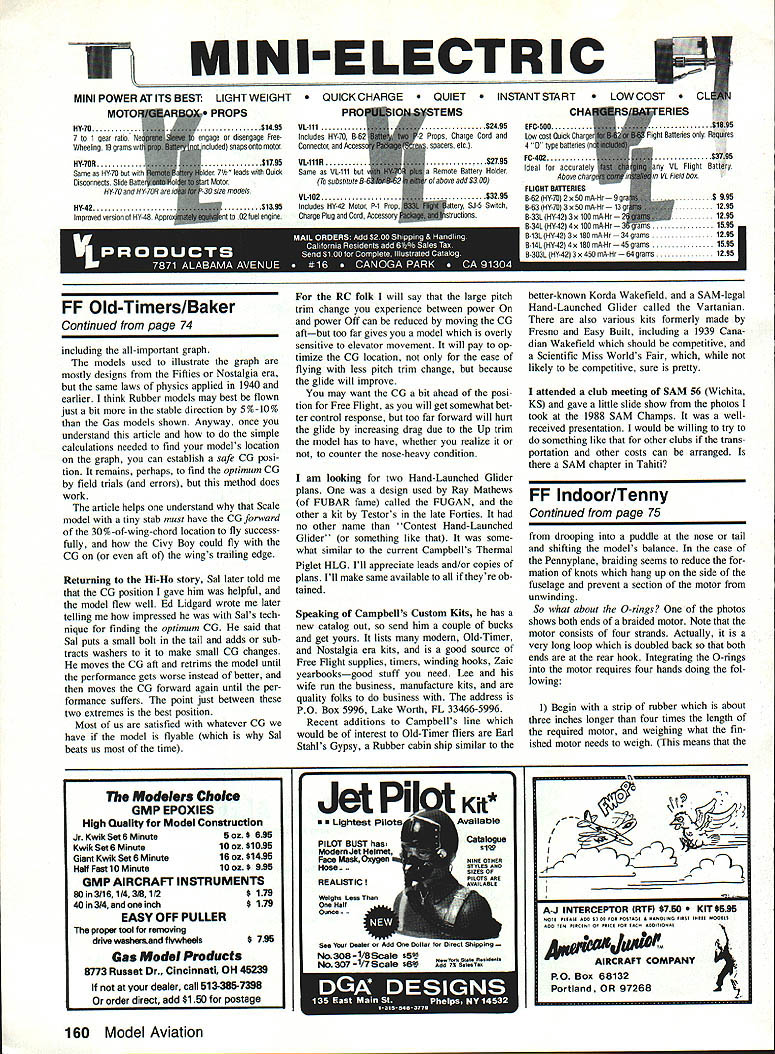
R.O.G. wheels (Jim Jones method)
Fabrication of R.O.G. wheels is easier if you do it the Jim Jones way—several wheels at once! Using Jim's method, you can make some very light, strong wheels with satisfying results.
Method:
- Soak a long balsa strip (for example, 1/2 x 5/8 in.) in water.
- Wrap it around a dowel of suitable diameter (1/2 in. for ROG Stick and 3/8 in. for ROG Cabin).
- After baking or air-drying the balsa, make a single cut across the spiral of balsa, separating it into several circles and some scrap.
- Glue each circle at the cut, then insert a single spoke into the circle.
- The hub, or bearing, is made from a tiny piece of tubing, like that furnished with some kinds of cyanoacrylate glue.
O-rings and braided motors
Another use for O-rings: I have extolled the virtues of using O-rings with indoor motors several times before. Aside from the convenience in handling, a motor with O-rings on both ends allows you to know precisely the turns and torque available at launch time. A major problem with competitive Pennyplanes is that a 10-in. motor stick isn't long enough to handle the long, heavy motors required for top times. As a result, bunching, hung knots, and other problems plague the serious PP flier.
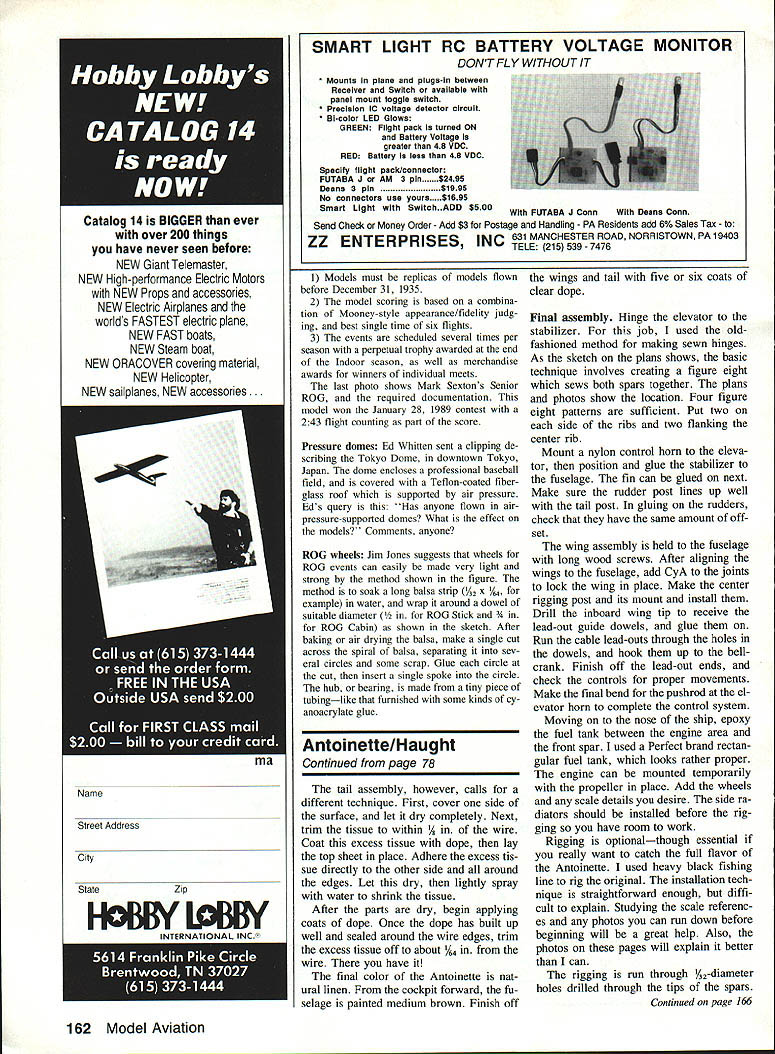
Braided motors? Unlimited Outdoor Rubber models (now called Mulvihill class) had similar problems, and some fliers used braided motors. A braided motor has been prewound loosely so that the motor tends to twist around itself. It is typically made as a very long loop which is doubled back so that both ends are at the rear hook. Braiding or pre-twisting helps prevent out-turns and can give a more consistent release. A downside to braided motors becomes evident when it comes to shortening the motor; it's a hassle equalizing the length of the strands.
So what about the O-rings? O-rings can be sliced from tubing such as RC pushrod plastic tubing. The O-rings are simply sliced off the tubing with a single-edge razor blade. The grooved block shown in the photo is used to hold the tubing and to guide the blade to make parallel cuts. Vary the thickness of the ring to suit the rubber size. A slotted block will help keep a consistent cut — a very good idea.
One of the photos shows both ends of a braided motor consisting of four strands. Integrating the motor requires four hands to handle and align the strands properly. General guidance:
- Begin with a strip of rubber about three inches longer than the final motor length and weighing what the finished motor needs to weigh. This means the initial strip should allow for trimming so the finished motor meets the desired weight/length.
- Prewind or braid the motor loosely so it will tend to twist around itself and reduce unwanted out-turns.
- When shortening, take care to equalize the length and tension of the strands.
More on fun models
Actually, all our models should be fun, but sometimes the competition is fierce enough to be more work than fun! Besides the events mentioned earlier (MA, March '89), here are more events and notes you may want to share.
#### Catapult gliders The Chicago Aeronuts have a Catapult Glider event at their contests, and it has been adopted by the NFFS for the USIC. The rules specify a model with a 12 x 3-in. wing, and a launching stick (used as a handle for the rubber) no longer than 6 in. This event blends well with normal HLG, but if held in Category I or low Category II sites it would probably require a maximum weight limit for safety. In watching this event at Johnson City, I expected the winning flights to have a consistent group of nine flights, but it wasn't so. Based on HLG experience, it seems like a repeatable release would be easier with a catapult than with the classic run-and-throw flight.
#### Limited Model (Professor Larrabee event) This is another event designed by Professor Larrabee of MIT. The event provides the contestant with constrained materials (for example, one 12-in. piece of 3/32" sheet balsa and additional specified items) and challenges them to build within those limits. Key rules and scoring:
- Models must be replicas of models flown before December 31, 1935.
- Model scoring is based on a combination of Mooney-style appearance/fidelity judging and best single time of six flights.
- The events are scheduled several times per season with a perpetual trophy awarded at the end of the indoor season, as well as merchandise awards for winners of individual meets.
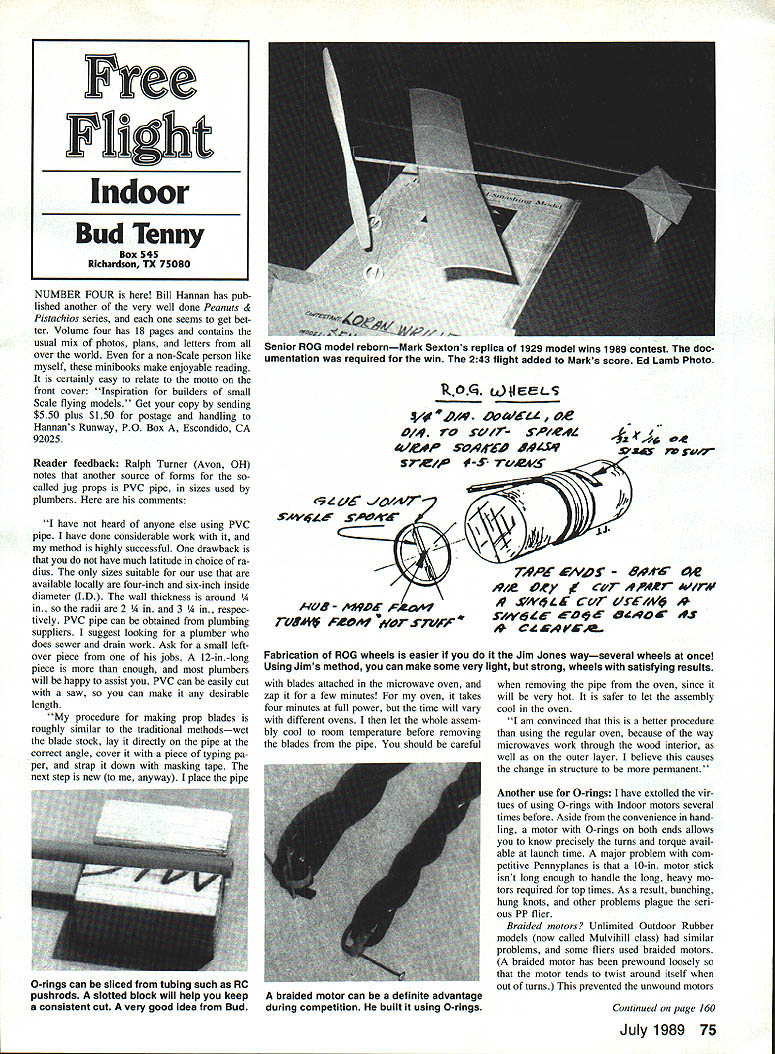
The last photo shows Mark Sexton's Senior ROG and the required documentation. This model won the January 28, 1989 contest with a 2:43 flight counting as part of the score.
Pressure domes
Ed Whitten sent a clipping describing the Tokyo Dome, in downtown Tokyo, Japan. The dome encloses a professional baseball field and is covered with a Teflon-coated fiberglass roof which is supported by air pressure. Ed's query is this: "Has anyone flown in air-pressure-supported domes? What is the effect on the models?" Comments, anyone?
Transcribed from original scans by AI. Minor OCR errors may remain.

