
Free Flight: Old-Timers
Bill Baker
1902 Peter Pan Norman, OK 73072
I read and appreciate mail from my readers. Lately I have noticed an increase in letters from younger builders who did not grow up building the models we now call Old-Timers and who are having trouble learning some basic techniques. That will give me material to write about for a few years. I'll begin by explaining how to get fuselage sides together using a simple jig and selecting the right wood.
Instructions often say, "Build two identical sides," and then, "Join with crosspieces." About equally helpful would be the next step: "Now cover." The following expands those terse steps into practical procedure.
Selecting longerons
- It is a big help if the wood for the fuselage longerons is carefully selected to be of the same density.
- I weigh mine on a good gram scale, but if you don't have a sensitive balance, do what the old-timers did: select by eye and feel, comparing pieces for similar stiffness and weight.
- The main thing is not to try to join two built-up sides when one set of longerons is much softer than the other; you can't expect to get a straight fuselage under such conditions.
Setting up a jig
- Set up a very simple jig to hold the sides properly in relation to one another. I mostly use square balsa blocks and balsa triangles pinned to the building board over the fuselage top view.
- Place a block across the nose end at right angles to the fuselage centerline for the sides to push against. If the sides are the same length, the aft ends will meet properly over the centerline (draw one on the plan if none is provided).
- For repeat builds, consider making a more permanent jig with wood blocks glued to a base board.
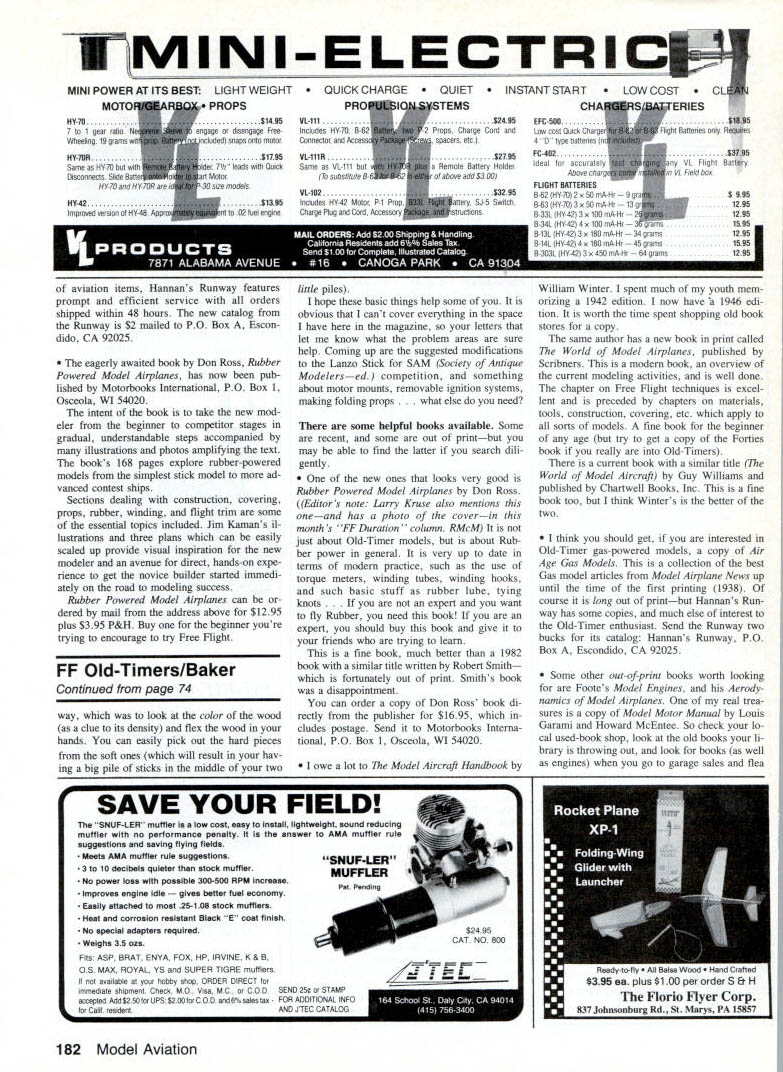
Assembling cross braces (recommended sequence)
- Do not try to install all cross braces at once.
- Install two or three pairs of cross braces near the widest point of the fuselage first, leaving the sides to the front and rear of this area unbent.
- Add pairs (top and bottom) of cross braces a couple of stations beyond these first ones.
- Draw in the tail and front ends and install crosspieces there.
- Finish all the braces in between, working a pair at a time and allowing glue to dry before proceeding.
Check frequently for square as you go.
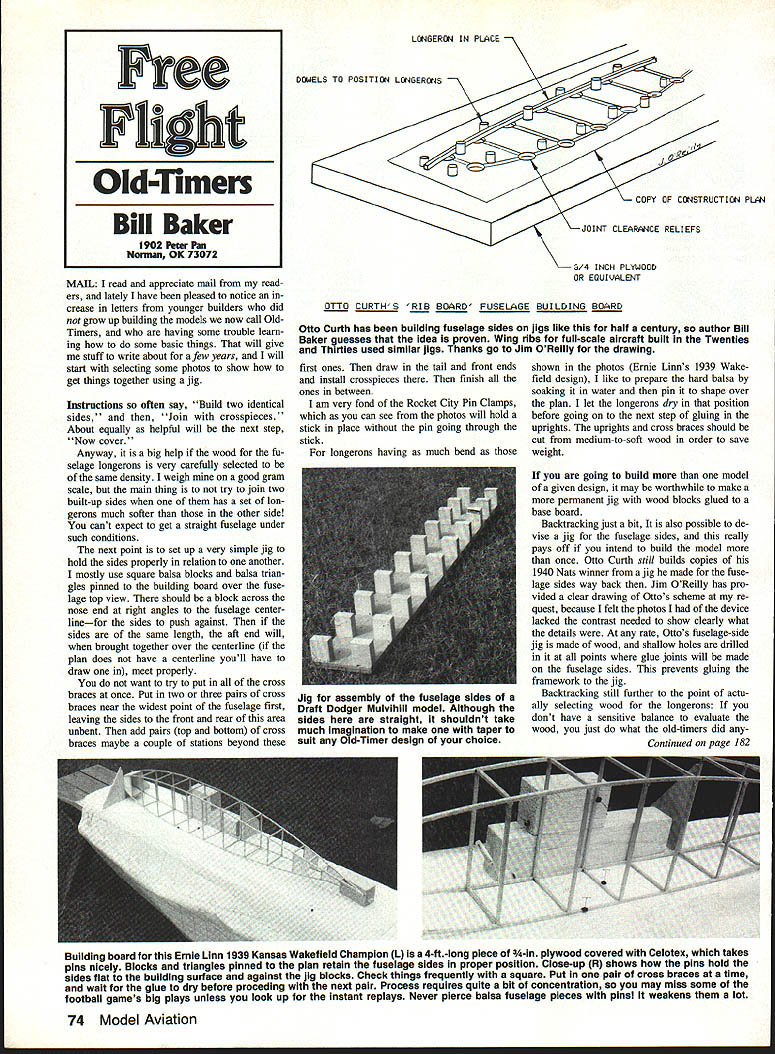
Jigs for fuselage sides
- If you plan to build more than one model of a given design, it pays to devise a jig specifically for the fuselage sides.
- Otto Curth still builds copies of his 1940 Nats winner from a jig he made long ago. Jim O'Reilly provided a clear drawing of Otto's scheme because photos lacked sufficient contrast.
- Otto's fuse-side jig is made of wood with shallow holes drilled at all points where glue joints will be made on the fuselage sides. The holes prevent gluing the framework to the jig.
Using pin clamps
- I am very fond of the Rocket City pin clamps; they hold a stick in place without the pin going through the stick.
- These clamps are especially useful when longerons have significant bend and you need to hold parts firmly without piercing and weakening them.
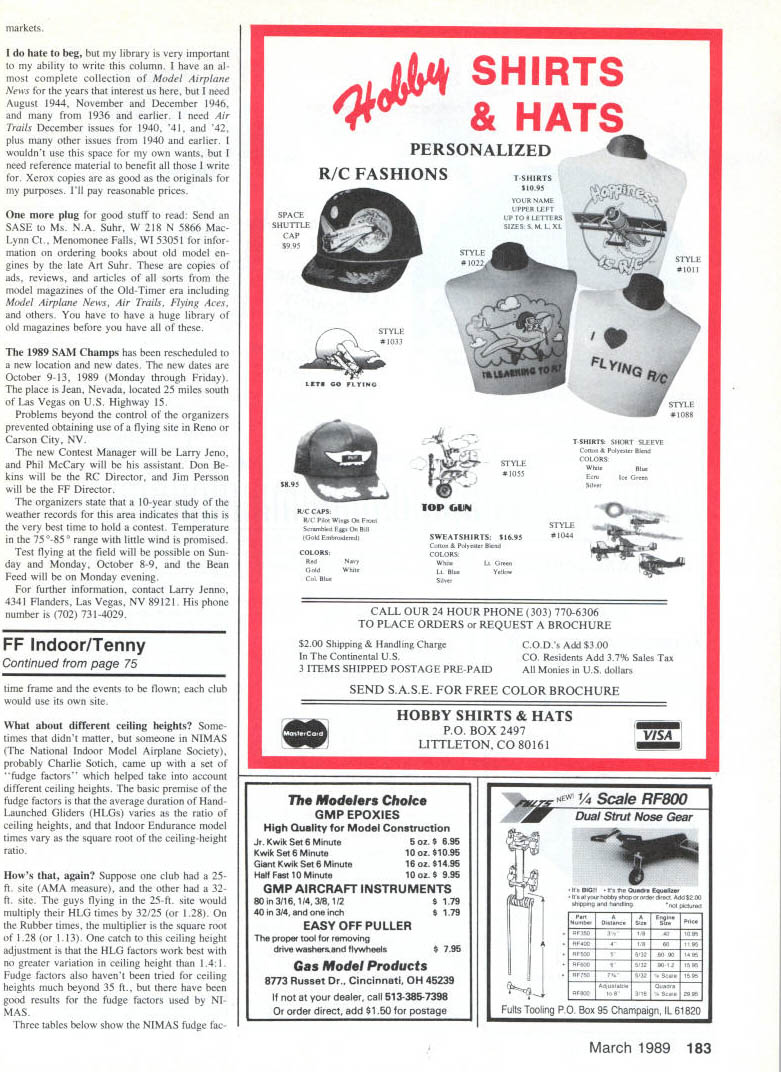
Preparing bent longerons
- For longerons requiring a lot of bend (for example, Ernie Linn's 1939 Wakefield design), prepare hard balsa by soaking it in water and then pin it to shape over the plan.
- Let the longerons dry in that position before gluing in the uprights.
- Cut uprights and cross braces from medium-to-soft wood to save weight.
Final tips
- When building, take your time and concentrate — the process requires patience.
- Put in a pair of cross braces at a time and wait for the glue to dry before proceeding to the next pair.
- Never pierce balsa fuselage pieces with pins; that weakens the structure significantly.
Bill Baker
Transcribed from original scans by AI. Minor OCR errors may remain.

