

FREE FLIGHT SCALE
Fernando Ramos 19361 Mesa Dr., Villa Park CA 92861 E-mail: fkramos@att.net
Nats mishap
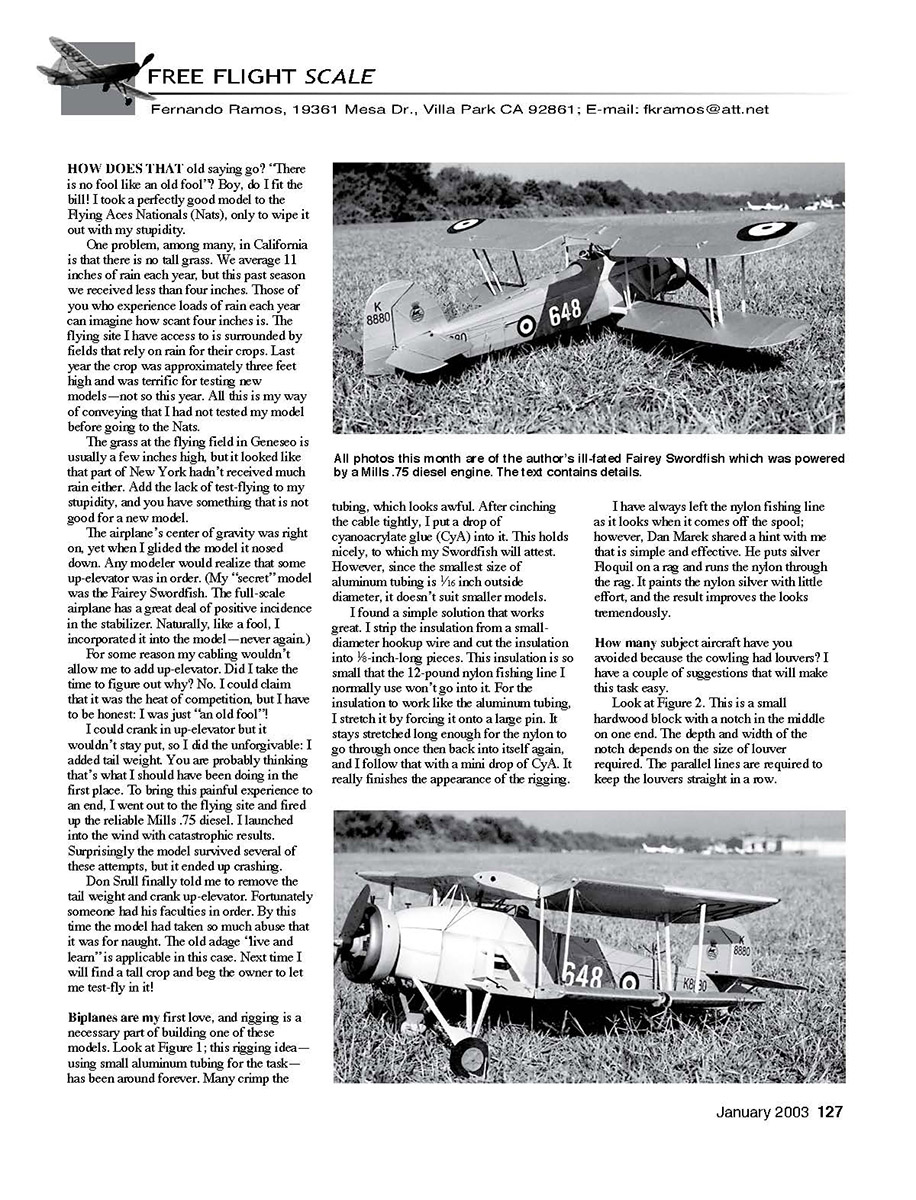
How does that old saying go? "There is no fool like an old fool"? Boy, do I fit the bill! I took a perfectly good model to the Flying Aces Nationals (Nats), only to wipe it out with my stupidity.
One problem, among many, in California is that there is no tall grass. We average 11 inches of rain each year, but this past season we received less than four inches. Those of you who experience loads of rain each year can imagine how scant four inches is. The flying site I have access to is surrounded by fields that rely on rain for their crops. Last year the crop was approximately three feet high and was terrific for testing new models—not so this year. All this is my way of conveying that I had not tested my model before going to the Nats.
The grass at the flying field in Geneseo is usually a few inches high, but it looked like that part of New York hadn’t received much rain either. Add the lack of test-flying to my stupidity, and you have something that is not good for a new model. The airplane’s center of gravity was right on, yet when I glided the model it nosed down. Any modeler would realize that some up-elevator was in order. (My "secret" model was the Fairey Swordfish. The full-scale airplane has a great deal of positive incidence in the stabilizer. Naturally, like a fool, I incorporated it into the model—never again.) For some reason my cabling wouldn’t allow me to add up-elevator. Did I take the time to figure out why? No. I could claim that it was the heat of competition, but I have to be honest: I was just "an old fool"!
I could crank in up-elevator but it wouldn’t stay put, so I did the unforgivable: I added tail weight. You are probably thinking that’s what I should have been doing in the first place. To bring this painful experience to an end, I went out to the flying site and fired up the reliable Mills .75 diesel. I launched into the wind with catastrophic results. Surprisingly the model survived several of these attempts, but it ended up crashing. Don Srull finally told me to remove the tail weight and crank up-elevator. Fortunately someone had his faculties in order. By this time the model had taken so much abuse that it was for naught. The old adage "live and learn" is applicable in this case. Next time I will find a tall crop and beg the owner to let me test-fly in it!
Biplane rigging
Biplanes are my first love, and rigging is a necessary part of building one of these models. The old idea of using small aluminum tubing for ferrules has been around forever. Many crimp the tubing, which looks awful. After cinching the cable tightly, I put a drop of cyanoacrylate glue (CyA) into it. This holds nicely, as my Swordfish will attest. However, since the smallest size of aluminum tubing is 1/16 inch outside diameter, it doesn’t suit smaller models.
I found a simple solution that works great:
- Strip the insulation from a small-diameter hookup wire and cut the insulation into 1/8-inch-long pieces.
- The insulation is so small that the 12-pound nylon fishing line I normally use won’t go into it unless you stretch it.
- Stretch the insulation by forcing it onto a large pin. It stays stretched long enough for the nylon to go through once, then back into itself again.
- After threading, put a mini drop of CyA. It finishes the appearance of the rigging nicely.
I had always left the nylon fishing line as it looks when it comes off the spool; however, Dan Marek shared a simple, effective hint. He puts silver Floquil on a rag and runs the nylon through the rag. It paints the nylon silver with little effort, and the result improves the looks tremendously.
Cowling louvers
How many subject aircraft have you avoided because the cowling had louvers? I use one of three different materials:
- Aluminum lithoplate (primary choice).
- Aluminized paper (I received some from a friend in the printing business; it should be available in some hardware stores).
- 3 x 5 file card or business cards made from heavier paper.
Method for forming louvers:
- Cut the material slightly wider than the louver; this width determines the width of the parallel lines on the wood block.
- Using a knife with a No. 11 blade, cut the material where each louver should be; these slits represent the height of the louver.
- Place the material between the parallel lines, lining the first slit over the notch in the wood block.
- Work the material into the notch with a bluntly pointed tool, rubbing from side to side. You will see a perfectly formed louver with little effort.
- Slide the strip up to the next slit and repeat until they are all formed.
Notes:
- With aluminized paper, the aluminized side should be face down. With lithoplate and file card this is not a consideration.
- If you have to use file card, wet the back side with thin CyA after the louvers are formed. This will hold the louvers in place and keep them from flattening.
Painting and finishing
I can't stress enough the concept that if you use, say, nitrate dope with Floquil or any of the many other paints I have mentioned in the past, the trim color (stripes, registration, etc.) should be done with pure Floquil. This way if there is any overspray after doing the trim color, Floquil thinner can be used to remove it without affecting the nitrate color underneath.
However, if you find yourself in a position in which that cannot be done, an ink eraser works great for removing small amounts of overspray. I use the "pencil" type that can be sharpened like a pencil. This allows you to get into small spaces. Take care to rub on the overspray only; otherwise you can dull the paint underneath.
Since I have mentioned Floquil, one thing I have not mentioned in quite a while is the use of its Crystal Cote. This product is used to get a high gloss over Floquil's regular paints. Putting a couple milliliters (or a capful) of Crystal Cote in a mixture of nitrate dope and Floquil color gives a patina to the finish. It also prevents tissue from becoming brittle.
Covering tip
At a club meeting a few of us were discussing our own particular methods of covering. We were pretty much in agreement for the most part. However, Allan Heinrich of Aerodyne incorporates one extra step that I never even considered.
Allan likes to use an aircraft covering acrylic called Sure Seam, made by Certified Coatings. He uses it full strength unless it tends to "rope"; if it does, he thins it with nitrate thinner.
Then comes the step I don't do: Allan brushes the glue everywhere the tissue will make contact so that the surface will be glossy. It allows the tissue to slide over the structure as it dries from water shrinking. This helps eliminate wrinkles and certainly provides better adhesion during the doping process.
Events and notes
John Bresnak of Brodak Manufacturing would like all of us modelers to consider our hobby a sport. For the sixth year in a row he sponsored the Brodak Fly-In, a control-line contest that drew record numbers from across the United States. Even though there is local publicity, his question is, "Where was ESPN?" If modeling were a "sport," ESPN might cover various events. This would not only help spread the word about our great "sport" and our hobby but attract many more juniors into the fold.
John has a neat lapel pin available. His telephone number is (724) 966-2726.
I am off to the United Kingdom to compete in the British Nationals and to the Czech Republic to compete in an international indoor contest. I will report on them when I get back.
fkr
Transcribed from original scans by AI. Minor OCR errors may remain.

