
Free Flight: Scale-Sport
Ralph D. Kuenz
PUTTING A FINISH on a model becomes more difficult when weight is a crucial factor in how well that model will perform. A light-weight model, which is what a rubber-powered model must be, requires some special methods to obtain a good finish. You must remember that you are out to "capture the feeling" of the real craft without penalizing the flying ability of the model. The beauty of your model is not skin deep. A well-built structure showing underneath compliments the effort done on finishing.
Let me define what I mean by finishing a rubber model. This includes tissue covering, and all color and markings. Some models have all or partial sheet wood covering. These too can be dressed up considerably with a good finish.
To start things right, clean your work area; a lot of clutter can hide the item you may need before the dope dries. Have a clear area big enough to lay down the biggest part you'll be working with. Check your brushes, making sure they are clean; a little black dope residue can really mess up your applying light color or clear. Gather together the items you will probably need to do the job and put them close at hand. New double-edge razor blades, sharp scissors, newspaper or newspaper-grade tablet, brushes, small bottles for mixing, clear dope and thinner, cotton swabs, sanding sticks, various grade sandpaper, can of 3M "Sprayment," and a clean cloth.
Try to pick a day when the humidity is low to do your covering. If the air is too moist the dope will blush and turn white in spots as it dries with trapped moisture.
Preparing the Structure: Use a sanding block to smooth out the bones. Sand gently over the entire structure, then give the outside areas and every part that will be an edge of the tissue covering a coat of 50/50 clear dope. That is 50% dope and 50% thinner with no plasticizer added. The plasticizer cuts down the adhesion quality of the dope so don't use it in the mix to apply the tissue. When this dries, lightly sand off the raised wood fibers with 240 grade paper. Carefully done, you won't need a sanding block, but using an old single edge razor blade, cut yourself out a comfortable sized piece with rounded corners that won't dig into ribs and stringers that you're not concentrating on. It's safer to sand the parts while holding them down on the work area rather than in your hand where you are much more apt to break something. In any case be prepared to reglue or replace a few sticks.
Covering: I tend to be stingy with Japanese tissue and choose to cut the pieces out to fit on the model with a minimum amount of excess to be trimmed off. When applying the tissue I have three bottles with brushes. One is 50/50 dope, one is thinner and one is water. Use 50/50 dope over the outline of the area to be covered. Carefully lay the tissue on, then go over the outline with thinner to bleed the dope through the tissue for good adhesion. Use the water for curved edges. For instance, the piece of tissue from the last rib to the wing tip. Here, along the tip, after the dope and thinner, the water will soften the tissue and allow you to work down around the edge with a fingertip.
Take your time, covering your model with as many pieces of tissue as needed to keep the wrinkles small. Now, the wrinkles are removed by water shrinking. The wings and tail parts (empennage) should be pinned down or supported to prevent warping. I usually build some wash-out into my wings; this means the wings are twisted so that the trailing edge is higher at the tips, so when I pin the wings down I jack up the trailing edge to keep this twist when dry. About 1/16" on a Peanut is fine.
If the stab and rudder are flat as in smaller models, I sandwich them in styrofoam blocks to dry without warping. After the parts dry and you still have some wrinkles, try wetting them again in the wrinkled area. I wet the area and hold it next to a light bulb. The heat helps in more stubborn areas. While doing this I wear an old pair of sun glasses covered with masking tape except for a 1/32" slit across the center. It's an Eskimo method of allowing you to look at bright objects without hurting the eyes.
Once you have the model covered, don't be too all-fired eager to start piling on layers of dope. Remember that, outside of the wire in the propshaft and landing gear, dope is the heaviest material used in construction of your model. Use only as much dope as needed to get adequate finish. There are three basic types of color schemes for a light weight model: 1) light color tissue overall, dark trim; 2) dark color tissue overall, light trim; 3) completely color-doped finish. Let's talk about the first two for the time being.
Number two is the easiest and frequently used color scheme on rubber models. Dark tissue can be applied over light tissue for good contrast. In this case give the model a coat of 50/50 dope and two or three drops plasticizer per ounce. Mix plasticizer with thinner first, then mix dope. Several commercial plasticizers available are Tri-Cresyl-Phosphate, Di-Butyl-... (continued)
Free Flight: Scale-Sport
butyrate. SIG "Lite Coat" will do the job nicely if you have trouble obtaining plasticizer. When doping the wings, I always do the bottom first because it's usually flat and has less surface area than the top. Thus, it will pull less and have less tendency to cause warps. With the bottom almost dry, the wing can be pinned down across some 1/8 in. sq. strips while the top is drying. Leave the flying surfaces pinned down for at least two hours, longer if you're not rushed, especially for the first coat.
While the parts are drying you can decide on your trim. If you are going to use decals the surfaces will need another coat of dope where the decals apply. You can take a little extra effort and cut the numbers and letters from the decal sheet to eliminate the clear material. This means you will have to position each character individually, but it can look much better than the shiny decal strip laid like a patch across the top of the wing.
If you choose to trim with dark tissue, draw the numbers and letters on the newspaper-grade tablet. If the plans show the markings, tape the plans to a newspaper. Now, sandwich up to four layers of the tissue between two layers of newspaper and cut through all the layers using a new razor blade or #11 X-Acto blade. The finish of the newspaper will hold the tissue and prevent it from sliding. Do not try to remove individual numbers from the sandwich, but complete cutting all the characters required before separating the layers of newspaper and tissue. With a straight edge, use this same sandwich method to cut thin tissue strips for control outlines, etc. The small registration numbers that appear vertically on the fin can be done with "rub-on" letters or a fine-point dry-mark pen if you have a steady hand.
The dry mark goes on without bleeding if the surfaces has a coat of dope. You can make a frame of 1/4 in. balsa and cover it with the tissue used on the model. Use it to practice drawing the registration numbers, company logos, or other designs with a dry mark. Do them over until you get a good one, and then cut out the piece of tissue and use it to cover the appropriate area. I've seen Pres Bruning do this — tricky eh?
A little higher up on the difficulty scale is trimming a dark model with a lighter color. Consider a model covered in black tissue that has yellow trim. Using the 1/4 in. frame, color dope yellow tissue with yellow dope. Apply rubber cement tape to the tissue and cut out the characters. When the backing is removed from the tape, you have tissue numbers ready to apply. It takes a little practice to be able to get the tissue in place just right. I let the tissue adhere to a small point, such as the tip of an X-Acto knife or a toothpick. Now carefully set one corner of the letter in position and gently press down working from the corners. The layer of rubber cement will prevent the dark color from bleeding through the lighter tissue. If you find the tissue too difficult to work with, a smooth-finish light grade of paper (substance 40) could be used. On a black background the control outlines should be gray. You can use gray boutique paper or white tissue strips doped on. With the white tissue, the black bleeds through, but you must be sure that the strips adhere evenly.
There is a neat product called liquid paper that secretaries use to cover over their mistakes in typing. It's nice to use for drawn on numbers over a dark background. It comes in white and pastel shades of blue, yellow, pink, and green. It can be thinned out to use in a drawing pen or applied with a good small brush. Check your local office supply store. (I will continue with the all color doped finish in my next installment.)
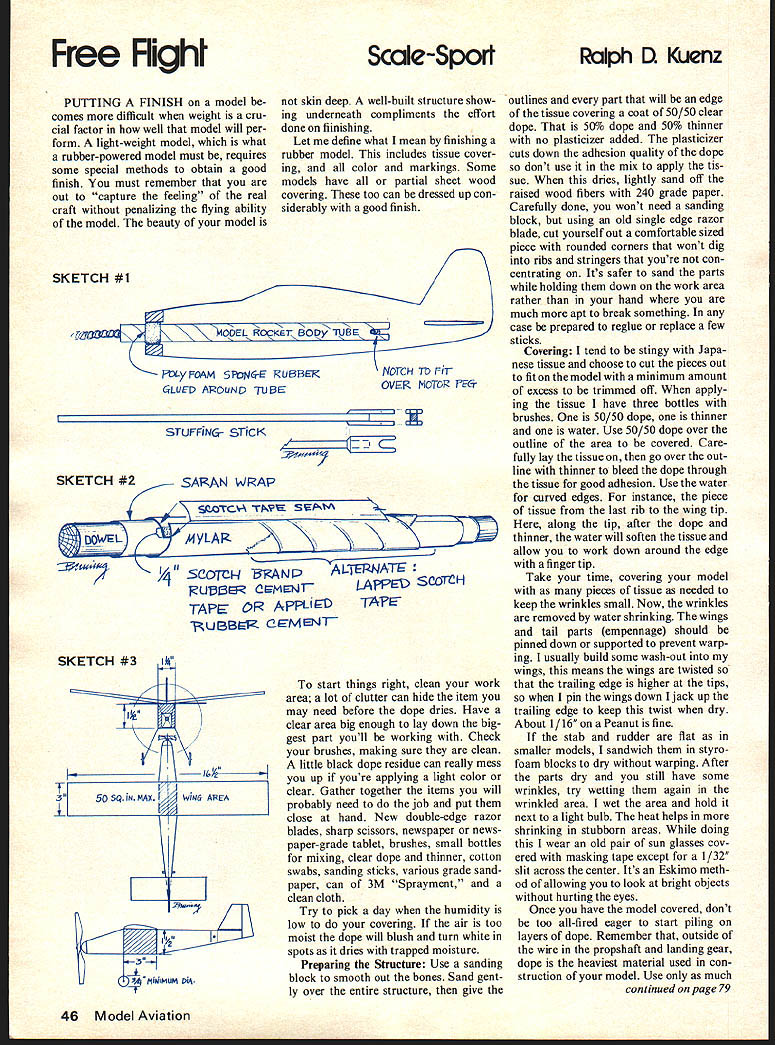
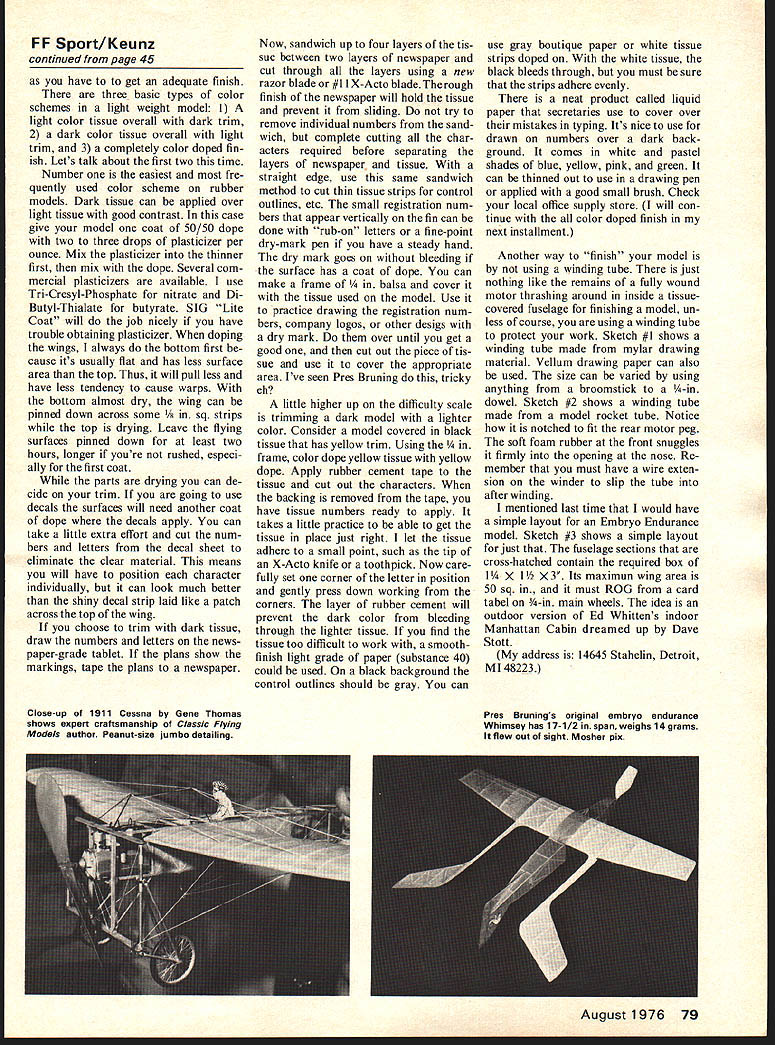
Another way to "finish" your model is by not using a winding tube. There is just nothing like the remains of a fully wound motor thrashing around inside a tissue-covered fuselage for finishing a model, unless of course, you are using a winding tube to protect your work. Sketch #2 shows a winding tube made from a model rocket tube. Notice how it is notched to fit the rear motor peg. The soft foam rubber at the front snuggles it firmly into the opening at the nose. Remember that you must have a wire extension on the winder to slip the tube into after winding.
I mentioned last time that I would have a simple layout for an Embryo Endurance model. Sketch #3 shows a simple layout for just that. The fuselage sections that are cross-hatched contain the required box of 1/4 x 1/8 x 3/8. Its maximum wing area is 50 sq. in., and it must ROG from a card table on 3-in. main wheels. The idea is an outdoor version of Ed Whitten's indoor Manhattan Cabin dreamed up by Dave Stott.
(My address is: 14645 Stahlein, Detroit, MI 48223.)
Transcribed from original scans by AI. Minor OCR errors may remain.

